
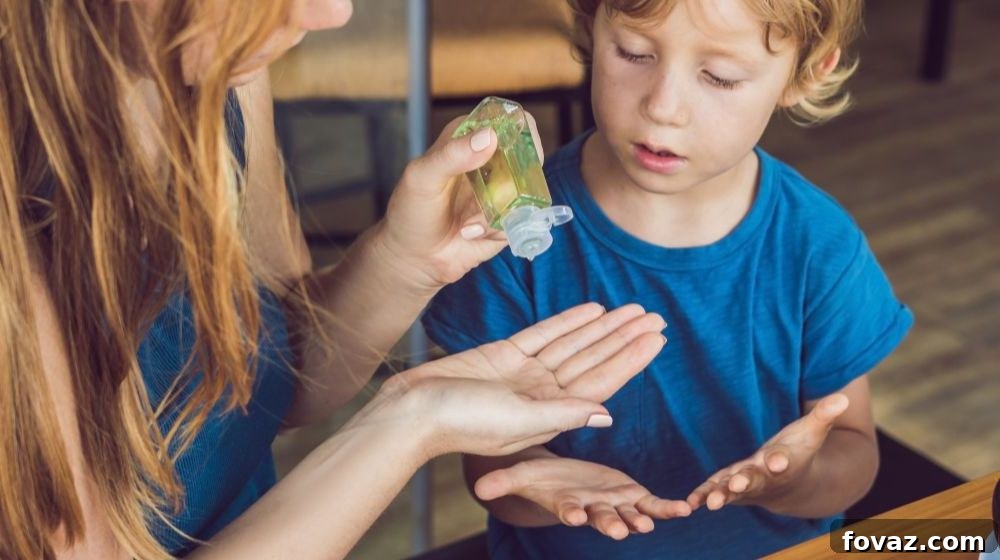
Mastering Homemade Hygiene: Crafting Your Own Commercial-Grade Hand Sanitizer for Ultimate Protection
In times of heightened global health awareness, proactive measures are more crucial than ever. With various health challenges impacting communities worldwide, ensuring personal and home hygiene has become a top priority. While traditional handwashing remains the gold standard for germ removal, a high-quality hand sanitizer serves as an indispensable tool when soap and water are not readily available. This comprehensive guide will empower you to create your own commercial-grade hand sanitizer right at home, offering a reliable defense against unseen threats, just like the trusted brands found in stores.
Forget the basic, often less effective, aloe vera-based concoctions. This DIY project walks you through making a potent, professional-grade sanitizing gel, formulated to deliver powerful germ-killing action. You don’t need to navigate crowded stores or worry about product shortages; with a few readily available ingredients and about 10 minutes of your time, you can safeguard yourself and your family. Prepare to transform your approach to personal sanitation and maintain a clean, virus-free environment.
RELATED: DIY Cleaners for Your Bathroom & Kitchen
Learn How to Make a Commercial-Grade Hand Sanitizer Gel
Creating your own hand sanitizer not only offers peace of mind but also gives you control over the ingredients, ensuring a product that meets your exact needs. This formula is designed for maximum efficacy, mirroring the quality of leading commercial sanitizers.
Materials Needed to Make Your Own Hand Sanitizer Gel:
To embark on this essential DIY project, gather the following ingredients. Precision in measurement is key for achieving the desired consistency and effectiveness.
- 8 oz. Purified Water
- 5-6 drops GlycolTEA™
- 1 tbsp. Carbomal80™
- 16 oz. 99% Isopropyl Alcohol
- 5-6 drops Silacal945™
Note: This carefully balanced recipe is designed to yield approximately 24oz. of hand sanitizer, enough to fill 3-4 standard-sized bottles. Always use high-quality, fresh ingredients for the best results.
Step 1: Create the Gel-Solution Base
The foundation of your commercial-grade hand sanitizer begins with crafting a smooth, stable gel base. This step ensures proper suspension of the active ingredients and provides the familiar gel texture.
Begin by preparing your blender, ensuring it’s clean and dry. Carefully measure and combine the purified water, 5-6 drops of GlycolTEA™, and one tablespoon of Carbomal80™. GlycolTEA™ typically functions as a pH balancer or stabilizer, while Carbomal80™ is a gelling agent crucial for creating the gel consistency. Blend these ingredients thoroughly for approximately 10-15 seconds. Observe the mixture; you should notice a visible change in consistency, thickening into a gel within about 10 seconds of blending. This initial blending ensures that the Carbomal80™ is fully hydrated and evenly dispersed, preventing lumps in your final product.
Once blended, you will have a milky white gel. Allow this mixture to settle for a few minutes. As it settles, it will gradually become clearer and more translucent. Set this gel solution aside while you prepare the next component. This allows the gelling agent to fully activate and stabilize, contributing to a smoother final product.
OPTION: While purified water is recommended for optimal clarity and purity, you may use tap water or pure drinking water as an alternative. Be aware, however, that tap water, due to its mineral content, might result in a slightly cloudier gel, though its effectiveness will not be compromised.
Step 2: Prepare the Potent Alcohol Solution
The efficacy of any hand sanitizer hinges on its alcohol content. This step focuses on preparing the potent disinfectant component, ensuring it is ready for integration into your gel base.
In a separate, clean container, carefully measure 16 ounces of 99% Isopropyl Alcohol. This high-concentration alcohol is the primary germ-killing agent in your hand sanitizer, essential for its commercial-grade effectiveness. To this, add 5-6 drops of Silacal945™. Silacal945™ often acts as a conditioning agent or emulsifier in cosmetic formulations, helping to ensure the stability and texture of the final product while also providing a smooth feel on the skin. Stir the alcohol and Silacal945™ mixture gently until it is thoroughly combined. This separate preparation ensures that the Silacal945™ is evenly distributed throughout the alcohol before it is introduced to the gel, preventing any potential clumping or separation issues. Stir until you have a fairly uniform solution. It’s crucial to handle high-concentration alcohol in a well-ventilated area and avoid open flames.
RELATED: Learn to Make Your Own Natural Cleaning Products
Step 3: Carefully Combine the Essential Solutions
With both the gel base and the alcohol solution prepared, the next critical step is to carefully combine them. This fusion will begin the transformation into your final hand sanitizer gel.
It’s now time to unite the two meticulously prepared solutions. Gently pour the alcohol solution from its separate container directly into the blender that holds your gel solution. The key here is to mix them slowly and deliberately. Stir the combined mixture gently for about 10-15 seconds. Avoid vigorous blending at this stage, as excessive agitation can introduce too many air bubbles, which can affect the final consistency and clarity of your hand sanitizer. Gentle stirring ensures that the alcohol is evenly integrated into the gel base without disrupting its structure.
After stirring, allow the entire solution to sit undisturbed for approximately 15 minutes. This resting period is vital. It allows the ingredients to fully interact, stabilize, and homogenize, ensuring that the alcohol is perfectly incorporated into the gel matrix. This step is crucial for achieving a stable, effective, and professional-grade hand sanitizer that won’t separate over time.
Step 4: Final Blend for a Perfectly Smooth Sanitizer Gel
The final step brings your hand sanitizer to its ready-to-use form, ensuring a smooth, consistent texture that rivals store-bought products.
Following the 15-minute resting period, it’s time for the final blending. Turn on your blender and mix the solution for another 10-15 seconds. This final burst of blending is designed to break up any remaining tiny lumps or inconsistencies, resulting in a perfectly smooth, uniform hand sanitizer gel. Congratulations! You have successfully created your own commercial-grade hand sanitizer.
Your homemade hand sanitizer is now ready for immediate use. You can transfer it into various containers – pump bottles, squeeze bottles, or travel-sized containers – to easily share with family members or carry with you on the go. Ensure all containers are clean and airtight to maintain product integrity.
NOTE: Immediately after the final blend, your hand sanitizer may still appear somewhat cloudy. This is a normal phenomenon and does not in any way diminish its effectiveness. The cloudiness is typically due to air bubbles introduced during the blending process. For a perfectly clear consistency, much like the store-bought sanitizers you’re accustomed to, simply let the finished product sit undisturbed for an additional 1-2 days. Over this period, the air bubbles will dissipate, leaving you with a beautifully clear and potent hand sanitizer.
Storage and Usage Tips: Store your hand sanitizer in a cool, dark place, away from direct sunlight and heat, to preserve its efficacy. When using, apply a generous amount to your palm, then rub your hands together thoroughly, covering all surfaces of your hands and fingers, until they are completely dry. This ensures maximum germ-killing action.
4 Alternative Products for Hand Sanitizing and Disinfection
While making your own commercial-grade hand sanitizer is highly recommended, it’s always good to know about other options for hand hygiene and disinfection, especially in a pinch. Here are four alternatives that can offer a degree of protection or aid in maintaining cleanliness.
1. Cleansing Foam: The Gentle, No-Rinse Option
The no-rinse cleansing foam is an excellent alternative, particularly for individuals with sensitive skin or those who require a milder option. Often used in healthcare settings for the elderly or individuals with disabilities, these foams are specifically formulated to be non-irritating while still providing cleansing properties.
Cleansing foams typically contain detergents like Sodium Lauroyl Sarcosinate, which is also found in body washes, shampoos, and regular soaps. This ingredient helps to lift dirt and germs from the skin without the need for water, making it a convenient solution for on-the-go hygiene.
TO USE: Dispense a small amount of foam onto your hands. Rub your hands together thoroughly for about 20 seconds, or until the foam fully dissolves and your hands feel clean. No rinsing is required, making it a quick and easy way to refresh and clean your hands.
2. Everclear Alcohol: A Powerful Disinfectant Base
If you have a bottle of Everclear high-proof grain alcohol on hand, it can serve as a potent base for a DIY disinfectant or hand sanitizer. Everclear, often bottled at 151 proof (75.5% alcohol by volume) or higher, meets the minimum alcohol concentration recommended by health organizations for effective germ killing. Its high alcohol content makes it a powerful agent for disinfection.
View this post on InstagramMom wins for social distancing and staying disinfected at her house when she ran out of Lysol spray 🙌🏻 @lysol_us @everclear #everclear #everclearalcohol #spraybottle #corona #usa #disinfectant #staysafe
A post shared by I Love All Things Crafty 😺 (@alleycatcraftshop) on
TO USE: To make Everclear more suitable for skin contact and to enhance its usability, add a moisturizing agent like glycerin or aloe vera gel to counteract the drying effects of alcohol. A few drops of essential oil can also be added for a pleasant fragrance. Whisk these ingredients together until well combined, then pour the mixture into a clean spray bottle. This versatile solution can be used to disinfect surfaces or as an emergency hand sanitizer, ensuring the alcohol content remains effective for germ killing.
3. DIY Lysol Wipes: For Surface Disinfection
Disinfecting wipes are incredibly convenient for cleaning surfaces, especially when store-bought options are scarce. If you have a can of Lysol disinfectant spray, you can easily create your own effective wipes for quick clean-ups and surface sanitation.
Check out an image of Lysol spray in action on Flickr
Lysol disinfectant spray is renowned for its ability to kill a wide range of bacteria and viruses on surfaces, including certain strains of the coronavirus, and often leaves a pleasant scent. While primarily for surfaces, having these DIY wipes can be a practical solution for disinfecting high-touch areas around your home or workspace.
TO USE: Take a few sheets of sturdy paper towels or napkins and fold them into a convenient size. Place them inside a resealable sandwich bag. Generously spray the napkins with Lysol disinfectant until they are thoroughly moistened. Seal the bag to keep the wipes damp and ready for use. These wipes are excellent for quickly cleaning doorknobs, light switches, countertops, or your car’s steering wheel. While they are great for surfaces, always exercise caution if using them on skin and rinse thoroughly, as Lysol is not designed for direct prolonged skin contact.
4. Concentrated Body Wash: A Last-Resort Cleansing Agent
This option should be considered a last resort for hand cleansing, suitable only when no other soap-based or alcohol-based alternatives are available. Concentrated body washes are primarily formulated for baths or showers and can be quite harsh on the skin if not properly diluted and rinsed off. However, they do contain potent detergents that can break down oils and remove germs.
Explore concentrated body wash ideas on Pinterest
Many concentrated body washes include ingredients like Triethanolamine Lauryl Sulfate, which is a strong anionic surfactant (detergent). While effective at cleaning, its concentration means it can strip natural oils from your skin, leading to dryness and irritation.
TO USE: If absolutely necessary, create a diluted solution. In an empty, clean shampoo bottle, combine four parts water with one part concentrated body wash. Shake the bottle vigorously to mix the solution thoroughly. This diluted mixture can then be used sparingly for hand washing, followed by a thorough rinse with water to minimize skin exposure to the harsh detergents. For convenience, you can also transfer the solution to a spray bottle if desired, but remember to always rinse hands after use. This is not a leave-on hand sanitizer.
Watch this detailed video from Perry Belcher of Survival Life for a step-by-step guide on how to make your own DIY hand sanitizer:
In a world where hygiene is paramount, understanding how to protect yourself and your loved ones is invaluable. With the prevalence of asymptomatic cases of various illnesses, frequent and effective sanitizing has become a critical habit. Luckily, this DIY commercial-grade hand sanitizer offers an accessible, inexpensive, and potent solution. Not only does it effectively sanitize, but with careful ingredient selection, it can also help keep your hands moisturized, preventing the dryness often associated with frequent sanitizing.
This homemade formulation stands proudly alongside, or even surpasses, many of the regular Purell-type hand sanitizers you find in the grocery store. It provides robust protection, peace of mind, and the satisfaction of having crafted a high-quality product yourself. Take control of your hygiene regimen and embrace the power of DIY for a healthier, safer future.
Get the essential ingredients to make this DIY project without having to go outside, here! You can even buy them in bulk to ensure you have enough supply to last through any extended periods of need. If you have other innovative hand sanitizer or disinfectant alternatives you’ve discovered, we’d love for you to share them in the comments section below and contribute to our community’s collective knowledge.
Download, save, or share this infographic for a quick visual reference:
Calling all crafting DIYhards, DIY Projects needs YOU! Click here if you want to contribute for us.
UP NEXT:
- Homemade Cleaning Products: What You Should Know Before You DIY
- 10 Essential Cleaning Checklist Items for Spring | DIY Projects
- 19 Easy Friendship Bracelets For Beginners To DIY
Don’t forget to stay connected with us on Facebook, Twitter, and Instagram for more inspiring DIY ideas and projects!