
DIY Entryway Makeover: Stylish & Organized Decor Ideas for a Welcoming Home
Your entryway is more than just a transitional space; it’s the first impression guests have of your home and the functional hub where daily routines begin and end. Often, it becomes a dumping ground for keys, coats, shoes, and bags, leading to clutter and stress. Yet, with a little creativity and some smart DIY solutions, your entryway can be transformed into an organized, beautiful, and truly welcoming area that reflects your personal style.
Making a great first impression extends beyond cleanliness; it encompasses thoughtful design and efficient organization. A well-designed entryway doesn’t just look good; it simplifies your life, making coming and going a breeze. This comprehensive guide will explore several ingenious DIY entryway decor ideas that are both easy to implement and highly effective in creating a tidy, functional, and aesthetically pleasing space. Get ready to turn your often-overlooked entryway into a proud statement piece of your home!
1. Brighten and Expand Your Space with a DIY Mirror & Shelf Console
Many entryways, especially in smaller homes or apartments, lack natural light and can feel cramped. A brilliant DIY solution to combat this is creating a custom entryway console featuring a floating shelf combined with a strategically placed grid of mirrors. This setup not only provides a convenient surface for essentials but also visually expands the space and dramatically boosts natural light, mimicking the effect of a window.
Benefits of a Mirror & Shelf Console:
- Visual Expansion: Mirrors create an illusion of depth, making small entryways feel larger and more open.
- Increased Light: Reflects natural and artificial light, brightening dark corners and making the space more inviting.
- Functional Surface: The shelf provides a perfect spot for keys, mail, decorative items, or a small plant.
- Stylish Statement: A well-arranged mirror grid can serve as an elegant focal point.
- Customizable: Easily adapted to fit any decor style, from modern to farmhouse, by choosing the right shelf and mirror frame (or frameless design).
Materials & Tools You’ll Need:
- Floating shelf (appropriate size and material for your entryway)
- Primer and paint (matching your wall color for a seamless look)
- Multiple frameless mirrors (e.g., square or rectangular, identical size for a grid)
- Measuring tape and a level
- Pencil for marking
- Drill and appropriate wall anchors/screws for secure shelf installation
- Construction adhesive suitable for mirrors (e.g., silicone-based mirror adhesive)
- Caulking gun (if using tube adhesive)
- Clean cloths and glass cleaner
Step-by-Step Guide:
- Prepare and Install the Shelf: Begin by prepping your floating shelf. For a seamless, built-in look, sand the shelf lightly, prime it, and then paint it the exact shade of your entryway walls. This step helps the shelf blend harmoniously into the existing decor. Once dry, use a measuring tape and level to mark the desired height for your shelf – approximately 3 feet (90-100 cm) from the floor is a common and ergonomic choice, providing a comfortable height for dropping keys or mail. Install the shelf securely according to the manufacturer’s instructions, ensuring it is perfectly level.
- Plan Your Mirror Grid: Before applying any adhesive, arrange your frameless mirrors on the floor or tape them temporarily to the wall above your shelf to visualize the layout. The goal is to create a “windowpane” effect. Leave a consistent gap of about one inch (2.5 cm) between each mirror to enhance this illusion. Use your pencil and level to mark the exact positions for each mirror, paying close attention to alignment both horizontally and vertically.
- Secure the Mirrors: Apply construction adhesive to the back of each mirror. A zigzag pattern or several dots of adhesive near the edges (but not too close that it squeezes out) will provide a strong hold. Carefully press each mirror onto its marked position on the wall, ensuring it’s level and maintaining the consistent spacing you planned. Hold each mirror firmly for a few moments as the adhesive begins to set.
- Finishing Touches: Allow the adhesive to cure completely as per the product instructions, which might take 24-48 hours. Once dry, give your newly installed mirrors a thorough cleaning. A streak-free shine is essential for maximizing light reflection and creating that radiant, welcoming atmosphere.
This DIY mirror and shelf console transforms a plain wall into a functional and visually stunning feature. It offers a practical spot for essentials like keys or decorative items, while the mirrors work magic by reflecting light and making even the smallest entryway feel open and airy. For more creative mirror projects, consider exploring ideas like How To Make A DIY Horizon Mirror.
2. Keep Floors Spotless with a DIY Pebble-Filled Shoe Tray
The entryway is a high-traffic zone, often bearing the brunt of outdoor elements like rain, snow, mud, and dirt. A common challenge is preventing these outdoor messes from being tracked throughout your home. A simple yet incredibly effective DIY solution is a pebble-filled shoe tray, positioned right by your front door. This practical addition provides a dedicated, self-draining spot for wet or dirty footwear, protecting your clean floors and maintaining a tidy appearance.
Why a Pebble-Filled Shoe Tray is Essential:
- Superior Drainage: The pebbles create a natural drainage system, lifting shoes above any accumulated water, melted snow, or mud, allowing them to dry faster.
- Protects Floors: Prevents unsightly stains, scratches, and damage to your delicate flooring from wet or gritty shoes and boots.
- Easy to Clean: Much simpler to clean the tray periodically than to constantly mop or scrub your entire entryway floor.
- Aesthetic Appeal: The natural stones add a touch of organic texture and visual interest to your entryway, making it look less like a utility item and more like a thoughtful design element.
- Odor Control: By allowing shoes to dry properly, it helps prevent mildew and unpleasant odors that can arise from damp footwear.
Materials & Assembly:
- Durable, waterproof tray (e.g., boot tray, large shallow planter saucer, or a sturdy metal/plastic tray that matches your decor)
- Small decorative pebbles or river stones (available at home and garden stores, craft stores, or even some pet supply stores; opt for smooth, non-porous stones)
- Optional: A small basket with several pairs of clean, cozy slippers for guests and family members
Simple Steps to Create Your Shoe Tray:
- Select Your Tray: Choose a tray that is robust, waterproof, and large enough to accommodate the number of shoes typically left by your door. Consider its depth; it needs to be deep enough to hold a good layer of pebbles without them spilling out, and allow for water collection underneath the shoes.
- Prepare and Add the Pebbles: Thoroughly wash your chosen pebbles to remove any dust, dirt, or debris. Allow them to dry completely to avoid introducing moisture into your new tray immediately. Once clean and dry, spread them evenly across the bottom of the tray to a depth of about 1-2 inches (2.5-5 cm). This creates the essential drainage layer that elevates footwear.
- Strategic Placement: Position the finished shoe tray immediately inside or just outside your front door. If you have a dedicated mudroom, it’s an ideal spot there too. Ensure it’s in a convenient, visible location so family and guests are encouraged to use it.
- Maintain Cleanliness: To prevent unpleasant odors, mildew, and to keep the tray effective, periodically empty the tray. Rinse the pebbles thoroughly, wash the tray itself, and allow both to air dry completely before reassembling. The frequency will depend on usage and weather conditions.
For an extra touch of hospitality and to further minimize tracked-in dirt, consider placing a small basket filled with cozy slippers next to the shoe tray. This encourages everyone to swap their outdoor shoes for indoor comfort, keeping your floors pristine. For more ingenious ways to keep your home organized and clutter-free, explore ideas like 32 Organization Hacks that Can Keep Anyone Organized.
3. Maximize Storage with Creative & Colorful Hooks and Knobs
An organized entryway is a functional entryway. If you find your foyer frequently overwhelmed by a pile of coats, umbrellas, school bags, and pet leashes, it’s time to implement smart vertical storage solutions. Utilizing hooks and knobs, particularly in an imaginative and colorful way, can transform clutter into charming organization. This DIY approach not only tidies up your space but also adds a playful touch of personality.
Key Benefits of Vertical Storage in the Entryway:
- Space-Saving: Utilizes often-overlooked wall space, especially crucial in small entryways where floor space is at a premium.
- Accessibility: Keeps frequently used items within easy reach, reducing morning rush stress and ensuring nothing is forgotten.
- Clutter Reduction: Provides a designated, visible spot for every item, preventing piles on floors, benches, or console tables.
- Personalization: Offers a fantastic opportunity to inject color, unique textures, and creative design elements into your entryway’s aesthetic.
- Durability: When installed correctly, hooks and knobs offer a robust solution for heavy items like winter coats or backpacks.
Smart Placement & Design Ideas:
- Inside the Closet Door for Accessories: Don’t let the back of your foyer closet door go to waste! Install a series of simple adhesive hooks or screw-in hooks on the inside. This is an ideal, hidden spot for hanging scarves, hats, reusable shopping bags, pet leashes, small umbrellas, or even keys. It keeps these items out of sight but readily accessible when you’re heading out.
- Low-Height Knobs for Children: Encourage independence and tidiness by installing a cluster of colorful knobs at a lower, child-friendly height on an exterior wall of your closet or entryway. This thoughtful placement makes it easy for kids to hang their own coats, backpacks, and sweaters, teaching them valuable organizational skills while keeping their items neatly off the floor.
- Repurpose & Personalize with Drawer Knobs:
- Sourcing: Hunt for unique and affordable drawer knobs at antique shops, flea markets, hardware stores, or even repurpose old ones from furniture. This adds character and a sustainable touch.
- Painting & Finishing: Unleash your creativity by painting these knobs in a vibrant array of colors that complement your home’s decor. Consider a gradient effect, a rainbow display, or a mix of contrasting hues for an eye-catching focal point. Ensure the paint is suitable for high-traffic use and sealed for durability and longevity.
- Safety First: When selecting knobs for children’s use, always opt for those with rounded edges to ensure they are completely safe and free from sharp points.
- Installation: Depending on the type of knob, you might need specific wall anchors or screws to securely mount them into your wall or closet door. Always measure and mark your desired placement precisely before drilling to achieve a neat and professional look.
- Entryway Wall Display: For entryways without a closet, a stylish array of hooks mounted directly on the wall can serve as a beautiful and functional coat rack. Mix different styles or materials of hooks (e.g., metal, wood, ceramic) for an eclectic look, or stick to a uniform design for minimalist appeal. Add a small shelf above the hooks for additional display or storage.
Beyond functionality, these colorful hooks and knobs act as decorative elements, transforming a practical necessity into a vibrant focal point. This simple DIY project brings both order and charm to your entryway. For more inventive ways to repurpose items and create smart storage solutions, especially through creative furniture upcycling, delve into ideas like 12 IKEA Hacks That Will Blow You Away.
4. Personalize and Organize with a DIY Chalkboard Message Center
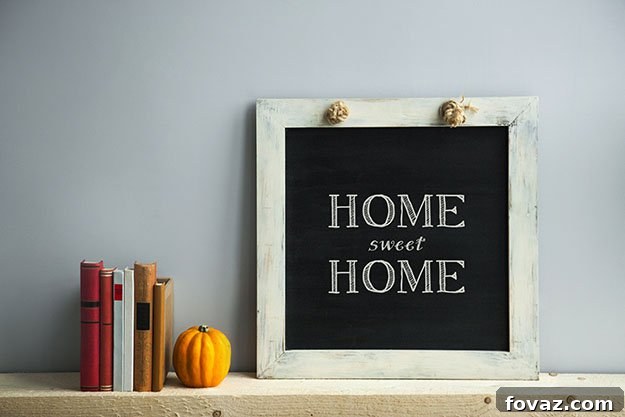
The entryway isn’t just for coming and going; it’s also a perfect communication hub for busy families. A DIY chalkboard message center offers a charming, functional, and endlessly customizable addition to your entryway decor. It serves as a central spot for reminders, grocery lists, inspirational quotes, or even a creative outlet for your family, all while adding a unique, rustic-chic accent to your home.
Benefits of an Entryway Chalkboard:
- Communication Hub: Easily leave notes for family members about appointments, chores, dinner plans, or simply “Have a great day!” messages.
- Memory Jogger: Jot down last-minute reminders for items to grab (like “gym bag” or “library books”) before heading out the door.
- Creative Outlet: A fun and interactive space for kids (and adults!) to doodle, practice handwriting, or display seasonal art.
- Decorative Element: Adds a touch of vintage charm, modern minimalism, or playful whimsy, depending on your chosen frame and styling.
- Eco-Friendly: A reusable surface reduces the need for disposable paper notes, making it a sustainable choice.
Creating Your DIY Chalkboard:
- Gather Your Materials:
- A framed panel or a smooth, flat piece of plywood/MDF (ensure it’s sanded smooth for best results)
- Chalkboard paint (available in various colors, most commonly black or dark green)
- Paintbrush or foam roller for a smooth application
- Painter’s tape (optional, for crisp edges if you’re only painting a section)
- Drop cloth or newspaper to protect your work surface
- Chalk and an eraser
- Prepare Your Surface: If using a new panel, ensure it’s clean and dry. If repurposing an old picture frame, remove any glass and backing, then clean the frame thoroughly. If desired, paint the frame itself to match or contrast with your entryway decor.
- Apply Chalkboard Paint: Stir the chalkboard paint well. Using a paintbrush or foam roller, apply thin, even coats to your panel. Allow each coat to dry completely according to the manufacturer’s instructions before applying the next. Typically, 2-3 coats are sufficient for a durable, smooth writing surface. For the smoothest finish, you may lightly sand with fine-grit sandpaper between coats if recommended by the paint instructions.
- Cure and Season the Chalkboard: This is a crucial step for longevity! Once the final coat of paint is completely dry (usually 3-7 days, carefully check your specific paint instructions), “season” your new chalkboard. To do this, take a piece of chalk, rub the side of it over the entire surface, then erase it completely. This primes the surface, preventing permanent “ghosting” from your very first writing.
- Display Your Chalkboard: Your DIY chalkboard is ready! You can lean it casually against a wall on top of your entryway console or shelf for an easy, flexible arrangement that allows for repositioning. Alternatively, mount it securely on the wall at an accessible height using appropriate hardware, making it a permanent fixture.
Tips for Maximizing Your Chalkboard Message Center:
- Designated Spot for Chalk: Attach a small cup or basket to the side of the board or place it on the shelf below for easy access to chalk and an eraser.
- Family Rules/Reminders: Dedicate a section for frequently updated lists like “Today’s To-Dos,” “Grocery List,” or “Don’t Forget.”
- Kid-Friendly Zone: Encourage your children to draw or write on the board. A fun incentive for them to keep it clean? Offer small treats or rewards for erasing the board once it’s completely filled with chalk art!
- Seasonal Decor: Change up your chalkboard messages and drawings with the seasons or holidays for an ever-fresh look.
This creative and practical addition enhances the functionality and charm of your entryway. It’s a dynamic element that evolves with your family’s needs and adds a personal touch to your home’s welcoming zone. For more inspiring projects that harness the versatility of chalkboard paint, explore 30 DIY Chalkboard Paint Projects.
Transforming your entryway doesn’t require a complete overhaul or a hefty budget. As these DIY ideas demonstrate, with a bit of creativity and effort, you can turn a neglected space into a highly functional, beautifully organized, and genuinely welcoming area. From expanding your space with mirrors to keeping shoes neat with pebbles, and from smart storage solutions with colorful hooks to a practical chalkboard message center, each project offers a unique way to enhance your home’s first impression. Embrace the power of DIY to create an entryway that not only meets your practical needs but also delights with its style and warmth.
More Inspiring DIY Projects You’ll Love:
26 Ingenious DIY Ideas For Small Spaces
35 Ways To Transform Your Old Furniture
6 Cool Home Office Ideas
Stay connected with us for daily inspiration and more DIY projects on Facebook, Twitter, Pinterest, and Instagram!
Article by Ella A. on behalf of Battersea Carpet Cleaners Ltd