
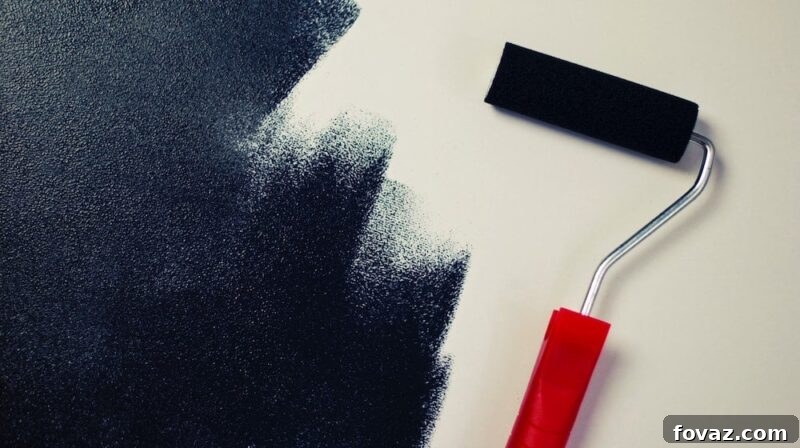
Transforming your old, tired furniture into stunning, custom pieces doesn’t have to break the bank or require professional skills. With the magic of DIY chalk paint, you can breathe new life into dressers, tables, chairs, and cabinets, giving them a charming vintage or elegantly distressed look. This comprehensive guide will walk you through everything you need to know about making your own chalk paint at home, ensuring a smooth, durable finish that perfectly captures the aesthetic you envision. Get ready to unlock your creativity and embark on an exciting furniture makeover journey!
Unlock Vintage Charm: Your Ultimate Guide to DIY Chalk Paint for Durable Furniture Makeovers
Learning how to make your own chalk paint is incredibly straightforward and surprisingly rewarding. This simple DIY project offers an affordable alternative to store-bought chalk paints and provides endless possibilities for customizing your home decor. Imagine that dull desk transforming into a vibrant, antique-inspired centerpiece – it’s all within reach with just a few common ingredients and a bit of elbow grease.
Why Choose DIY Chalk Paint for Your Furniture?
Chalk paint has become a favorite among DIY enthusiasts for several compelling reasons. Its distinctive matte finish instantly adds a touch of rustic elegance, vintage flair, or shabby chic appeal to any piece. But the benefits extend beyond aesthetics:
- Minimal Prep Work: One of the biggest advantages is that chalk paint often requires little to no sanding or priming. It adheres wonderfully to most surfaces, including wood, metal, laminate, and even glass, making furniture makeovers quicker and easier.
- Beautiful Finish: It dries to a velvety, ultra-matte finish that is perfect for achieving a time-worn, antique look.
- Easy to Distress: Its unique texture makes it exceptionally easy to distress, allowing you to reveal underlying colors or the original wood for that coveted aged appearance.
- Versatility: Whether you’re aiming for a solid, opaque color, a layered effect, or a heavily distressed masterpiece, chalk paint is incredibly versatile.
- Cost-Effective: Making your own chalk paint is significantly more economical than purchasing specialized brands, allowing you to tackle multiple projects on a budget.
Essential Supplies for Crafting Your Homemade Chalk Paint
Before you dive into mixing, gather all your materials. Having everything at hand will make the process seamless and enjoyable. Here’s a detailed list of what you’ll need to create your custom chalk paint:
- Acrylic Latex Paint: Choose a good quality latex paint in your desired color. While any finish can technically work, a flat or eggshell finish is generally recommended as it provides the best base for chalk paint’s characteristic matte look and adhesion. Semi-gloss or glossy paints might require very light scuff sanding for optimal adherence.
- Plaster of Paris (in powder form): This is the key ingredient that gives chalk paint its unique texture, quick-drying properties, and excellent adhesion. Ensure it’s in a fine powder form for a smooth mixture.
- Water: Essential for mixing the plaster of Paris into a smooth paste and for adjusting the consistency of your final chalk paint.
- A Wide-Mouthed Jar with Lid: Ideal for mixing and storing your freshly made chalk paint. A wide mouth makes it easier to stir and access the paint.
- A Plastic Fork or Stirring Stick: For thoroughly blending your ingredients. A paint stirrer or even an old whisk can work well.
- High-Quality Paint Brush: Invest in a good quality brush. Natural bristle brushes are often preferred for chalk paint as they help achieve that characteristic textured finish, but synthetic brushes also work effectively for smoother applications.
- Measuring Cup: Accuracy in measurements ensures the best paint consistency and performance.
- Clear Coat Sealer (Matte Polycrylic recommended): A crucial step for durability. Polycrylic offers a low-odor, quick-drying, and non-yellowing protective layer. Other options include clear wax for a traditional feel.
- Optional: Sanding blocks or sandpaper (for distressing), damp cloths, drop cloths, painter’s tape, stir stick for original paint.
Pro Tips for Optimal Chalk Paint Results
- Choose Your Paint Finish Wisely: While interior eggshell or satin latex paints can be used, you’ll generally achieve the best results and the most authentic chalk paint look with a flat finish acrylic latex paint. A flat finish provides a better “tooth” for the plaster to adhere to, enhancing the matte effect and making distressing easier.
- Always Test Your Color: Before committing to your entire project, mix a small batch and test it on an inconspicuous area or a scrap piece of wood. This allows you to check the color and consistency.
- Ensure Good Ventilation: When painting, especially with oil-based paints or sealers, always work in a well-ventilated area to ensure proper air circulation and minimize fume inhalation.
Step-by-Step Guide: Crafting Your Own Chalk Paint
Step 1: Preparing Your Plaster of Paris Paste
The secret to smooth, lump-free chalk paint lies in this initial mixing step. Remember, you’ll be working with a fundamental ratio of one part plaster of Paris to three parts of latex paint. For this first phase, you’ll focus on the plaster:
In your wide-mouthed jar, combine one cup of plaster of Paris powder with approximately one-quarter to one-third cup of water. Slowly add the water to the plaster while stirring continuously with your plastic fork or stirring stick. The goal is to create a thick, smooth paste without any lumps. Keep mixing until the consistency resembles that of mayonnaise – creamy and uniform. This might take a few minutes of steady stirring. A smooth paste ensures your final paint will be free of gritty particles.
Tip: Don’t have a precise measuring cup? A standard coffee mug can serve as your “part” measurement, just ensure you use the same mug for both plaster and paint to maintain the correct ratio.
Step 2: Combining Plaster of Paris Paste with Latex Paint
Now that your plaster paste is perfectly smooth, it’s time to introduce the color. This step requires careful integration to maintain an even consistency throughout your paint.
Into your plaster paste mixture, slowly pour in three cups (or three ratios, based on your chosen ‘part’ measurement) of your acrylic latex paint. Begin stirring immediately and thoroughly. Continue mixing until the plaster paste is completely integrated with the paint, resulting in a homogenous color and texture. It’s crucial to achieve a smooth blend without streaks or separated layers.
Tip: If you’re preparing a larger batch of chalk paint, hand-mixing can be quite laborious. A stick blender or an immersion blender is a fantastic tool to quickly and effectively combine the ingredients, ensuring a perfectly smooth and lump-free chalk paint every time. Just be sure to dedicate that blender for paint use only!
Step 3: Preparing Your Furniture and Applying the Paint
With your fresh batch of chalk paint ready, it’s time to tackle your furniture. The beauty of chalk paint is its forgiving nature, but a little preparation goes a long way for a lasting finish.
First and foremost, clean the surface of your furniture thoroughly. Remove any dust, dirt, grease, or grime. A simple wipe-down with a damp cloth followed by drying is usually sufficient. For very glossy or oily surfaces, a light scuff sanding (with 220-grit sandpaper) and a wipe with a degreaser can improve adhesion, though often not strictly necessary with chalk paint. Ensure the surface is completely dry before painting.
Now, begin painting as you normally would. Apply thin, even coats using your chosen brush. Chalk paint tends to dry quickly, so work efficiently. For complete coverage, two to three coats are typically required, allowing ample drying time (usually 30-60 minutes) between each coat. Don’t worry if the first coat looks a bit streaky; subsequent coats will build up the color and texture.
Tip for a Distressed Look: One of the most popular applications for chalk paint is achieving a beautifully distressed, vintage look. Once your final coat of paint has fully dried (ideally several hours or overnight), take a fine-grit sanding block (e.g., 220-grit) and lightly run it over the edges, corners, raised details, and areas where natural wear would occur. Use long, light, and even strokes along the grain of the wood. The goal is to gently remove paint from these high points, allowing the original surface or an underlying paint color to show through. Be careful not to press too hard, as this can cause gouging or uneven removal. Start subtly and add more distressing as desired until you achieve your preferred aged aesthetic. This technique instantly adds character and history to your piece, making it appear as though it has been loved for generations.
Step 4: Proper Storage for Your DIY Chalk Paint
Taking a break from painting, or have leftover paint? Proper storage is crucial to prevent your homemade chalk paint from drying out and to ensure it remains usable for future projects.
Always ensure the lid is securely placed back on your wide-mouthed jar immediately after use. Chalk paint dries much faster than regular latex paint due to the plaster of Paris. Store the sealed jar in a cool, dark place away from direct sunlight or extreme temperatures. Before resuming painting, give the paint a good stir to reintegrate any settled ingredients and ensure a consistent texture. Stored correctly, your DIY chalk paint can last for several weeks, if not months.
Step 5: Sealing Your Masterpiece with a Clear Coat
While chalk paint is durable, applying a protective clear coat is essential to safeguard your furniture from daily wear and tear, moisture, and scratches, ensuring its longevity and maintaining its beautiful finish.
A matte Polycrylic clear coat is highly recommended as a top sealer. It dries quickly, offers excellent protection, and has a significantly lower odor compared to many oil-based sealers. Its matte finish also helps preserve the characteristic velvety look of chalk paint. The only slight drawback is that Polycrylic can sometimes appear slightly milky when wet, which might subtly lighten dark-colored furniture. Always test on an inconspicuous area if you’re concerned. Alternatively, you can use clear furniture wax, which gives a softer, more traditional feel, but typically requires reapplication over time and isn’t as resistant to moisture as Polycrylic.
Important Tip: Before applying any clear coat or sealer, it is absolutely crucial to remove all sanding dust from your furniture. Dust particles trapped under the sealer will create a rough, uneven finish. To do this, simply wipe down the furniture thoroughly with a slightly damp cloth (ensure it’s just damp, not wet) and allow it to dry completely before proceeding with the clear coat. For an even cleaner surface, a tack cloth can be used.
Apply the clear coat in thin, even layers according to the manufacturer’s instructions, allowing adequate drying time between coats. Typically, two to three coats provide excellent protection.
Beyond the Basics: Exploring Advanced Chalk Paint Techniques
Once you’re comfortable with the fundamentals of making and applying chalk paint, you can explore more advanced techniques to truly personalize your furniture:
- Waxing: In addition to clear wax for protection, consider dark wax to create an antique patina, emphasizing carved details and recesses for a truly aged look. White wax can create a limed or bleached wood effect.
- Layering Colors: Apply two different chalk paint colors, allowing each to dry, then distress to reveal hints of the bottom color, creating depth and visual interest.
- Stenciling: Use stencils with chalk paint to add intricate patterns, monograms, or designs to your furniture for a custom touch.
- Washing: Create a paint wash by diluting your chalk paint with water and applying it over a base color for a soft, translucent effect.
And there you have it! You’ve not only learned how to make chalk paint from scratch but also how to apply it expertly, complete with tips for achieving that coveted distressed finish. This affordable and enjoyable DIY approach empowers you to transform ordinary pieces into extraordinary statements, adding character and personal style to your home.
Chalk paint offers an easy, accessible, and durable way to infuse vintage charm into your living space. Its superior adhesion and unique finish make it a standout choice for furniture makeovers, often outperforming standard latex paint in terms of character and ease of use.
For a visual walkthrough and to see these steps in action, press play to watch the full video tutorial on how to make chalk paint:
As you can see, learning how to make chalk paint is indeed as easy as pie! Remember, the quality of your finished project often reflects the care you put into selecting your materials. Always do a little research on paint brands and plaster of Paris to ensure you achieve the best possible results for your furniture transformations.
Now that you’re equipped with the knowledge to make your own chalk paint, what exciting furniture makeovers are you planning to embark on? Share your ideas and project plans with us in the comments below! We love hearing about your creative endeavors!
Feeling inspired for more DIY projects? Don’t miss out on these fantastic DIY coffee table ideas you can create to complement your newly painted furniture!
Stay connected with our vibrant DIY community! Follow us for more inspiration, tips, and tutorials on Facebook, Twitter, Pinterest, and Instagram!