
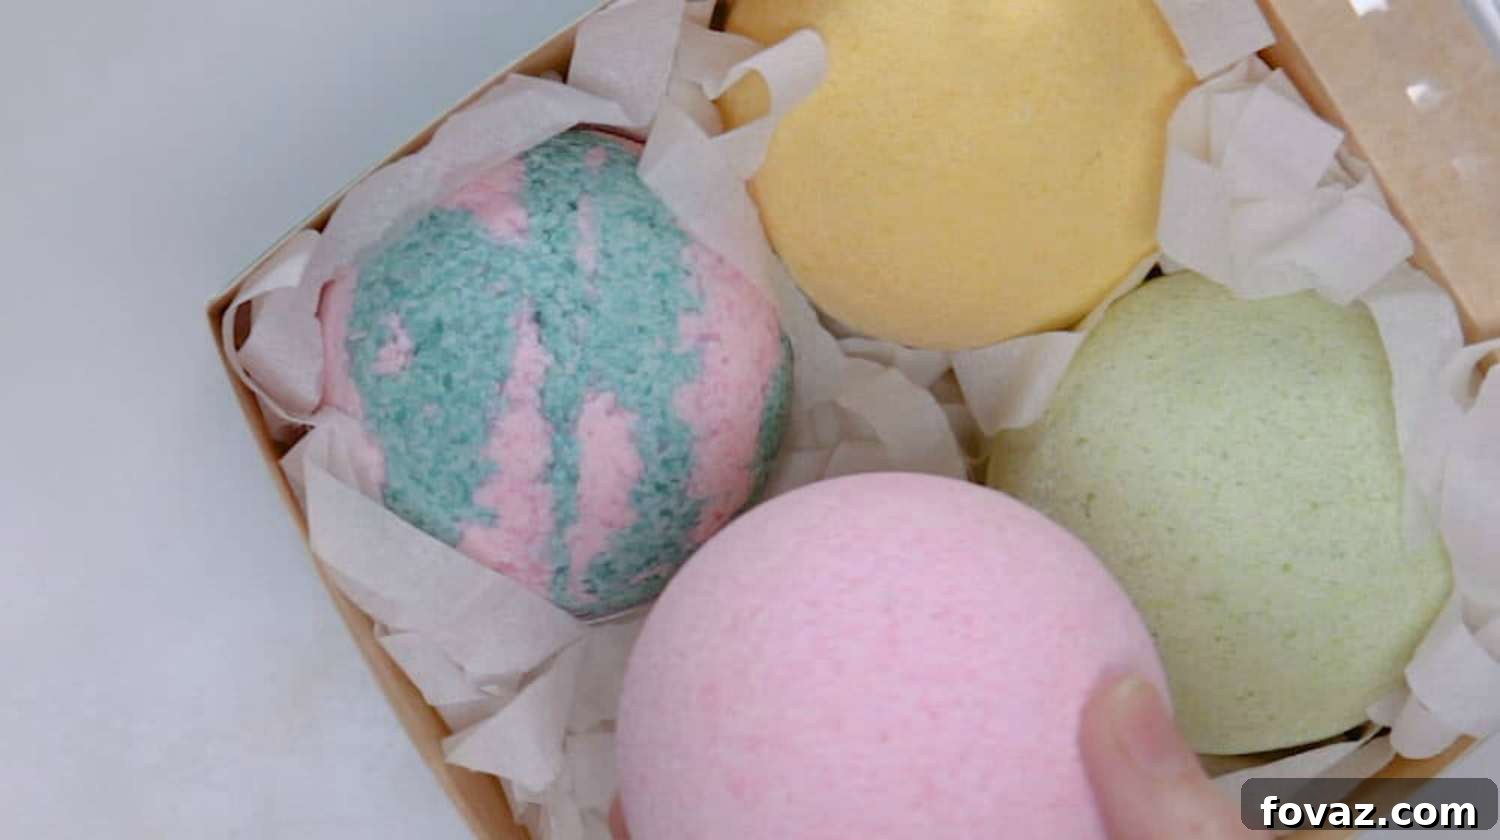
Craft Your Own Luxurious Fizz: The Ultimate DIY Bath Bombs Guide
Are you a devoted fan of bath bombs but find their price tags a bit steep? Imagine transforming your ordinary bath into a lavish, spa-like experience with beautifully scented, fizzy creations you made yourself. This comprehensive guide will walk you through everything you need to know about making your own luxurious DIY bath bombs at home, allowing you to enjoy endless relaxation without breaking the bank!
RELATED: 17 DIY Bath Bombs & Homemade Bath Bomb Recipes
In this article:
- Why Make Your Own Bath Bombs?
- Essential Bath Bomb Ingredients
- A Quick Overview of the Bath Bomb Making Process
- Step-by-Step: Crafting Your Basic Bath Bomb Mix
- Mastering the Perfect Bath Bomb Consistency
- DIY Bath Bomb Molds: Tips for Perfect Shapes
- Elevate Your Bath Bombs: Adding Color, Scent, and Texture
- Drying and Storing Your Homemade Bath Bombs
- Common Problems and Expert Troubleshooting Tips
Why Make Your Own Bath Bombs?
There’s immense satisfaction in crafting something with your own hands, especially when it results in a product that brings joy and relaxation. Making homemade bath bombs offers numerous advantages over store-bought alternatives. Firstly, it’s significantly more cost-effective, allowing you to create a large stash of bath bombs for the price of just a few commercial ones. Secondly, you gain complete control over the ingredients. This means you can choose natural, skin-friendly components, avoid harsh chemicals or artificial fragrances that might irritate sensitive skin, and even tailor them to specific skin needs, such as moisturizing or detoxifying.
Furthermore, the creative possibilities are endless! From vibrant colors and captivating scents to therapeutic additives and decorative elements, you can personalize every aspect to suit your mood, preference, or even create thoughtful, unique gifts for friends and family. This guide will empower you to become a bath bomb artisan, transforming simple ingredients into delightful effervescent treats for your bath.
Essential Bath Bomb Ingredients
Understanding the fundamental components of bath bombs is crucial for success. The magic of a bath bomb lies in a simple chemical reaction, and it all starts with two key dry ingredients. Here’s a detailed look at what makes your bath bombs fizz, along with other crucial elements:
The Core Fizzing Duo:
- Baking Soda (Sodium Bicarbonate): This alkaline powder is a household staple and the primary ingredient in bath bombs. It reacts with acid to create carbon dioxide gas, which produces the signature fizz. Always opt for food-grade baking soda for purity.
- Citric Acid: Derived from citrus fruits like oranges and lemons, citric acid is the acidic counterpart to baking soda. When combined with baking soda and introduced to water, it initiates the effervescent reaction. Ensure you use fine-grain citric acid for optimal blending and fizz.
The standard ratio for a reliably fizzy and structurally sound bath bomb is generally 2 parts baking soda to 1 part citric acid. For instance, if you use 200 grams of baking soda, you’d use 100 grams of citric acid. This balance is key to achieving that satisfying bubbly release in your tub.
Binding Agents:
- A Small Amount of Water: While water is essential for the fizzing reaction in the bath, it’s also used in minimal quantities during the mixing process to help bind the dry ingredients together. The trick is to add it very slowly and sparingly to prevent premature fizzing.
- Witch Hazel (Recommended Alternative): Many experienced bath bomb makers prefer using witch hazel in a spray bottle instead of pure water. Witch hazel evaporates more slowly, giving you better control over the binding process and significantly reducing the risk of premature fizzing. It also adds a slight astringent quality that can be beneficial for skin.
- Carrier Oils (Optional but Recommended): Adding a small amount of a light carrier oil like sweet almond oil, jojoba oil, or fractionated coconut oil can act as an additional binder, enrich the bath bomb with moisturizing properties, and help disperse essential oils.
Additional Essential Items:
- Large Mixing Bowl: A spacious bowl gives you ample room to mix your ingredients thoroughly without spillage.
- Whisk or Spoon: For combining dry ingredients and mixing in liquids.
- Gloves: Protect your hands from potential skin irritation from raw ingredients and ensure your oils and scents don’t transfer to your mixture.
- Measuring Cups/Scales: Accurate measurements, especially for the baking soda and citric acid ratio, are vital. A kitchen scale is highly recommended for precision.
- Spray Bottle: Essential for applying water or witch hazel in fine mists.
With just these basic ingredients and tools, you can create bath bombs so robust that they’ll hold their shape beautifully until it’s time for their grand entrance into your bathwater!
A Quick Overview of the Bath Bomb Making Process
Before diving into the intricate details, let’s get a bird’s-eye view of the entire bath bomb crafting journey. Understanding the sequence of steps can help you visualize the process and prepare efficiently:
- Gather & Measure: Collect all your ingredients and measure them accurately.
- Combine Dry Ingredients: Thoroughly mix all dry components in a large bowl.
- Gradually Add Wet Ingredients: Slowly spray in your chosen liquid (water or witch hazel) along with any oils or fragrances, mixing continuously until the mixture just begins to clump.
- Mold & Pack: Firmly press the mixture into your chosen bath bomb molds.
- Dry & Cure: Allow your freshly molded bath bombs to dry completely for 1-2 days.
- Store: Once dry, store them properly to maintain freshness and fizz.
This simple framework underpins every successful bath bomb creation. Now, let’s delve into each stage with more detail.
Step-by-Step: Crafting Your Basic Bath Bomb Mix
With your materials ready and the basic procedure outlined, it’s time to get your hands dirty and start mixing. This foundational step is critical for the integrity and fizz of your homemade bath bombs.
- Prepare Your Dry Base: In a large, clean mixing bowl, combine 2 parts sodium bicarbonate (baking soda) with 1 part citric acid. For beginners, a good starting point is about 200g of baking soda and 100g of citric acid. Use a whisk to ensure these powders are thoroughly blended and any lumps are broken up. This ensures an even distribution for the fizzing reaction.
- Set Aside Excess (Pro Tip): It’s a smart practice to mix a little extra dry base (baking soda and citric acid) and set it aside in a separate, airtight container. This reserve can be invaluable if you accidentally add too much liquid (water, witch hazel, or essential oils) in the later steps, allowing you to easily adjust the consistency without starting over.
- Introduce Liquid Gradually: Now, begin adding your liquid binder (water or witch hazel) by lightly spraying tiny amounts at a time. After each spray, immediately mix the concoction thoroughly. The goal is to moisten the mixture just enough for it to hold together when squeezed, without triggering the fizzing reaction.
- Observe for Clumping: Continue the repetitive process of spraying and stirring. You’ll notice the mixture gradually starts to clump together when you press it with your fingers or against the side of the bowl. It should feel like damp sand – not wet dough.
- Avoid Over-Wetting: This is perhaps the most crucial step. Adding water too quickly or too much at once will activate the citric acid and baking soda, causing your mixture to fizz prematurely. This will result in weak or non-fizzing bath bombs. Patience is key here.
- Eliminate Lumps: As you mix, if you spot any tiny lumps of water, oil, or colorant, use the back of your spoon or your gloved hand to squash them against the edges of your bowl. This ensures a consistent, uniform mixture free from pockets of moisture that could lead to cracking or uneven fizzing.
Once your mixture reaches the ideal consistency – resembling damp sand that holds its shape when squeezed but crumbles easily when poked – you’re ready for the next exciting phase: molding!
Mastering the Perfect Bath Bomb Consistency
Achieving the right consistency for your DIY bath bombs is often the trickiest part, yet it’s absolutely vital for creating sturdy, beautiful, and effectively fizzing bombs. Numerous factors, including humidity levels, the type of fragrance oils used, and even the ambient temperature, can influence how your mixture behaves. Knowing what “right” feels like is crucial, as too wet or too dry can lead to crumbling, cracking, or softening.
The “Ideal” Consistency:
The perfect bath bomb mixture should feel like slightly damp sand. When you grab a handful and squeeze it firmly, it should hold its shape, creating a compact ball. However, if you then poke it gently, it should crumble apart easily, not stick together like play-doh. It should be just wet enough to bind but dry enough to prevent any premature fizzing.
Signs Your Mixture Is Too Wet:
- Sticky Texture: The mixture will stick excessively to your fingers, gloves, or the inside of your mixing bowl and molds.
- Overly Damp Appearance: It will look visibly wet, not just moist.
- Audible Hissing/Crackling: The most definitive sign of being too wet is hearing a faint (or sometimes loud) fizzing, hissing, or crackling sound. This means the chemical reaction has already begun, and your bath bombs will lose fizz power.
- Dough-like Feel: If it feels like bread dough or play-doh, it’s definitely too wet.
Solution for Too Wet: If you find your mixture is too wet, don’t despair! This is where your reserved dry ingredient mix comes in handy. Slowly add small amounts of your pre-mixed baking soda and citric acid (in the 2:1 ratio) to absorb the excess moisture. Mix thoroughly after each addition until you reach the desired consistency.
Signs Your Mixture Is Too Dry:
- Hard, Crumbly, or Pebbly Texture: The mixture will feel gritty and resistant to clumping.
- Slips Through Fingers: It will behave like dry sand, refusing to hold any shape when you try to squeeze it.
- Fails to Hold Shape: When you attempt to clump it together, it instantly crumbles apart without any effort.
- Difficulty Molding: If it won’t pack firmly into your molds and just falls apart, it’s too dry.
Solution for Too Dry: If your mixture is too dry, use your spray bottle to add very fine mists of water or witch hazel. Spray once or twice, then mix thoroughly. Repeat this process patiently until the mixture begins to hold its shape when squeezed. Avoid pouring liquid directly, as this can easily over-wet specific areas and cause fizzing.
With practice, you’ll develop an intuitive feel for the perfect consistency, making this once-tricky step much easier to master.
DIY Bath Bomb Molds: Tips for Perfect Shapes
Molding is where your bath bomb mix finally takes its appealing form. While it might seem daunting at first, it’s truly an “easy when you know how” skill. To guide you through creating beautifully shaped DIY bath bombs, here are essential tips and a step-by-step molding process:
Choosing Your Molds:
Bath bomb molds come in various materials and shapes. Common options include:
- Metal Spheres: These classic two-part metal molds are excellent for traditional round bath bombs. They offer durability and a smooth finish.
- Plastic Spheres: Similar to metal, but lighter. Ensure they are sturdy enough to withstand firm packing.
- Silicone Molds: Available in countless shapes (cupcakes, hearts, stars, intricate designs), silicone molds are flexible, making demolding easier, especially for beginners.
- Household Items: Get creative! Muffin tins, plastic Easter eggs, or even cookie cutters can serve as temporary molds for unique shapes.
The Molding Process:
- Prepare Your Molds: Ensure your molds are completely clean and dry. Any residue or moisture can cause your bath bombs to stick.
- Overfill One Half: Take one half of your chosen mold (especially for sphere molds). Spoon the bath bomb mixture into it, overfilling it slightly. Use the edge of the spoon or your fingers to lightly press it down, cutting away any excess mix that’s too high. This helps create a dense core.
- Repeat for the Other Half: Do the same for the second half of the mold, ensuring both halves are generously overfilled and slightly mounded.
- Press Firmly Together: Gently but firmly push the two overfilled halves of the mold together. Apply consistent, strong pressure. The excess mixture will squeeze out from the seam; this is a good sign as it indicates you’ve packed it densely.
- Clean the Seam: Scrape away any excess mixture from around the seam of the mold using your finger or a spoon. This creates a neat finish.
- Wait (Briefly) Before Demolding: For metal or plastic sphere molds, you generally want to demold fairly quickly. For silicone, you might leave them in for a few minutes to firm up slightly.
- Demolding Spheres:
- Carefully remove the top half of the mold.
- Place a sheet of cellophane (or your clean palm) over the exposed half of the bath bomb.
- Invert the mold onto your palm or the cellophane.
- Gently lift the remaining mold half straight up. The bath bomb should slide out cleanly. If it sticks, gently tap the mold.
- Demolding Silicone Molds: Gently flex the silicone mold away from the bath bomb, then push the bomb out from the bottom.
- Place Gently to Dry: Carefully transfer your freshly molded bath bomb to a clean, dry, flat surface (like a baking sheet lined with parchment paper or a towel). Handle it with extreme care as it is very delicate at this stage.
Key Tips for Success:
- Pack Tightly: The firmer you pack the mixture into the molds, the stronger and more durable your bath bomb will be.
- Twist (If Needed): For stubborn metal molds, a slight twisting motion as you pull the halves apart can sometimes help release the bomb.
- Don’t Force It: If a bath bomb is stubbornly stuck, try leaving it in the mold for another 10-15 minutes. Sometimes a little extra time helps it firm up enough to release.
With a bit of practice, you’ll be creating perfectly shaped bath bombs every time!
Elevate Your Bath Bombs: Adding Color, Scent, and Texture
Beyond the basic fizz, customizing your DIY bath bombs with vibrant colors, enchanting scents, and delightful textures is what truly makes them unique and personal. This allows you to create a sensory experience tailored to your exact preferences, making them perfect for personal use, thoughtful gifts, or even special occasions like Valentine’s Day, Mother’s Day, or Father’s Day. Let’s explore the exciting world of bath bomb customization.
Adding a Splash of Color:
Colorants are often added during the liquid introduction stage, allowing them to disperse evenly throughout the mixture.
Liquid Coloring
To tint your DIY bath bombs in a specific shade, add liquid food coloring or specialized bath bomb dyes before you incorporate water or witch hazel. A few drops are usually sufficient for pastel shades, while more drops will create deeper, more intense colors. Be mindful that liquid colorants also contribute to the “wetness” of your mixture, so adjust your other liquid binders accordingly. Too much liquid coloring can make your bath bombs too wet and prone to premature fizzing.
Powdered Colorants (Mica Powder & Lake Dyes)
Powdered colorants, such as mica powders or cosmetic-grade lake dyes, are a popular choice for their vibrant hues and ease of use. They provide greater control over color intensity and are less likely to affect the consistency of your bath bomb mixture compared to liquid options. Add powdered colorants to your dry ingredients and mix thoroughly before any liquids are introduced. This ensures an even, streak-free color distribution. Mica powders also add a beautiful shimmer to your bath water!
RELATED: Bathroom Decorating Ideas On A Budget
Enchanting Scents (Essential Oils & Fragrance Oils):
No bath bomb is complete without an inviting aroma. Scents are typically added with other liquid ingredients (like carrier oils or witch hazel).
- Essential Oils: For a natural and therapeutic experience, pure essential oils are an excellent choice. Lavender for relaxation, peppermint for invigoration, tea tree for cleansing, or citrus oils for an uplifting boost are popular options. Always research essential oil safety, as some require dilution or should be avoided by certain individuals (e.g., pregnant women).
- Fragrance Oils: If you’re looking for a wider variety of scents or stronger, longer-lasting aromas, cosmetic-grade fragrance oils are ideal. From sweet vanilla to fresh ocean breezes, the options are limitless. Ensure they are skin-safe and ph-balanced for bath products.
Start with a small amount (e.g., 10-20 drops per 200g of dry mix) and gradually add more until you achieve your desired scent intensity.
Adding Intriguing Texture and Therapeutic Benefits:
Take your bath bomb mixes a step further by incorporating additives that provide both visual appeal and skin-benefiting properties.
1. Oats
Finely ground oatmeal (colloidal oats) is a wonderful addition, especially for sensitive or irritated skin. It contains mucilage, which creates a soothing, gooey texture in the water, leaving your skin feeling incredibly soft and smooth. Be cautious not to add too much, as excessive oats can break the bath bomb’s consistency or create a thick, glue-like bath.
2. Clay
Cosmetic clays like Kaolin, Bentonite, or Rose Clay can improve the structural integrity of your bath bombs, helping them dry harder and crack less. They also impart a luxurious, silky texture to the bathwater. Clays can be slightly drying, so consider pairing them with a moisturizing carrier oil to balance their effects. Clays can also naturally color your bath bomb.
3. Aloe Powder
Freeze-dried aloe vera powder is a unique ingredient that can make your bath bombs extra special. Known for its soothing and healing properties, aloe is perfect for calming sun-kissed skin or simply adding a hydrating boost. It pairs beautifully with refreshing fragrances like green tea, cucumber, or mint.
4. Milk, Yogurt, or Goat’s Milk Powder
Inspired by ancient beauty remedies, milk powders (whole fat milk, goat’s milk, or buttermilk powder) are revered for their skin-softening and hydrating qualities. The lactic acid in milk acts as a gentle exfoliant, leaving skin feeling supple. Use whole-fat versions for a richer, more luxurious feel. These should be in powdered form and added to the dry ingredients.
5. SLS or Other “Bubbles” (SLSA)
If you love a foamy, bubbly bath, adding a lathering agent is essential. Sodium Lauryl Sulfoacetate (SLSA) is a popular choice for bath bombs. It’s a mild, plant-derived surfactant that creates a rich, long-lasting foam without the harshness of some other sulfates. More foam equals more fun and a truly indulgent bath experience!
Sodium Lauryl Sulfoacetate Definition: A large molecule ingredient commonly found in bath bombs and bubble baths that makes them foamy or bubbly. It is derived from palm and coconut oils, which are considered gentle and non-irritating, making it a preferred choice over harsher sulfates.
6. Botanicals
For a truly elegant and visually stunning bath bomb, incorporate dried flower petals or herbs. Rose petals, lavender buds, calendula, or ground vanilla bean fibers add a touch of natural beauty and can enhance the aroma. Be mindful not to add too many, as they can sometimes clog drains or create a messy tub. A delicate sprinkle often suffices.
7. Salts
For a deeply relaxing and mineral-rich bath, add Epsom salts, Atlantic Sea salts, or Dead Sea salts. These salts are known for their muscle-soothing and detoxifying properties. A general guideline is to add at least a cup per batch of bath bombs to maximize their effectiveness. Incorporating salts might affect the binding, so consider increasing your binder (like clay or a bit more witch hazel) to ensure the bombs hold together.
8. Butters and Carrier Oils
Different kinds of cosmetic butters (like cocoa butter, shea butter, mango butter, or even exotic coffee butter) can infuse your bath bombs with intense moisture, leaving your skin feeling incredibly soft and nourished. Similarly, adding a small amount of carrier oils like sweet almond, jojoba, or avocado oil provides extra hydration. Melt butters gently before adding them to your mixture, or use them in their solid form, grated or finely chopped, mixed with dry ingredients. These additives contribute to a smooth and silky bath experience.
By experimenting with these colors, scents, and textures, you can unlock a world of personalized bath bomb creations, turning every bath into a bespoke ritual.
Drying and Storing Your Homemade Bath Bombs
The journey from a powdery mixture to a perfectly fizzing bath bomb isn’t complete until it’s properly dried and cured. This crucial final step ensures your bath bombs are hard, durable, and retain their fizzing power over time.
The Drying Process (Curing):
Once you’ve successfully molded your DIY bath bombs, they need ample time to dry and harden. This process, often called curing, allows any residual moisture to evaporate, preventing premature fizzing and strengthening their structure.
- Gentle Placement: Immediately after molding, very gently place your bath bombs on a clean, dry, flat surface. A baking sheet lined with parchment paper or a clean, dry towel works perfectly. Ensure there’s good air circulation around each bomb.
- Hands Off: Resist the urge to move, turn, or prod your bath bombs during the initial drying phase. They are extremely delicate when fresh and can easily crumble or crack.
- Patience is Key: Allow your completed DIY bath bombs to dry for a minimum of 1-2 days. In humid environments, they may require even longer – sometimes up to 3-4 days. You’ll know they’re fully dry when they feel hard and solid, with no give when gently squeezed.
- Optimal Environment: A cool, dry room with good air circulation is ideal for drying. Avoid humid areas like bathrooms or kitchens if possible. Some crafters use a dehumidifier in the drying room to speed up the process.
Proper Storage for Longevity:
Once your bath bombs are thoroughly dry and hardened, proper storage is essential to protect them from moisture and preserve their scent and fizz.
- Airtight Containers: The biggest enemy of a bath bomb is humidity. Store your dried bath bombs in an airtight environment such as sealed plastic containers, glass jars with tight-fitting lids, or vacuum-sealed bags. This prevents moisture from the air from triggering a slow, silent fizzing reaction, which will deplete their power.
- Cool, Dry Place: Keep your stored bath bombs in a cool, dry place away from direct sunlight, heat, and any sources of moisture. A cupboard, pantry, or closet is perfect. Avoid storing them in the bathroom, where humidity levels fluctuate significantly.
- Individual Wrapping (Optional but Recommended): For extra protection, especially if you’re making them for gifts or in large batches, consider individually wrapping each bath bomb. Plastic wrap, shrink wrap, or even cellophane bags tied with a ribbon work well. This provides an additional barrier against moisture and helps preserve their scent.
- Enjoy Them Fresh: While properly stored bath bombs can last for several months, they are best enjoyed within 2-3 months for optimal fizz and fragrance. The longer they sit, the more their potency can diminish.
With a little patience during the drying phase and careful storage, you will have successfully created your very own luxurious bath bomb delights, ready to transform your bath into a personal sanctuary whenever you desire!
Common Problems and Expert Troubleshooting Tips
Even seasoned bath bomb makers encounter challenges from time to time. The beauty of DIY lies in learning and refining your craft. Here’s a comprehensive guide to common bath bomb problems, their causes, and effective solutions, ensuring your next batch is a masterpiece!
1. Bath Bombs Just “Flatten Out” And Soften
- The Problem: Your freshly molded bath bombs lose their shape, slump, or become soft and crumbly after a short while.
- The Cause: This almost always indicates that your mixture had too much liquid (water, witch hazel, or oils) in it. The excess moisture triggers a slow fizzing reaction, causing the bombs to expand, weaken, and then flatten as they dry. High humidity in your drying environment can also contribute.
- The Solution: Revisit the section on “Mastering the Perfect Bath Bomb Consistency.” Remember, the mix should feel like damp sand that clumps when squeezed but crumbles easily when poked, NOT like wet dough. In your next batch, add liquids even more slowly and in smaller increments. If your environment is humid, consider using a dehumidifier or finding a drier room for curing.
2. Bombs Look Fine But Easily Crumble or Dent in Your Hand
- The Problem: Your bath bombs hold their shape out of the mold but are fragile, crumbling or denting with minimal pressure.
- The Cause: This suggests that the mixture wasn’t packed densely enough into the molds. It could also be a result of using too many coarse additives (like large salt crystals or certain dried herbs) that weaken the internal structure, or insufficient binding.
- The Solution: When molding, ensure you pack the mixture into each half of the mold very firmly, really pressing it down. Use your body weight if necessary. Scrape off the excess to create a dense, compact form. If using coarse ingredients, consider grinding them finer or reducing their quantity. Ensure your liquid binder (witch hazel or water) was adequate to create a sticky-enough mix.
3. Bombs Look Fine Out of The Molds But Form Large Cracks
- The Problem: Your bath bombs initially look perfect, but as they dry, significant cracks appear on their surface.
- The Cause: This is commonly due to one of two reasons: either there’s still too much moisture trapped within the bath bomb (which slowly fizzes and expands, causing cracks), or the bath bomb dried too quickly on the outside, creating a hard shell that then cracks as the inside continues to dry and shrink. Trapped carbon dioxide trying to escape is often the culprit.
- The Solution: Ensure your mixture isn’t too wet. If the mixture felt perfect, consider your drying environment. A slightly slower, more even drying process can prevent this. Avoid placing them directly in front of a fan or in very hot, dry air immediately after molding. A more stable, moderate temperature is best. Adding a small amount of a hardening agent like Kaolin clay can also help.
4. Bombs Won’t Stay Together or Split Down The Seam
- The Problem: Your bath bombs fall apart when demolded, or the two halves separate along the seam.
- The Cause: This typically indicates that you didn’t add quite enough liquid binder (water, witch hazel, or oils) to your mix, preventing the ingredients from adhering sufficiently. It can also happen if the two halves weren’t pressed together firmly enough.
- The Solution: Carefully review your consistency. Your mixture needs to be just wet enough to hold together firmly when squeezed. If it feels too dry, gently mist with witch hazel and mix thoroughly. When molding, ensure you overfill both halves of the mold and press them together with significant, sustained pressure. You should see a good amount of excess mixture squeezing out from the seam, indicating a tight pack.
5. Bombs Won’t Come Out Of The Mold
- The Problem: Your DIY bath bombs are stubbornly stuck inside your molds, refusing to release cleanly.
- The Cause: This can be due to too much water or cornstarch (if used) in the mixture, making it too sticky. Silicone molds, particularly older ones or those with intricate details, can sometimes cling to the mix. Sodium bicarbonate and citric acid aren’t inherently greasy, but a very wet mixture, especially with cornstarch, can increase stickiness.
- The Solution: Firstly, ensure your molds are perfectly clean and dry before use. If using plastic or metal molds, a tiny spritz of rubbing alcohol inside the mold before filling can help. For silicone molds, sometimes a thin layer of a non-stick cooking spray (like coconut oil spray) can assist, but be careful not to introduce too much oil. Ensure your mixture isn’t too wet. If the bomb still won’t release, gently tap the mold around the edges. For stubborn cases, you can place the mold in the freezer for 10-15 minutes; the cold can sometimes help the bath bomb shrink slightly and release.
Press the play button to check out our video on DIY bath bombs below:
Embarking on the journey of making your own DIY bath bombs opens up a world of creative possibilities and unparalleled relaxation. Once you master the art of crafting these never-boring, effervescent delights, you’ll find yourself constantly experimenting with new colors, fragrances, and therapeutic additives. You’ll never look at store-bought bath bombs the same way again!
Remember the key principles from this guide: precise measurements, careful liquid addition, firm molding, and proper drying. With a little practice and patience, you’ll be creating awesome bath bombs that cater perfectly to your desires. Say goodbye to overpriced bath treats and embrace the satisfaction of crafting your very own luxurious bath experiences!
Have you tried making a DIY bath bomb before? Share your experience, tips, and favorite recipes with us in the comments section below! We love hearing from fellow DIY enthusiasts!
Up Next:
- 12 DIY Bath Bombs & Homemade Bath Bomb Recipes
- 12 DIY Detox Baths
- Create A Prism Candle Light | DIY Mason Jar Crafts
Share your photos with us on social! We’re on Facebook, Twitter, Pinterest, and Instagram!
Editor’s Note: This post was originally published on April 9, 2018, and has been updated for quality and relevancy.