
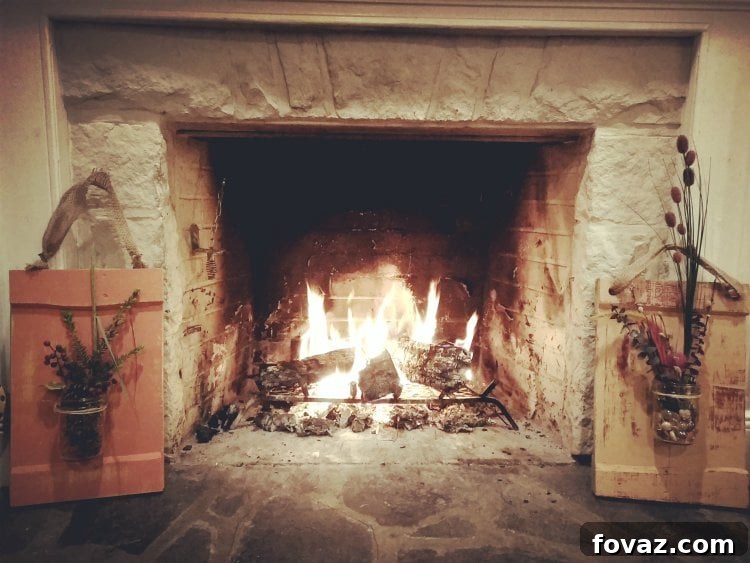
Reversible Reclaimed Wood Wall Art: Seasonal Mason Jar Flower Holder DIY
Transforming ordinary materials into extraordinary decor is one of the most rewarding aspects of DIY. This project epitomizes that spirit, offering a stunning, versatile, and eco-friendly piece of wall art that adapts to the seasons. We’re crafting a reversible, distressed reclaimed wood wall art piece, featuring mason jar holders perfect for showcasing flowers or greenery. It’s a project designed for accessibility, requiring minimal tools and supplies, yet yielding results that will undoubtedly impress.
Many online inspirations exist for reclaimed wood crafts, but the aim here was to elevate the concept. How can we make it more functional, more aesthetically pleasing, and more distinctly ‘you’? The answer lies in its reversible nature, allowing a seamless transition from vibrant spring hues to warm autumnal tones with a simple flip. This guide will walk you through each step, from sourcing humble pallet wood to creating a captivating piece of home decor that celebrates every season.
Why Reclaimed Wood? The Charm of Sustainable Decor
Reclaimed wood isn’t just a trend; it’s a testament to sustainability, character, and cost-effectiveness. Choosing reclaimed wood for your projects offers several compelling advantages:
- Eco-Friendly: By repurposing wood, you’re diverting waste from landfills and reducing the demand for new timber, contributing to a greener planet.
- Unique Character: Each piece of reclaimed wood tells a story. Its imperfections—knots, nail holes, weathered grain, and natural distressing—add an unparalleled depth and character that new wood simply cannot replicate. This inherent history ensures your finished piece is truly one-of-a-kind.
- Cost-Effective: Often, reclaimed wood, especially pallets, can be sourced for free or at a very low cost, making ambitious decor projects much more budget-friendly.
- Durability: Many older pieces of wood, having already endured years of exposure, possess a natural resilience and stability that makes them ideal for long-lasting decor.
Embracing reclaimed wood allows you to create beautiful, sustainable art that brings a touch of rustic elegance and authenticity into your home.
Gather Your Materials and Tools
Before diving into the creative process, ensure you have all your supplies ready. This project prioritizes simplicity, so don’t worry about needing an extensive workshop.
Supplies You’ll Need:
- A pallet or other source of reclaimed wood (e.g., old fence boards, barn wood)
- Variety of paints (acrylic, latex, or chalk paint work well for a distressed look)
- Sandpaper (various grits, 150-220 recommended)
- Small nails or brads
- Burlap or other rustic-looking fabric for hanging
- Twine or sturdy string for jar attachment
- Mason jars (preferably wide-mouth for ease of use)
- Wood glue (optional, but recommended for added stability)
Essential Tools:
- A saw (circular saw, reciprocating saw, or even a sturdy hand saw)
- A hammer
- A drill with various bits (wood bits for holes)
- Pry bar or wonder bar (highly recommended for pallet breakdown)
- Safety gloves
- Eye and face protection
Ready to turn these basic items into a captivating display? Let’s get started!
Step #1: Sourcing and Selecting Your Reclaimed Wood
The foundation of this project is, naturally, reclaimed wood. The beauty of working with salvaged materials is the thrill of the hunt and the unique character each piece brings. Pallets are an excellent and often free resource, readily found outside large retail stores, grocery outlets, or industrial areas. Many businesses are happy for you to take them off their hands, saving them disposal costs. When selecting pallets, look for those with minimal damage, fewer broken slats, and less signs of heavy staining or chemical spills (avoid pallets marked with “MB” which indicates Methyl Bromide treatment). The rougher, more weathered ones often yield the most interesting textures once cleaned up.
While pallet wood is a fantastic choice due to its availability and rustic texture, feel free to use any reclaimed wood you can get your hands on. Old fence boards, barn wood, or even discarded lumber from construction sites can work beautifully. Prioritize pieces that offer a good balance of character (knots, minor imperfections) and structural integrity. Always prioritize safety during sourcing; wear gloves and inspect the wood carefully for sharp edges, splinters, or protruding nails.
Step #2: Safely Breaking Down Your Pallet
Deconstructing a pallet can be the most physically demanding part of the project, but it’s crucial for obtaining usable planks. While a hammer and saw can get the job done, a pry bar (like a wonder bar or crowbar) and a reciprocating or circular saw will make the process significantly easier and faster.
Step #2a: Saw Off the Edges
Begin by cutting the outer stringers (the thicker pieces that support the planks). Using a circular saw or reciprocating saw, carefully cut along the inner edge of these stringers, removing the end planks. Before you cut, thoroughly check for any embedded nails that could damage your saw blade or cause kickback. Safety is paramount: always wear gloves and eye/face protection. Work slowly and deliberately. Once the ends are removed, flip the pallet and repeat the process on the other side.
Step #2b: Pry Up the Boards
With the ends removed, you’ll have access to the middle planks. Insert your pry bar or the claw of your hammer underneath the middle part of each plank, as close to the stringer as possible. Gently begin to pry the board up, working it back and forth to loosen it from the nails. The goal is to lift the board without splitting it. If a board seems particularly stubborn, try prying from both sides of the stringer. You can also carefully use your hammer to drive out stubborn nails from the back side of the planks once they are slightly lifted.
Once all the planks are separated, go back and meticulously remove all remaining nails or nail fragments from both the planks and any remaining stringer pieces. Organize your salvaged wood by length and condition; you’ll likely have planks of varying sizes, which can be useful for different parts of your project.
Step #3: Choosing Your Boards for Aesthetics and Structure
With a pile of reclaimed wood, it’s time to select the pieces that will form the body of your wall art. This step is where your creative vision truly takes shape. Consider the overall aesthetic you’re aiming for. For a classic barn-wood feel, you might want wider boards for the main panel and thinner pieces for the cross braces. Embrace the imperfections: knots, divots, old nail holes, and variations in grain all contribute to the unique character of reclaimed wood. However, ensure these features don’t compromise the structural integrity of the piece.
Each board will have distinct sides – a “top,” “bottom,” “front,” and “back.” Spin each piece around, examining all surfaces to determine the most appealing orientation. Look for the best grain patterns, most interesting distressing, or specific imperfections you want to highlight. Imagine how these individual pieces will come together to form a cohesive, balanced, and visually engaging composition.
Step #4: Cutting Your Reclaimed Wood to Size
Careful measurement and precise cuts are essential for a professional-looking finish. For this project, a finished height of approximately 18 inches works well, offering a good balance for hanging and displaying flowers. Instead of measuring from the very ends of the boards, which often have saw damage or nail holes, find the healthiest, most intact section in the middle. From this centerline, measure out 9 inches in each direction to mark your 18-inch cut. This technique ensures you’re working with the strongest and most aesthetically pleasing part of the plank.
To ensure uniform cuts across multiple boards, clamp them together securely before making your pass with a saw. A table saw provides the most consistent results, but a circular saw with a straight edge guide can also achieve accurate cuts. Once your main vertical boards are cut, lay them out side-by-side to determine the required length for your horizontal cross pieces. Since this piece will be reversible, you’ll need four cross pieces for each wall art unit (two for each side).
Step #5: Sanding for Smoothness and Attaching the Pieces
While the rough, weathered texture is a hallmark of reclaimed wood, you want to smooth down any rough spots to prevent splinters and ensure a pleasant tactile experience. Begin with a coarser grit sandpaper (e.g., 150-grit) to remove any large splinters, uneven patches, or particularly rough areas. Then, follow up with a finer grit (e.g., 220-grit) to achieve a smoother finish. The degree of sanding is a personal preference; experiment to find the balance between preserving the rustic feel and creating a user-friendly surface.
After sanding, it’s time to assemble. Position your cross pieces to securely hold the vertical planks together. Use small brads or finishing nails for attachment. To prevent hammer marks on your beautifully aged wood and ensure the brads are flush or slightly below the surface, use a nail punch. A clever trick if you don’t have a nail punch: use another brad to carefully tap the first one just below the surface. Strategically place your new nail holes to either blend in with existing ones or to create new points of interest, maintaining the wood’s inherent character.
Step #6: Painting Your Seasonal Masterpiece
This is where your wall art truly comes to life, allowing for immense creativity and personalization. The key to a beautiful distressed look often lies in layering. For a simple, single-sided project, two colors (an undercoat and a topcoat) might suffice. However, for our reversible, dual-tone, distressed design, the possibilities multiply.
Consider the color palettes for both spring and fall. For spring, vibrant and fresh hues work best. The original project used two shades of green, a pale blue, and bright yellow. For the undercoat, these colors provide depth when distressed. For fall, muted, earthy tones are ideal, such as barn red, beige, orange, and a darker yellow. The beauty of this project is that each side gets its own distinct look.
For each chosen color, apply at least two coats, but three are highly recommended for rich, even coverage and better durability, especially if you plan on distressing later. Don’t rush this stage; allow ample drying time between coats. The cumulative effect of these layers will create a depth and richness that is key to achieving a truly authentic distressed finish. Embrace the process; while it might involve numerous coats, the final impact is well worth the effort.
Example Spring Undercoat Colors:
Example Spring Topcoat Colors:
Example Fall Topcoat Colors:
Step #7: Distress for Authentic Weathered Charm
Distressing is the art of making new wood look old, giving it the appearance of being naturally weathered over time. The fundamental principle here is asymmetry. Natural wear and tear is rarely uniform; it happens where objects rub, impact, or where elements take their toll. Therefore, the “wrong” way to distress is to do it symmetrically. Think about how a branch might have repeatedly brushed against one spot, or how machinery might have bumped another section repeatedly.
An orbital sander can significantly speed up this process, but you can achieve equally beautiful results with simple sandpaper, perhaps while enjoying your favorite podcast or show. Focus on the edges, corners, and raised grain areas where natural wear would occur. Apply varying pressure and techniques: sand some spots down to the undercoat, revealing a hint of the contrasting color; in other areas, expose the raw reclaimed wood for maximum authenticity. You can also experiment with other distressing tools like wire brushes, hammers, or even chains for different textures and marks. The existing textures and imperfections in your reclaimed wood will wonderfully enhance the distressed patterns you create.
Distressed Fall Side Example:
Distressed Spring Side Example:
Step #8: Drilling Holes for Mason Jar Attachment
Now, let’s prepare for the mason jars. First, decide on the vertical placement of your jars. A good rule of thumb is to set them slightly below the halfway point of your wood panel, allowing ample space for taller flowers or plants without overcrowding the upper portion of the art. Mark your desired height. Then, on either side of the panel’s midline, measure out an equal distance (e.g., one inch from the center) and mark these spots. These will be your drill points.
Using a drill bit appropriate for your twine or hanging material, carefully drill holes at your marked spots. To give the holes a cleaner, more finished look and to prevent any fraying of your twine, you can optionally use a round file or a larger drill bit to gently smooth and bevel the edges of the newly drilled holes. While not strictly necessary for function, this small detail adds a refined touch to your rustic piece.
Step #9: Ingenious Reversible Hanging Solutions
Designing a hanging mechanism for a double-sided piece presents a unique challenge. Standard picture wire or a simple nail in the wall won’t work, as both sides will be visible. The solution needs to be aesthetically pleasing on both sides, complement the rustic motif, and not damage the artwork when flipped. After some creative brainstorming, two distinct yet harmonious hanging methods were developed, adding visual interest while maintaining the “of a piece” feel.
Hanging Method 1: Integrated Burlap Loop
For one of your wall art pieces, drill two larger holes (approximately ¾ inch) into the top edge of the board, spaced evenly. Once drilled, thread a sturdy piece of burlap fabric through these holes. Bring the ends together at the top and tie a secure knot, creating a robust and rustic hanging loop. Ensure the knot is tight and large enough not to slip back through the holes. The burlap perfectly complements both the spring and fall aesthetics, offering a natural and textural element.
Example of drilled holes in wood for burlap:
Burlap threaded through and knotted:
Hanging Method 2: Bent Nail Eye Hooks
For the second piece, you can create improvised eye hooks using old, characterful nails. The key here is careful bending. Instead of using pliers, which can put too much stress on one point and cause the nail to break, try partially nailing them into a scrap piece of wood. Then, gently tap the side of the nail head with your hammer at an angle to gradually bend it into an “L” or “hook” shape. This distributes the stress better. Once bent, mark where you want to drill pilot holes in the top of your wall art piece. Choose a drill bit slightly smaller than the nail’s shank to ensure a snug fit.
After drilling the pilot holes, apply a small amount of wood glue to the bottom portion of the bent nails and insert them into the holes. Wipe away any excess glue immediately. Once the glue is dry, you can string a piece of burlap or twine between these two improvised eye hooks, knotting each end securely to create another unique and functional hanger. This method adds an extra layer of rustic authenticity, utilizing the charm of aged hardware.
Old nails for character:
Improvised bent nail eye hooks:
Burlap strung between bent nails:
Step #10: Tying on the Mason Jars
Mason jars are the perfect choice for this project, not only for their inherent country charm but also because their distinct lip provides an ideal anchor for the twine, ensuring the jars remain securely in place. Twine, with its natural fibers, further enhances the rustic aesthetic, but feel free to substitute it with any sturdy string, wire, or ribbon that matches your preferred style.
To attach each jar, cut a piece of twine approximately 15 inches long. Thread one end of the twine through one of the pre-drilled holes in your wood panel, then through the second hole, and back through the first hole again. Now, thread the twine back through the second hole one more time, leaving ample excess on both ends. You’ll want enough length to create a double loop that wraps completely around the jar, making almost two full rotations.
The ingenious aspect of drilling the holes only two inches apart (significantly less than the diameter of a typical mason jar) becomes apparent now. As you tighten the twine around the jar, this narrow spacing pulls the jar firmly towards the center of the wooden panel, enhancing its stability and preventing it from swinging freely. Wrap the twine securely around the jar’s lip, ensuring it sits snugly. Tie a robust knot to hold everything in place. The lip of the mason jar acts as a natural stopper, preventing the twine from sliding off, even with the weight of flowers and water.
Front view of jar attachment:
Back view of jar attachment:
Close-up of twine secured by jar lip:
When you’re ready to switch seasons, simply untie the twine, remove the jar, flip your wall art panel over to its alternate side, and then re-tie the twine, securing the jar in place once more. It’s a quick and effortless transition!
Step #11: Adding Your Seasonal Floral or Plant Arrangements
The final, most delightful step is to personalize your wall art with seasonal flora. This is where you bring your spring and fall visions to life. Consider not only fresh flowers but also live plants, dried arrangements, or even decorative fillers.
Spring Side: Fresh and Vibrant
For the spring side, opt for bright, cheerful colors. You might add some spring-colored marbles or decorative stones to the bottom of the mason jars. For one piece, choose fresh cut flowers like a vibrant blue hydrangea, complementing a pale blue paint scheme. Integrate yellow and green accent flowers or greenery to echo the undertones of your distressed paintwork, creating a cohesive and lively display.
For the second spring piece, consider a live plant. A small “baby dragon plant” with variegated leaves, for instance, adds a third color and intriguing texture. The spiky, outward-pointing lines of such a plant can offer a wonderful contrast and balance to the softer, more rounded forms of hydrangeas. Experiment with different textures and forms to create dynamic compositions.
Spring arrangement example:
Fall and Winter Side: Warm and Earthy
Transitioning to fall requires different colors and plant types. You might design one piece with a distinctly autumnal feel and another with a more wintery touch. For the fall arrangement, dried elements work beautifully: pussy willow, eucalyptus branches, dyed grasses, and cattail plants. Add fall-colored beads or small leaf cut-outs for extra thematic flair, perhaps repurposed from holiday decorations.
For a winter-themed piece, fill the mason jar with natural elements like pinecones. Incorporate berry branches (available at craft stores like Michael’s), a snip of fresh evergreen from your garden, and a tall piece of dried grass to add height and structure. These elements evoke a cozy, festive winter atmosphere.
Fall arrangement example:
Winter arrangement example:
Remember to consider the color palette of your painted wood when selecting your flowers and plants, ensuring they enhance and complement the overall design.
Your Seasonal Wall Art is Complete!
Congratulations! You’ve successfully navigated 11 easy and cost-effective steps to create your very own versatile, reversible wall art, ready to celebrate every season. This project is a testament to the power of DIY – transforming simple, often discarded materials into a functional and beautiful piece of home decor that reflects your personal style and creativity.
Lessons Learned and Pro Tips for Your Project
Even the most straightforward projects can offer valuable learning experiences. Here are a few insights from this build that might help you avoid common pitfalls:
- Fastener Security: While brads provide a clean look, two per cross piece might not be sufficient to withstand vibrations over time. For enhanced durability, especially for items that might be moved or exposed to environmental changes, consider adding a small dab of wood glue to each joint before securing with brads. This significantly increases stability.
- Bending Nails: If you’re creating your own hardware, like the bent nail hooks, bending nails with pliers can often lead to breakage. A more effective method is to partially embed the nail into a scrap piece of wood and then gently tap the head at an angle with a hammer to achieve the desired bend. This distributes the stress more evenly and reduces the likelihood of the nail snapping.
- Undercoat Importance: Do not skimp on undercoats, especially if you plan on heavy distressing. A single undercoat might be too thin, leading to raw wood being exposed too quickly during sanding, rather than revealing the desired contrasting color layer. Aim for at least two, preferably three, undercoats to ensure depth and allow for more control during the distressing phase. This directly impacts the vibrancy and visual texture of your finished piece.
We encourage you to experiment with different wood types, paint colors, distressing techniques, and hanging methods. The beauty of DIY lies in its infinite possibilities for customization. Share your reclaimed wood projects and any modifications you’ve made in the comments below – we’d love to see your creations!
Looking for more innovative DIY solutions for small spaces? Discover how to maximize your outdoor areas by checking out this guide on making an outdoor storage bench seat for small yards!
Stay connected with our vibrant DIY community! Follow us for more inspiration, tips, and project ideas on Facebook, Twitter, Pinterest, and Instagram!