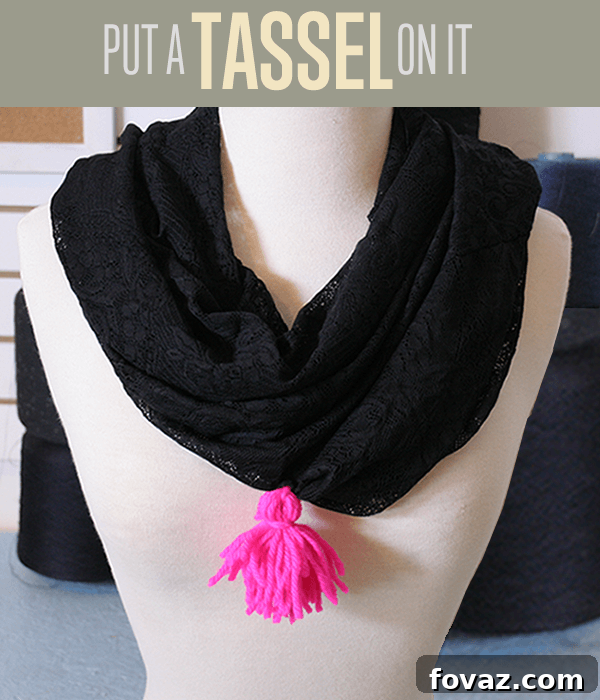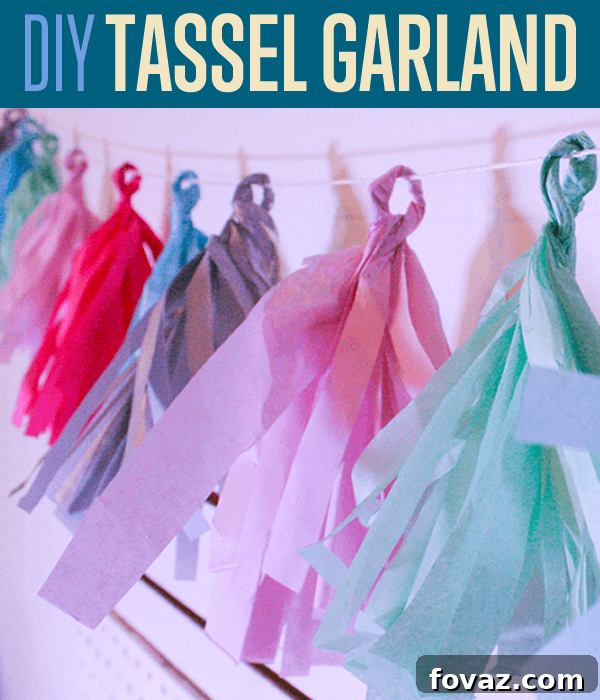
Welcome to the wonderful world of tassels! These charming and versatile embellishments are truly everywhere right now, adding a touch of playful elegance and festive spirit to any setting. From adorning party decor and home interiors to personalizing accessories and gifts, tassels are a simple yet impactful way to infuse personality and style. The best part? They are incredibly easy and cost-effective to make yourself!
In this comprehensive guide, we’ll walk you through two essential DIY tassel projects. First, you’ll learn how to craft beautiful, airy tassel garlands using tissue paper, perfect for celebrations, nurseries, or adding a pop of color to any room. Then, we’ll dive into making classic, sturdy tassels from yarn, which can be adapted for countless creative uses, from jewelry to keychains. Get ready to unleash your creativity and discover the joy of handmade embellishments that elevate your everyday!
How to Make a Stunning Tissue Paper Tassel Garland
Creating your own tissue paper tassel garland is a fantastic way to add vibrant decor to any event or space. This project is surprisingly simple, requiring minimal supplies and delivering maximum visual impact. Follow these easy steps to craft a beautiful, celebratory garland that will impress your guests and brighten your home.
Supplies for Your Tassel Garland:
- Tissue Paper: Choose quality sheets, ideally around 20×25 inches. Each standard sheet will yield four lovely tassels. Don’t be afraid to experiment with different colors and even metallic tissue papers for extra sparkle!
- Rope or Twine: Select a sturdy yet flexible rope or twine in a length appropriate for where you plan to hang your garland. Cotton rope, baker’s twine, or even thin ribbon work wonderfully.
- Sharp Scissors: A good pair of sharp scissors will make clean cuts and ensure crisp fringe for your tassels.
Step 1: Prepare Your Tissue Paper – Fold and Cut
Begin by taking a single sheet of tissue paper. Many tissue paper packages come pre-folded into quarters, which simplifies this step. If your sheet isn’t already folded, gently fold it in half lengthwise, then in half widthwise to create four equal sections. Carefully cut along both folded edges, effectively dividing your large sheet into four smaller, individual rectangles. Each of these pieces should measure approximately 10 inches long by 7.5 inches wide. Remember, exact measurements aren’t critical; a slight variation in size is perfectly fine and will still result in beautiful tassels!
Step 2: Create the Fringe – Snip Your Tassels
Gather all four of your cut tissue paper pieces and stack them neatly together. Fold this stack in half “hamburger style” – meaning you fold it across the shorter dimension, so it resembles a squat rectangle (think portrait orientation if you were holding it). Now, with the folded edge at the top, begin cutting strips from the unfolded edge towards the fold. Make your cuts about 1/4 inch apart, ensuring they are even and extend roughly 1 inch away from the folded edge. The goal is to create a fringe that is consistent in length and width, which will give your finished tassels a professional and fluffy appearance. Take your time to make clean, continuous cuts.
Step 3: Unfurl Your Fringe – Open the Tissue
Once you’ve finished cutting all the strips on your stack, carefully unfold the tissue paper. At this point, the fringed paper should resemble a delicate, rectangular sea anemone or a feathery mat. Lay it flat on your workspace, admiring the uniform strips you’ve created. This is the foundation of your tassel, and seeing it laid out helps visualize the next steps.
Step 4: Form the Body – Roll Your Tassel
Select just one of the cut tassel sheets you’ve prepared. Lay it flat on your clean work surface. Starting from one of the shorter ends (the one without the fringe), begin rolling the tissue paper tightly and evenly. Continue rolling until you reach the opposite end. The goal is to create a compact, cylindrical roll with the fringe cascading outwards from the center. Keep the roll as snug as possible without tearing the delicate paper.
Step 5: Define the Top – Twist and Shape
After rolling, your tissue paper bundle will resemble a festive Christmas cracker. Hold it firmly in both hands, one hand on each side of the central roll. Begin to twist the center section tightly. The twisting motion will gather and secure the tissue paper, forming a compact “stem” or “neck” for your tassel. Continue twisting until this central section is firm and well-defined, with the fringed ends fanning out on either side. This twisting action is crucial for creating a durable and attractive tassel head.
Step 6: Secure and Loop – Form the Hanger
Once you’ve twisted the center section sufficiently, carefully bring the two twisted ends together to form a loop. This loop will be used to attach your tassel to the garland rope. Take one of the fringed ends and wrap it securely around the base of the loop you’ve just created, twisting it tightly into place. Repeat with the other fringed end, wrapping it around the same spot in the opposite direction. This double-wrap method ensures your loop is strong and the tassel remains intact. Give it a gentle tug to confirm it’s secure. Congratulations, you’ve just made your first tissue paper tassel! Repeat these steps until you have created all the tassels needed for your garland.
Step 7: Design Your Garland – Arrange Tassels
Before stringing your tassels, it’s always a good idea to lay them out in the order you envision for your garland, especially if you’re working with a variety of colors. This allows you to experiment with different color combinations and spacing. I often aim for an arrangement that appears random but is actually purposefully aligned to ensure similar colors are a good distance from each other, creating a balanced and visually appealing flow. Consider patterns, gradients, or a completely whimsical mix. A well-planned arrangement will make your finished garland truly shine.
Step 8: Assemble the Garland – String Your Tassels
Now it’s time to bring your garland to life! Take your chosen rope or twine. The length should correspond to where you intend to hang it, plus a generous amount of extra on each end for tying and aesthetic draping. I typically add at least a yard (about 3 feet) for good measure, but if you’re conserving materials, an extra foot on each side should suffice. Gently slip each tassel’s loop onto the rope, following your pre-determined arrangement. You can secure each tassel in place with a small knot if you want to prevent them from sliding, or leave them free to adjust their spacing as needed after hanging. Ensure even spacing between each tassel for a polished look.
Step 9: Display Your Creation – Hang Them Up!
Your magnificent tissue paper tassel garland is complete! Now for the exciting part – displaying it. There are countless ways to hang your garland: across a doorway, above a party table, along a mantelpiece, or even draped over a headboard in a bedroom. For a temporary display, a few pieces of strong tape might suffice, but for a more secure and aesthetically pleasing result, consider using small nails, command hooks, or decorative clips. Step back and admire your beautiful, handmade creation!
Hooray, you’re done with your first tassel project, and it’s definitely party time! But wait, there’s more crafting fun to be had! You still need to master the art of making a classic tassel from yarn or string, a technique that opens up a whole new world of decorative possibilities.
How to Make a Basic Yarn Tassel for Endless Uses
Yarn tassels are wonderfully versatile and incredibly satisfying to make. They add a charming, textural element to anything from fashion accessories to home decor. This technique is straightforward, quick, and perfect for using up leftover yarn scraps. Let’s get started on creating these delightful little adornments.
Supplies for Making a Yarn Tassel:
- Yarn, String, Thread, or Rope: The material you choose will define the look and feel of your tassel. Wool, acrylic, cotton, embroidery floss, or even thin cord all work beautifully. You’ll need approximately 5 to 15 yards per tassel, depending on your desired thickness and size.
- Scissors: A sharp pair of scissors is essential for clean cuts.
- A Solid Object for Wrapping: This could be a piece of cardboard, a postcard, a book, your phone, or even your hand. The height of this object will determine the length of your finished tassel. For example, if you wrap yarn around a 6-inch tall object, your final tassel will be roughly 3 inches tall.
Step 1: Build the Body – Wrap Your Yarn
Take your chosen solid object (like a 6-inch postcard). Begin wrapping your yarn or string around the object consistently. The more times you wrap, the fuller and thicker your tassel will be. Aim for a good density; in the sample picture, you can see the desired thickness building up. Remember, each full wrap (front and back of your object) uses twice its height in yarn. So, wrapping around a 6-inch card means 1 foot of yarn per complete revolution. It adds up quickly, which is why a good-sized spool of yarn is handy! Continue wrapping until you achieve your desired volume, typically around 5-10 yards for a medium-sized tassel.
Step 2: Secure the Top – Tie the Initial Knot
Once you’ve reached your desired thickness, carefully cut a separate piece of yarn, about 6-8 inches long. Slip this shorter piece underneath the wrapped yarn bundle at one end of your solid object. Bring the ends of this shorter piece up over the top of the bundle and tie a tight, secure knot. This knot will hold all the wrapped strands together at the top, forming the hanger for your tassel. Make sure it’s snug, but don’t pull so hard that it cuts into the yarn.
Step 3: Define the Shape – Tighten the Knot and Remove
Gently slide the entire chunk of wrapped yarn off your solid object. Now, carefully pull the short piece of yarn (the one you just tied) even tighter around the top of the bundle. Double-knot it using a square knot for maximum security. This step is crucial for creating a neat and defined tassel head. The tighter this knot, the more structured the top of your tassel will be. Ensure all strands are gathered neatly under this knot.
Step 4: Release the Fringe – Cut the Loops
Now, take your sharp scissors and carefully cut through all the loops at the bottom end of your yarn bundle. By doing this, you’re “setting free” the individual strands that will form the body of your tassel. Make sure to cut all loops evenly so that the fringe is consistent in length. Give the tassel a gentle shake to help the strands fall into place and fluff up.
Step 5: Create the Neck – Form a Cinching Loop
Cut another separate piece of yarn, about 8-10 inches long. Position this piece horizontally a short distance below the top knot of your tassel, forming a small loop as pictured. Begin wrapping the longer end of this new piece tightly around the entire tassel body, just below the top knot and over the loop you’ve created. This wrapping will create the distinct “neck” or “head” of your tassel and secure all the strands neatly in place. Wrap several times for a firm, defined neck.
Step 6: Finalize and Trim – Your Tassel is Ready!
Once you’ve wrapped the neck to your satisfaction, tie off the loose end of the wrapping yarn securely with a hidden knot. You can gently thread the excess through the wrapped section or trim it very close to the tassel body. Finally, hold your tassel up and trim the bottom fringe with your scissors to achieve a perfectly even length. And voilà! You’ve successfully made your very own yarn tassel. Hang it wherever you please and enjoy your handmade creation!
Tassels are incredibly versatile! You can craft them from almost any material imaginable, from delicate embroidery thread to chunky rope. The creative possibilities for using these charming embellishments are truly endless. Here are just a few ideas to spark your imagination:
- Fashion & Accessories: Adorn scarves, add a stylish zipper pull to a jacket or bag, create unique earrings or necklaces, or embellish hats.
- Home Decor: Spruce up throw pillows, add flair to curtains, create decorative garlands, or use them as tie-backs.
- Personalization: Attach them to keychains, bookmarks, gift wrapping, or even use them to personalize pet toys (cat toys are a popular choice!).
Since a basic tassel takes only about two minutes to make, you might find yourself creating more than enough to decorate your entire life! Have fun experimenting with different colors, textures, and sizes.
Hello! My name is Lisa, and I’m a passionate crafter and contributor here at DIY Projects. I also share my creative endeavors and lifestyle tips on my personal blog, itsaLisa.com. I absolutely love thinking outside the box and developing easy-to-follow DIY tutorials for fellow enthusiasts like you. As Albert Einstein wisely said, “creativity is intelligence having fun,” and I truly believe that crafting is one of the most enjoyable ways to express our intelligence!
I would be thrilled to hear how you’re getting creative with your own tassel projects. Please share your ideas, tips, and finished creations in the comments below, or connect with me on social media. You can find me on Instagram and Twitter. Happy crafting, and I look forward to seeing your amazing tassel creations!