
Transforming old fabrics into beautiful and functional home decor has never been easier or more rewarding. If you’ve been searching for a simple yet impactful DIY project that adds character to your living space while being kind to your wallet and the planet, then learning how to make a rag rug is your perfect next endeavor. This delightful craft allows you to upcycle fabric scraps, old clothes, or worn-out bed linens into a cozy, custom rug that brings warmth and personality to any room. Even if your sewing skills are limited to stitching a straight line, you’re perfectly equipped to create a stunning, unique rag rug with this comprehensive guide!
How to Make a Rag Rug: The Ultimate Easy Sewing Project for Your Home
There’s a special charm that comes with handmade items, and a DIY rag rug is no exception. Beyond their aesthetic appeal, these rugs offer practical benefits, especially in high-traffic areas. I recently noticed our home needed more soft landings, particularly with energetic kids constantly tracking in dirt and grime onto the living room floor. The thought of constantly cleaning or repeatedly buying new rugs felt unsustainable and uninspiring. That’s when the idea of creating my own, personalized rugs sparked an exciting challenge. I wanted a project that was not only budget-friendly but also allowed me to inject a unique accent into our home decor. And that’s exactly what I discovered with these wonderfully versatile and adorable rag rugs!
This project is an absolute dream for anyone looking to practice their sewing machine skills while making something truly useful. It’s incredibly forgiving, making it ideal for beginners, and it champions the art of upcycling. Imagine giving new life to those forgotten t-shirts, worn-out jeans, or faded bedspreads that are too good to throw away but no longer serve their original purpose. With this DIY rag rug tutorial, you can transform almost any fabric you have into a soft, durable, and stylish floor covering. It’s a creative outlet that saves money, reduces waste, and results in a truly bespoke piece for your home.
Why Choose a DIY Rag Rug?
Beyond the simple joy of crafting, making your own rag rug offers a multitude of benefits:
- Eco-Friendly & Sustainable: This is a fantastic way to divert textile waste from landfills. By repurposing old clothes, linens, and fabric scraps, you contribute to a more sustainable lifestyle and embrace the principles of a circular economy.
- Budget-Friendly Decor: Instead of spending a fortune on store-bought rugs, you can create custom pieces using materials you already own. It’s an incredibly cost-effective solution for refreshing your home decor.
- Personalized & Unique Style: With complete control over fabric choices, colors, and patterns, your rag rug will be a one-of-a-kind creation that perfectly complements your home’s aesthetic. Express your creativity and design a rug that truly reflects your style.
- Beginner-Friendly Sewing: This project is designed for everyone. If you can sew a straight line on a sewing machine, you possess all the necessary skills. It’s an excellent way to build confidence in your sewing abilities without complex techniques or patterns.
- Adds Warmth & Comfort: Rag rugs bring a tactile warmth and softness to any floor. They can define spaces, absorb sound, and provide a cozy landing spot, especially welcome in busy family areas.
Materials You’ll Need for Your Custom DIY Rag Rug:
Gathering your supplies is the first exciting step in bringing your rag rug vision to life. The beauty of this project lies in its simplicity and the fact that most materials can be found around your home or sourced very affordably.
- Base Fabric (Towel): A sturdy towel serves as the perfect foundation for your rug. Its absorbency and durability make it an ideal base. You can use an old bath towel, beach towel, or even a smaller hand towel depending on your desired rug size. The size of your towel directly dictates the final dimensions of your rug, so choose wisely!
- Fabric Scraps (for the “Rag” Strips): This is where your creativity truly shines! You can use almost any fabric: old t-shirts, jeans, bed sheets, pillowcases, flannel shirts, cotton scraps, or even remnants from previous sewing projects. Aim for fabrics that are relatively easy to cut and sew, and consider their texture – a mix can add wonderful depth. Think about your desired color palette and gather a harmonious selection.
- Sharp Scissors (Fabric Shears are Best): Good quality fabric shears will make cutting your fabric strips much easier and more precise. Avoid using dull scissors, as they can fray fabric and make the process frustrating.
- Measuring Tape or Ruler: Essential for consistent fabric strip dimensions and for marking your sewing lines on the base towel.
- Fabric Pen or Marker: A regular marker will work, but a disappearing ink fabric pen or tailor’s chalk is ideal if you prefer not to have permanent lines on your base towel.
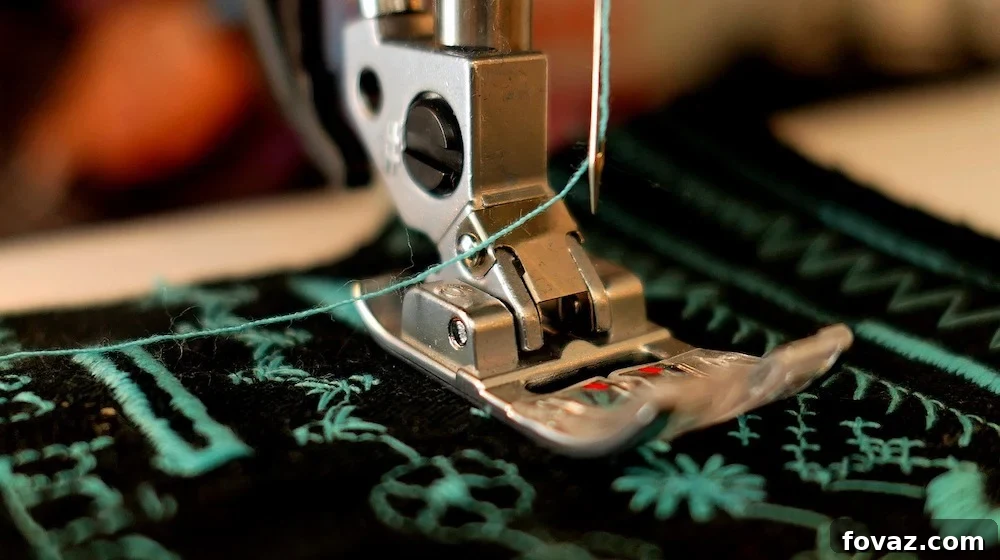
- Sewing Machine: Any basic sewing machine capable of a straight stitch will be perfect for this project. No fancy features are required!
- Thread: Choose a strong, durable thread that matches or complements the colors of your fabric scraps. Polyester all-purpose thread is usually a good choice.
Step-by-Step Guide: Crafting Your Handmade Rag Rug
Follow these detailed steps to create your very own charming and durable rag rug. Remember, precision in cutting and marking will lead to a more professional-looking finished product, but don’t be afraid to embrace the handmade charm of slight imperfections!
Step 1: Prepare Your Fabric Scraps
Lay your chosen fabric flat and smooth it out. This step is crucial for accurate cutting. Begin cutting small, consistent rectangles or strips from your fabric. For this particular rug, I recommend cutting pieces approximately 4 inches long by 1 inch wide. The key is consistency in size, as this contributes to the uniform texture and fluffiness of the finished rug. You can create a template from cardboard to speed up the cutting process and ensure all your pieces are the same dimensions. Consider pre-washing and drying your fabrics if they are new or if you’re concerned about shrinkage, especially if mixing different types of textiles.
Step 2: Prepare the Base Towel
Take your base towel and lay it out flat on a clean, spacious work surface. Using your measuring tape or ruler and your fabric marker, draw parallel lines across the width of the towel. These lines will serve as your sewing guides. For a dense, fluffy rug, aim to draw lines about an inch apart. If you prefer a rug with a slightly looser texture or want to complete the project more quickly, you can space your lines 1.5 to 2 inches apart. Ensure your lines are as straight as possible, as this will dictate the alignment of your fabric rows. A consistent gap between rows is essential for an even finish.
Step 3: Arrange Your Fabric Strips
Now comes the creative part – arranging your cut fabric strips! Take your prepared fabric rectangles and begin laying them onto the base towel, following the pattern or color scheme you envision. Slightly overlap each fabric piece from the previous one. This overlapping technique is vital for creating a full, plush look. It’s advisable to lay out and arrange about half a row or a short section at a time, rather than the entire rug. This prevents the fabric pieces from shifting or falling off when you move the towel to your sewing machine, making the transition smoother and more manageable. Experiment with different color combinations and textures to achieve your desired aesthetic.
Step 4: Begin Sewing Your First Row
Carefully transfer the section of your towel with the arranged fabric strips to your sewing machine. Position the first fabric strip directly under the needle, aligning it with the first marked line. With your sewing machine, sew a straight line directly through the center of your overlapped fabric pieces and into the base towel. Use a medium-length straight stitch. Take your time, guide the fabric gently, and ensure your stitches are strong and secure. Sewing slowly will help maintain a straight line and prevent the fabric from bunching up. Backstitch at the beginning and end of your row to secure the stitches.
Step 5: Continue Adding and Sewing Rows
Once you’ve completed sewing your first row of fabric strips, continue the process. Add more cut fabric pieces to the next marked line on your towel, ensuring they are overlapped consistently. Move your towel under the sewing machine and sew another straight line. Repeat this action, adding more fabric and sewing new rows, until you reach the end of the base towel. Maintaining a consistent overlap and sewing along the marked lines will ensure an even and aesthetically pleasing rug. Don’t rush this process; the quality of your finished rug depends on careful and deliberate sewing.
Step 6: Fold, Fill, and Finish!
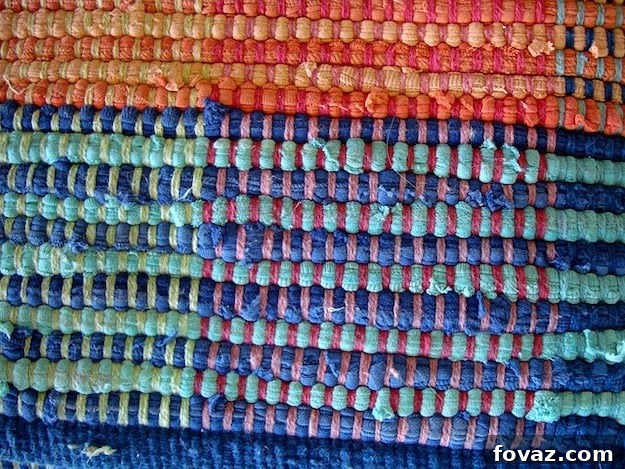
Congratulations, you’ve sewn your first complete row! Now for the magic: gently fold the sewn fabric strips downwards, away from where you’re about to sew the next row. This action helps to create the characteristic “fluffy” texture of a rag rug. With the previously sewn row folded down, you can now clearly see your next marked line on the base towel. Repeat the entire process: lay out a new set of fabric strips, ensuring they overlap and cover the raw edges of the previous row, and then sew them down. Continue this “fold, lay, and sew” method until you have completely filled out all the marked rows on your base towel. The closer your rows are, the denser and more luxurious your rug will feel.
Wasn’t that incredibly satisfying? You’ve just successfully crafted a beautiful and functional DIY rag rug entirely from upcycled materials. This project not only breathes new life into old textiles but also adds a unique, handmade touch to your home decor.
Tips for Success & Customization:
- Row Spacing: The spacing between your rows significantly impacts the final look and feel of your rug. For a very plush, dense rug, keep your rows closer together (e.g., 1 inch apart). If you want a quicker project or a slightly lighter rug, you can space them further apart (e.g., 1.5 to 2 inches). I personally prefer the closer spacing for a super soft and snug feel.
- Fabric Consistency: While mixing fabrics adds character, try to use fabrics of similar weight if you’re aiming for a very even texture. However, experimenting with different textures can also create a wonderfully eclectic look.
- Edge Finishing: Once your rug is complete, you can hem the edges of the towel base for a neater finish, or simply trim any excess fabric from the base.
- Size Matters: The duration of your project will largely depend on the size of the rug you’re creating. A small mat might take a few hours, while a larger area rug could be a weekend project.
- Pattern Play: Don’t limit yourself to random patterns. You can arrange your fabric strips to create stripes, checkerboards, or even abstract designs.
Once I completed my own rag rug, it became an instant hit! My kids immediately gravitated towards it, finding it incredibly soft and comfy. They even giggled about how it tickled their feet when they stood on it. It’s truly a DIY craft project I look forward to making again and again, perhaps for other rooms or as thoughtful handmade gifts. The sense of accomplishment and the joy it brings are unparalleled.
Care and Maintenance for Your Handmade Rag Rug
Caring for your DIY rag rug is straightforward, ensuring it remains a beautiful and functional part of your home for years to come. For most rag rugs made from cotton or similar washable fabrics, a gentle machine wash is usually suitable. Use a mild detergent and wash on a delicate cycle with cold water. Tumble dry on low heat or, even better, air dry flat to help maintain its shape and prevent any potential shrinking or damage. Always test a small, inconspicuous area first if you’re unsure about a specific fabric mix. Regular shaking out and occasional vacuuming (on a low setting) will also help keep your rug clean and fluffy.
Looking for a Visual Guide? Watch Our Rag Rug Video Tutorial!
Sometimes seeing is believing! If you prefer to watch the crafting process unfold, check out this excellent video tutorial on how to make a rag rug from Shelley Nichol:
We hope you thoroughly enjoyed this easy-to-follow tutorial on how to make a rag rug! We’d absolutely love to hear about your experience. Please share your thoughts, tips, or even photos of your finished rag rugs in the comments section below. Do you have other brilliant craft projects you’d like to share with our vibrant DIY community? Share them with us – we’re always eager to try new creative endeavors! Our passion lies in empowering individuals to connect with their creative side through cool DIY projects, whether it’s crafting unique items, enhancing home decor, discovering innovative upcycling ideas, trying new recipes, or mastering practical tutorials. This platform was created to inspire and demonstrate that a wealth of fulfilling projects are just a click away. Let’s build a thriving community of DIY enthusiasts together! Stay connected and discover more inspiration with us on Facebook, Twitter, Pinterest, and Instagram!
Explore More Creative DIY Projects to Ignite Your Inspiration!
If you’ve enjoyed crafting your rag rug, you’re in for a treat! We have a treasure trove of other exciting DIY projects waiting for you. Dive into more of our popular posts and discover new ways to express your creativity, save money, and enhance your home: