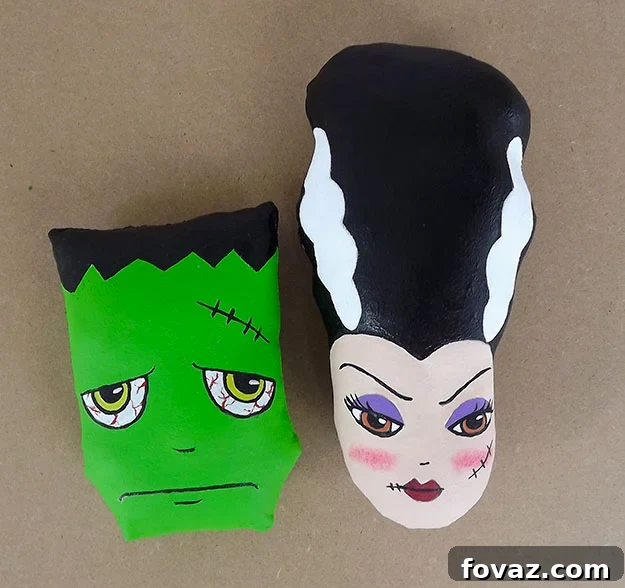
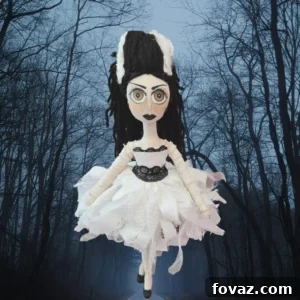
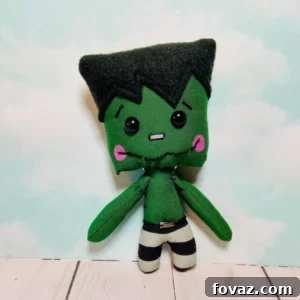
‘Tis the season for spooky delights and creative expression! As All Hallows’ Eve approaches, there’s no better way to embrace the spirit of Halloween than by crafting something truly unique and memorable. This year, ditch the mass-produced decor and infuse your home with handcrafted charm by creating these adorable, yet wonderfully eerie, painted Frankenstein and Bride of Frankenstein fabric dolls. These DIY cloth dolls are a perfect Halloween arts and crafts project, offering a fantastic opportunity to unleash your inner artist and bring iconic horror figures to life in a charming, textile form.
Imagine these delightful, handmade figures gracing your mantelpiece, welcoming trick-or-treaters from a display shelf, or even serving as heartwarming, slightly macabre, gifts for fellow Halloween enthusiasts. Far from the monstrous depictions, our Mr. & Mrs. Frankenstein dolls possess a sweet, stylized appeal, making them perfect for family-friendly Halloween celebrations. This comprehensive guide will walk you through each step of crafting these lovable characters, from basic sewing techniques to detailed painting, ensuring your Halloween decor is both unique and personal.
Whether you’re an experienced crafter or new to the world of DIY, this project is designed to be accessible and enjoyable. While a sewing machine can certainly speed up the process, these dolls can just as easily be hand-stitched with a little patience and a keen eye for detail. The magic truly happens when you pick up your paintbrushes, transforming simple muslin into a pair of iconic, endearing figures. Let’s gather our supplies and embark on this thrilling Halloween crafting adventure!
Craft Your Own Iconic Frankenstein & Bride Fabric Dolls: The Ultimate Halloween Sewing Project
Essential Materials for Your Halloween Arts and Crafts Project:
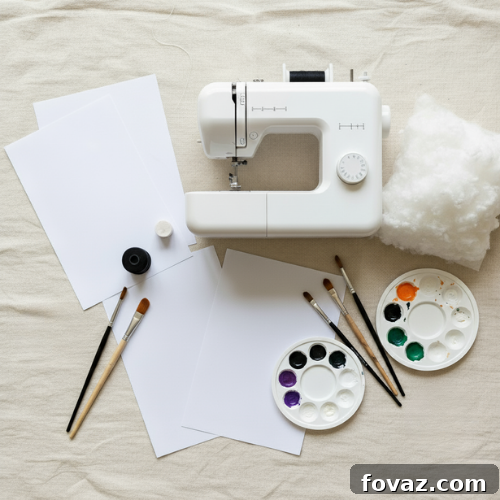
To embark on this exciting DIY journey, you’ll need a carefully selected array of materials. Each item plays a crucial role in bringing your Frankenstein and Bride dolls to life, from shaping their forms to adding their signature details. Gathering everything beforehand will ensure a smooth and enjoyable crafting experience.
- Muslin: A versatile and durable cotton fabric, perfect for doll making. Its natural texture accepts paint beautifully, providing an ideal canvas for your creative vision. Opt for unbleached muslin for an authentic, slightly aged look, or bleached for a brighter base.
- Fiberfill: This soft, synthetic stuffing material will give your dolls their plump, huggable form. Ensure you have enough to stuff both dolls firmly, allowing them to hold their shape without feeling too rigid.
- Sewing machine: While not strictly mandatory, a sewing machine will significantly expedite the assembly process, creating strong, even seams. If you prefer, a needle and thread can be used for hand-stitching, which adds a charming, rustic touch.
- Needle and thread: Essential for closing the stuffing openings and for any hand-sewing details. Choose a strong, all-purpose thread that complements the muslin’s natural color.
- Paints: Acrylic paints are highly recommended for this project due to their versatility, quick drying time, and vibrant color range. You’ll need various colors for skin tones, hair, facial features, and any additional embellishments you wish to add.
- Brushes: A selection of brushes is key for achieving different levels of detail. Include fine-tipped brushes for intricate facial features and stitching, as well as broader brushes for base coats and larger areas like hair.
- Gesso: This acrylic primer prepares your fabric surface for painting, creating a smooth, uniform base. It helps your colors appear more vibrant and prevents the paint from being fully absorbed into the muslin, reducing the number of coats needed.
- Protective sealer: A crucial final step, a clear matte or satin protective sealer will protect your finished artwork from dust, fading, and wear. It ensures your dolls remain vibrant and well-preserved for years to come.
- Red oil pastel (any brand): Ideal for creating soft, natural-looking rosy cheeks for Mrs. Frankenstein, adding a touch of subtle warmth and character to her face.
- Patterns (below): The foundational templates for your doll’s body shapes. Make sure to print these at the correct scale.
Step-by-Step Guide to Crafting Your Iconic Dolls:
This section provides detailed instructions to guide you through each stage of creating your Frankenstein and Bride dolls. Follow these steps carefully to ensure a successful and satisfying crafting experience, resulting in beautifully finished Halloween decorations.
Step One: Prepare and Sew the Doll Bodies
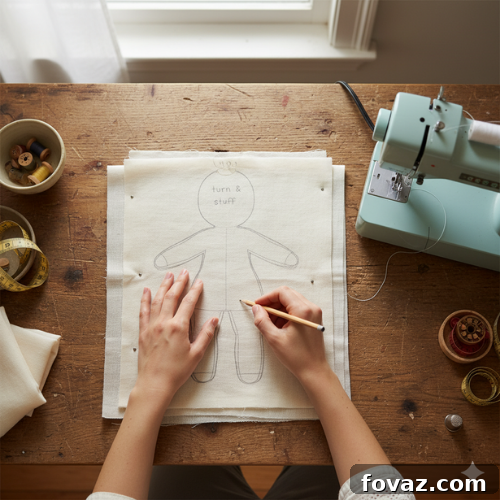
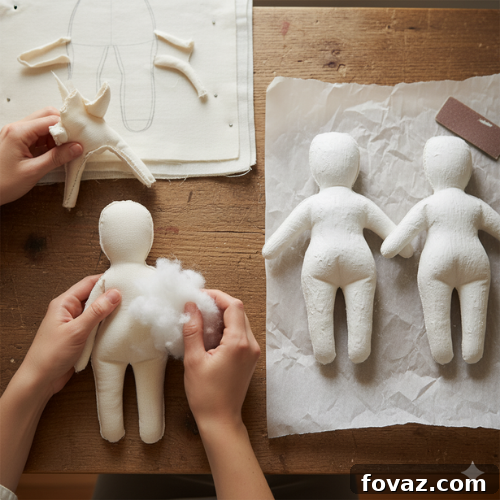
Begin by taking your chosen muslin fabric and folding it in half, ensuring the grain is straight and the edges are aligned. Carefully place your printed patterns onto the double layer of muslin. Using a fabric marker or pencil, meticulously trace around each pattern piece. Precision here is key for well-proportioned dolls. Once traced, sew completely around each piece, following your traced lines, but remember to leave a small opening—approximately 2-3 inches—at the top of their heads. This opening is vital for turning the fabric right side out and later for stuffing your dolls.
Step Two: Trim, Turn, Stuff, and Prime
After sewing, carefully trim any excess fabric, leaving a small seam allowance (about 1/8 to 1/4 inch) close to your sewing line. This reduces bulk. For smoother curves, snip small notches into the seam allowance around curved edges, being careful not to cut through your stitches. Now, gently turn each doll body right side out. A blunt tool, like a chopstick or a knitting needle, can help push out intricate areas. Once turned, firmly stuff both dolls with fiberfill, ensuring they are plump and hold their shape evenly, without lumps or soft spots. Hand-sew the opening closed using a ladder stitch for a nearly invisible finish. Finally, cover both doll bodies with gesso or white acrylic paint. This creates a smooth, even surface for your subsequent painting layers. Allow them to dry completely, then sand lightly with fine-grit sandpaper for an extra smooth finish.
Step Three: Outline the Iconic Hairlines
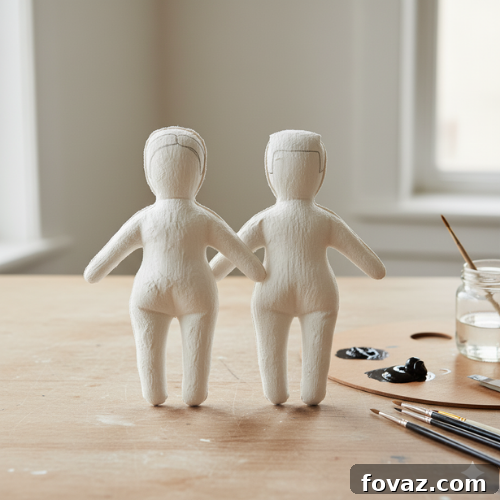
This is where your dolls truly begin to take on their iconic characteristics. Using a pencil, lightly transfer the general shape of the hair to both doll pieces. For Mrs. Frankenstein, draw a distinctively curvy hairline, reminiscent of her classic film appearance. This will serve as a guide for her elaborate white hair. For Mr. Frankenstein, depict his signature flat-top hairline, a key element of his recognizable silhouette. Take your time to get these foundational lines just right, as they define the overall look of your dolls.
Step Four: Paint the Striking Hair Details
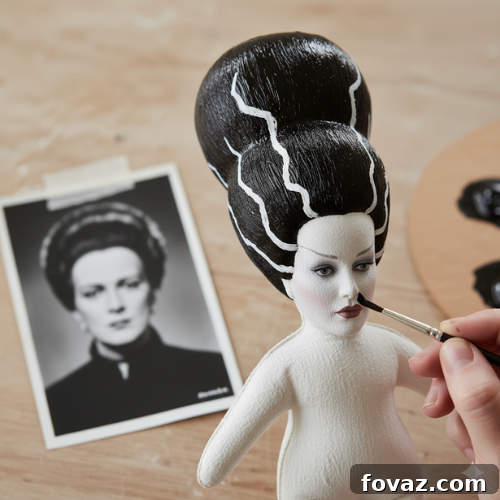
Now, it’s time to bring those hair outlines to life with paint. Begin by filling in Mr. Frankenstein’s hair area with a dark color, typically black or a deep brown, reflecting his classic look. For Mrs. Frankenstein, paint her hair white, covering the area within the curvy hairline you previously drew. To truly capture her electrifying style, add curvy vertical squiggles on her white hair with a thin brush and black or dark gray paint. Consider referencing images from “The Bride of Frankenstein” film for accurate inspiration, paying close attention to the dramatic, windswept nature of her hair accents. These details are what make her truly unforgettable.
Step Five: Define Mrs. Frankenstein’s Face
With the hair established, turn your attention to Mrs. Frankenstein’s captivating face. Using a pencil, lightly trace the desired shapes for her eyes and lips onto her head. Remember, these are just guidelines, allowing for adjustments before you commit with paint. For her nose, a simple, elegant line will suffice. The true drama of her face often comes from her eyebrows; paint them thick and arched, giving her a theatrical and intensely expressive look. Experiment with different eyebrow shapes to find the perfect blend of allure and mystery for your Bride.
Step Six: Define Mr. Frankenstein’s Face
Now, for the strong, stoic features of Mr. Frankenstein. Using a pencil, lightly transfer the shapes for his eyes. His facial expression is often characterized by simplicity and intensity. For his lips, a simple, long, vertical line effectively conveys his iconic sewn-mouth look. A smaller, straight line for his nose will complete his basic facial structure. The goal here is to capture his somewhat somber yet powerful demeanor with minimal, deliberate lines. Referencing classic imagery of the character can help you achieve an authentic feel.
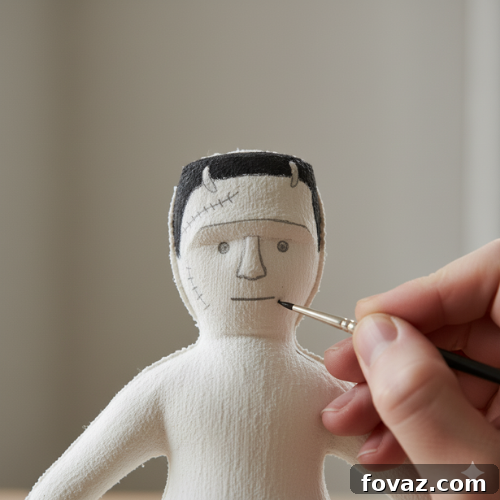
Step Seven: Add Color to Mrs. Frankenstein’s Features
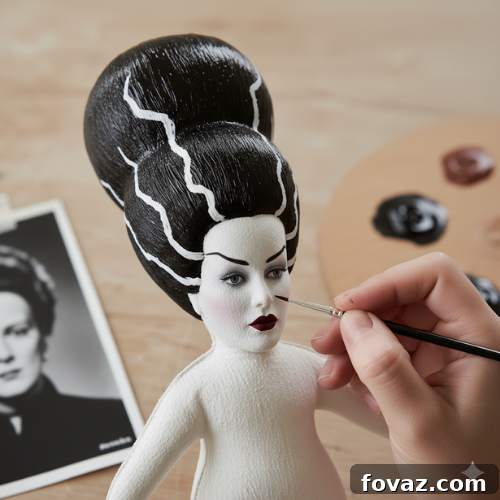
It’s time to bring vibrant color to Mrs. Frankenstein’s face. Choose a color for her eyes that complements her dramatic style; shades of purple, blue, or green can lend a mysterious allure. Experiment with different shades for her eyes and eyelids to add depth. For her lips, a dark burgundy or deep red lipstick will provide a classic, gothic elegance. Apply the paint carefully with a fine-tipped brush, ensuring clean lines and smooth coverage. Allow each layer of paint to dry thoroughly before adding subsequent layers to prevent smudging.
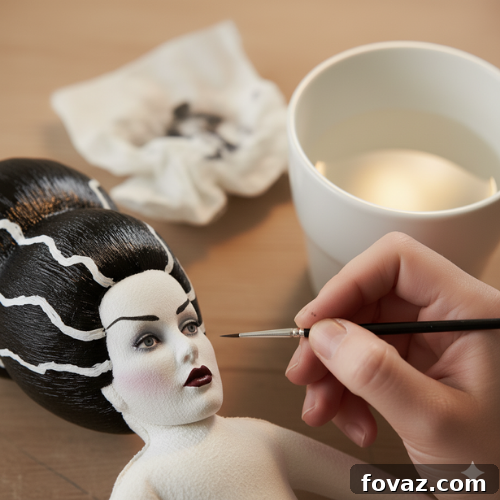
Step Eight: Detail Mr. Frankenstein’s Eyes and Stitches
For Mr. Frankenstein, choose any color you desire for his eyes. While often depicted with dark eyes, a contrasting color can add a unique touch. The most iconic feature of Frankenstein’s monster is his visible stitching. Using black paint and a very thin brush, carefully create stitches on his forehead and along his various features, such as around his jawline or neck. These stitches are crucial for capturing his classic, reanimated look. You can also use a fine-tip black permanent marker for this part if you find it easier to control, ensuring sharp, precise lines.
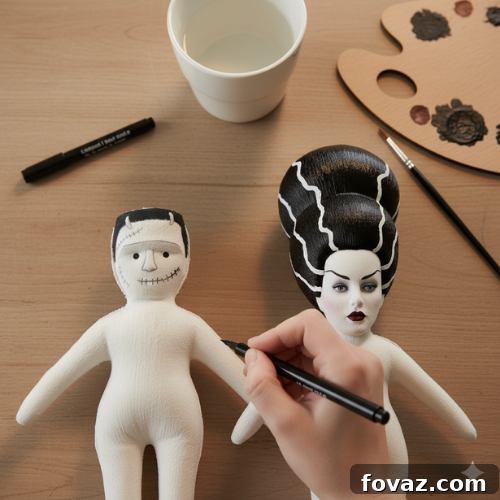
Step Nine: Refine and Outline Features
This step focuses on adding depth and definition. For Frankenstein, use a thin brush and red paint (or a thin red permanent marker) to create small, subtle veins in his eyes. This adds a touch of unsettling realism. For Mrs. Frankenstein, use black paint to outline her eyes, lashes, eyebrows, nose, and other facial features. This outlining technique makes her features pop and gives her face a more finished, illustrative quality. Lastly, add a tiny dot or dash of white paint to the corner of each doll’s eyes to simulate a reflection, bringing a spark of life to their gaze. Once all paint is completely dry, sand them very lightly once more to smooth any rough textures and prepare for sealing.
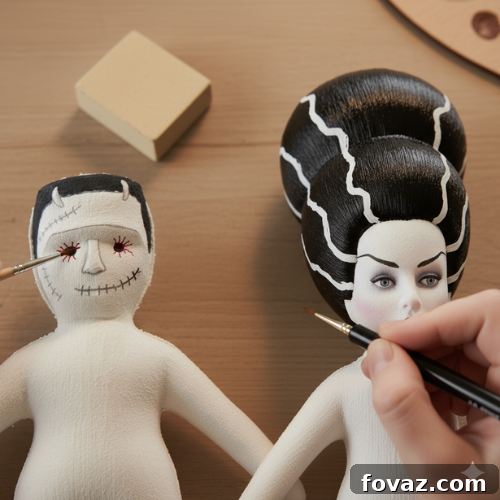
Step Ten: Add Rosy Cheeks and Seal the Faces
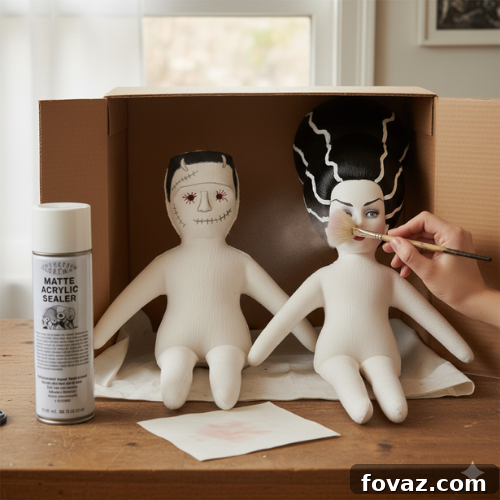
To give Mrs. Frankenstein a touch of ghoulish charm, apply a red oil pastel color to her cheeks. Using an old, soft brush, gently rub and blend the pastel onto her cheeks, creating a subtle, natural flush. The oil pastel offers a softer look than paint for this effect. Once satisfied with the facial details, it’s crucial to seal your artwork. Spray both dolls’ faces with an acrylic matte sealer. A product like Krylon Matte finish works wonderfully, but feel free to use any brand you prefer. This protective layer will shield your intricate painting from smudges, dust, and UV light, ensuring your dolls maintain their beauty over time.
Step Eleven: Achieve an Aged, Vintage Look (Optional)
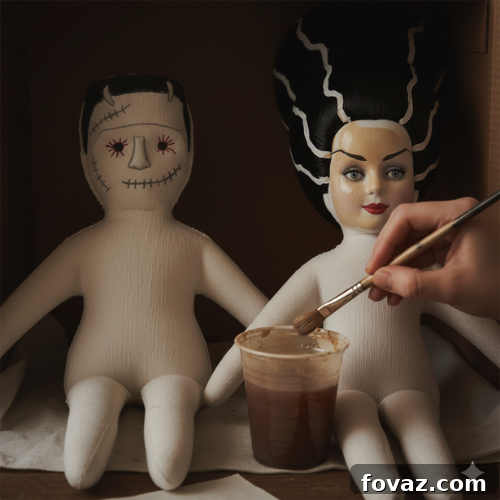
If you desire to give your Frankenstein and Bride dolls a wonderfully aged, vintage aesthetic, this optional step is perfect. Dilute a small amount of brown acrylic paint with water until it reaches a thin, ink-like consistency. Apply this watery brown wash over the dolls’ entire surfaces, working in small sections. The wash will settle into the fabric’s texture, creating shadows and an antique effect. Immediately after application, use a paper towel to gently remove any excess paint, especially from raised areas, leaving behind a subtle, weathered patina. This technique adds character and depth, making your dolls look like cherished, time-worn heirlooms.
Tips for Customizing Your Frankenstein Dolls
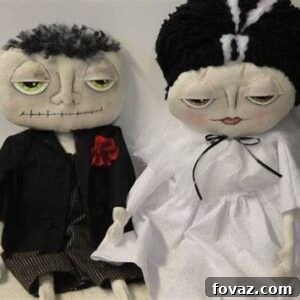
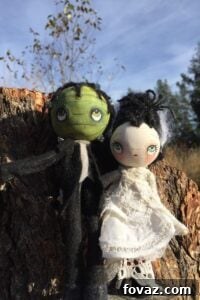
One of the joys of DIY projects is the freedom to personalize. Don’t hesitate to add your unique touch to these Frankenstein and Bride dolls. Consider using different fabric textures for clothing, like tweed for Frankenstein or lace for his bride. You could add small accessories like a tiny bow tie for Mr. Frankenstein or a delicate veil for Mrs. Frankenstein. Experiment with different paint colors for their skin to achieve varying degrees of “ghoulishness,” from pale green to subtle grey. Embellish their clothing with faux stitches, buttons, or even tiny patches to enhance their character. Remember, these patterns are a starting point; let your imagination guide you in creating truly one-of-a-kind Halloween masterpieces.
Caring for Your Handmade Fabric Dolls
To ensure your beloved Frankenstein and Bride dolls remain a cherished part of your Halloween decor for years to come, proper care is essential. Since they are painted fabric dolls, it’s best to keep them away from direct sunlight to prevent fading. If they accumulate dust, gently wipe them with a soft, dry cloth or use a soft-bristled brush. Avoid submerging them in water or attempting to machine wash them, as this can damage the paint and stuffing. If accidental spills occur, blot immediately with a damp cloth, being careful not to rub. Storing them in a dry, dust-free environment during the off-season will help preserve their condition and vibrant colors.
Love this Spooky Project? Discover More Halloween Arts and Crafts!
If you’ve enjoyed crafting these unique Frankenstein and Bride fabric dolls, then you’re undoubtedly ready for more creative Halloween adventures! The world of spooky DIY projects is vast and full of delightful possibilities. Whether you’re looking for quick decorations, costume elements, or engaging activities for the whole family, there’s always something new to create. Explore more fantastic ideas to make your Halloween celebrations truly unforgettable, from eerie home accents to fun, themed projects.
For even more crafting inspiration and a deeper dive into the world of DIY, check out our YouTube Shorts for quick tips and visual guides on various Halloween arts and crafts. These short videos offer engaging ideas to spark your creativity and enhance your holiday decor.
Then you’ll love this other fantastic DIY Halloween sewing project:
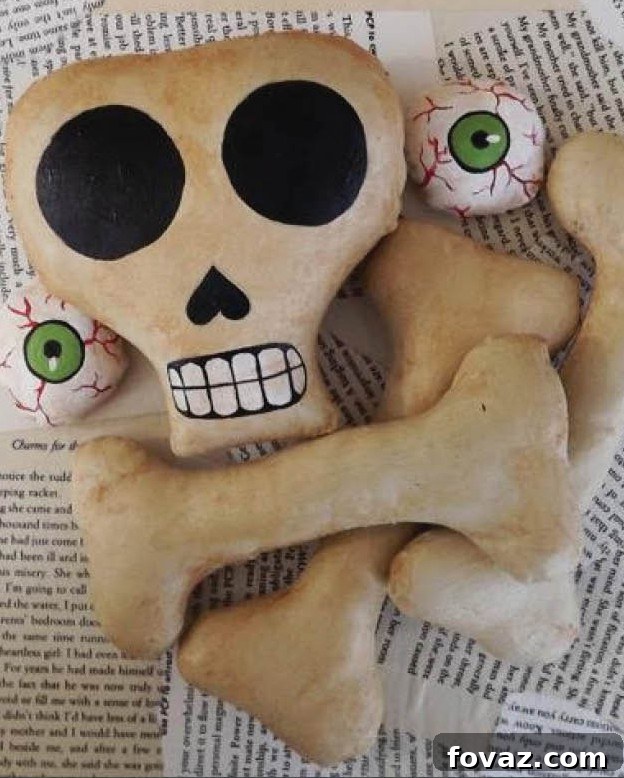
DIY Skulls & Bones: Craft Spooky Decorations
If you enjoy working with fabric and creating impressive Halloween decorations, you’ll definitely want to explore this exciting project. Learn how to make chilling yet charming skull and bones decor that perfectly complements your Frankenstein and Bride dolls. This detailed tutorial provides all the instructions you need to craft unique skeletal accents for your haunted home. It’s a perfect way to expand your collection of handmade Halloween wonders and impress your guests with your crafting prowess!