
Mastering Basic Wire Wrapping: Your Guide to Creating Stunning Handmade Jewelry
Have you ever admired unique, handcrafted jewelry and wished you could create your own? The exciting news is, you absolutely can! Wire wrapping, a fundamental and incredibly versatile technique in jewelry making, might seem intimidating at first glance, but it’s surprisingly simple and profoundly rewarding to master. It’s an art form that transforms ordinary wire and beads into extraordinary wearable art. Once you’ve learned to craft a few basic wire components – such as elegant dangles and sturdy links – a vast world of creative possibilities opens up. You’ll be able to design and assemble any kind of chain-linked jewelry your imagination desires. Imagine crafting personalized earrings, stunning necklaces, charming bracelets, and delicate anklets, not just for yourself but also as thoughtful, bespoke gifts for friends and family. This comprehensive wire wrapping basics tutorial is designed to demystify the process, guiding you step-by-step from a beginner to a confident wire artist. All you truly need is a good set of jewelry pliers, some quality wire, beautiful beads, and a willingness to explore, and the entire realm of wire-wrapped creations will become your oyster. Ready to unlock your inner jewelry designer? Keep reading for all the essential tips and tricks to master wire wrapping.
Getting Started: Essential Supplies for Wire Wrapping
Before we begin shaping wire into dazzling jewelry components, it’s crucial to gather all the necessary supplies. Having the right tools and materials at your fingertips will ensure your wire wrapping experience is smooth, enjoyable, and ultimately, yields beautiful results.
- 1 Large Center-Drilled Spherical Bead (with 1mm hole): This will serve as the focal point for our first dangle project. Its classic spherical shape is perfect for showcasing vertical designs.
- 3 or 4 Small Center-Drilled Seed Beads (or similar size, with 1mm hole): These tiny beads are ideal for adding delicate accents, creating spacers, or providing a pop of color around larger beads.
- 1 Tip-Drilled Bead, or “Briolette”: A briolette is typically a faceted, pear-shaped bead with a hole drilled through its tip. It creates a graceful, elegant drop when suspended, making it perfect for our horizontal dangle.
- 1 24 Gauge Head Pin: A head pin is a short piece of wire with a flattened head or a decorative stop on one end, specifically designed to hold beads securely for dangles. The 24 gauge is a versatile and manageable thickness for many beginner projects.
- 6 inches of 24 Gauge Wire: This length of wire will be used for creating links and specific types of dangles. 24 gauge wire offers a good balance of flexibility for wrapping and sufficient strength to hold its shape once formed.
- Flat Nose Pliers: These pliers feature flat, smooth jaws, making them indispensable for gripping wire firmly, straightening bends, and making precise, sharp angles without marring the wire’s surface.
- Round Nose Pliers: Characterized by their tapered, conical jaws, round nose pliers are your essential tool for forming perfectly rounded loops, smooth curves, and tight coils. The varying jaw thickness allows for loops of different sizes.
- Jewelry Wire Clippers: Designed specifically for cutting jewelry wire, these clippers provide a clean, flush cut, preventing jagged edges that can snag fabric or skin. Using dedicated jewelry clippers also prolongs the life of your other pliers.
While this list covers the absolute essentials for our introductory projects, remember that the world of jewelry making offers an extensive range of tools and materials. As you grow more confident, you might explore different wire gauges, specialized plier types, and an even broader variety of beads. But for now, these core items are all you need to confidently embark on your wire wrapping adventure!
Creating a Vertical Center-Drilled Dangle
A dangle is a fundamental component in jewelry design, typically featuring a single connecting loop at the top, allowing it to hang freely and gracefully. Dangles are exceptionally versatile, perfect for crafting earrings, adding charming elements to necklaces, or embellishing charm bracelets. This specific method focuses on creating a vertically strung dangle, utilizing a head pin, and is ideal for beads that are drilled through their center.
Step 1: String Your Bead(s) onto the Head Pin
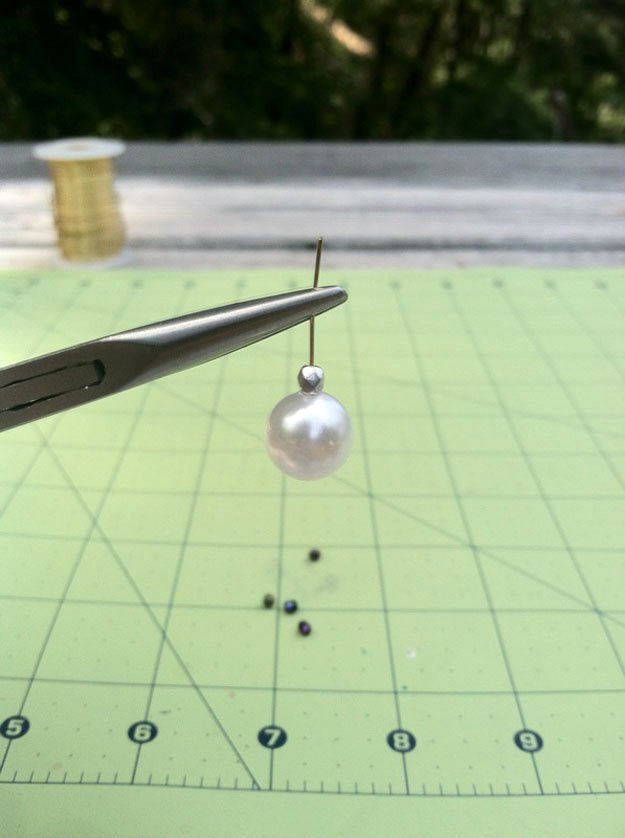
Start by taking your head pin and carefully threading your large spherical bead onto it. For an extra touch of visual interest or to add a slight contrast, you have the option to string a smaller bead (such as a seed bead) on top of the large one. Ensure that all beads sit snugly and securely against the flat head or decorative stop of the pin, leaving no gaps.
Step 2: Prepare the Wire for Looping with a Bend
With your beads in place, grasp the head pin wire just above the uppermost bead using your round nose pliers. Position the pliers so that the tip of their jaws is precisely where you envision the base of your finished loop. While firmly holding the bead assembly with your non-dominant hand to prevent it from rotating, use the pliers to gently bend the wire about 45 degrees to the right. It’s crucial to leave a small, intentional space between this bend and the top bead. This gap is vital because it provides room for the bottom jaw of your pliers to rest when forming the loop, preventing the wire from pressing against or damaging the bead.
Step 3: Form the Primary Connecting Loop
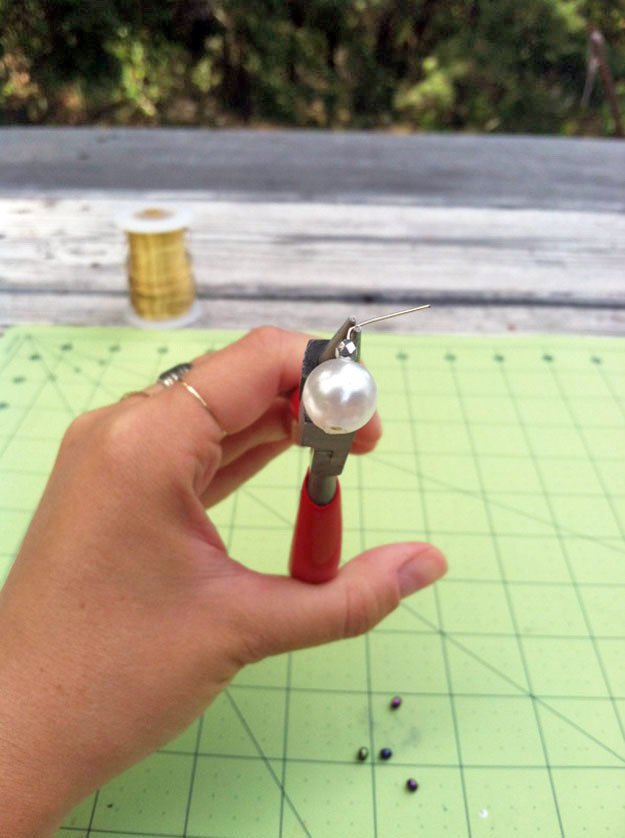
Now, keeping your round nose pliers firmly in their position, use your fingers (or your flat nose pliers if the wire is particularly stiff or short) to wrap the longer, tail end of the wire completely over the top jaw of the round nose pliers. Continue wrapping until a full, circular loop is perfectly formed around the pliers’ jaw. This stage presents a critical decision point: if you intend to directly connect this dangle to another component, such as an earring hook, a link in a chain, or another finding, you must do so *before* fully closing the loop. Alternatively, if you plan to connect it later using a jump ring, you can proceed to fully close the loop in the next step.
Step 4: Create the Secure Wire Coil
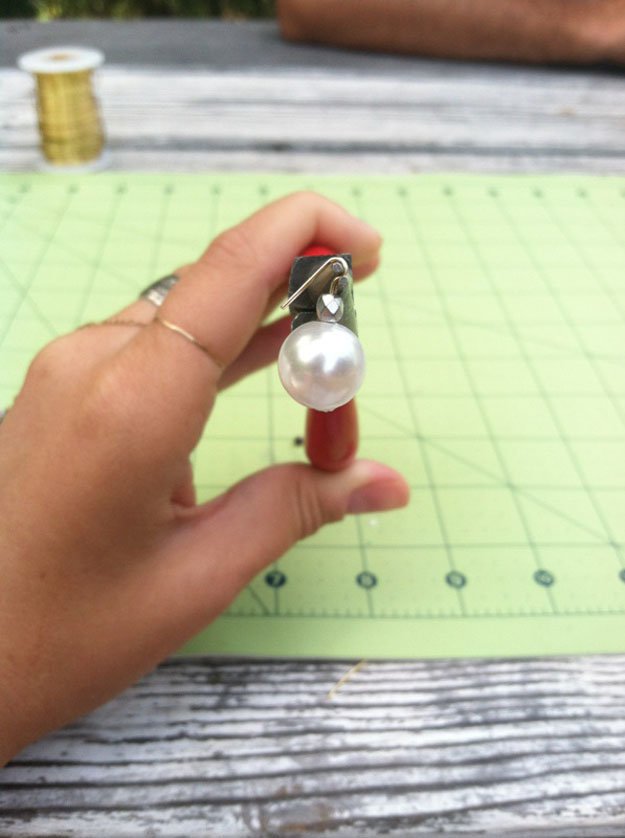
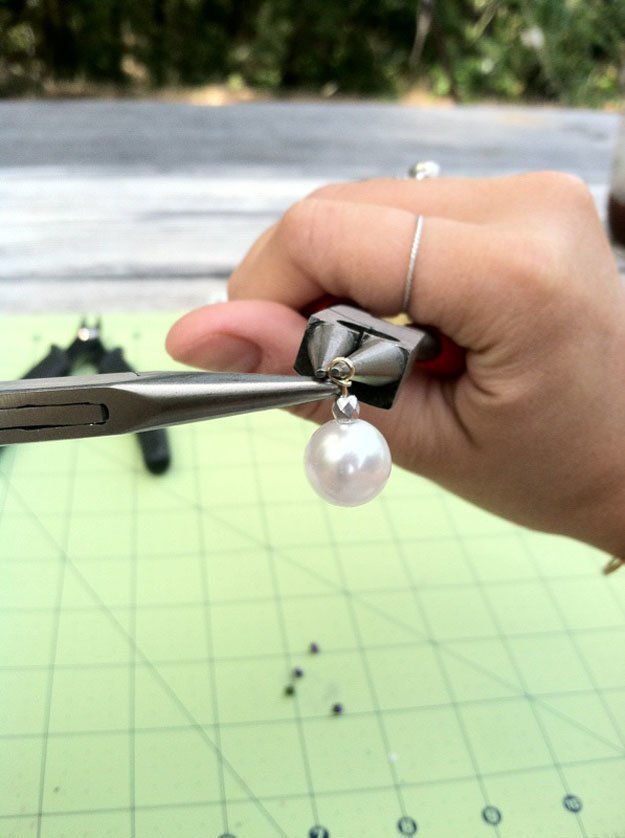
Once your loop is formed and any connections are made, guide the tail end of the wire down and underneath the newly created loop, crossing the main shaft of the wire (the segment extending directly from the bead). Now, hold the loop firmly in place with your round nose pliers to maintain its shape. Using your flat nose pliers, carefully begin to coil the excess tail wire tightly around the main shaft, positioning these coils neatly between the bottom of the loop and the top bead. Aim for approximately two full, snug rotations. If the coils appear slightly spaced out, you can gently use your flat nose pliers to squeeze them closer together, creating a tidy and professional-looking wrapped coil. This coiling action not only secures the loop but also adds a decorative, finished touch to your dangle.
Step 5: Finishing Touches and Trimming
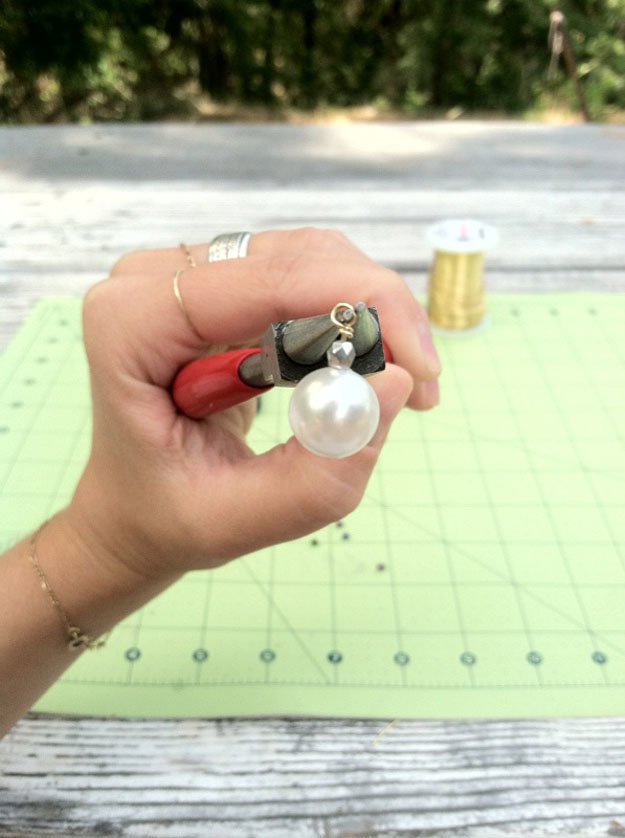
With the coil securely in place, take your jewelry wire clippers and carefully snip off any remaining excess wire. Ensure you make the cut as close to the coil as possible to maintain a clean appearance. To prevent the tiny cut end of the wire from snagging on your skin or clothing, use your flat nose pliers to gently roll or tuck the sharp tip of the coil inwards onto itself. And just like that, your beautifully crafted vertical center-drilled dangle is complete! It’s now ready to be strung onto a chain, transformed into a pair of custom earrings, or added as a charm to any of your jewelry creations.
Crafting a Horizontal Tip-Drilled Dangle
This next tutorial introduces a different approach to creating a dangle, specifically designed for beads that are drilled horizontally through their tip, such as the elegant briolette. While the bead’s drilling is horizontal, the finished dangle will still hang vertically, much like a center-drilled dangle. This technique beautifully accentuates the unique shape and facets of tip-drilled beads, resulting in a distinctively graceful and sophisticated piece.
Step 1: Prepare the Wire and Position the Briolette Bead
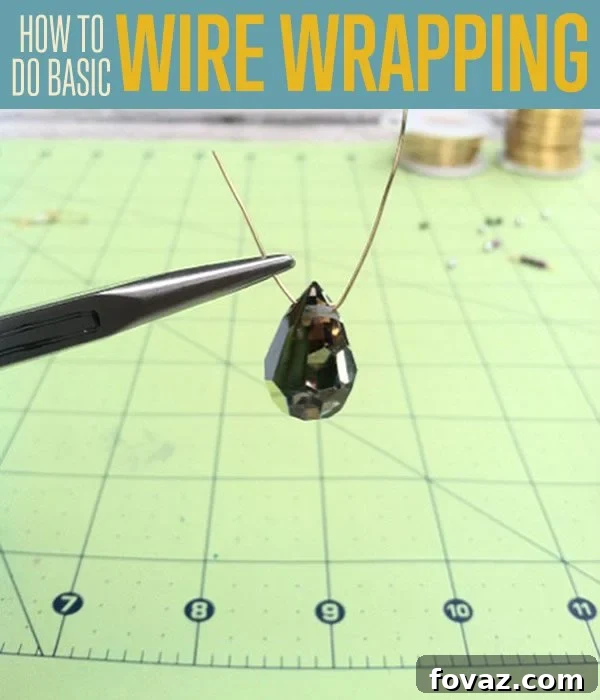
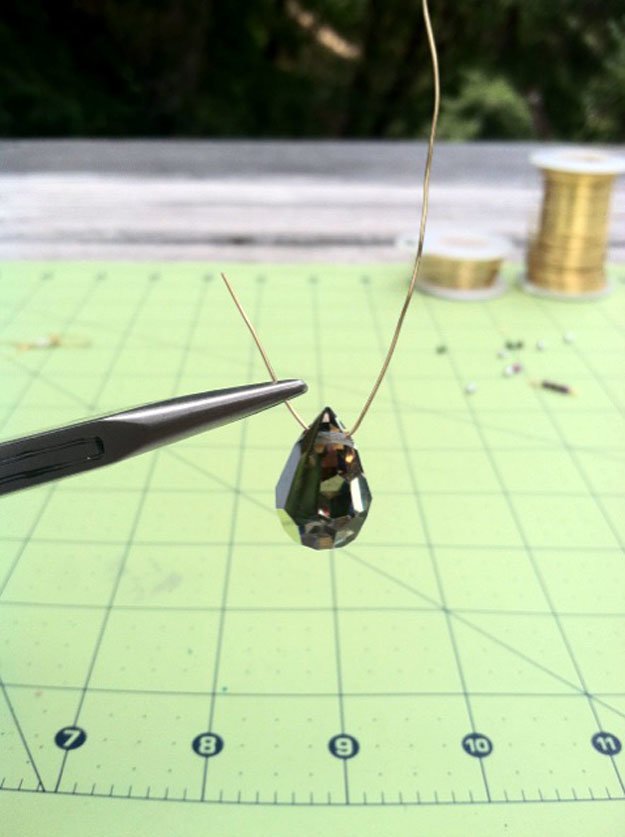
Begin by cutting a piece of your 24 gauge wire to a length of approximately three inches. Carefully thread your briolette bead onto the wire, ensuring it is positioned precisely in the center of the wire segment. To stabilize the bead and prevent it from sliding around as you work, gently bend both ends of the wire slightly upwards. This subtle bend will create a secure cradle around the bead, keeping it firmly in place for the upcoming steps.
Step 2: Form the Triangular Wire Frame Above the Bead
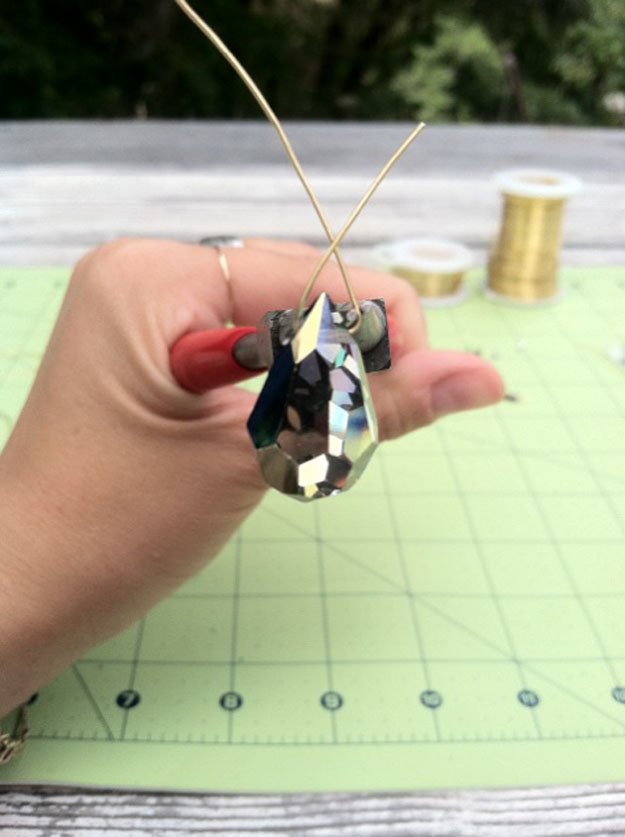
Using your round nose pliers, carefully bend the wire upwards on both sides of the bead. Bring the two wire ends together so they cross neatly above the top of the briolette. This action will form a distinct triangular shape around the bead, encasing it elegantly. It’s important to ensure that you leave a tiny bit of subtle space between the wire and the bead’s surface. This slight allowance provides the bead with a delicate amount of movement, contributing to its lovely “dangle” quality once the piece is finished.
Step 3: Positioning Wires for the First Coil
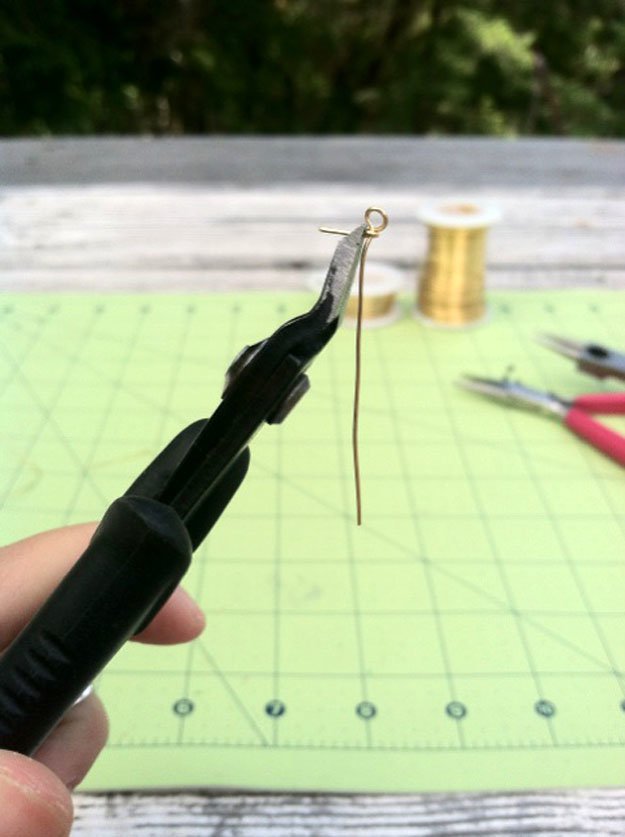
Now, direct your attention to the two wire ends that have crossed above the bead. Manipulate them carefully so that one end points straight upwards – this will become the primary vertical shaft of your dangle. The other end should be positioned to cross the vertical wire horizontally, forming a neat and precise 90-degree angle. This exact positioning is crucial for setting up the clean, secure coil that you will create in the next step, ensuring structural integrity and a refined aesthetic.
Step 4: Create the Initial Wire Coil
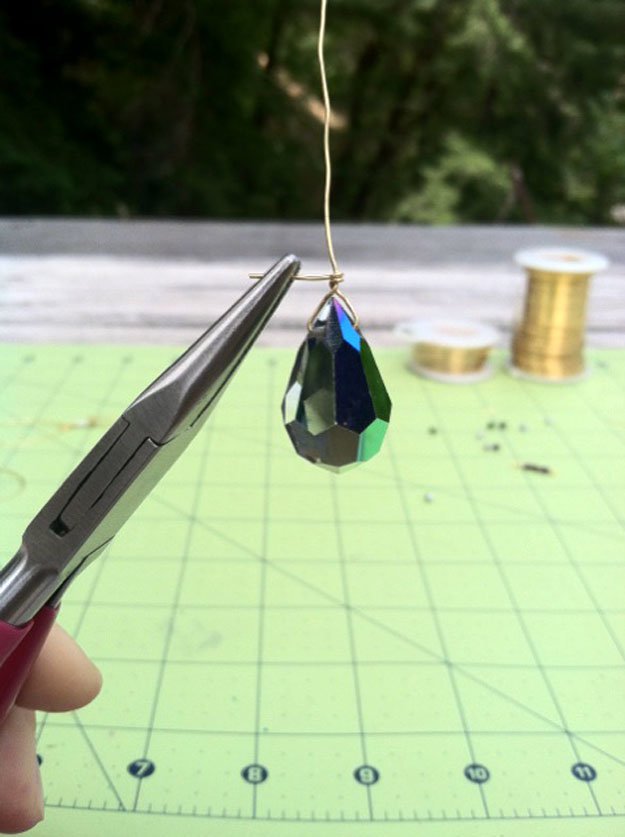
Take the horizontal wire and meticulously coil it tightly around the vertical wire. Complete two full, even rotations. This particular step can be a little delicate, as you want to avoid accidentally bending the vertical wire while coiling. A very effective tip is to firmly hold the vertical wire with the fingers of your non-dominant hand, just above the point where you intend to create the coil. This provides essential stability. Then, use your flat nose pliers to grip and carefully wrap the horizontal wire, ensuring a tight, consistent coil that is both secure and visually appealing.
Step 5: Forming the Top Connecting Loop
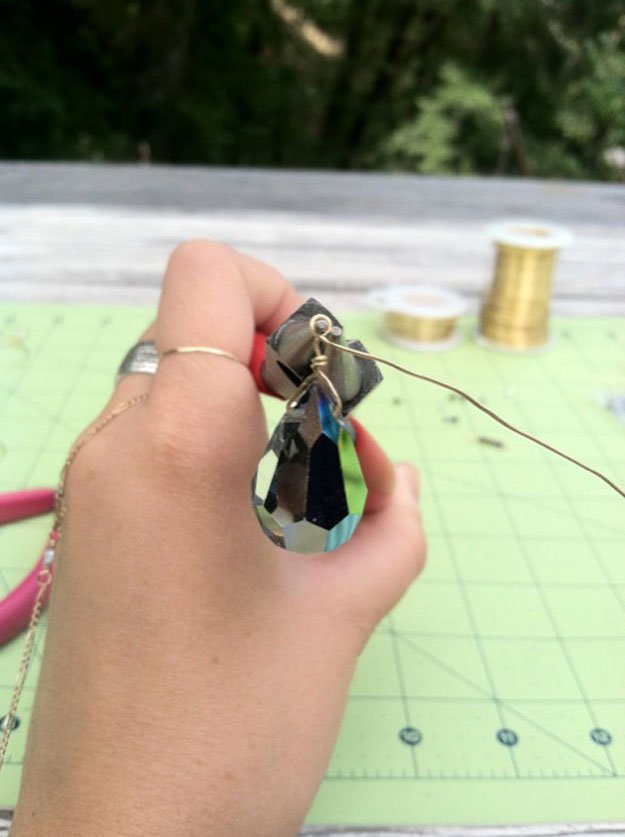
Once the initial coil is complete, use your jewelry wire clippers to carefully snip off any excess wire from the coiled section. Now, focus on the remaining vertical wire. Using your round nose pliers, form a loop at the very top, mimicking the technique you perfected in the first dangle tutorial. Wrap the wire smoothly over the top jaw of your pliers, making sure to leave a slight, deliberate space between the newly formed loop and the coil you just created. As with previous steps, if you plan to attach this dangle directly to an earring wire, a chain, or another component, now is the perfect moment to make that connection before completely closing the loop.
Step 6: Completing the Second Coil and Finishing
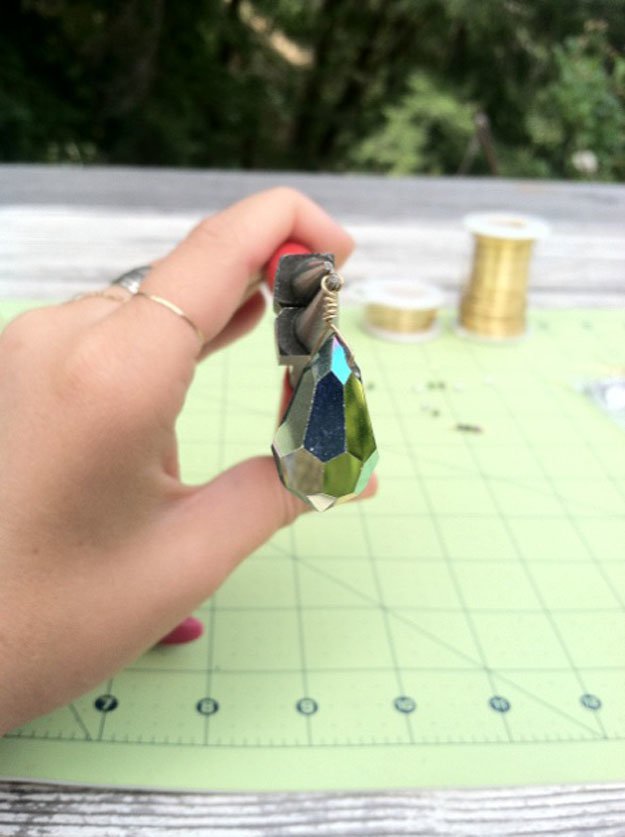
With the top loop in place, take the remaining wire in the space you purposefully left below the loop and create a second, smaller coil. Wrap this wire tightly against the first coil, ensuring it’s neat and snug. After completing a couple of clean wraps, snip off any remaining excess wire with your clippers. To ensure a smooth, professional finish, use your flat nose pliers to gently tuck or roll the tiny cut end of the wire inwards, preventing any snags. Step back and admire your elegantly crafted horizontal tip-drilled dangle! Its sophisticated hanging style is perfect for adding a touch of unique charm to any of your jewelry creations.
Mastering the Beaded Link: Crafting Your Own Chains
The beaded link is an exceptionally versatile and fundamental component in jewelry making. It features a bead (or a series of beads) elegantly framed between two connecting loops, one at each end. Mastering this technique is a game-changer, as it enables you to create entirely custom, handmade chains of any desired length, whether you’re envisioning delicate necklaces, intricate bracelets, or robust anklets. Once you’ve learned how to craft a single beaded link, you can easily connect a multitude of them to form a vast array of unique and personalized chain designs.
Step 1: Initiate the First Wrapped Loop
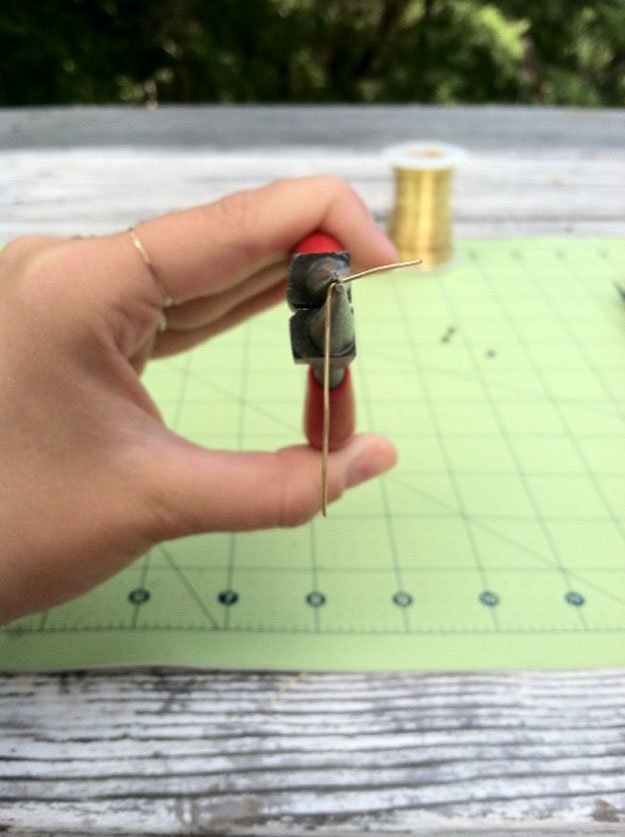
To begin, cut a piece of your 24 gauge wire to a manageable length of approximately three inches. Our goal is to create a wrapped loop, a technique that you are now familiar with from the previous dangle tutorials. Grasp the wire firmly with your round nose pliers, positioning them about an inch from one end of the wire. Using the pliers, gently bend the shorter end of the wire roughly 45 degrees to the right, establishing the crucial initial angle for your loop.
Step 2: Form the Loop and Connect if Necessary
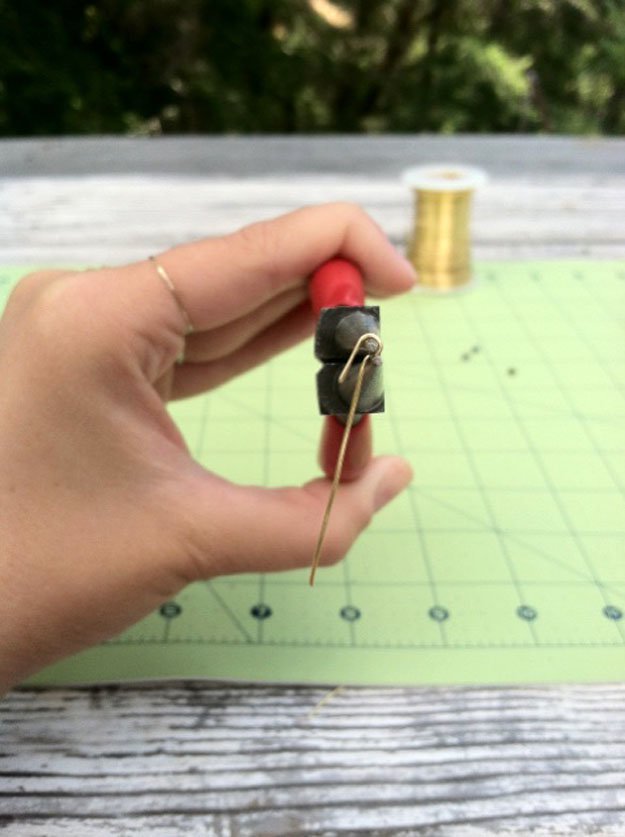
Keeping the round nose pliers in their precise position, wrap the short end of the wire smoothly over the top jaw of the pliers to form a complete, neat loop. This step comes with a very important reminder, a common pitfall even for seasoned crafters: If you intend to connect this particular link to another jewelry component – such as an existing chain, another link you’ve already made, or a clasp – it is absolutely essential to make that connection *now*, before you fully close the loop. Failing to do so will mean trying to pry open a perfectly formed, tightly wrapped loop later, which can be challenging and potentially damage your work.
Step 3: Secure the Loop with Coils and Trim
Once your loop is perfectly formed (and connected, if applicable), guide the tail end of the wire underneath the pliers and begin to tightly coil it around the main wire shaft. Position these coils neatly in the space between the base of the loop and where your beads will eventually sit. Aim for a couple of tight, consistent rotations to ensure the loop is securely anchored. After you’ve created a clean coil, use your jewelry wire clippers to carefully snip off any remaining excess wire as close to the coil as possible, ensuring a smooth, flush finish. If necessary, use your flat nose pliers to gently tuck or smooth any sharp wire ends.
Step 4: Incorporate Your Beads
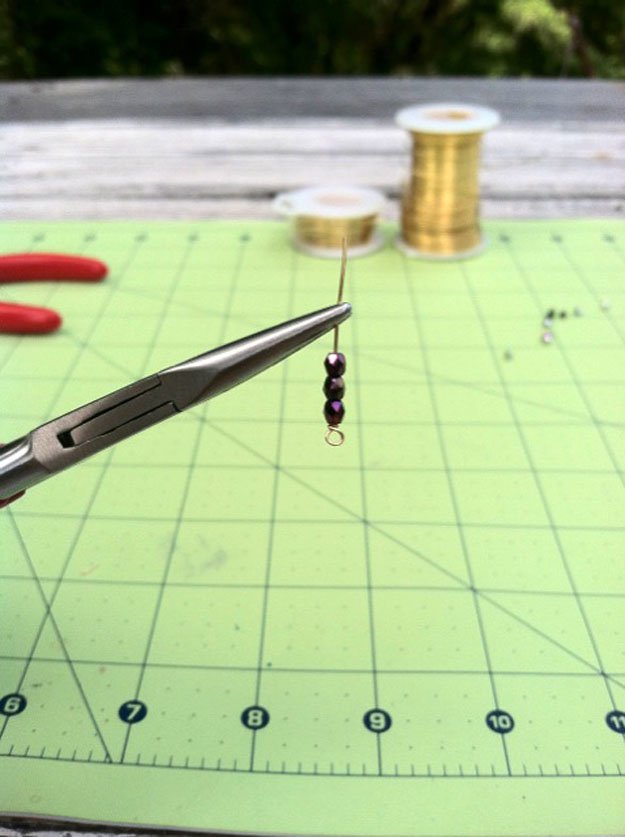
Now that one end of your link is expertly completed, flip your wire piece upside down to expose the open, unworked end of the wire. Carefully string your chosen small beads (or a single larger bead, depending on your design aesthetic) onto this open end. Slide them gently down the wire until they rest snugly against the wrapped coil you just created. Take a moment to ensure they are centered and beautifully arranged for your intended design, ready for the second loop.
Step 5: Complete the Second Wrapped Loop
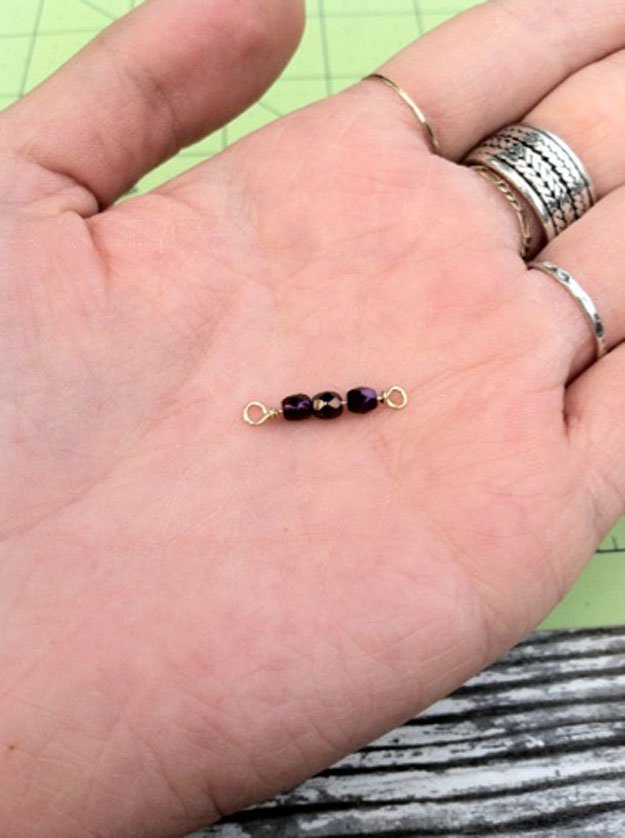
To finalize your beaded link, you will now repeat Steps 1 through 3 on the other open end of the wire, directly above the beads you’ve strung. This process will create a perfectly symmetrical wrapped loop, mirroring the first one you meticulously crafted. Once again, it’s crucial to recall the connecting step: if this link is meant to attach to any other component, make that connection *before* fully closing this second loop. And there you have it – a flawlessly crafted beaded link! With this versatile skill, you are now equipped to create a multitude of these links, allowing you to construct stunning, customized handmade chains for any jewelry project, unlocking limitless design possibilities.
Unleash Your Creativity: Beyond the Basics of Wire Wrapping
Congratulations on successfully completing our basic wire wrapping tutorial! You have now acquired fundamental skills that are not only rewarding but also highly empowering, enabling you to create a vast array of beautiful handmade jewelry pieces. From crafting elegant dangles that are perfect for earrings or charm bracelets, to constructing versatile beaded links that form the very foundation of customized chains, you’ve taken significant and confident steps into the captivating world of DIY jewelry making.
The true beauty and magic of wire wrapping lie in its endless possibilities for creativity. These basic techniques are merely a powerful springboard for your imagination. Do not hesitate to experiment with different wire gauges, explore an extensive variety of beads (from glass to natural stones), and discover unique combinations of loops, coils, and structural designs. Remember that practice is paramount – the more you engage with wire, the more comfortable and confident you will become, and the more refined and intricate your creations will grow. With dedication, you’ll soon be designing complex patterns and elaborate pieces with remarkable ease and artistic flair.
We are genuinely eager to hear about your wire wrapping journey and see what amazing creations you’ve brought to life! Did this comprehensive tutorial successfully guide you in creating something special? Do you have any personal tips, clever tricks, or unique variations that you’d love to share with your fellow crafters? Please take a moment to leave your valuable feedback, constructive suggestions for future craft projects, or any questions you might have in the comments section below. Your insights and contributions are invaluable, helping us continuously tailor our content to precisely what our vibrant community of DIY enthusiasts wants to learn and explore most. We truly appreciate and cherish hearing from each and every one of you!
To ensure you never miss out on the latest and greatest DIY projects, expert tips, and inspiring tutorials, make sure to sign up for our exclusive mailing list. You’ll receive fresh inspiration and exciting updates directly in your inbox, guaranteeing you’re always informed and ready for your next crafting adventure.
Explore More DIY Jewelry Projects and Enhance Your Skills
Ready to expand your jewelry making skills and dive into more intricate designs? Check out these related posts for additional inspiration, advanced techniques, and essential supplies:
- DIY Jewelry Making: Master the Byzantine Chain Weave Bracelet
- Essential DIY Jewelry Making Supplies: Discover the Jump Ring Mandrel
- DIY Jewelry: Learn How to Make an Elegant Jewelry Wire Vine Necklace
- Inspirational Handmade Jewelry Ideas: DIY Bracelets for Every Style