
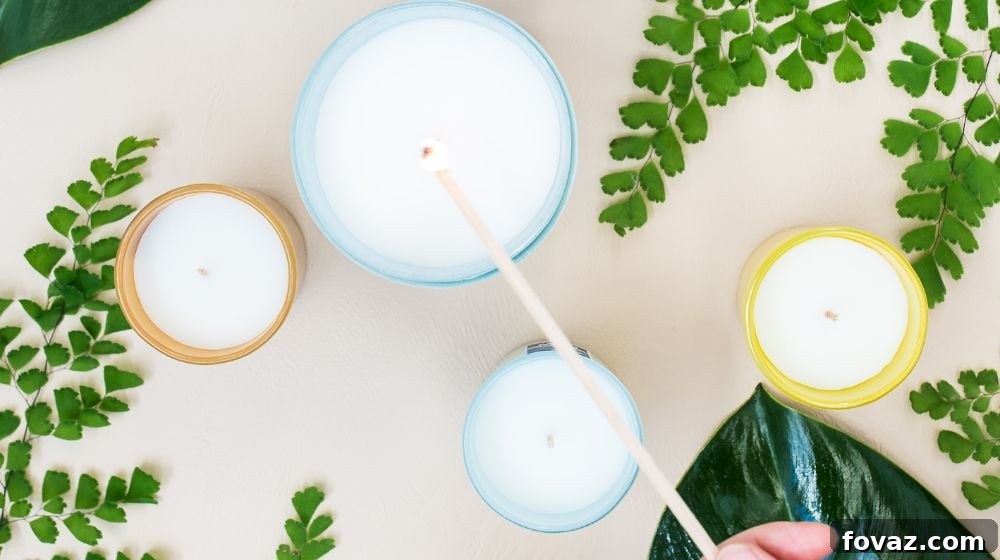
Embarking on the rewarding journey of candle making is an exciting endeavor, whether you’re crafting personalized gifts, creating a relaxing ambiance for your home, or even starting a small business. To ensure your creative process is smooth and successful, having the right tools is paramount. A comprehensive candle making kit is your foundation, providing everything you need to transform raw materials into beautiful, fragrant candles. This ultimate guide will walk you through the essential components of a robust candle making setup, ensuring you’re well-equipped for every step of your DIY adventure.
RELATED: Soothing DIY Lavender Candles To Melt Your Stress Away
Your Essential Candle Making Kit: A Detailed Checklist for Crafting Success
From the foundational ingredients to the specialized equipment, each item in your candle making kit plays a crucial role. Understanding their purpose and how to choose the best options will significantly enhance your results and overall experience.
1. The Heart of Your Candle: Choosing the Right Wax
View on Pinterest
Candle wax is more than just a fuel source; it dictates the candle’s burn time, scent throw, and overall aesthetic. Different waxes offer unique properties, making your choice a critical first step in defining your candle’s characteristics.
- Paraffin Wax: A versatile and widely used wax due to its flexibility and availability. Paraffin is excellent for holding dyes and is suitable for various candle types, from pillars to containers. However, it’s a petroleum byproduct, and while refined, some crafters prefer natural alternatives. It boasts good scent throw but may not bind natural oils as effectively as some plant-based waxes.
- Beeswax: Renowned for its natural honey-like aroma and long, clean burn. Harvested from beehives, beeswax is a premium, natural wax with a high melting point, resulting in extended burn times. Its natural golden hue can be a beautiful feature, though it can also limit dye options. It’s an excellent choice for those seeking an all-natural, sustainable option.
- Soy Wax: A popular eco-friendly alternative derived from soybeans. Soy wax is celebrated for its clean burn and excellent scent throw, as its natural oils readily mix with fragrances. It has a lower melting point than beeswax, contributing to a longer burn. It’s often preferred for container candles due to its softer consistency and is generally more affordable than beeswax, making it a favorite among DIY enthusiasts.
- Coconut Wax: Gaining popularity for its luxurious texture and incredible scent throw. Coconut wax is a natural, slow-burning wax that offers a very clean burn. It’s known for its creamy, smooth appearance and ability to blend well with other waxes like soy or beeswax to enhance their properties. It can be more expensive than soy or paraffin.
- Palm Wax: Derived from palm oil, this wax can create unique crystalline patterns, especially in pillar and votive candles. It burns cleanly and holds fragrance well. However, it’s important to source sustainably harvested palm wax to avoid contributing to deforestation concerns.
- Gel Wax: A clear, non-toxic, and odorless wax made from a blend of resin and mineral oil. Gel wax has a high melting point and offers a unique aesthetic, allowing for the embedding of decorative objects within the candle. It’s perfect for themed or novelty candles, though it doesn’t mix well with all additives and requires specific wicks.
- Bayberry Wax: A traditional and somewhat rare wax with a distinctive sweet, herbal, slightly floral scent. Bayberry wax has a low melting point and is often used for special occasion candles, particularly during the holiday season. It can be quite expensive due to its limited availability.
When selecting your wax, consider the type of candle you wish to create (container vs. pillar), desired burn characteristics, scent throw performance, and personal preferences regarding natural versus synthetic materials.
2. The Conductor of the Flame: Understanding Wicks
Wicks are the lifeblood of your candle, drawing fuel (melted wax) upwards to sustain the flame. The performance of your wick is crucial and is influenced by factors such as the type of wax, the amount of fragrance oil, and any dyes or additives used. Selecting the correct wick size and type is essential to prevent issues like tunneling, mushrooming, or excessive soot.
- Flat Wicks (Braided): Among the most common and versatile wicks, typically made from three flat-braided fibers. They are designed to curl slightly as they burn, promoting a self-trimming action. Ideal for taper and pillar candles made from paraffin or beeswax.
- Square Wicks: Constructed with a thicker, more robust braid than flat wicks. Their sturdy build makes them excellent for candles with high fragrance loads, dyes, or other additives that might otherwise clog a thinner wick. They are also well-suited for pillar and taper candles.
- Wax-Coated/Pre-tabbed Wicks: These wicks come pre-dipped in wax and often feature a metal tab at the base. They are convenient for beginners and work exceptionally well with jar candles, votives, and tea lights. They are generally not recommended for gel candles due to compatibility issues.
- Core Wicks (Zinc/Cotton): Core wicks have a paper or metal (zinc) core that helps them stand upright, making them easy to use. Zinc core wicks are stiffer and suitable for harder waxes and heavily scented candles, while cotton core wicks offer a cleaner burn and are often used in container candles.
- Wood Wicks: A popular choice for a unique aesthetic and auditory experience, as they produce a gentle crackling sound similar to a miniature fireplace. Wood wicks burn cleanly and provide a wide, low flame. They require specific testing to ensure proper performance and can sometimes be more challenging to work with than traditional cotton wicks.
Always perform wick testing with your specific wax, container, and fragrance combination to ensure an optimal burn.
3. The Vessel of Creation: Molds and Containers
View on Pinterest
Molds and containers define the shape and presentation of your candles. They come in a vast array of materials, sizes, and designs, each offering distinct advantages. Your choice will depend on the type of candle you’re making and your desired aesthetic.
- Glass Containers: A timeless and popular choice for container candles, especially those made with soy or paraffin wax. Glass jars, votive holders, and tumblers offer excellent heat resistance, allowing the flame to safely burn down to the bottom. They come in various shapes and sizes, from small tea light cups to large multi-wick vessels, and beautifully showcase the candle’s color and texture.
- Ceramic Containers: Offer a rustic, artisan feel. Ceramic vessels are sturdy and heat-resistant, making them suitable for container candles. They can be glazed or unglazed, providing diverse stylistic options to complement any decor.
- Metal Tins: Lightweight, durable, and travel-friendly. Metal tins are often used for smaller, portable candles. They are excellent at dissipating heat and come with secure lids, making them ideal for gifts or taking your favorite scent on the go.
- Silicone Molds: Highly flexible and non-stick, silicone molds are fantastic for creating intricate, unusual shapes that are easy to demold. They are durable and reusable, offering endless creative possibilities for pillar and novelty candles.
- Plastic Molds: More rigid than silicone, plastic molds (often polycarbonate) are also great for pillar and votive candles. They provide a smooth finish and come in a wide variety of classic shapes. They are generally more affordable but can be less durable over time than silicone or metal.
- Metal Molds: Offer the crispest, smoothest finish for pillar candles. Typically made from aluminum, these molds are sturdy and conduct heat efficiently, allowing for quick cooling. They are excellent for creating classic, professional-looking pillar candles.
Always ensure your chosen container or mold is heat-safe and compatible with your wax type. For instance, some waxes might adhere too strongly to certain materials or require specific release agents for easy demolding.
RELATED: DIY Wooden Candle Holder | Easy DIY Projects
4. The Safe Melting Zone: A Double Boiler System
Melting candle wax directly over high heat can lead to scorching, uneven melting, or even fire hazards. The safest and most advisable method is using a double boiler, also known as a bain-marie. This indirect heating system gently melts the wax, maintaining a consistent temperature and preventing burning. While specialty wax melters are available, you can easily assemble a double boiler with common kitchen items:
- Bottom Pot: A larger saucepan filled with a few inches of water.
- Top Pot/Pouring Pitcher: A smaller, heat-safe container (such as a stainless steel pouring pitcher or a heat-resistant bowl) that fits snugly over the bottom pot without touching the water. This is where your wax will melt.
The steam from the boiling water in the bottom pot will gently heat the top container, melting your wax slowly and evenly. This method is crucial for preserving the integrity of the wax and ensuring safe handling.
5. The Power Behind the Heat: Your Heat Source
To operate your double boiler, you’ll naturally need a reliable heat source. Common options include:
- Stovetop: Most home kitchens are equipped with an electric or gas stove, which works perfectly for a double boiler setup. Always use a burner that is appropriately sized for your pots.
- Hot Plate: An electric hot plate offers portability and can be useful if you prefer to work in a well-ventilated area away from your main kitchen. Look for one with adjustable temperature control.
- Induction Cooktop: Offers precise temperature control and quick heating for your double boiler.
Regardless of your chosen heat source, always supervise melting wax closely and never leave it unattended. Ensure the area is clear of flammable materials and well-ventilated.
6. The Essence of Ambiance: Fragrance Oils and Essential Oils
Fragrance is a key element that defines a candle’s appeal, infusing your space with soothing, invigorating, or comforting aromas. Your choice of scent can evoke memories, set a mood, or simply add a delightful sensory experience.
- Fragrance Oils: Specially formulated for candles, these synthetic or natural blend oils are designed to withstand high temperatures and provide a strong, consistent scent throw. They come in an enormous variety of scents, from popular food aromas like vanilla and cinnamon to complex floral bouquets and earthy notes.
- Essential Oils: Pure, natural extracts from plants. While they offer authentic botanical scents and potential aromatherapy benefits, essential oils can be more volatile and may not always hold up as well under candle wax temperatures, potentially resulting in a weaker scent throw. Some essential oils are also not safe for burning or can be toxic in high concentrations. Always research the safety and suitability of specific essential oils for candle making.
The “fragrance load” (the percentage of fragrance oil relative to the wax) is crucial. Typically, you’ll need about 1 ounce (30ml) of oil per pound (450g) of wax, but this can vary depending on the wax type and desired scent strength. Most wax manufacturers provide recommendations for optimal fragrance loads. Always add fragrance oils at the correct temperature (usually specified by the wax supplier) to ensure proper binding and maximum scent throw.
7. The Hue of Creativity: Candle Dye or Colorants
Adding color can enhance the visual appeal of your candles, matching them to your decor or a specific theme. Candle dyes come in various forms, offering different levels of vibrancy and ease of use.
- Liquid Dyes: Highly concentrated and easy to mix, liquid dyes offer vibrant colors and allow for precise shade adjustments by adding drops.
- Dye Blocks/Chips: Solid blocks or chips of dye that are added directly to the melted wax. They are convenient for consistent coloring across batches and often produce rich, opaque colors.
- Flake Dyes: Similar to dye chips but in a flaked form, offering easy measurement and melting.
Remember that the color of the melted wax will appear darker than the final dried candle. It’s a good practice to test a few drops of colored wax on a white surface (like parchment paper) to see its true dried shade before pouring your entire batch. Be mindful that excessive dye can sometimes affect the wick’s performance or clog it.
8. The Supporting Cast: Other Miscellaneous Supplies
Beyond the core components, several other items are essential for precision, safety, and decorative finishing touches.
- Digital Scale: Accuracy is key in candle making. A digital scale is indispensable for precisely measuring wax, fragrance oils, and even dyes, ensuring consistent results batch after batch.
- Thermometer: A heat-safe thermometer (candy or craft thermometer) is critical for monitoring wax temperatures. Correct temperatures are vital for adding fragrance oils, pouring wax, and preventing issues like frosting or cracking.
- Wick Clips/Centering Tools: These tools help hold the wick upright and centered in your container or mold as the wax cools and solidifies, ensuring an even burn.
- Pouring Pitcher: A dedicated pouring pitcher with a handle and spout makes transferring hot, melted wax into containers or molds much safer and cleaner.
- Stirring Utensils: Use dedicated stirring spoons or spatulas for wax to avoid cross-contamination with food items. Stainless steel or silicone options are easy to clean.
- Hot Glue Gun and Sticks: Useful for securely attaching wick tabs to the bottom of containers, preventing them from shifting during the pouring process.
- Safety Gear: Always prioritize safety. Wear heat-resistant gloves, an apron, and eye protection to safeguard against hot wax splashes or spills.
- Cleaning Supplies: Keep paper towels, rubbing alcohol, and old newspapers handy to protect your work surface and clean up any spills or drips immediately.
- Labels and Decorative Elements: To give your DIY candles a professional and personalized touch. Labels can include scent names, burn instructions, and your brand. Lids, ribbons, and other embellishments can transform a simple candle into a beautiful gift or a decorative home accent.
Gearing Up: Basic Knowledge About the Types of Candles You Can Make
Understanding the different types of candles you can create will help you choose the appropriate waxes, wicks, and containers for your projects. Each candle type has specific requirements and characteristics:
- Taper Candles: These are long, slender, and elegant candles that typically require a candle holder to stand upright. They are often made from harder waxes like paraffin or beeswax and use flat or square wicks. Taper candles are perfect for formal dining settings or decorative displays.
- Pillar Candles: Broad, freestanding candles that do not require a container. They are typically cylindrical but can come in various geometric shapes. Pillar candles need to be made with a wax that is firm enough to hold its shape (e.g., specific pillar blends of paraffin, soy, or palm wax). They often feature multiple wicks for a wider melt pool and require a fire-safe plate beneath them.
- Poured/Container Candles: The most common and beginner-friendly type, where melted wax is poured directly into a heat-safe container (glass jar, tin, ceramic vessel). The wax takes the shape of its vessel, and these candles are usually made with softer waxes like soy or coconut blends. They offer endless possibilities for customization in terms of scent, color, and container design.
- Votive Candles: Short, cylindrical candles designed to be burned within a snug-fitting votive holder. They are typically smaller than pillar candles and rely on the holder to contain their melt pool. Votive waxes are formulated to liquefy completely when burned in a holder, creating a brilliant glow.
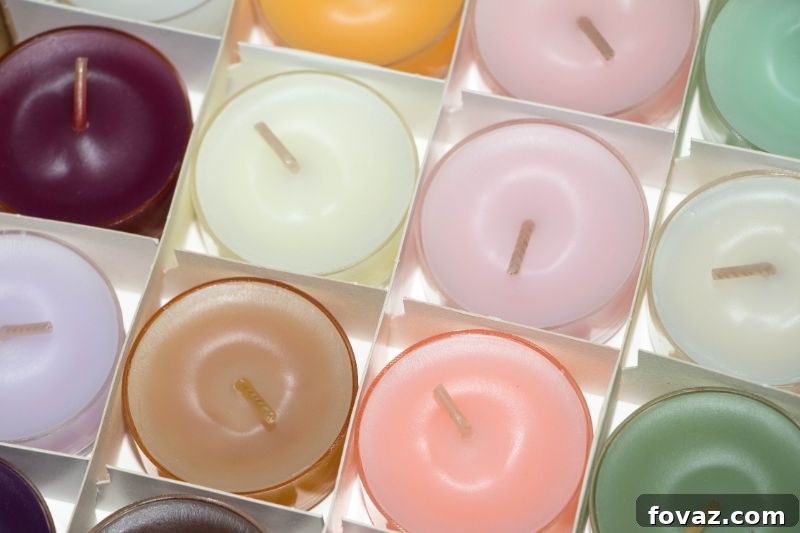
- Tea Lights: Small, short candles set inside aluminum or polycarbonate cups. Tea lights are designed for short burn times (usually 2-4 hours) and are excellent for creating ambient lighting, warming essential oils, or using in decorative lanterns. They are very similar to votive candles but are distinct in their self-contained cups and shorter stature.
With your candle making kit checklist complete, learn how to make a basic candle with this beginner-friendly guide from eHowHome:
Safety First: Essential Precautions for Candle Makers
While candle making is a creative and enjoyable hobby, working with hot wax and open flames requires strict adherence to safety guidelines:
- Never Leave Melting Wax Unattended: Hot wax can reach dangerously high temperatures and is flammable. Always stay in the vicinity of your double boiler.
- Keep a Fire Extinguisher Handy: In case of a wax fire, a small fire extinguisher or a lid to smother the flames can be life-saving. Never use water on a wax fire, as it can cause it to spread.
- Work in a Well-Ventilated Area: Ensure good airflow to disperse any fumes from melting wax or fragrance oils.
- Use Proper Equipment: Always use heat-safe containers, pouring pitchers, and thermometers designed for crafting.
- Mind Your Temperatures: Adhere to the recommended temperatures for melting wax, adding fragrance, and pouring, as overheating can compromise the wax and create a fire hazard.
- Protect Your Work Surface: Lay down newspapers, parchment paper, or a silicone mat to protect your tables from wax spills and heat damage.
- Wear Protective Gear: Gloves and an apron are essential to protect your skin and clothing from hot wax. Eye protection is also highly recommended.
There you have it! A comprehensive overview of everything you need to assemble the perfect candle making kit. By gathering these essential tools and understanding their functions, you’ll be well-prepared to unleash your creativity and craft beautiful, aromatic candles right in your own home. Enjoy the process, and happy DIYing!
What other unique items do you find indispensable in your candle making kit? Share your tips and tricks with us in the comments section below!
UP NEXT:
- DIY Soy Candles | 15 Addictive Scents You Will Love
- Create A Prism Candle Light | DIY Mason Jar Crafts
- Bike Repair: 7 Common Problems And Fixes Without Going To The Shop
Calling all crafting DIYhards, DIY Projects needs YOU! Click here if you want to contribute for us.
Don’t forget to stay connected with us on Facebook, Twitter, and Instagram!