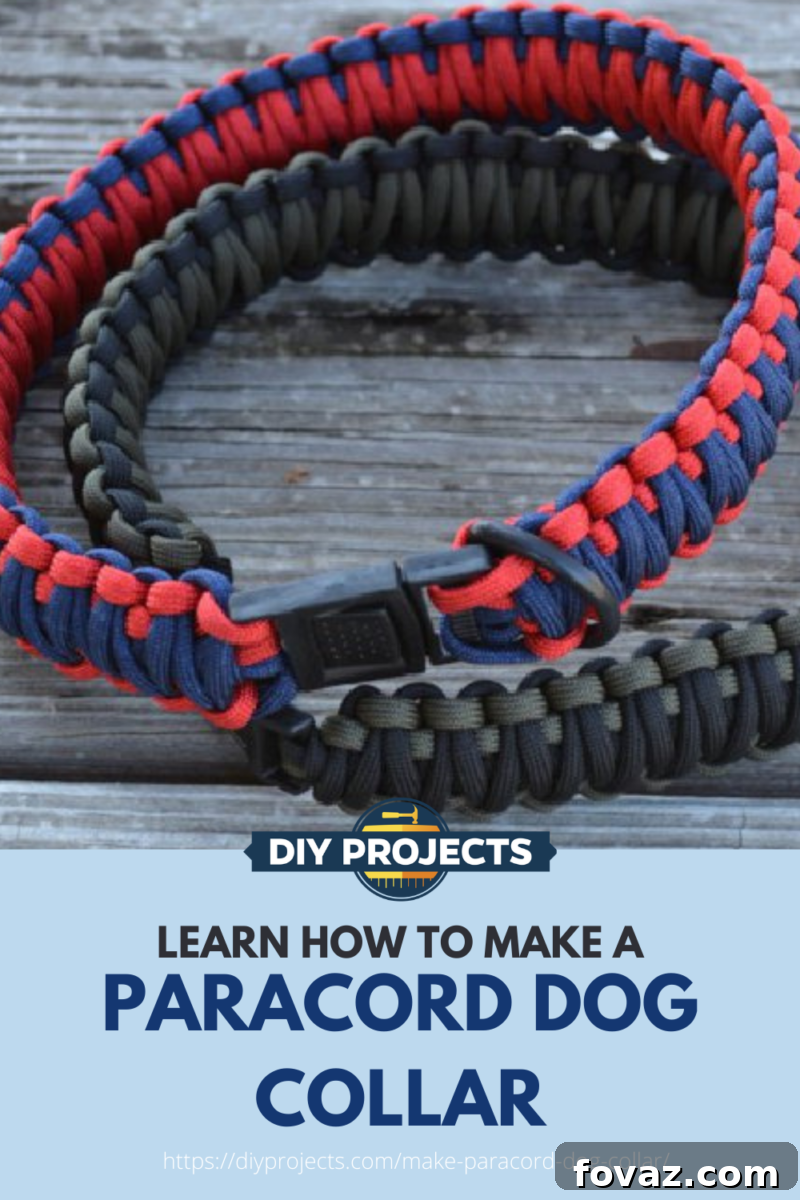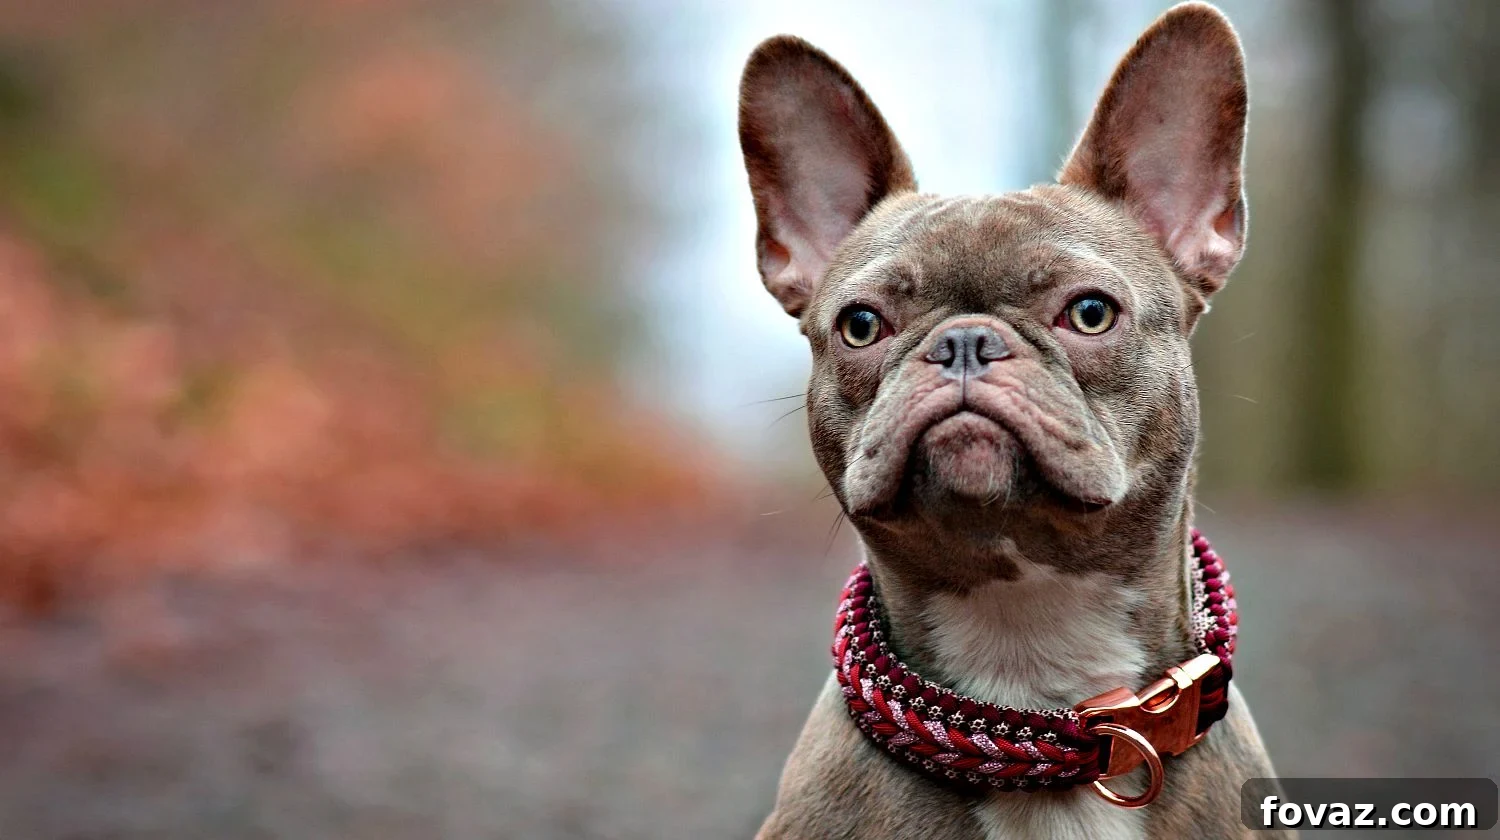
Crafting the Ultimate DIY Paracord Dog Collar: A King Cobra Weave Guide
Every dog owner knows that their furry companion deserves the very best. From the food they eat to the toys they play with, quality and durability are paramount. That’s especially true for something as essential as a dog collar. If you’re looking for a project that combines practicality with a personal touch, then learning how to make a paracord dog collar is an absolute must!
This comprehensive guide will walk you through creating a stylish, incredibly strong, and highly durable paracord dog collar using the robust King Cobra weave. Not only will you craft a collar that stands the test of time and adventure, but you’ll also create a unique accessory perfectly tailored for your beloved canine. Get ready to impress fellow dog owners and provide your best friend with a collar that’s as reliable as it is handsome.
RELATED: DIY Dog Crafts Man’s Best Friend Will Love
Why Choose a Paracord Dog Collar?
Paracord, or parachute cord, is renowned for its strength and versatility, making it an ideal material for pet accessories. A paracord dog collar isn’t just a fashion statement; it’s an investment in your dog’s safety and comfort. Here’s why a DIY paracord collar stands out:
- Unmatched Durability: Made from 550 paracord, these collars can withstand significant wear and tear, perfect for active dogs who love to explore.
- Weather Resistant: Paracord is naturally resistant to moisture, mildew, and rot, ensuring your collar stays in great condition even after wet adventures.
- Customization Galore: With an endless array of colors and patterns, you can design a collar that perfectly matches your dog’s personality or your preferred aesthetic.
- Comfort for Your Canine: The King Cobra weave, in particular, creates a thick, padded collar that distributes pressure evenly, making it more comfortable for your dog, especially on walks.
- Emergency Preparedness: In a survival situation, a paracord collar can be unravelled to provide a strong, multi-purpose rope for various uses.
Essential Materials You’ll Need
Before diving into the weaving process, gather all your supplies. Quality materials are key to a durable and safe collar for your dog. Pay attention to the length of paracord required, as it’s crucial for achieving the desired collar size. For a standard 20-inch collar, you’ll need approximately 1.5 feet of paracord for every inch of finished collar length. Adjust accordingly for smaller or larger dogs.
What You’ll Need:
- 550 Paracord: Approximately 19 feet of your primary color and 19 feet of a secondary color (totaling 38 feet for a 20-inch collar). Ensure you choose genuine 550 paracord for optimal strength.
- Plastic or Metal Buckle: A side-release buckle that is appropriately sized for your dog’s neck and the width of your finished collar. Metal buckles offer superior strength and aesthetics, while plastic ones are lighter and cost-effective.
- A D-Ring: A sturdy metal D-ring for attaching your leash and identification tags. Ensure it’s welded for maximum security.
- Lighter: Essential for melting and sealing the paracord ends to prevent fraying and secure joins.
- Sharp Scissors: For clean cuts of the paracord.
- Measuring Tape: To accurately measure your dog’s neck and the collar length.
Step-by-Step Guide: Crafting Your Custom Paracord Dog Collar
Let’s begin the exciting process of weaving your custom paracord dog collar. Follow these steps carefully to ensure a sturdy and beautiful result. Patience and attention to detail will be your best tools!
Step 1: Preparing and Joining Your Paracord
The foundation of your two-color paracord collar begins with securely joining your two pieces of cord. This creates a seamless transition and ensures uniform strength throughout the collar.
Start by trimming one end of each paracord color at a slight angle using your sharp scissors. This angled cut will help create a cleaner, stronger bond. Next, carefully use your lighter to melt the trimmed ends of both cords until they become soft and pliable. While the ends are still hot and melted, press them firmly together. Hold them in place for a few seconds until the plastic cools and solidifies, forming a strong, permanent bond. Always exercise caution when working with a lighter.
Step 2: Securing the Cord to the First Buckle Half
Now that your paracord is one continuous piece, it’s time to attach it to the first half of your buckle. This initial attachment sets the stage for the rest of your collar’s structure.
Fold the joined paracord in half, positioning the melted joint exactly at the fold. Take this loop and thread it through one of the slots on the female (adjustable) part of your chosen buckle. To secure it firmly, create a simple hitch knot: bring the two free ends of the paracord back through the loop you just threaded. Pull both ends of the cord tightly to cinch the loop snugly around the buckle, effectively securing the paracord to this end of the buckle.
RELATED: Easy DIY No Sew Dog Jacket
Step 3: Establishing the Collar Length
Accurate sizing is crucial for your dog’s comfort and safety. This step involves determining the final length of your paracord dog collar and securing the second buckle half accordingly.
First, thread the two free ends of the paracord through the corresponding slots on the male (fixed) part of your buckle. Now, carefully measure your dog’s neck. A good rule of thumb is to allow enough space for two fingers to fit comfortably between the collar and your dog’s neck. For demonstration purposes, we are creating a 20-inch collar, which is suitable for a large dog. Slide the male buckle piece along the paracord until the measured distance between the two buckle halves matches your desired collar length. Once the length is set, loop the ends of the paracord around the buckle slot one more time. Pull them taut to secure this end of the buckle, ensuring the length remains constant throughout the weaving process.
Step 4: Incorporating the D-Ring
The D-Ring is an essential component, providing a secure attachment point for your dog’s leash and identification tags. It needs to be positioned correctly before you begin weaving.
Slide your D-ring onto the two core strands of paracord, moving it up until it rests snugly against the male (fixed) buckle piece that you just attached and secured in the previous step. Ensure it’s facing the correct direction, with the opening of the ‘D’ facing away from the buckle, ready for leash attachment.
Step 5: Mastering the Cobra Weave
The Cobra weave is the fundamental pattern for this collar. It’s a strong, flat weave that forms the core of your paracord dog collar. Consistency in tension is key here for a uniform look and feel.
To begin the standard Cobra weave, identify your two core strands (the ones running between the buckles) and your two working strands (the free ends). Let’s assume your primary color is blue and your secondary is red for this explanation. Start on one side, say the left. Take the blue working strand and pass it over the two central core strands. Now, take the red working strand from the right side, pass it over the blue strand you just laid down, then bring it *under* the two core strands, and finally, up through the loop created by the blue cord on the left. You’ve created your first knot! Push the knot up towards the buckle with your thumb and pull both the blue and red cords firmly and evenly to tighten. This is critical for a tight, neat weave.
Now, repeat the step, but starting on the right side. Take the red working strand and pass it over the two core strands. Then, take the blue working strand from the left, pass it over the red strand, bring it *under* the two core strands, and up through the loop formed by the red cord on the right. Push up with your thumb and pull both cords to tighten. Continue alternating sides (left start, then right start, then left start, and so on) until you’ve woven almost the entire length of the collar, stopping just before the D-ring. Your knots should form a consistent, interlocking pattern.
Step 6: Securing the Cobra Weave Connection
Once you’ve woven the Cobra pattern down to the D-ring, it’s essential to secure the ends to prevent the weave from unraveling. This step provides a strong, clean finish to the initial layer of your collar.
Continue the Cobra weave until you reach the D-ring, ensuring the last knot is as close as possible to it. You might not be able to fit a full knot directly against the D-ring, so aim for snugness. Once the weave is complete, turn the collar over. Take the two working ends of the paracord and thread them through one of the slots on the male buckle piece. Pull the cords through firmly. This helps to lock the existing weave into place and prepares the collar for the next, more advanced weave.
Step 7: Advancing to the King Cobra Weave
If you’re familiar with paracord projects, you know the Cobra weave is popular. For this paracord dog collar, we’re taking it a step further with the King Cobra weave. This technique weaves back over the existing Cobra weave, creating a thicker, wider, and even more robust collar – ideal for larger dogs or for added comfort and strength.
The King Cobra weave uses the exact same knotting technique as the regular Cobra weave, but you’re now weaving *on top* of the existing Cobra weave, using the visible strands of the underlying weave as your new “core.” To maintain a consistent color pattern, start with the same color cord you began the original Cobra weave with. Let’s say you started with blue on the left. Repeat the process: take the blue cord, pass it over the underlying blue weave. Then take the red cord, pass it over the blue, under the underlying weave, and up through the blue loop. Pull firmly to tighten. This weave is incredibly strong and adds significant thickness and padding, making the collar exceptionally comfortable for dogs of all sizes.
As you weave, ensure each King Cobra knot sits snugly against the previous one and locks into place. You’ll feel it firm up as you tighten. Keep working your way down the collar, alternating sides just as you did with the initial Cobra weave. The key here is consistent tension and making sure the new knots fully encompass the previous layer, adding bulk and strength. Continue this pattern, pulling each knot tight, until you reach the D-ring. The added thickness will be visibly noticeable and tactilely firm.
Step 8: Completing the King Cobra Weave
Continue the King Cobra weave all the way down the length of your collar, aiming to get as close as possible to the D-ring. The goal is to cover the entire length of the initial Cobra weave uniformly with this second layer.
Work diligently, ensuring each knot is tight and evenly spaced. Make sure your final King Cobra knot sits snugly against the D-ring, leaving no gaps. This ensures a professional and secure finish to the main body of your paracord dog collar.
Step 9: Finalizing and Securing Your Collar
This final step is crucial for the safety and longevity of your handmade paracord dog collar. It involves securing the working ends to prevent unraveling and giving your collar a clean, finished look.
Once you’ve completed the King Cobra weave down to the D-ring, turn the collar over. Take the two remaining working ends of the paracord. Carefully thread these ends through a couple of the existing loops on the underside of the King Cobra weave. This will anchor the ends securely within the collar’s structure. You might need to use a pair of pliers or a fid to help push the cords through the tight loops. Thread them through at least two or three loops to ensure maximum security. This hidden threading ensures your collar won’t come apart, even during vigorous play or adventurous outings with your dog.
Once you’re satisfied with how securely the ends are threaded, trim the excess paracord close to the collar using your sharp scissors. Finally, use your lighter to carefully melt the trimmed ends and gently press them flat against the existing weave. This creates a neat, sealed finish that prevents fraying and keeps the collar looking tidy and professional. Take a moment to admire your new King Cobra Paracord Dog Collar!
The Enduring Benefits of Your Handmade Paracord Dog Collar
Beyond the satisfaction of a DIY project, your new paracord dog collar offers tangible benefits. It’s incredibly tough, designed to withstand the elements and the rigors of daily use. Its custom fit ensures comfort for your dog, while the vibrant colors allow for true personalization. This isn’t just a collar; it’s a testament to your dedication to your pet’s well-being and style.
Care and Maintenance for Your Paracord Collar
To keep your paracord dog collar looking its best and performing optimally, occasional cleaning is recommended. Paracord is easy to clean; simply handwash with mild soap and water, then air dry. Regularly inspect the buckle and D-ring for any signs of wear and tear, ensuring your dog’s safety remains a top priority.
Unleash Your Creativity: Customization Ideas
The beauty of a DIY project lies in its potential for customization. Experiment with different color combinations – team colors, holiday themes, or simply your favorite hues. You can also integrate small beads or charms into your weave for an extra personal touch, making each collar truly one-of-a-kind. Don’t be afraid to try different paracord patterns once you master the Cobra and King Cobra!
Explore More Paracord Projects
Paracord’s versatility extends far beyond dog collars. Once you’ve mastered this craft, a world of other creative and practical projects awaits! Check out these other tutorials to continue expanding your paracord skills:
- Looking for a list of Cool Paracord Projects?
- Ever wonder how to make a snare trap?
- What about a monkey fist? How about a giant monkey fist?
- Here’s how to make a paracord keychain!
- You can even make belts with paracord!
- Also, just finished compiling our How To Make A Paracord Bracelet List!
Watch the Video Tutorial
Sometimes, seeing a project in action makes all the difference. For a visual guide to making a paracord dog collar, especially for medium and large dogs, check out this helpful video. It provides an excellent complement to our written instructions, offering another perspective on the techniques involved.
The video tutorial, much like our guide, demonstrates the process for a larger dog, resulting in a robust 20-inch collar. Remember, if your pup is smaller or larger, you can easily calculate the amount of paracord you’ll need with this simple rule: allow approximately 1.5 feet of paracord for every 1 inch of your desired finished paracord dog collar length. Always add a little extra for trimming and mistakes.
Final Thoughts & Share Your Creations!
You’ve successfully crafted a personalized, durable, and stylish paracord dog collar! This project is not just about making an accessory; it’s about investing time and love into something truly special for your canine companion. The waterproofing, resistance to rot, and the potential to recycle the cord for survival bracelets (should your dog ever outgrow it!) are just added bonuses.
Have you learned how to make a paracord dog collar? We’d love to see your creations and hear about your experience! Share your tips and tricks in the comments below!
UP NEXT:
- 21 DIY Dog Clothes And Coats You Should Make
- DIY Fabric Dog Collar | How To Make A Dog Collar
- 4th Of July Drink Recipes In Mason Jars To Mix At Home
Calling all crafting DIYhards, DIY Projects needs YOU! Click here if you want to write for us.
Don’t forget to stay connected with us on Facebook, Twitter, and Instagram!
Editor’s Note: This post was originally published on July 13, 2018, and has been updated for quality and relevancy.