
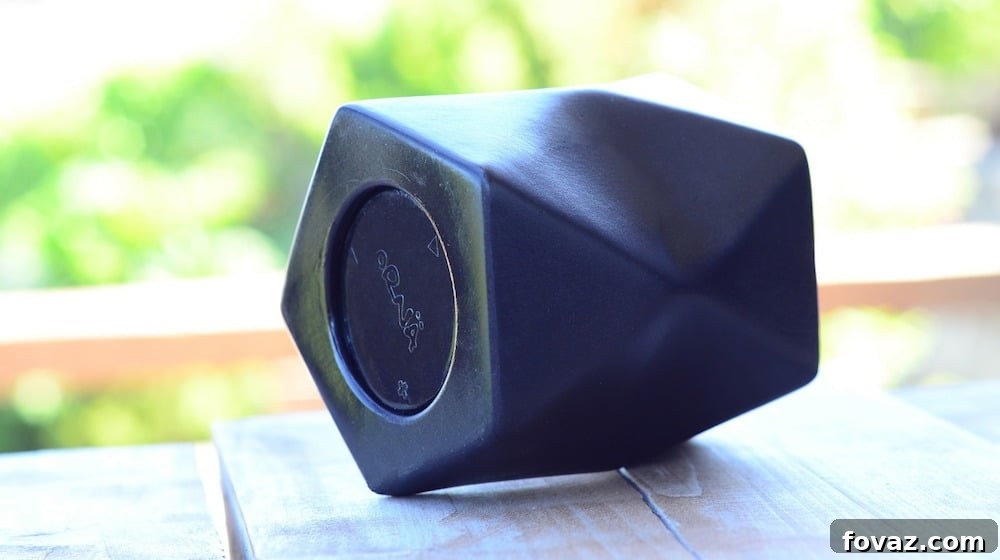
Transform your outdoor gatherings with the power of music! You might assume that a high-quality outdoor wireless speaker comes with a hefty price tag, but what if you could build one yourself for a fraction of the cost? This detailed DIY guide will show you how to construct your very own budget-friendly outdoor Bluetooth speaker, ensuring your guests are always entertained and your backyard becomes the go-to spot for good times. Get ready to enjoy your favorite tunes under the open sky without breaking the bank!
Build Your Own Budget-Friendly DIY Outdoor Wireless Speaker for Ultimate Backyard Entertainment
There’s nothing quite like enjoying your favorite playlists and podcasts while soaking up the sun or relaxing in your garden. For many of us, music is an essential part of daily life, and the desire for quality sound doesn’t stop at the threshold of our homes. However, portable outdoor speakers can often be expensive, especially those offering decent sound quality and wireless convenience. This is where the magic of DIY comes in. By embarking on this exciting project, you’ll not only save money but also gain the satisfaction of crafting a functional and personalized audio device.
Imagine hosting a barbecue, lounging by the pool, or simply working in your garden with a custom-built speaker broadcasting your preferred tracks. This project isn’t just about saving cash; it’s about creating a unique piece of electronics that perfectly fits your needs and style. Whether you’re planning a lively outdoor party, a relaxed evening with friends, or even pairing it with a DIY shoebox projector for a complete backyard cinematic experience, this homemade Bluetooth speaker is your ticket to enhanced outdoor entertainment. Let’s dive into the world of DIY audio and discover how accessible and rewarding building your own outdoor wireless speaker can be.
Essential Materials and Components You’ll Need:
Gathering your materials is the first crucial step in any DIY project. For this outdoor wireless speaker, we’re focusing on readily available and often recycled components, keeping the cost down while maximizing functionality. Here’s a comprehensive list of what you’ll need, along with some tips on sourcing:
- Wooden or Plastic Box: This will serve as the enclosure for your speaker components. A sturdy box is vital for protecting the internal electronics and ensuring good sound resonance. Wooden boxes often offer better acoustics, while plastic boxes provide superior weather resistance, making them ideal for outdoor use. Consider a size that comfortably fits all components and allows for future portability.
- Bluetooth Receiver Adapter with 3.5mm Output: This component is the heart of your wireless functionality. It allows your speaker to connect wirelessly to smartphones, tablets, or other Bluetooth-enabled devices. The 3.5mm output is essential for connecting to the audio amplifier. Look for one with decent range and stable connectivity.
- Audio Power Amplifier: A small, low-power audio amplifier (like a 2x3W or 2x5W class D amplifier module) is crucial for boosting the audio signal from the Bluetooth receiver to drive your speakers. Ensure it has appropriate power output for your chosen speakers and operates on a USB-compatible voltage (typically 5V).
- Old Speaker (or a pair) from an MP3 Player or Similar Device: Reusing speakers from old electronics is a fantastic way to save money and repurpose old tech. Ensure the speakers are in good working condition and their impedance (ohms) is compatible with your chosen audio amplifier. Two speakers will provide stereo sound, enhancing your audio experience.
- Female USB Plug: This will be the power input port for your speaker. It allows you to connect a standard USB charging cable to power the device, making it versatile for various power sources.
- Male USB Connector with Cable: This cable will be used to draw power from your chosen power source (like a USB charging adapter or power bank) and connect it to the internal components. You might need to cut and strip the wires from an existing USB cable.
- 3.5mm Stereo Jack with Cable: This cable will carry the audio signal from your Bluetooth receiver to the audio power amplifier. A standard auxiliary cable can be cut and repurposed for this.
- USB Charging Adaptor or Power Bank: This provides the necessary 5V power supply for your speaker. A power bank offers excellent portability for true outdoor freedom, while a wall adapter can be used for stationary setups.
- Dremel (Handheld Rotary Tool) or Similar Cutting Tool: Essential for precisely cutting holes in your chosen box for speakers, ports, and switches. A jigsaw, utility knife, or even a drill with appropriate bits can also be used depending on your box material.
- Hot Glue Gun and Hot Glue Sticks: Your primary adhesive for securing internal components, sealing gaps, and providing insulation. Ensure you have plenty of glue sticks on hand.
- Soldering Iron and Solder Wire: Necessary for making secure electrical connections between components. Basic soldering skills will be required.
- Wire Strippers: For safely stripping insulation from electrical wires.
- Small Screwdriver Set: Useful for any components that require tightening or loosening.
- Multimeter (Optional but Recommended): For checking continuity, voltage, and troubleshooting electrical connections.
Spend your days in technicolor with this *bright* idea 💡 Head on over to our site (link in bio) to find more DIY projects like this 💥💥💥 || 📷: @carnevale_studio
A post shared by DIY Projects (@diyprojectsdotcom) on
Step-by-Step Guide: How To Make Your Own Outdoor Wireless Speaker:
Step 1: Mark The Box for Component Placement
Before making any cuts, it’s crucial to plan the layout of your speaker components. Carefully position your chosen speakers on the exterior of the box where you intend them to be mounted. Use a pencil or marker to trace the outline of each speaker. Also, identify suitable locations for the USB power input, a potential power switch (if adding one), and any other ports. Ensure enough internal space for the amplifier, Bluetooth receiver, and wiring without crowding. This planning phase prevents mistakes and ensures a clean, functional design.
Step 2: Precisely Cut The Component Holes
With your markings in place, it’s time to cut the holes. Use your Dremel or another appropriate cutting tool (like a jigsaw for larger speaker holes or a drill for smaller ports). For the main speaker holes, cut slightly inside your marked lines to ensure a snug fit. For other ports, make sure the holes are just large enough for the components to pass through. Always wear safety goggles and gloves when operating power tools, and work in a well-ventilated area. Clean cuts are essential for both aesthetics and potentially for preventing sound leakage.
Step 3: Solder Wires to Your Speakers
After your holes are cut, prepare your speakers. Each speaker will have two terminals, usually marked for positive (+) and negative (-). Cut two lengths of speaker wire for each speaker, ensuring they are long enough to reach the amplifier when mounted inside the box. Carefully strip a small amount of insulation from the ends of these wires and the speaker terminals. Using your soldering iron, securely solder one wire to the positive terminal and the other to the negative terminal of each speaker. Pay close attention to polarity; consistent positive and negative connections are vital for correct sound reproduction. If your speakers aren’t marked, you might need to use a multimeter to identify polarity or simply be consistent with your wiring.
Step 4: Securely Glue The Speakers to the Box
Once the wires are soldered, mount your speakers into the holes you cut. Apply a generous bead of hot glue (or a more permanent adhesive like silicone sealant for better weatherproofing and sound isolation) around the rim of each speaker hole on the inside of the box. Carefully press the speakers into place from the outside, ensuring a tight seal. Hold them firmly until the glue sets. A good seal not only prevents the speakers from rattling but also improves the overall sound quality by preventing air leaks, which can degrade bass response.
Step 5: Solder The Power Supply Wires to the Amplifier
Now, let’s prepare the amplifier for power. Locate the power input terminals on your audio power amplifier (usually marked DC IN, VCC, or similar, with specific positive (+) and negative (-) indicators). Cut two wires of appropriate length from your male USB connector cable (you’ll typically use the red wire for positive and black for negative). Strip the ends of these wires. Carefully solder the positive wire from your USB cable to the positive power input terminal of the amplifier, and the negative wire to the negative terminal. Double-check your polarity to prevent damage to the amplifier.
Step 6: Connect Power Wires to the USB Female Plug
Next, we’ll connect the amplifier’s power input to the female USB plug, which will be your external power port. The male USB cable you just soldered to the amplifier’s power input needs to be connected to the female USB plug. Identify the positive and negative terminals on the female USB plug. Solder the positive wire from the amplifier’s power input (which is coming from the male USB cable) to the positive terminal of the female USB plug. Do the same for the negative wire. This creates a complete power circuit: external power source (via male USB cable) -> female USB plug -> male USB cable (internal) -> amplifier. Ensure these connections are robust and well-insulated with hot glue or heat shrink tubing.
Step 7: Connect The Bluetooth Module and 3.5mm Jack Cable to the Amplifier
This step involves connecting the audio signal path. Your Bluetooth receiver adapter will have an audio output (typically a 3.5mm jack or solder points for L/R/GND). Your audio amplifier will have audio input terminals (usually marked L/R/GND or IN+/IN-). Cut the 3.5mm stereo jack cable to the desired length. Strip the outer insulation to reveal the individual wires (typically left, right, and ground). Solder the corresponding wires from the 3.5mm jack cable to the audio output of your Bluetooth adapter. Then, solder the other ends of these wires to the audio input terminals of your power amplifier, matching left to left, right to right, and ground to ground. This ensures the sound signal from your Bluetooth device reaches the amplifier to be amplified and sent to the speakers.
Step 8: Initial Power Up and Testing
Before sealing everything inside the box, it’s critical to perform a test run. Plug your USB charging adapter or power bank into the female USB connector you installed. Power on the system (if your Bluetooth receiver or amplifier has a power switch). Your Bluetooth receiver should become discoverable. Pair your smartphone or other device with the Bluetooth speaker. Play some music at a low volume. Listen for clear sound from both speakers. Check for any static, buzzing, or lack of sound. If everything works as expected, you’re ready for the final assembly. If not, carefully troubleshoot your wiring, especially checking polarity and solder connections.
Step 9: Secure and Finalize Components Inside the Box
Now that your speaker is working, it’s time to neatly arrange and secure all components inside the box. Use plenty of hot glue to firmly attach the Bluetooth receiver, amplifier, and any loose wiring to the interior walls or base of the box. This prevents components from rattling around and getting damaged during transport. Ensure all connections are secure and well-insulated. For cables that need to exit the box (like the USB power input if it’s a permanently attached cable, or an auxiliary input), cut a small, neat gap at a corner or another discreet location on the box. Once everything is secured and tidy, you can close and seal your box, making sure it’s ready for the outdoors.
Your DIY Outdoor Wireless Speaker is Complete!
Congratulations! You’ve successfully built your very own DIY outdoor wireless speaker. Now, it’s time to fire up your favorite tunes, connect your device via Bluetooth, and let the good times roll. Whether you’re hosting a backyard bash, enjoying a quiet evening on the patio, or taking your music on a picnic, this portable, budget-friendly speaker will be your go-to for quality outdoor audio. Experience the immense satisfaction of listening to music from a device you created with your own hands.
Watch this insightful video from American Hacker for a visual walkthrough and more intricate details about this exciting project:
This project proves that you don’t need to spend a fortune to enjoy modern conveniences like wireless audio in the great outdoors. The joy of listening to your favorite songs while soaking in nature’s beauty is truly unparalleled, and now it’s accessible through your own ingenuity. Embrace the spirit of DIY, let your creativity flow, and discover the endless possibilities that come with building things yourself. Don’t forget to have fun in the process, and enjoy the fruits of your labor!
What are your thoughts on this innovative DIY outdoor wireless speaker project? Are you eager to build one for your next outdoor adventure or gathering? Share your intentions and any questions in the comments section below. We love hearing from our DIY community!
Looking for another exciting project to enhance your backyard experience? Why not explore this fantastic DIY projector screen guide and create the ultimate outdoor movie night right in your own backyard!
Stay inspired and connected with us for more exciting DIY projects and creative ideas. Follow us on Facebook, Twitter, Pinterest, and Instagram!
Editor’s Note – This post was originally published in August 2016 and has been thoroughly updated for enhanced quality, improved clarity, and relevancy, ensuring you have the best possible guide for your DIY speaker build.