
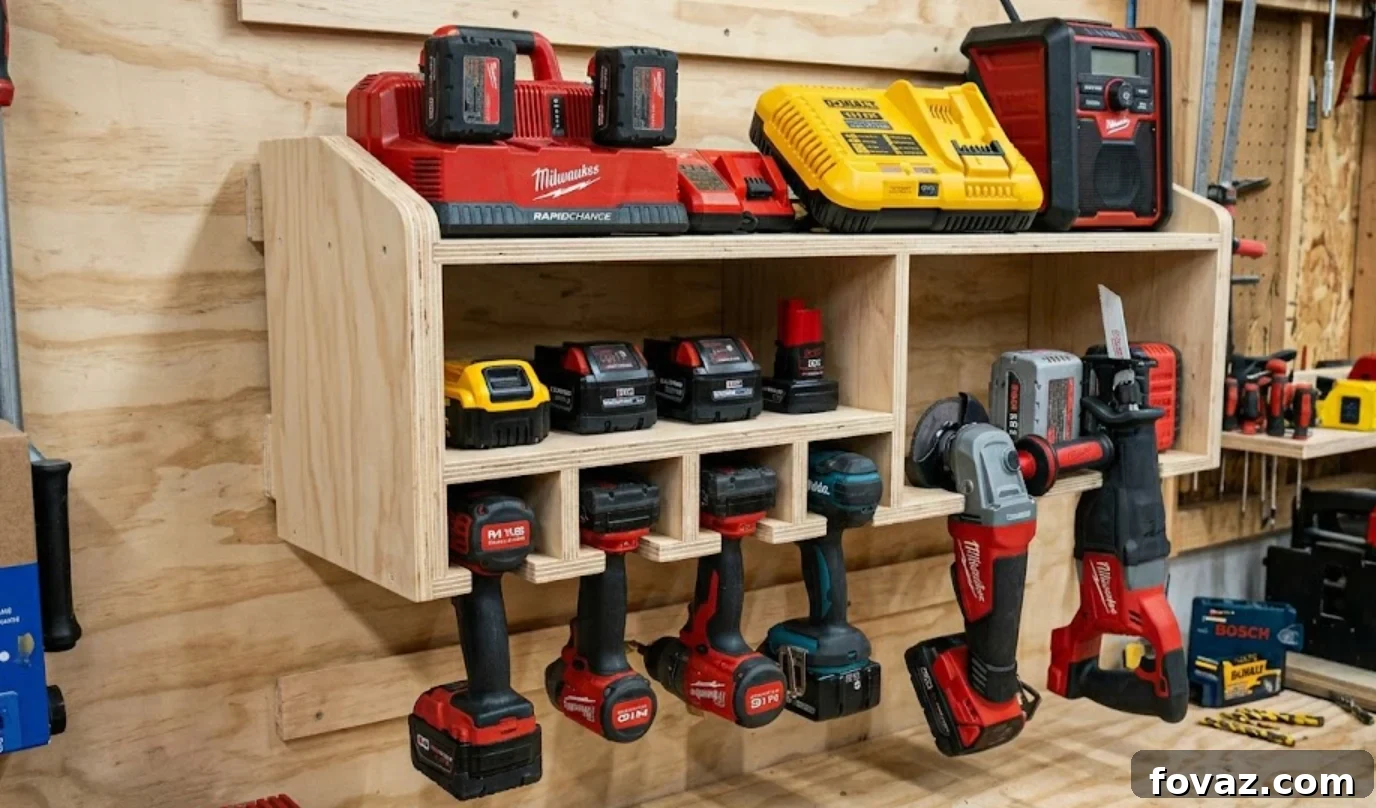
Build Your Own Cordless Tool Wall Rack: The Ultimate DIY Workshop Organizer with Integrated Charging
Are you tired of cluttered workbenches, misplaced drills, and dead batteries? A disorganized workshop can stifle creativity and productivity, turning simple tasks into frustrating hunts. The solution? A custom-built cordless tool wall rack. This comprehensive guide will walk you through creating an efficient, space-saving tool organizer that not only stores your drills and impact drivers securely but also features a dedicated, integrated charging station. Designed to be remarkably beginner-friendly, this project promises to transform your workspace in just a few hours, providing a tailored, accessible home for your essential power tools and keeping your batteries perpetually ready for action.
Project Overview: Custom Cordless Tool Wall Rack Storage at a Glance
This DIY project is perfect for anyone looking to bring order and efficiency to their workshop, garage, or even a utility closet. Taking approximately 3 to 4 hours from start to finish, it’s an incredibly rewarding and impactful build for its relatively low time commitment. You’ll spend an estimated $45–$65 on a single sheet of plywood and basic finishing supplies, making it a highly cost-effective storage solution compared to purchasing pre-made, less optimized options. The skill level required is genuinely beginner-friendly; if you possess the fundamental ability to confidently operate a circular saw for straight cuts and a power drill for fastening, you possess all the necessary skills to complete this project successfully. The impressive result is a robust, wall-mounted tool organizer featuring 4 precisely sized tool bays and a cleverly integrated charging shelf, ensuring your batteries are always topped off and your tools are always within reach.
RELATED: How to Build a Garage Pegboard Wall in Under an Hour
Understanding the Design: What You’re Building for Optimal Organization
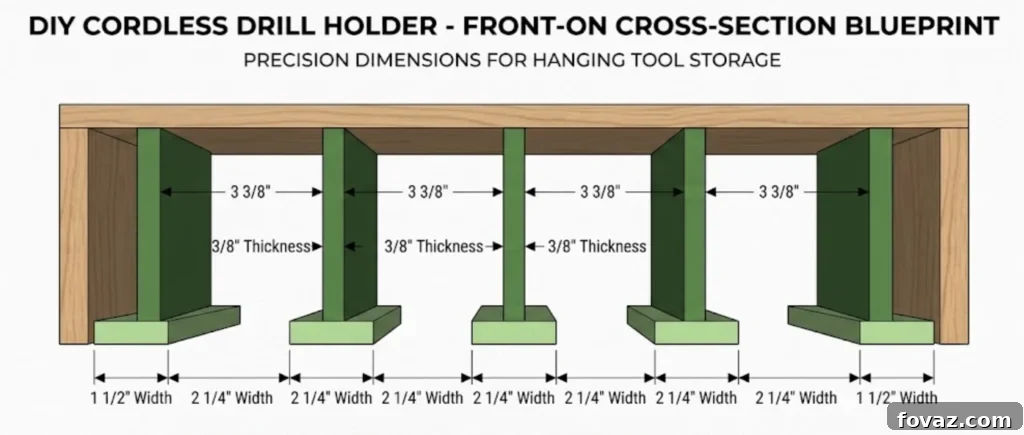
Picture a sleek, wall-mounted cabinet, meticulously designed with functionality at its core, specifically for your cordless power tools. The fundamental structure of this organizer is a robust box, cleverly engineered with two internal shelves. The true innovation of this design lies along the bottom shelf, where you’ll install a series of unique, upside-down “T” shapes. Each “T” is a two-part assembly: a flat, horizontal piece called the T-Spacer, which rests securely on the shelf, and an upright, vertical piece known as the Vertical Divider, which protrudes upwards. The precise and consistent gaps created between these upright Vertical Dividers are your dedicated tool slots; this is where your drills, impact drivers, and other cordless tools will hang securely, handle-down, ready for immediate use.
Above these perfectly sized tool slots, a second, upper shelf serves as your highly convenient and integrated charging station. This upper shelf will incorporate a discreetly placed hole in its back, specifically designed for your charger’s power cord to pass through effortlessly. This innovative cord management solution ensures that unsightly wires are kept hidden from view, maintaining a clean and professional aesthetic for your charging area. With this setup, your batteries can remain perpetually topped off, organized, and easily accessible, all without contributing to the usual clutter that often plagues workshop charging zones. In essence, you are constructing a perfectly optimized storage unit: a strong box frame, two strategically placed shelves, and five precisely crafted T-shaped dividers, all working in seamless harmony to organize and power your cordless tool arsenal.
Why Choose DIY? The Unrivaled Advantages of Building Your Own Cordless Tool Wall Rack
While the market offers various store-bought tool organizers that might initially seem like convenient solutions, they frequently come with significant compromises that can undermine their utility. Many commercial drill racks are mass-produced with generic, oversized 3-inch slots, marketed as being able to accommodate “any tool.” However, this universal approach often results in a frustratingly poor and loose fit for the vast majority of standard cordless drills and impact drivers. A 3-inch slot is simply too wide, leading to tools that wobble excessively, slide forward unexpectedly, and can even nose-dive onto your workbench or workshop floor, risking costly damage to both the tool and your workspace. This inherent lack of precision is a major drawback.
This DIY drill storage rack fundamentally solves this pervasive problem by employing a custom-engineered T-slat system. Our design features precise 2-inch wide slots, which are meticulously sized to snugly fit almost any standard drill or impact driver. This snug fit is absolutely crucial; it completely eliminates the frustrating wobble, forward sliding, and unwanted movement common with generic racks, providing secure and stable storage for your valuable tools. Whether your workshop is primarily powered by DeWalt, Milwaukee, Makita, Ryobi, or a diverse mix of all these popular brands and their various voltages (12V, 18V, 20V MAX), this rack’s dimensions are optimized for a truly universal yet incredibly secure fit, ensuring your tools stay exactly where you put them.
Beyond superior tool fit, this DIY project incorporates a highly functional, built-in tool charging station. This dedicated upper shelf, complete with a convenient cord grommet hole for impeccable cord management, transforms your storage solution into an active power hub. No more chargers scattered haphazardly across your workbench, creating tripping hazards, or tangled wires contributing to visual chaos. Your batteries can stay perpetually topped off, neatly organized, and always ready for immediate use, all within the clean, efficient confines of your custom rack. This dual-purpose design not only dramatically declutters your space but also significantly improves your workflow, saving you valuable time and preventing frustration by ensuring your tools and their essential power sources are always in their designated, accessible, and charged spots. Furthermore, choosing the DIY route allows for personalization of color and potential future expansion, offering a truly tailored workshop solution.
Essential Dimensions: Cordless Tool Wall Rack Slot Specifications for Precision Fit
The operational success and optimal tool fit of this wall rack hinge entirely on precise measurements, particularly concerning the dimensions of the tool slots and the overall structure. Understanding these critical dimensions ensures your tools fit perfectly and securely, preventing any movement, wobble, or potential damage to your valuable equipment. Here’s a detailed breakdown of the key numbers and a clear explanation of why each measurement is so important for the rack’s functionality and stability:
| Measurement | Dimension | Why It Matters |
| Slot width (the gap) | 2″ | This is the most critical dimension, engineered to fit standard drills and impact drivers from all major brands snugly, effectively eliminating wobble and ensuring a secure hold. |
| Bay spacing | 3″ center-to-center | This measurement defines the consistent distance from the center of one vertical divider to the center of the next. It ensures uniform and optimal spacing for individual tools, preventing overcrowding. |
| T-Spacer width | ½” | This is the precise thickness of the flat piece that forms the base of the “T” assembly. Its dimension is crucial as it directly contributes to creating the exact 2-inch gap between the vertical dividers. |
| Edge margin | 1½” | This refers to the essential space maintained from the very end of the bottom shelf to the first and last vertical divider. This margin is vital for providing structural integrity to the ends of the rack and contributes to its balanced aesthetic appearance. |
The carefully selected 2-inch slot width is a cornerstone of this design, specifically engineered to accommodate a vast array of popular cordless tool lines. This includes, but is not limited to, industry favorites such as DeWalt 20V MAX, Milwaukee M18, Makita LXT, Ryobi ONE+, and most compact 12V tool series available on the market. This broad compatibility ensures that the majority of users will find their standard drills and impact drivers fit perfectly. However, if your personal collection includes specialized, high-torque impact wrenches, angle grinders, or other power tools that feature noticeably bulkier bodies, fatter handles, or wider necks, it is always a prudent step to measure the widest part of your tool’s handle or body first. In such specific cases, you might judiciously consider widening one of your end slots to 2½ inches. This minor customization would ensure a perfect, custom fit for those larger, more specialized items, all while maintaining the snug and secure fit for your other standard tools within the remaining 2-inch slots.
Comprehensive Materials List for Building Your DIY Tool Rack
Building this robust and highly functional cordless tool wall rack requires a straightforward yet carefully selected collection of materials, primarily focusing on quality plywood and durable hardware components. We have optimized this list for both efficiency and affordability, ensuring you can achieve a high-quality finished product that is both sturdy and professional in appearance, all without exceeding your budget. Paying attention to material quality will directly impact the durability and longevity of your rack.
Plywood: The Essential Foundation of Your Rack
- 1 sheet ¾” × 2′ × 4′ Sande Plywood: This particular type of plywood is widely available and often conveniently sold as a “project panel” at most major home improvement stores. Sande plywood is specifically recommended for this project due to its relatively smooth face veneer, which makes it significantly easier to sand, prime, and paint, ultimately contributing to a much more professional and aesthetically pleasing finished appearance for your rack. The ¾” thickness is absolutely crucial as it provides exceptional strength, rigidity, and stability, which are paramount for reliably supporting the combined weight of multiple cordless tools, their batteries, and the charging unit.
Hardware: For Strength, Security, and Functionality
- 1¼” wood screws (box of 50): These medium-length wood screws are the primary fasteners used for the internal assembly of the plywood components. They are ideal for securely joining the various plywood pieces, creating strong and durable structural connections throughout the rack. A standard box of 50 screws provides more than enough for the entire project, allowing for a few spares.
- 3″ wood screws (4 screws for wall mounting): These longer, heavy-duty wood screws are absolutely critical for securely mounting the finished rack to your wall studs. Their substantial length ensures deep penetration into the wooden studs behind your drywall, providing maximum holding power for the considerable combined weight of the rack and its fully loaded contents. Do not compromise on these.
- Wood glue: Essential for creating incredibly strong, durable, and long-lasting joints. When applied generously in conjunction with screws, wood glue creates a mechanical and chemical bond that is often stronger than the wood itself, ensuring your rack withstands the rigors of daily use and prolonged heavy loads without weakening.
- 1½” cord grommet (optional but highly recommended): This small yet significant detail provides a wonderfully clean, professional, and finished aesthetic for the charging shelf’s cord hole. Beyond aesthetics, it prevents the fraying of the plywood edge over time, protects the cord from sharp edges, and gives the integrated charging station a polished, well-thought-out look while efficiently managing and concealing charger cords.
Finish: Protecting and Personalizing Your Workshop Organizer
- Spray primer (1 can): Primer is a crucial preparatory step that ensures proper and uniform adhesion of your chosen paint, especially on plywood, which can be prone to uneven absorption due to varying wood grain densities. It creates a smooth, consistent, and sealed base, which is indispensable for achieving a professional-looking, streak-free final finish.
- Spray paint in your preferred color (2 cans): Select a color that complements your workshop aesthetic or personal preference. Spray paint offers an incredibly easy, quick, and efficient way to achieve an even coating over all surfaces of the rack. Typically, two cans provide sufficient coverage for two light, even coats, ensuring excellent color saturation, enhanced durability, and a vibrant, long-lasting finish.
Optional Upgrades: Enhancing Functionality and Day-to-Day Convenience
- Auto-off power strip: This smart and energy-efficient addition is a fantastic way to prevent “charger vampire draw” – the subtle but continuous consumption of power by many chargers even when batteries are full or not present. An auto-off power strip can intelligently detect when connected devices are fully charged or not actively in use, automatically cutting power to them. This not only saves energy, reducing your electricity bill, but also subtly extends the overall lifespan of your valuable cordless tool batteries by preventing unnecessary charging cycles.
- Paint pen for labeling slots: For the ultimate level of organization and immediate identification, a paint pen or a permanent marker allows you to clearly label each individual tool slot (e.g., “DRILL,” “IMPACT,” “DRIVER,” “MULTI-TOOL”). This seemingly simple upgrade dramatically improves workshop efficiency, making finding and returning tools intuitive, swift, and completely hassle-free, especially in a busy or multi-user environment.
Precision Cutting: Your Essential Cut List for Plywood Optimization
Accuracy in cutting your plywood components is absolutely paramount for the structural integrity, squareness, and overall aesthetic appeal of your cordless tool rack. This meticulously detailed cut list ensures you maximize your single sheet of ¾” × 2′ × 4′ Sande plywood while obtaining all necessary components with precise dimensions. Always remember to double-check all your measurements and confirm your blade kerf before making any cuts to prevent costly errors.
| Part | Qty | Dimensions | Notes |
| Back Panel | 1 | 24″ wide × 18″ tall | This forms the main structural backbone of the entire rack, providing robust stability and the essential surface for secure wall mounting. |
| Side Panels | 2 | 11″ deep × 18″ tall | These panels create the left and right walls of the rack’s enclosure, precisely defining its overall depth and total height. |
| Middle Shelf | 1 | 24″ wide × 10½” deep | This upper shelf is dedicated entirely to serving as the charging and battery storage area, strategically positioned for convenient access above your tools. |
| Bottom Shelf | 1 | 24″ wide × 10½” deep | This serves as the foundational base for your tools; all the T-slat assemblies, which securely hold your drills, will be attached to this shelf. |
| Vertical Dividers | 5 | 10½” deep × 5″ tall | These upright pieces constitute the vertical component of each “T” assembly, crucial for establishing the precise structure of your tool slots. |
| T-Spacers | 5 | ½” wide × 10½” long | These flat, narrow strips form the horizontal base of each “T” assembly and are critically important for defining the precise 2-inch slot width. |
A common and understandable question often arises regarding the cut list: Why do we need 5 vertical dividers if we’re only creating 4 tool slots? The logic behind this is quite straightforward and fundamental to creating distinct, separated bays. To delineate and create four individual gaps (which are your tool slots), you inherently require five dividing elements to define their precise boundaries and separation points. Think of it in simpler terms: if you wish to create four separate rooms within a larger space, you would require five walls to effectively divide and enclose each of those rooms. The five dividers in this design will define the precise start and end points for each of the four hanging bays, ensuring consistent, perfectly measured 2-inch spacing across the entire length of the rack, guaranteeing optimal tool organization.
Step-by-Step Construction Guide: Building Your Cordless Tool Rack with Confidence
Follow these detailed, easy-to-understand steps to meticulously assemble your cordless tool wall rack. Adhering to precision and exercising patience at each stage will ensure you construct a sturdy, highly functional, and aesthetically pleasing final product that will serve your workshop needs for years to come. Take your time, measure twice, and cut once!
Step 1: Accurately Cut Your Plywood Components
Begin your project by carefully breaking down your ¾” × 2′ × 4′ Sande plywood sheet into all the individual pieces specified in the detailed cut list. You can achieve this with maximum precision and clean edges using a table saw. Alternatively, a circular saw paired with a reliable straightedge guide (such as a clamped straight board or a factory-made saw guide) can yield excellent results. If you don’t own a table saw, remember that many home improvement stores offer cutting services; they will typically make the first few panel cuts on their large panel saw for free or a minimal charge. This can be especially helpful for achieving long, perfectly straight rip cuts on the larger pieces.
Special Note for Cutting the Narrow T-Spacers: The ½” wide T-Spacers require particular attention due to their narrow dimension. A table saw excels at this with a precise fence setting. If you are using a circular saw, carefully clamp a straightedge precisely ½” from your saw blade’s kerf line. As an alternative, and often the easiest method for beginners, ask the hardware store to rip a ½” wide strip from the edge of your plywood panel when they make your initial cuts. Once you have this strip, you can simply crosscut it into the five required 10½” pieces at home with ease. Before moving on to the assembly stage, take the crucial time to sand all cut edges thoroughly with 120-grit sandpaper. This step is not merely for aesthetics; it effectively removes any potential splinters, smooths rough spots, and significantly helps the paint adhere evenly and professionally in later stages, ensuring a high-quality finished appearance.
Step 2: Construct the T-Slat Assemblies for Tool Holding
The T-slat assemblies are the ingenious heart of your tool holding system, designed to cradle your cordless tools securely. Each assembly consists of two distinct plywood parts that, when expertly joined, create the iconic upside-down “T” shape:
- T-Spacer: This is the flat ½” wide strip, 10½” long, that will lay horizontally and be securely fastened to the bottom shelf.
- Vertical Divider: This is the 5″ tall piece, 10½” deep, that will stand upright from the T-Spacer, effectively forming the precise side walls of your tool slots.
Detailed Assembly Instructions for Each T-Assembly:
- Place one T-Spacer flat and stably on your workbench. Ensure it’s secure and won’t shift during assembly.
- Carefully locate the exact longitudinal center of the T-Spacer. Since it measures 10½” long, the precise center will be at 5¼” from either end. Mark this central point clearly with a pencil.
- Take one Vertical Divider and stand it upright on the T-Spacer. Crucially, align the 10½” edge of the Vertical Divider precisely with the center mark you just made on the T-Spacer. It is absolutely vital that the Vertical Divider is perfectly perpendicular (at a 90-degree angle) to the T-Spacer – visualize the perfect shape of an upside-down letter ‘T’.
- Apply a generous and continuous bead of high-quality wood glue along the entire joint where the bottom edge of the Vertical Divider meets the top surface of the T-Spacer. This glue is absolutely vital for creating a strong, long-lasting, and rigid bond.
- While holding the two pieces firmly and ensuring their alignment, drive two 1¼” wood screws through the bottom surface of the T-Spacer and up into the Vertical Divider. Ensure the screws are slightly offset from the exact center and spaced to provide maximum holding power without risking splitting the wood.
- Repeat this meticulous process for all five T-assemblies. Consistency in assembly here is paramount for ensuring uniform and functional tool slots across your entire rack.
Optional Improvement for Enhanced Tool Access and Ergonomics: Consider a small but impactful detail by beveling or lightly rounding the front edges of the T-Spacers. This can be easily achieved with sandpaper, a sanding block, or even a router equipped with a small round-over bit. This minor aesthetic and functional enhancement makes sliding tools in and out of their slots much smoother, reducing friction, preventing potential snagging, and generally improving the user experience.
Step 3: Assemble the Main Box Structure of Your Organizer
The sequence of assembly for the main box structure is critical to ensure squareness, stability, and a strong overall rack. Follow these steps carefully, using both wood glue and screws for each joint to create maximum strength:
- Lay the Back Panel flat on your workbench. This large piece will serve as the foundational backbone for the entire rack.
- Attach the two Side Panels to the left and right vertical edges of the Back Panel. Apply a generous bead of wood glue along the edges where they will meet. Secure each Side Panel by driving three 1¼” wood screws through the back panel and directly into the edges of the side panels. Ensure the Side Panels are perfectly flush with the back edge of the Back Panel and extend forward 11″ to define the rack’s depth.
- Now, it’s time to install the Bottom Shelf. Measure precisely 5½” up from the bottom inside edge of each Side Panel. Mark a clear, level line across the inside surface of both Side Panels at this exact height. This line accurately indicates where the top surface of your Bottom Shelf will sit.
- Apply wood glue generously to the ends of the Bottom Shelf where it will meet the Side Panels. Carefully align the Bottom Shelf with the marked lines. Drive two 1¼” wood screws through each Side Panel and into the ends of the Bottom Shelf, ensuring it is perfectly level and flush with your marks.
- Next, prepare for the Middle Shelf installation. Measure precisely 5½” up from the top surface of the already installed Bottom Shelf, along the inside of each Side Panel. Mark another clear, level line. This line accurately denotes where the bottom surface of your Middle Shelf will sit.
- Install the Middle Shelf using the identical technique: apply wood glue to its ends, align it carefully with the newly marked lines, and secure it with two 1¼” wood screws driven through each Side Panel into the ends of the Middle Shelf.
At this crucial point, you should now have a complete, robust, and perfectly square box structure, featuring two precisely spaced internal shelves. Your rack is now ready for the next stages of internal customization and the integration of its smart features.
Step 4: Prepare the Cord Grommet Hole for an Integrated Charging Station
Before proceeding with the installation of the T-slat assemblies, it is significantly easier and more precise to drill the necessary hole for your charger cord. This crucial step is what creates the seamless, integrated functionality of your charging station within the rack.
Select the appropriate tool for this task: either a 1½” spade bit or a hole saw. Both are effective, but a hole saw will generally provide a cleaner cut. Position the hole strategically in one of the back corners of the Middle Shelf. A good general placement that balances aesthetics and functionality is approximately 2 inches from the back edge of the shelf and 2 inches from one of the side edges. Before drilling, visualize where you plan to place your battery charger on the shelf and drill the hole accordingly to ensure optimal and discreet cord routing. This thoughtfully placed hole will allow the charger cord to drop neatly behind the rack, effectively keeping your charging area clean, organized, and completely free from visible and unsightly wires, contributing to a much tidier workshop environment.
Step 5: Install the T-Slat Assemblies for Consistent Tool Organization
This is arguably the most critical step for achieving perfect tool fit and consistent organization within your rack. The uniform width of your 2-inch tool slots depends entirely on the precise and careful installation of the T-slat assemblies. For this, a dedicated spacing jig is an invaluable aid. Take a scrap piece of plywood or wood and cut it to exactly 2 inches wide; this will serve as your essential spacer block, ensuring consistency.
Detailed Installation Sequence for T-Slat Assemblies:
- Begin by working from the left side of the Bottom Shelf. Measure exactly 1½” from the left interior edge of the side panel. Mark a clear pencil line on the shelf at this precise point.
- Take your first T-assembly (constructed in Step 2). Place it on the Bottom Shelf so that the left edge of its T-Spacer aligns perfectly with the 1½” pencil mark you just made. Ensure the Vertical Divider component is facing upwards, towards the Middle Shelf.
- Apply a strong, continuous bead of wood glue to the entire bottom surface of the T-Spacer. This, combined with the screws, will create an incredibly robust bond. Secure this first T-assembly to the Bottom Shelf by driving two 1¼” wood screws through the T-Spacer and firmly into the Bottom Shelf.
- Now, take your precisely cut 2-inch spacer block. Place it firmly and snugly against the right side of the Vertical Divider of the T-assembly you just installed. This spacer precisely defines the width of your first tool slot.
- Grab your next T-assembly. Butt its Vertical Divider snugly against the spacer block. Ensure the T-Spacer is correctly aligned on the shelf, running parallel to the front and back edges.
- Carefully remove the spacer block. Apply wood glue to the bottom of this T-Spacer and then secure it to the Bottom Shelf with two 1¼” wood screws, just as you did with the first assembly.
- Repeat this exact process for the remaining T-assemblies, consistently using your 2-inch spacer block between each Vertical Divider. This method ensures perfectly consistent 2-inch gaps for all your tools across the entire rack.
- When all five T-assemblies are successfully installed, you should find that you have approximately 1½” of margin remaining on the right side of the Bottom Shelf. This margin should mirror the left side, indicating accurate and symmetrical spacing throughout your installation.
Crucial Final Check: Before the wood glue fully dries and sets permanently, take a critical moment to inspect your work. You should now clearly see 4 distinct tool slots (gaps), and each should measure exactly 2 inches wide. If any gap appears uneven, too wide, or too narrow, carefully remove the screws and reposition the T-assembly before the glue sets permanently. This meticulous attention to detail at this stage will guarantee that all your tools fit perfectly and are organized flawlessly.
Step 6: Integrate Compact Battery Storage (Optional Enhancement)
For those who frequently utilize compact, stick-style batteries, commonly associated with 12V compact tools or some smaller 18V/20V MAX lines, adding integrated battery storage can be a highly valuable and space-saving enhancement. This simple modification keeps your smaller batteries readily accessible, neatly organized, and prevents them from cluttering your charging shelf.
On the left exterior Side Panel of the rack, drill two or three 1-inch holes. Space these holes approximately 3 inches apart vertically, ensuring adequate room for your batteries to slide in and out easily without binding. These precisely drilled holes will allow your compact batteries to slide in effortlessly and remain securely in place, effectively freeing up valuable surface space on your main charging shelf and adding another layer of intuitive organization to your workshop. You have the flexibility to adjust the number and spacing of these holes to perfectly suit your specific collection of compact batteries and your personal preference for accessibility.
Finishing Touches: Preparing Your Rack for Action and Aesthetic Appeal
Applying a protective and aesthetic finish to your cordless tool rack is a crucial step that not only protects the plywood from moisture, dirt, and wear but also gives it a professional, personalized look that complements your workshop. It is significantly easier and yields superior results to complete this entire finishing process *before* mounting the rack to the wall. This allows for full access to all surfaces and angles.
- Final Comprehensive Sanding: Before you even think about priming, conduct a thorough inspection of the entire rack. Identify and address any remaining rough spots, sharp edges, or visible glue squeeze-out. Lightly but completely sand all surfaces again with 120-grit sandpaper to ensure a perfectly smooth, uniform, and paint-ready surface. After sanding, meticulously wipe down the entire rack with a tack cloth or a slightly damp rag to remove every last trace of sawdust and debris. This step is critical for proper paint adhesion and a flawless finish.
- Priming for Perfection: Once thoroughly sanded and cleaned, apply one even, consistent coat of high-quality spray primer to all exterior and interior surfaces of the rack. Primer is crucial because it creates a uniform base for your paint, helps seal the porous plywood, and significantly ensures better adhesion of your topcoat, resulting in a more vibrant and long-lasting final color. Allow the primer to dry completely, typically 1–2 hours, or strictly as directed by the product manufacturer’s instructions, before proceeding.
- Painting Your Rack: Once the primer is thoroughly dry, apply two light, even coats of your chosen spray paint. Always apply the first coat thinly and allow it to dry to the touch before applying the second. The technique of applying multiple light coats is always preferable to one heavy coat, as this approach effectively prevents drips, runs, and ensures a much smoother, more durable, and professional-looking finish. Always ensure you work in a well-ventilated area, or outdoors if possible, during painting.
- Personalized Labeling (Optional but Highly Recommended): Once the paint is fully cured (allow at least 24 hours for proper curing), consider adding labels to your tool slots. Use a durable paint pen or a permanent marker to clearly designate each specific bay (e.g., “DRILL,” “IMPACT,” “DRIVER,” “MULTI-TOOL,” or even specific brands). This seemingly simple customization dramatically improves overall workshop organization and operational efficiency, helping you to quickly identify precisely where each tool belongs and reducing fumbling and wasted time in your busy workshop.
Secure Mounting: Installing Your Cordless Tool Wall Rack with Confidence
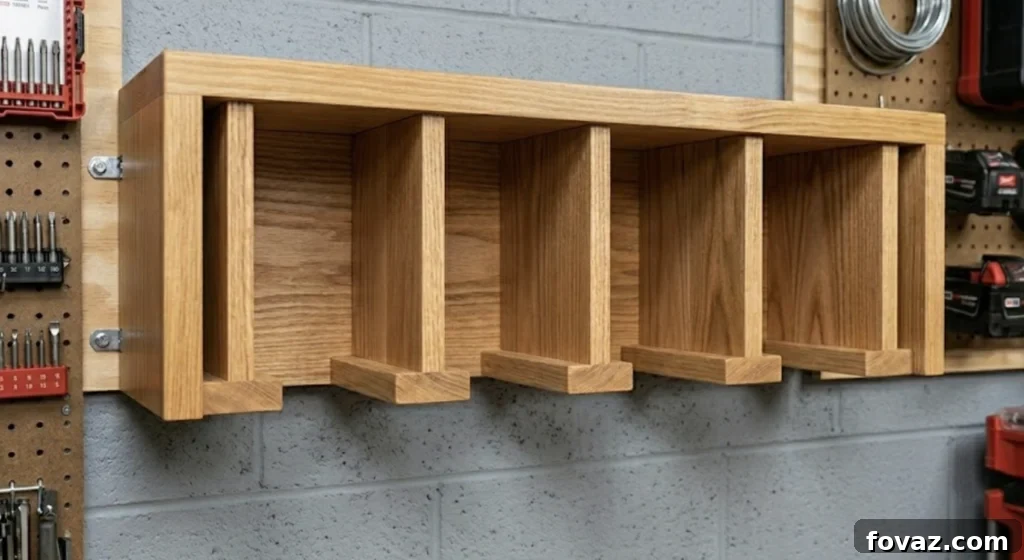
Mounting your completed tool rack securely to the wall is an absolutely critical step that cannot be overstated. A fully loaded rack, containing multiple cordless tools, several batteries, and a charger, can easily exceed 30 pounds, and potentially much more depending on your specific tools. For this significant weight, it is absolutely imperative to anchor the rack into at least two sturdy wall studs. Relying solely on drywall anchors, even heavy-duty ones, will almost certainly fail over time due to the constant stress and weight, risking severe damage to your tools, the rack itself, and potentially causing injury if it were to fall. Always prioritize stud mounting for maximum safety and stability.
Detailed and Secure Mounting Instructions:
- Locate Wall Studs: Using a reliable electronic stud finder, carefully locate at least two adjacent vertical wall studs in your desired mounting area. Mark the exact center of each detected stud clearly with painter’s tape or a pencil. Remember, wall studs are typically spaced either 16 or 24 inches on center in most residential construction.
- Position the Rack: Hold the finished rack against the wall at your desired, ergonomic height. It is highly recommended to have a helper assist you in holding it steady and perfectly level during this initial positioning. Alternatively, you can temporarily install a small wooden cleat or ledger board beneath the rack to support its weight while you mark and drive the first screw.
- Initial Fastening: Once positioned, drive one of the 3-inch wood screws through the Back Panel of the rack and directly into the precise center of one of the located wall studs. Do not tighten this screw completely at this stage; leave it slightly loose to allow for minor adjustments.
- Check for Level: With the first screw loosely in place, use a reliable spirit level to ensure the rack is perfectly horizontal. Gently adjust the rack’s position until it is absolutely straight and level.
- Secure Second Stud: Once confirmed level, drive a second 3-inch screw through the Back Panel into the center of the other located wall stud. This will lock the rack into its level position.
- Add Additional Screws for Maximum Security: For ultimate security and to effectively distribute the considerable weight evenly, drive two more 3-inch screws through the Back Panel. Ensure each additional screw also penetrates a wall stud. You should have a robust total of four 3-inch screws firmly anchored into the studs, creating a strong and reliable mount.
- Final Tightening: Once all four screws are securely in place and you’ve double-checked that the rack is perfectly level, go back and firmly tighten all screws until the rack is flush, completely immovable, and immovably secure against the wall.
Mounting Height Tip for Optimal Ergonomics: When deciding on the ideal height for your tool rack, always consider user ergonomics. A good rule of thumb is to position the rack so that your tool handles, when hanging in their respective slots, are roughly at chest height. This comfortable and accessible height makes grabbing and returning tools effortless, significantly reducing strain on your back and shoulders and improving overall efficiency in your workshop. It also keeps heavy items at a stable, easily reachable height, minimizing the risk of accidental drops.
Safety First: Important Considerations During Build and Use
Working with power tools, sharp cutting implements, and building materials inherently carries certain risks. It is absolutely crucial to adhere to essential safety practices at all times to protect yourself and anyone else in your workspace. Always prioritize your safety and the safety of those around you throughout every stage of this project, from cutting to mounting.
- Eye Protection is Non-Negotiable: Always wear certified safety glasses or goggles when operating any power tools (saws, drills), during sanding operations, or when driving screws. Flying wood debris, sawdust particles, and potential tool fragments can cause severe and permanent eye injuries.
- Hearing Protection is Essential: Power saws, especially circular saws and table saws, generate significant noise levels that can exceed safe limits for prolonged exposure. Always use appropriate hearing protection (such as earplugs or earmuffs) to prevent noise-induced hearing damage, which can be irreversible.
- Respiratory Protection for Dust: Plywood dust, particularly from cutting and sanding, can be very fine, airborne, and highly irritating to the lungs. Wear a certified dust mask or a respirator to protect your respiratory system from inhaling these fine particles. Work in a well-ventilated area to minimize dust accumulation.
- Adhere to Tool Safety Guidelines: Always meticulously follow the manufacturer’s safety guidelines and operating instructions for all power tools you use. Ensure that all safety guards are correctly in place and functional, that blades are sharp and appropriate for the material, and that tools are unplugged or batteries removed when changing blades, bits, or making any adjustments.
- Ensure a Stable Work Surface: Always perform cutting, drilling, and assembly tasks on a stable, level workbench or surface. Crucially, clamp your materials securely before cutting or drilling to prevent them from shifting unexpectedly, which can lead to inaccurate cuts or dangerous kickbacks.
- Secure Mounting is a Priority: As has been reiterated multiple times throughout this guide, ensure your completed rack is anchored exclusively and firmly into robust wall studs using the recommended long screws. Never, under any circumstances, rely solely on drywall for mounting, as it lacks the structural integrity to safely support the weight of multiple cordless tools and accessories over time.
- Electrical Safety: When setting up your charging station, ensure all electrical connections are safe and not overloaded. Use a power strip with surge protection.
Frequently Asked Questions About Your Cordless Tool Wall Rack
Here are detailed answers to some common questions that arise when building, customizing, and using your DIY cordless tool wall rack, helping you maximize its potential and ensure long-term satisfaction:
How much weight can this cordless tool wall rack safely hold once fully built and installed?
When constructed precisely as directed in this guide, utilizing ¾” plywood components, and most importantly, when securely mounted into at least two robust wall studs using the recommended 3-inch wood screws, this rack is engineered to safely and reliably hold 40+ pounds. This substantial capacity is more than sufficient for a full complement of 4 cordless tools (such as drills and impact drivers), their corresponding batteries, and a battery charger, providing exceptionally robust and reliable storage that will withstand years of heavy use without compromise.
Will the 2-inch slots truly fit my specific collection of cordless tools?
Yes, the precisely engineered 2-inch slot width is optimized to fit the vast majority of standard drills and impact drivers manufactured by all major power tool brands. This includes popular models from industry leaders such as DeWalt 20V MAX, Milwaukee M18, Makita LXT, Ryobi ONE+, and most compact 12V tool lines. The design prioritizes a snug, secure fit to effectively eliminate wobble and prevent tools from slipping. If, however, your personal arsenal includes a specialized, high-torque impact wrench, a larger angle grinder, or any tool with a particularly bulky body, wider handle, or larger neck profile, it is always the best practice to measure that specific tool’s widest point first. For such larger items, you have the flexibility to slightly widen one of your end slots to 2½ inches to ensure a perfect, custom fit for those bulkier tools, without compromising the snugness and security for your other standard tools within the remaining 2-inch slots.
Can I easily scale this design to make it larger and accommodate even more tools?
Absolutely! This intelligent design is highly adaptable and can be easily scaled up to accommodate a significantly larger tool collection. To increase capacity, simply extend the overall width of the Back Panel, Middle Shelf, and Bottom Shelf to your desired length. For instance, you could extend the width to 36 inches or even 48 inches to effectively double your storage capacity. When scaling up, remember to add more T-assemblies as needed, ensuring you meticulously maintain the critical 2-inch slot gaps and the 3-inch center-to-center spacing throughout the expanded design for consistent tool fit. You will, of course, also need to adjust your plywood material list to acquire a larger panel or additional sheets to match your expanded dimensions.
Do I absolutely need a table saw to successfully complete this project?
No, a table saw, while offering unparalleled precision for rip cuts, is not strictly necessary to complete this project. All the main cuts for this tool rack can be effectively and accurately achieved with a circular saw when paired with a reliable straightedge guide (such as a clamped straight board, a T-square, or a factory-made saw guide). For the narrower ½” T-Spacers, if you’re not entirely comfortable cutting them precisely with a circular saw due to their small size, the simplest and often best alternative is to ask your local hardware store to rip a ½” wide strip from your plywood sheet when you purchase it. They often provide this service for free or for a minimal charge. You can then easily crosscut this pre-ripped strip into the five required 10½” pieces at home with minimal effort.
What is the most effective and secure way to mount my battery charger to the shelf?
Most modern cordless tool battery chargers are thoughtfully designed with convenient keyhole slots located on their back panel, specifically for secure wall or shelf mounting. To effectively utilize these for your integrated charging station: first, accurately measure the exact center-to-center distance between the keyhole slots on your specific charger. Next, drive two pan-head screws into the back edge of your Middle Shelf (or just forward of the cord grommet hole), ensuring their spacing precisely matches the keyhole slots on your charger. The screws should protrude slightly. You can then simply slide the charger onto these screws, allowing the keyhole slots to securely engage and lock the charger firmly in place. This method ensures your charger won’t accidentally lift off, slide around, or become dislodged when you’re inserting or removing batteries, providing a stable, secure, and reliable charging station.
How can I prevent my cordless tool batteries from draining or degrading while stored in the rack?
Modern lithium-ion batteries, like those used in most cordless tools, are equipped with sophisticated built-in discharge protection circuits. This means they generally won’t “drain” themselves completely to zero while in storage. However, for optimal long-term battery lifespan and health, it is widely recommended by manufacturers to store them at a partial charge, typically between 30% to 50% capacity, rather than continuously at a full charge or completely depleted. If your charger is plugged into the integrated charging station, consider using an auto-off power strip (as mentioned in optional upgrades). This intelligent device can detect when a battery is fully charged or when no devices are actively drawing power, and it will automatically cut power to the charger. This smart feature effectively prevents the charger from continuously cycling or drawing “vampire power” unnecessarily, which can subtly extend battery life over time and reduce your overall electricity consumption. For very long-term storage (several months or more), it’s always best to remove batteries from the charger and store them in a cool, dry place at their recommended partial charge.