
Are you searching for the perfect solution to keep everyone cool and entertained as the temperatures rise? Look no further! This comprehensive guide will walk you through creating your very own DIY water blob – a fantastic, oversized water cushion that promises endless hours of laughter, bouncing, and splashing fun for the entire family. Forget expensive inflatable pools or crowded public spaces; with a few simple materials and our easy-to-follow steps, you can transform your backyard into a refreshing oasis that will be the envy of the neighborhood.
How to Make a DIY Water Blob: Your Ultimate Summer Backyard Project!
Summer is synonymous with sunshine, outdoor adventures, and, let’s be honest, finding creative ways to beat the heat. If you’re anything like us, you’re constantly on the hunt for engaging activities that don’t break the bank and deliver maximum enjoyment. This year, we’ve discovered the ultimate summer hack: the homemade water blob. It’s an ingenious, large-scale water mat that acts as a giant, bouncy, cool playground right in your backyard. Whether you’re entertaining toddlers, active school-aged children, or even looking for a unique spot to relax yourself, a DIY water blob is a game-changer for summer fun.
Our journey to the water blob began out of necessity. After a beloved plastic pool suffered an irreparable tear, we were faced with the choice of buying a new one or finding a more innovative, potentially more exciting alternative. A quick search online, heavily influenced by the creative power of Pinterest, led us to the brilliant concept of a water blob. It’s not just a replacement; it’s an upgrade! This project offers a unique sensory experience, encourages gross motor skills, and provides a truly memorable way to cool down. Ready to dive into making your own incredible water blob? Keep reading for all the details, expert tips, and safety tricks you’ll need to master this cool DIY project.
Why Make a Homemade Water Blob? The Benefits of Backyard Water Play
Beyond simply replacing a broken pool, a DIY water blob offers a plethora of advantages that make it an irresistible summer craft project. Firstly, it’s incredibly cost-effective. Compared to purchasing a new, large inflatable pool, the materials for a water blob are surprisingly affordable, making it a budget-friendly option for families looking for creative summer activities. Secondly, it provides a unique play experience. Kids aren’t just swimming; they’re bouncing, sliding, and rolling on a giant, squishy water pillow, stimulating their senses and encouraging imaginative play in a way a traditional pool cannot.
Moreover, the water blob is surprisingly versatile. You can make it as large or as small as your space allows, tailoring it to your specific needs. It’s also relatively easy to set up and, with proper care, can last for multiple play sessions throughout the summer. It promotes outdoor activity, reduces screen time, and creates lasting memories. Plus, it’s a fantastic conversation starter for neighborhood gatherings or playdates! Imagine the delight on your children’s faces when they see their very own giant water balloon ready for action. This homemade water blob is truly a testament to the fun you can create with a little DIY spirit and some simple materials.
Don’t Miss our special section on crafting Mini Water Blobs at the end of this post – perfect for younger children, sensory play, or even unique party favors!
What You’ll Need to Create Your DIY Water Blob: Essential Materials
Gathering your materials is the first exciting step in bringing your water blob to life. The good news is, most of these items are readily available at hardware stores, home improvement centers, or craft shops. For best results and durability, we highly recommend investing in quality materials, especially for the plastic sheeting, to ensure your homemade water blob provides lasting fun.
- Plastic Sheeting: This is the heart of your water blob. For a truly giant water blob, we highly recommend heavy-duty polyethylene plastic sheeting, specifically 10ft x 25ft with a 6.0 Mil thickness. The “Mil” refers to the thickness – 6.0 Mil is robust enough to withstand plenty of bouncing and play, significantly reducing the risk of tears and punctures. You can typically find this in the paint, landscaping, or construction section of most hardware stores. For smaller blobs, you can opt for thinner plastic or a smaller roll, but always prioritize durability.
- Duct Tape: A trusty roll of waterproof, heavy-duty duct tape is absolutely essential for reinforcing the final seal on your water blob. Choose a high-quality brand to ensure maximum adhesion and long-lasting durability, as this tape will be critical for containing the water.
- Parchment Paper: This non-stick paper is crucial for preventing your plastic from melting directly onto your iron. Standard kitchen parchment paper works perfectly. You’ll use it as a protective barrier during the sealing process, ensuring a clean and effective bond without damaging your iron or the plastic.
- Blue Food Coloring (Optional): While not essential for the function of your water blob, a few drops of blue food coloring will give your water blob a beautiful, inviting hue, reminiscent of a clear blue swimming pool. Ensure it’s food-grade and non-toxic, especially since children will be playing on it.
- Iron: Any standard household iron will do the trick. The most important features are a dry heat setting (ensure the steam function is turned OFF) and the ability to reach a high temperature for effective plastic sealing.
- Garden Hose: An indispensable tool for easily and efficiently filling your magnificent creation with plenty of water.
- Plenty of Water: The main ingredient for endless fun and cooling refreshment! Ensure you have access to a reliable water source.
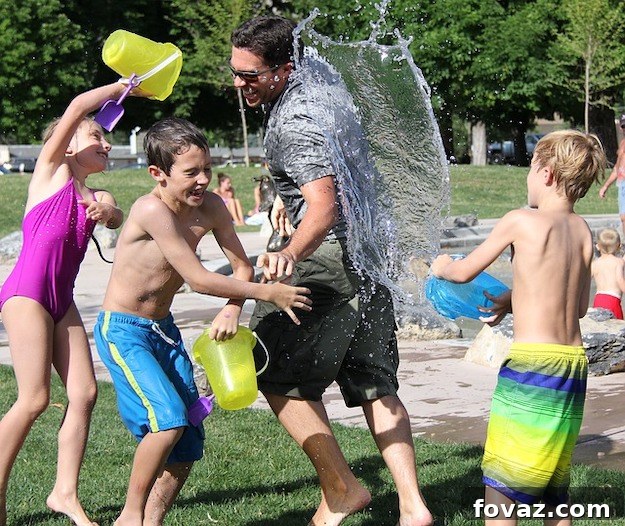
Before you begin, ensure you have a large, clean, flat, and clear surface to work on, such as a garage floor, a spacious patio, or a cleared section of your lawn. Good ventilation is also a good idea when working with heat and plastic, even though the fumes from ironing plastic sheeting are generally minimal.
Step-by-Step Guide: Crafting Your Perfect Water Blob for Ultimate Summer Fun
Step 1: Prepare Your Parchment Paper for Precise Sealing
Begin by taking a piece of parchment paper and folding it neatly in half. Next, draw a clear line about 2 inches away from the folded edge. This line will serve as your invaluable guide, helping you maintain a consistent and strong seal when you iron the plastic. This seemingly small preparatory step is vital for ensuring a professional-looking, durable, and leak-proof edge for your amazing homemade water blob.
Step 2: Lay Out and Fold Your Plastic Sheeting with Care
Unroll your large plastic sheeting and lay it out completely flat on your designated spacious workspace. It’s absolutely crucial to ensure there are no wrinkles, folds, or creases, as these imperfections can significantly hinder a proper and secure seal. Once laid out perfectly flat, carefully fold the plastic in half, aligning all the edges as precisely as possible. This meticulous folding creates the double layer of plastic that will eventually hold all the water. If you desire a smaller water blob, you have the option to cut your plastic sheeting to your preferred size *before* folding it in half.
PRO TIP: For a perfect, wrinkle-free fold, enlist the help of a second person. Work together to smooth out any trapped air bubbles or wrinkles as you fold, ensuring a flawless and even surface for the subsequent sealing process.
Step 3: Begin Ironing the Edges to Create a Strong Seal
Now comes the pivotal moment where the magic happens! Set your household iron to a high heat setting, making absolutely sure that the steam function is completely turned OFF. Carefully insert one of the plastic edges into your folded parchment paper, precisely aligning the plastic edge with the guide line you drew in Step 1. Slowly and steadily, begin to iron over the parchment paper. The concentrated heat from the iron will melt the two layers of plastic together, creating a robust, waterproof, and air-tight seal. Move the iron along the edge with firm, consistent, and even pressure. It’s paramount to be patient and work slowly and deliberately to ensure a complete and unbroken seal around the entire perimeter.
SAFETY FIRST: The iron will be extremely hot, and the plastic can become very warm during this process. Always exercise extreme caution. It’s a highly recommended practice to test a small, inconspicuous corner of the plastic first to get a feel for your iron’s specific heat and how the plastic reacts before tackling the main edges.
Step 4: Cool, Check, and Repeat the Sealing Process
After ironing a section, carefully remove the parchment paper. It is absolutely essential to allow the newly sealed plastic to cool down completely before touching it or moving on to the next section. This crucial cooling period is vital for the seal to properly set and bond. You should observe a slightly translucent, fused line where the two layers of plastic have successfully joined. Continue this careful process around three of the four edges of your folded plastic sheeting, effectively creating a large, open-top pouch or pocket for your water blob.
VISUAL CUE: A well-sealed edge will typically appear slightly darker or more opaque than the unsealed plastic, clearly indicating a successful and secure bond between the two layers.
Step 5: Create a Small, Convenient Opening for Filling
As you iron the final, fourth edge of your water blob, remember to intentionally leave a small opening – approximately 6-8 inches wide – unsealed. This precisely measured gap is where you’ll comfortably insert your garden hose to fill your magnificent water blob. To make it incredibly easy to locate this opening later, you might want to visibly label this opening with a permanent marker or temporarily place a small piece of painter’s tape nearby. Ensuring this opening is strategically placed (perhaps conveniently in a corner) will significantly simplify the entire filling process.
Step 6: Thoroughly Double-Check All Your Hard-Earned Seals
Once all edges are meticulously ironed (with the exception of your designated filling opening), it’s absolutely crucial to perform a comprehensive and thorough inspection. Carefully examine every single inch of your sealed edges for any missed spots, tiny gaps, or potential weak points that could compromise the integrity of your water blob. Holding the blob up to a strong light source can significantly help you spot any subtle imperfections. Even a minuscule pinhole can lead to frustrating leaks, so your attention to detail here is paramount. A perfect, strong seal is the ultimate key to preventing any unwelcome water gushes once the summer fun officially begins!
Step 7: Time to Fill Your Water Blob and Watch it Come to Life!
With all edges securely sealed and meticulously inspected, it’s finally time for the most exciting part: filling up your amazing DIY water blob! Carefully insert your garden hose into the small opening you purposefully left. Begin filling slowly and steadily, allowing the water to spread evenly throughout the blob. For a water blob of this generous size (approximately 10ft x 12.5ft when folded), it typically takes about 20-30 minutes to fill completely. Remember, the critical goal is not to fill it to its absolute maximum capacity. Overfilling can put excessive pressure on the delicate seams, potentially leading to unwanted bursts. Aim to fill it about two-thirds to three-quarters full. This specific fill level allows for optimal squishiness, perfect play, and ensures robust structural integrity for prolonged enjoyment.
IMPORTANT NOTE: Supervise the filling process very closely. As the blob fills, gently move the hose around inside to help distribute the water evenly and prevent the plastic layers from sticking together, ensuring a uniformly filled water blob.
Step 8: Add a Splash of Color (An Optional, Yet Highly Recommended Fun Touch!)
When your water blob is approximately halfway full, now is the absolutely perfect time to add a few drops of blue food coloring if you desire a vibrant and aesthetically pleasing touch. Simply squeeze the food coloring directly into the opening while the water is still actively flowing into the blob. The incoming water will naturally help disperse the color throughout the entire blob, creating a beautiful, inviting blue hue that truly enhances the visual appeal. This optional step truly elevates the visual charm of your homemade water blob, making it even more appealing and exciting for kids!
Step 9: Securely Seal the Opening and Let the Summer Fun Begin!
Once your water blob is filled to your desired level (remembering the two-thirds to three-quarters rule), carefully remove the garden hose. Immediately grab your trusty roll of waterproof duct tape. Take several long pieces of duct tape and firmly seal the remaining opening. Apply multiple layers of tape, pressing down very firmly to ensure a strong, completely waterproof closure. You want this final tape seal to be as robust and secure as the heat-sealed edges. After it’s thoroughly sealed, gently roll or maneuver the water blob a bit to ensure the internal water pressure helps to further secure and strengthen the tape adhesion.
And that’s it! Your magnificent homemade water blob is now fully ready for action and endless summer fun. Call the kids outside and watch their eyes light up with pure delight as they discover their new giant water playground. They’ll absolutely love jumping, rolling, sliding, and simply lounging on this cool, wonderfully squishy surface – the ultimate backyard summer attraction!
Water Blob Durability and Essential Safety Tips for Lasting Fun
Your DIY water blob will undoubtedly provide countless hours of enjoyment, but its lifespan largely depends on usage and diligent care. If the kids are particularly wild, or if the water blob is placed on a rough or abrasive surface, you might experience minor leaks or small punctures. Don’t worry, a roll of heavy-duty duct tape is your absolute best friend for quick and effective patch-ups! Simply apply a clean, generously sized piece of tape firmly over any small hole or tear. To maximize the longevity and enjoyment of your amazing water blob, consider these vital tips:
- Surface Matters Critically: Always place your water blob on a soft, perfectly flat surface such as a well-maintained lawn, a clean tarp, or a blanket. Absolutely avoid concrete, asphalt, gravel, or any areas with sharp stones, sticks, or other debris that could easily puncture the plastic.
- Avoid Sharp Objects at All Costs: Make sure to remind children not to bring any toys with sharp edges, pointy sticks, rough rocks, or anything else that could potentially puncture the plastic onto the water blob. Clear the play area of any potential hazards.
- Adult Supervision is Absolutely Key: Always, always supervise children, especially younger ones, when they are playing on or near the water blob. Ensure they play safely, adhere to ground rules, and do not engage in overly roughhousing or dangerous stunts.
- Mind the Sun Exposure: Prolonged exposure to direct, intense sunlight can significantly weaken the plastic material over time, making it brittle and more prone to tears. If possible, consider placing your water blob in a partially shaded area or cover it with a light tarp or blanket when it’s not in active use.
- Proper Drainage and Thoughtful Storage: When the fun for the day or season is over, you can efficiently drain the water blob by carefully reopening the taped seal or by carefully puncturing a small hole in a discreet corner. Once completely empty, thoroughly clean the plastic, let it air dry completely, fold it neatly, and store it in a cool, dry place for future summer use.
With these comprehensive precautions and diligent care in mind, you’re now fully equipped to enjoy your custom-made water blob all summer long, creating unforgettable memories for your family and friends!
Explore More Water Blob Inspiration and Creative Ideas!
To give you an even clearer visual of the entire making process, we highly recommend checking out this fantastic video tutorial. Seeing the steps demonstrated in action can often clarify any lingering questions you might have and boost your confidence in tackling this awesome DIY project!
We also absolutely adore the charming concept of mini water blobs! They are perfectly sized for party favors, engaging sensory play for toddlers and preschoolers, or simply as delightful individual cool-down stations. Our creative friends at HelloWonderful offer a brilliant and easy-to-follow tutorial on how to make them. They even show you how to stuff them with fun little plastic sharks for an extra whimsical and oceanic touch! Click here to learn how to create your own collection of mini water blobs and add another layer of versatile fun to your exciting summer activities and events.
Join Our Vibrant DIY Community! Share Your Water Blob Success!
We truly hope you thoroughly enjoyed our detailed and comprehensive tutorial on how to make a DIY water blob! This fantastic project is a testament to the fact that amazing summer fun doesn’t require a huge budget, just a little creativity, some basic materials, and a willingness to get hands-on. We’d absolutely love to hear from you!
What are your thoughts on this fantastic homemade water blob? Did you customize yours with different colors, glitter, or unique themes? Share your valuable experiences, helpful tips, and impressive photos of your creations in the comments section below! Do you have any other cool DIY projects or ingenious craft ideas that you’ve tried and loved? We’re always incredibly eager to discover new ways to get creative and would be thrilled to give your suggestions a try and feature them!
Our mission at [Your Website Name, if applicable, otherwise keep it general] is to inspire people to connect with their inherent creative side and realize the endless possibilities of DIY. We firmly believe that anyone can create wonderful things with their own hands, and we strive to build a vibrant, supportive community where sharing ideas and inspiration is just a click away. Stay connected with us for even more exciting DIY tutorials, inspiring home decor projects, ingenious upcycling ideas, delicious recipes, handy life hacks, and so much more! Follow us and become an active part of our growing community on Facebook, Twitter, Pinterest, and Instagram!