
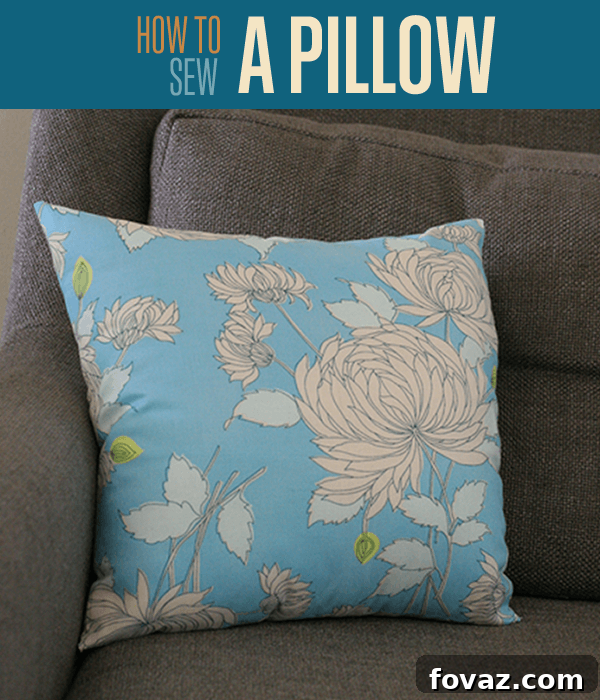
Have you ever walked through a home decor store, admiring beautiful throw pillows, only to be disheartened by their price tags? Many of us have experienced that moment, wishing we could bring those luxurious accents home without breaking the bank. The good news is, you absolutely can! Learning how to sew your own pillows is not only incredibly satisfying but also a fantastic way to infuse your living space with personalized style on a budget. Imagine stepping into a fabric store, surrounded by an endless array of textures, colors, and patterns, knowing that each selection can transform into a unique masterpiece for your home. This simple craft allows you to create stunning decorative pieces tailored precisely to your taste, often in less than 30 minutes per pillow.
This comprehensive sewing tutorial is designed to empower you, whether you’re a seasoned seamster or a complete beginner, to craft your very own bespoke throw pillows. Say goodbye to the limitations of store-bought options and embrace the freedom to design pillows of any shape, size, color, or pattern. You can even get creative by using two different fabrics for the front and back, offering versatile decorating options with a simple flip. Transform your rooms with custom-made pillows – an easy, affordable, and deeply rewarding handmade accessory that truly brings your personal style to life!
Unlock Your Creativity: Why Sew Your Own Pillows?
Beyond the sheer joy of creating something with your own hands, there are numerous compelling reasons to embark on your pillow-making journey.
Cost-Effectiveness
One of the most significant advantages of DIY pillows is the substantial cost savings. Pre-made decorative pillows, especially those with unique designs or high-quality fabrics, can be surprisingly expensive. By purchasing fabric and an insert separately, you can often create a custom pillow for a fraction of the retail price. This means you can achieve a high-end look without the high-end cost, allowing you to refresh your home decor more frequently and economically.
Unleash Personalization
The retail market, while vast, can still be limiting when it comes to finding that ‘perfect’ pillow to match your unique interior design vision. Sewing your own pillows offers unparalleled creative freedom. You are the designer! Choose fabrics that perfectly complement your existing furniture, wall colors, or seasonal themes. Experiment with different textures like velvet, linen, cotton, or even outdoor-friendly fabrics. This level of customization ensures that your pillows are not just decorative items, but true reflections of your personal style and aesthetic.
Satisfaction and Skill Building
There’s an undeniable sense of accomplishment that comes with making something beautiful from scratch. Each stitch, each perfectly pressed seam, contributes to a finished product you can proudly display. For beginners, this project is an excellent entry point into the world of sewing, teaching fundamental techniques like measuring, cutting, pinning, straight stitching, and hand-finishing. These foundational skills can then be applied to countless other sewing projects, opening up a new hobby or even a potential side hustle.
Sustainable & Eco-Friendly Decor
Sewing your own pillows also offers an opportunity to embrace more sustainable practices. You can repurpose old curtains, tablecloths, or even clothing into new pillow covers, giving new life to forgotten textiles. By choosing durable fabrics and creating long-lasting pieces, you contribute to reducing waste and promoting a more eco-conscious lifestyle.
Getting Started: Essential Supplies to Sew a Pillow Cover
Before you dive into the exciting world of fabrics and stitches, gather your materials. Having everything ready will make the process smoother and more enjoyable.
Watch our project video tutorial:
Supplies Needed to Sew a Pillow:
- Fabric: The star of your project! Choose a fabric that matches your desired aesthetic and durability. Consider factors like weave, texture, and care instructions. For a 14″ x 14″ pillow, a half-yard of fabric (which typically gives you 18″ in length and 45″ in width) is usually more than enough. Always aim to purchase fabric that is at least 1.5 inches larger than the final dimensions of your pillow on all sides to account for seam allowances and potential shrinkage.
- Pillow Insert: This is the inner cushion that gives your pillow its shape and fullness. Ensure the insert is the same size or slightly larger than your intended pillow cover for a plump, professional look. Common sizes include 14×14, 16×16, 18×18, and 20×20 inches.
- Sewing Machine: Any basic sewing machine capable of a straight stitch will work perfectly for this project. Familiarize yourself with how to thread it and operate the foot pedal.
- Sewing Kit Essentials:
- Thread: Select a high-quality polyester thread that matches the primary color of your fabric as closely as possible for a seamless finish.
- Pins: Essential for holding fabric pieces together before sewing. Ballpoint pins are great for knit fabrics, while sharp universal pins work well for most woven fabrics.
- Fabric Scissors: Dedicate a pair of sharp scissors specifically for fabric to ensure clean, precise cuts and prevent fraying.
- Thread Snips: Small, sharp snips are ideal for quickly trimming loose threads.
- Seam Ripper: Every sewist’s best friend! This tool is invaluable for carefully unpicking stitches if you make a mistake – and don’t worry, even experienced sewers use them!
- Iron and Ironing Board: Crucial for pressing seams open and ensuring a crisp, professional finish.
- Measuring Tape or Ruler: For accurate measuring of your fabric and pillow insert.
- Fabric Marker or Tailor’s Chalk: Useful for marking cutting and sewing lines on your fabric.
Step-by-Step Guide to Sewing Your Custom Pillow Cover
Step 1: Prepare Your Fabric with Precision
The first crucial step to a professional-looking pillow is preparing your fabric. Before you even think about cutting, lay your chosen fabric flat and press it thoroughly with a warm iron. This step is often overlooked but is absolutely vital. Any wrinkles, creases, or folds in the fabric can lead to inaccurate measurements and distorted cuts, ultimately affecting the shape and finish of your pillow cover. Take your time to ensure the fabric is perfectly smooth and flat from edge to edge. If your fabric is prone to shrinking, it’s also a good idea to pre-wash and dry it according to its care instructions before pressing. This prevents unexpected shrinkage after your pillow is complete.
Step 2: Measure Your Fabric for the Perfect Fit
Now that your fabric is pristine, it’s time to measure. Determine the exact dimensions of your pillow insert. You can usually find this information on the insert’s tag, or simply use a measuring tape to measure its length and width. For instance, if your insert is 14″ x 14″, you will need to cut your fabric larger to accommodate the seam allowance.
A standard seam allowance for home decor projects is 5/8 inch. You’ll need this allowance on all four sides of your pillow cover. So, for a 14″ x 14″ insert, your cut fabric piece will be:
- Width: 14″ (insert width) + 5/8″ (left seam) + 5/8″ (right seam) = 14″ + 1-1/4″ = 15-1/4″
- Length: 14″ (insert length) + 5/8″ (top seam) + 5/8″ (bottom seam) = 14″ + 1-1/4″ = 15-1/4″
Therefore, you would measure out a 15-1/4″ x 15-1/4″ square of fabric for your pillow cover. Use a ruler and a fabric marker or tailor’s chalk to clearly mark your cutting lines on the wrong side of the fabric. Accuracy here is key for a well-fitting cover.
Step 3: Precisely Cut Your Pillow Fabric
With your measurements marked, it’s time to cut the fabric. For the cleanest and most accurate cut, lay your fabric on a flat, sturdy surface. You have a few options for cutting tools:
- Fabric Scissors: Ensure they are sharp and used exclusively for fabric. Cut slowly and steadily along your marked lines.
- Rotary Cutter and Mat: This is highly recommended for straight lines, as it provides exceptional precision and speed. Use a clear ruler as a guide to ensure your cuts are perfectly straight.
- Pinking Shears: These scissors create a zigzag edge. While they don’t provide a perfectly straight cut, the jagged edge helps to prevent the fabric from fraying as you work, which can be particularly useful for loosely woven fabrics.
No matter which tool you choose, aim for clean, smooth cuts that follow your measured lines precisely. Any irregularities here can affect the final shape of your pillow.
Step 4: Pin the Sides Together for Sewing
Now you’re ready to assemble! Take your two pieces of cut fabric. Place them “right sides together,” meaning the side of the fabric you want to be visible on your finished pillow should be facing inward, touching the “right side” of the other fabric piece. Align the edges perfectly.
Using your sewing pins, secure the fabric pieces along three of the four sides: the right, left, and top edges. Insert pins perpendicularly to the edge, about 1 inch in from the edge and spaced every 1-2 inches. This will hold the fabric firmly in place as you sew. If you cut your fabric on the fold, you will only need to pin two sides, as one side will already be intact. Ensure all raw edges are aligned before pinning to prevent any shifting during sewing.
Step 5: Sew the Pillow Sides on Your Machine
With your fabric securely pinned, head over to your sewing machine. Start sewing along one of the pinned edges, using a 5/8-inch seam allowance. This means that as you sew, you should keep 5/8 of an inch of fabric to the right of your needle. Most sewing machines have markings on the throat plate (the metal plate under the needle) that indicate common seam allowances, typically in 1/8-inch increments. Align the raw edge of your fabric with the 5/8-inch mark.
Begin by backstitching a few stitches at the start and end of each seam to lock the stitches in place and prevent unraveling. Slowly guide the fabric through the machine, removing pins just before your needle reaches them. Continue sewing in a straight line down the first side, pivot at the corner, and sew down the second side, then pivot and sew down the third side. Remember to leave one entire side (the bottom) completely open. This opening is where you will insert your pillow form later. If your top side was also a raw edge (not on a fold), ensure you sew all three sides that are open, leaving only one for the insert.
Step 6: Press Pillow Seams for a Crisp Finish
After sewing, take your fabric back to the ironing board. Place the stitched fabric with the seam facing up. Carefully spread the seam open with your fingers, so the two seam allowances lay flat on either side of the stitch line. Then, press the seam open with a hot iron. This step is crucial for achieving a clean, professional finish and reducing bulk in the corners. Pressing the seams open helps the pillow cover lay flatter and gives it a sharper, more defined edge once turned right side out. Ensure you press thoroughly along the entire length of each seam you’ve sewn.
Step 7: Clip Corners to Eliminate Bulk
To ensure your pillow has perfectly sharp, crisp corners when it’s turned right side out, you need to clip the seam allowance at each corner. With the fabric still inside out, carefully snip off the excess fabric at a 45-degree angle, very close to the seam line but without cutting through the stitches. This removes bulk from the corners, allowing the fabric to push out completely when inverted. Repeat this for all sewn corners. This small step makes a significant difference in the final appearance of your pillow.
Step 8: Turn Right Side Out and Shape Corners
Now for the exciting part – seeing your pillow cover take shape! Gently turn the fabric piece right side out, pushing the “pretty” side of the fabric to the exterior. Once turned, carefully use your fingers or a point turner (a specialized tool for pushing out corners) to fully extend each corner. Aim for perfect 90-degree angles. If you don’t have a point turner, the blunt end of a pair of scissors or a chopstick can work, but be very gentle to avoid poking through your stitches. Ensure all seams are pushed out neatly and lay flat.
Step 9: Gently Stuff the Pillow Insert
With your cover fully formed, it’s time to introduce the pillow insert! Carefully push the insert into the open end of your pillow cover. Gently wiggle and manipulate the insert to ensure it fills all corners and edges of the cover, creating a snug and plush fit. Take care not to pull too hard on the seams of your cover, which could put stress on your stitching. The goal is for the insert to fill the cover completely, giving your pillow a smooth, firm, and well-stuffed appearance.
Step 10: Prepare the Bottom Opening for Hand Stitching
The final step in constructing your pillow is to close the open side. With the pillow insert now inside, hold the raw edges of the opening and fold the fabric inward by 5/8 of an inch on both the top and bottom edges of the opening. This creates a neat, finished edge that aligns perfectly with your existing seam allowances. Press these folded edges with your iron if needed, to create a sharp crease and make them easier to work with. This step ensures that your hand-stitched closure will be as invisible and professional as possible.
Step 11: Pin the Bottom Opening Securely Shut
Once you’ve folded the raw edges inward, carefully align the two folded edges, bringing them together to close the opening. Use your sewing pins to secure this closed edge. Place pins perpendicular to the fold, spaced every inch or so along the entire length of the opening. This will hold the fabric firmly in place while you prepare for the final hand-sewing step, ensuring that your closure remains straight and even.
Step 12: Prepare Your Needle and Thread
For this final closure, you’ll be hand-sewing with a slip stitch, which requires a single strand of thread. Select a sewing needle that is appropriate for your fabric thickness. Cut about 20 inches of thread – this length is manageable and reduces tangling. Thread your needle, pulling the thread through the eye, and then tie a secure knot at the very end of the single strand. A small, double knot works best to prevent the thread from pulling through the fabric. Using thread that matches your fabric color closely is essential for making the stitches virtually invisible.
Step 13: Initiate the Slip Stitch for an Invisible Closure
The slip stitch (also known as the ladder stitch or invisible stitch) is perfect for closing openings on stuffed items like pillows. To begin, insert your needle into one of the bottom corners of the opening, pushing it from the folded edge into the body of the pillow, and then bringing it out through the very edge of the fold. Pull the thread all the way through until the knot is nestled securely and hidden inside the folded seam allowance, out of sight. This starting point ensures a clean, invisible beginning for your stitch.
Step 14: Master the Art of the Slip Stitch
Now, continue with the slip stitch along the entire opening. The technique involves picking up a small stitch from one folded edge, then moving across to the opposite folded edge and picking up another small stitch. Imagine your needle as a small rabbit, playfully diving under the tunnels of fabric as it makes its way across a field.
- First, push your needle into the folded-under edge of the fabric on the left side, taking a small stitch (about 1/8 to 1/4 inch long) parallel to the fold.
- Pull the thread through.
- Now, bring the needle straight across to the right side, directly opposite where your thread just emerged. Insert the needle into the folded-under edge of the right side, again taking a small stitch parallel to the fold.
- Pull the thread through.
Continue this alternating pattern, picking up small stitches from each folded edge. As you pull the thread taut after every few stitches, the edges will draw together, and the thread will “disappear” into the fold, creating a nearly invisible seam. Maintain even tension and consistent stitch length for the best results.
Step 15: Securely Tie Off Your Slip Stitch
Once you’ve stitched across the entire opening and reached the opposite corner, it’s time to secure your work. To tie a knot, take a small stitch close to the final stitch, but don’t pull the thread all the way through. Instead, leave a small loop of thread. Pass your needle through this loop two or three times. Then, pull the needle through the loops and gently pull the thread taut, creating a secure knot. You can repeat this once more for extra security. After knotting, insert your needle into the seam allowance and push it out a few inches away, then snip the thread close to the fabric. This hides the tail of the thread within the pillow, leaving no visible ends.
Step 16: Display and Enjoy Your Beautiful New Pillow!
Congratulations! You have successfully mastered the art of sewing a pillow cover. Take a moment to admire your handiwork. Fluff your new pillow, place it on your sofa, bed, or favorite armchair, and revel in the satisfaction of creating a beautiful, personalized piece of home decor. This skill opens up a world of possibilities for customizing your living spaces, crafting thoughtful gifts for friends and family, and even exploring more complex sewing projects. Your home, and perhaps the homes of those you cherish, will soon be adorned with delightful, unique, and comfortable handmade accessories.
Elevate Your Pillow Game: Advanced Tips & Variations
Once you’ve mastered the basic technique, you might want to explore some exciting variations to further customize your pillows:
- Envelope Closure: For covers you want to easily remove and wash, an envelope closure is a fantastic, no-zipper option. This involves extending the back fabric into two overlapping panels.
- Zipper Closure: A more advanced technique, adding a zipper allows for a completely removable cover without any hand-stitching visible on the outside.
- Adding Piping or Cording: To give your pillows a professional, tailored look, you can sew piping into the seams. This adds a decorative edge and can highlight the pillow’s shape.
- Different Shapes: Don’t limit yourself to squares! Experiment with rectangular, round, or bolster pillows for added visual interest.
- Fabric Combinations: Use a luxurious velvet for the front and a durable linen for the back, or incorporate contrasting patterns for a truly unique piece.
- Embellishments: Add embroidery, appliques, buttons, or fringe for extra flair and texture.
Conclusion: Your Journey into Handmade Home Decor Begins Now!
Sewing your own throw pillows is more than just a craft; it’s an opportunity to inject personality, comfort, and unique style into your home. This project offers immense creative freedom, significant cost savings, and the deep satisfaction of creating something beautiful with your own hands. From selecting the perfect fabric to executing precise stitches, each step brings you closer to a piece of decor that is truly yours.
We hope this detailed guide has inspired and equipped you to embark on your pillow-making adventure. The skills you’ve gained here are foundational, opening doors to a wider world of sewing projects and handmade home transformations. Don’t hesitate to experiment with different fabrics, colors, and embellishments to create a collection of pillows that perfectly reflects your individual taste and enhances the comfort of your living space. Share your creations, inspire others, and continue to explore the endless possibilities of DIY decor.
Happy sewing, and enjoy the cozy, custom haven you’ve created!