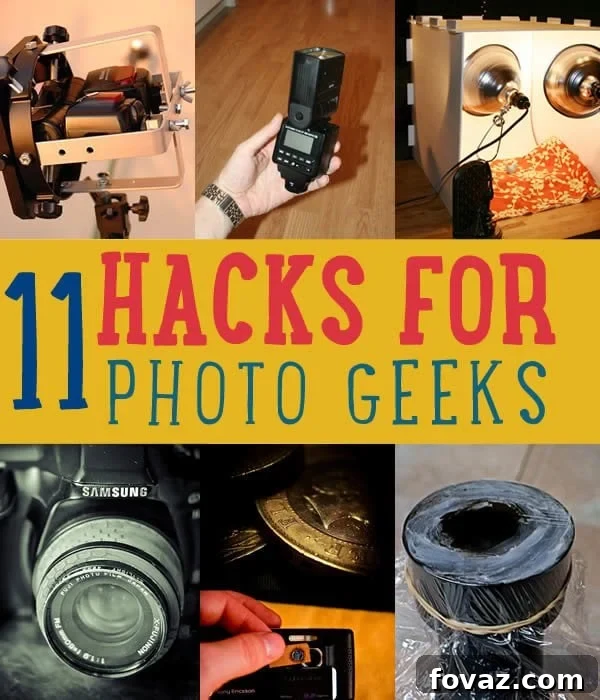
If you’re an Etsy shop owner, an aspiring entrepreneur selling crafts online, or managing an e-commerce store on any digital platform, you already know that a picture is worth a thousand words. But in the competitive world of online retail, a truly captivating product photo can be worth far more than that – it can be the difference between a browsing customer and a successful sale.
Imagine strolling down a bustling high street. Which shop instantly captures your attention and invites you in: the one with a beautifully curated window display, or the one with a cluttered, dimly lit, and unappealing storefront? Your product photographs serve as your virtual shop window, your primary opportunity to make a compelling first impression. Great, eye-catching images act as powerful magnets, drawing potential buyers in, while dark, blurry, or unprofessional shots can unfortunately push them away before they even consider your product’s quality.
The visual appeal of your products directly impacts customer perception, trust, and ultimately, your sales conversion rates. Recognizing the immense power of high-quality product photography in boosting online sales, we’ve compiled two invaluable tutorials. These guides will equip you with the knowledge to create stunning visuals for all your products, ensuring they stand out in a crowded digital marketplace.
- How to Construct a Professional-Grade DIY Light Box
- How to Edit Your Product Photos to Truly Make Them POP!
You’ll be delighted to discover that neither of these tutorials demands expensive, professional camera equipment. With a few simple, affordable materials and a willingness to learn, you can achieve professional-looking results right from the comfort of your home.
These expertly crafted, step-by-step tutorials were originally developed by Anna from The House of Mouse, an accomplished Etsy seller, and have been thoughtfully adapted and expanded for DIY Projects to benefit our wider community of makers and sellers.
SEE ALSO: How To Shoot Professional Looking Photographs At Home
Crafting Your DIY Light Box: A Comprehensive Step-by-Step Guide for Stunning Product Photography
A light box, sometimes referred to as a light tent or photo studio in a box, is an indispensable tool for anyone serious about product photography. Its primary function is to provide soft, diffused, and even lighting around your product, minimizing harsh shadows and reflections. This results in clean, professional-looking images that highlight your product’s details and true colors. Building one yourself is surprisingly simple and incredibly cost-effective.
Step 1: Selecting the Right Foundation – Your Box
The journey to perfect product photos begins with selecting the appropriate container. Opt for a sturdy cardboard box that is suitably sized for the items you intend to photograph. For smaller treasures like jewelry, charms, or miniature crafts, a box approximately 30cm (or 1 foot) wide, deep, and tall will suffice. This size provides ample space for your product and allows light to circulate effectively. However, if you’re showcasing larger items such as small handbags, apparel, or pottery, you’ll need to choose a significantly larger box to ensure your product fits comfortably without touching the sides, allowing for proper light diffusion and a clean background.
Step 2: Preparing Your Box – The Openings for Light
With your box chosen, it’s time to create the necessary openings. Carefully cut out the entire top of the box. Next, cut out the majority of the front panel, leaving a sturdy bar across the very top edge. This horizontal strip of cardboard is crucial; it helps the box maintain its structural integrity and provides a stable point to potentially attach light sources or diffusion material later. For even greater light penetration and diffusion, consider cutting out two additional square or rectangular openings on the side panels of the box. These side openings will later be covered with diffusion material, allowing light to enter from multiple angles, further softening shadows.
Step 3: Interior Lining – The Foundation of Brightness
The secret to a professional-looking light box lies in its interior. Line the inside of your box with plain white paper. This isn’t just for aesthetics; white surfaces are highly reflective and will bounce light around, ensuring even illumination of your product. For the backdrop, use a large single piece of white paper or cardstock. Crucially, create a gentle, continuous curve with this paper in the back horizontal corner of the box. This smooth, seamless transition from the back wall to the bottom surface eliminates any harsh lines or corners that would otherwise appear in your photographs, giving your product a floating, studio-quality look.
Step 4: Enhancing Reflectivity – Side Linings for Optimal Light Bounce
Don’t stop at just the back and bottom. It’s equally important to line the interior side panels of your light box with white paper. These additional reflective surfaces play a vital role in bouncing light around even more effectively. This technique maximizes the overall brightness within your light box, ensures consistent illumination from all angles, and helps to eliminate any lingering shadows that might detract from your product. The result will be exceptionally bright, evenly lit photographs that truly highlight your product’s features.
Step 5: The Perfect Backdrop – Choosing Your Canvas
To further avoid any distracting lines or textures in your photographs, it’s essential to use a large, single piece of material for your background. Anna, the creator of this tutorial, prefers a crisp white background for its versatility and ability to make colors pop, so she utilized a piece of A3 white card. However, the choice of background color is entirely yours! You can experiment with different colors that complement your product or brand aesthetic. Alternatively, if you prefer a softer texture or a different visual feel, you can use a smooth piece of fabric, ensuring it’s wrinkle-free.
Step 6: Securing Your Seamless Backdrop
Once you’ve chosen your backdrop material, carefully stick or pin it into place within your light box. The key here is to maintain the continuous curve from the back wall down to the bottom surface, as established in Step 3. This seamless curve is fundamental to achieving that professional, “infinity wall” effect, where the background appears to extend endlessly without a discernible horizon line. Ensure the material is taut and smooth, free from any creases or bumps that could create unwanted shadows or distractions in your final images.
Step 7: Illuminating Your Scene – The Optimal Light Source
For your light source, Anna highly recommends using two adjustable lamps equipped with daylight light bulbs. A wattage equivalent of 100 watts (often achieved with CFL or LED bulbs) will deliver excellent results. Daylight bulbs are paramount because they emit a color temperature that closely mimics natural sunlight, ensuring that the colors in your photographs are accurate and true-to-life. In contrast, regular yellowish incandescent bulbs can cast an undesirable warm tint on your products, distorting their true appearance. You’ll notice daylight bulbs appear slightly bluish when not illuminated. These specialized bulbs are readily available at most well-stocked electrical stores, home improvement centers, and even some art supply stores, as many painters utilize them for color accuracy.
Step 8: Optimal Light Placement for Shadow Elimination
Strategically arrange your two lamps on either side of your light box. Angle them inwards, pointing towards the product’s center. This two-point lighting setup is incredibly effective at eliminating harsh shadows, providing balanced illumination across your product, and revealing intricate details. If the lamp stands extend below your light box – as they often do – simply elevate your light box by placing it on a stack of books or a sturdy platform to ensure it sits level and stable. While some photographers might opt for a single lamp, Anna’s experience strongly suggests that using two lamps completely eradicates unwanted shadows and significantly enhances the visibility of your product’s finer details and textures.
Step 9: Observing the Light – A Visual Confirmation
Once your daylight bulbs are switched on and positioned, take a moment to observe the interior of your light box. You should clearly see the light bouncing and reflecting off the white interior surfaces in all directions. This abundant, diffused light is precisely what you’re aiming for. It creates a soft, enveloping glow that evenly illuminates your product from every angle, making it perfect for capturing bright, clear, and professional-grade photographs without any distracting hot spots or dark areas.
Step 10: Stability is Key – Setting Up Your Camera
For truly sharp, consistent, and professional-looking product photos, a tripod for your camera is an invaluable asset. If you possess one, set it up directly in front of your light box, ensuring your camera is perfectly level and stable. If a tripod isn’t yet part of your gear, consider adding one to your wish list for future photography endeavors! In the meantime, you can improvise by resting your camera on a stack of books, a sturdy box, or anything else that provides a stable, flat surface to prevent camera shake.
According to Anna, utilizing a tripod allows you to turn off your camera’s built-in flash – a crucial step for high-quality product photography. While a flash can sometimes provide extra light, it often creates harsh shadows, unpleasant glare, and unnatural colors. When the flash is off, especially in lower light conditions, any photographs taken handheld can appear shaky or blurry. A tripod eliminates this instability, ensuring your photos are consistently sharp, clear, and perfectly focused, capturing every detail of your handcrafted items.
Congratulations! Your DIY light box is now fully assembled and ready for action. Place your product gracefully inside, switch on your lamps, carefully arrange your camera (remembering to turn off the flash!), and start capturing those brilliant product photographs!
Transforming Your Images: Mastering Photo Editing for That “POP!”
Capturing your products within the perfect light box environment is a fantastic first step, but it’s often just the beginning of creating truly impactful imagery. Once you have your initial shots, a touch of post-processing in a photo editing program can elevate them from good to absolutely stunning. This refinement process allows you to correct minor imperfections, enhance brightness, improve contrast, and ensure your items truly shine and grab attention. While many excellent photo editing software options exist (e.g., GIMP, Affinity Photo, online editors), here we’ll primarily focus on utilizing the powerful “Levels” tool in Adobe Photoshop to brighten your photos and make your items truly stand out.
Step 1: Accessing the Power of Levels in Photoshop
To begin refining your image in Photoshop, navigate to the main menu bar. Click on the ‘Layer’ menu, then hover over ‘New Adjustment Layer,’ and from the submenu, select ‘Levels.’ A dialog box will appear; simply click ‘OK’ to open the Levels adjustment tool. This action creates a non-destructive adjustment layer, meaning you can always go back and tweak your changes without permanently altering your original image.
Step 2: Understanding the Levels Histogram
The Levels tool presents itself as a visual representation known as a histogram – a graph that displays the tonal range of your photograph, from the darkest shadows on the left to the brightest highlights on the right, with mid-tones in the center. Beneath this histogram, you’ll see three primary sliders: a black one for shadows, a gray one for mid-tones (gamma), and a white one for highlights. By manipulating these sliders, you can precisely control the brightness, contrast, and overall tonal balance of your image, allowing you to create various effects, including significantly lightening your photographs.
Step 3: Precision with the Droppers – Setting Your White Point
Below the histogram, you’ll find three small eyedropper icons positioned in the bottom right corner of the Levels tool. These are the “dropper” features, designed for precise color and tonal adjustments. The three droppers allow you to select the darkest point (black dropper), a neutral mid-tone (gray dropper), and the lightest point (white dropper) in your photograph. While all three have their uses, Anna emphasizes the effectiveness of the lightest one (the far right dropper) for quick brightening. Feel free to experiment with all three to understand their effects, but for a simple brightening, the white dropper is your key tool.
Step 4: Fine-Tuning with the White Dropper and Sliders
Select the white dropper tool. Now, carefully click it on what you perceive to be the lightest, purest white area within your photograph. This could be a white background, a highlight on your product, or a white element of the product itself. As you click, Photoshop will automatically readjust the image’s tonal range, bringing that selected point to true white and often dramatically brightening the entire photograph. You can continue clicking on different “lightest” areas until you are satisfied with the result. For instance, Anna would select the brightest part of her seamless background to achieve optimal white balance and overall image brightness.
Next, you can further refine your image using the sliders beneath the histogram. Click and drag the middle (gray) arrow, which controls the mid-tones, to the left to gently lighten your photograph even more, or slide it to the right to subtly darken it if needed. This mid-tone adjustment allows for nuanced control over the overall exposure without clipping your highlights or shadows.
Slide the middle arrow to the left to brighten the mid-tones of your photograph.
Or slide it to the right to make the mid-tones darker.
Once you are completely happy with your adjustments and the renewed vibrancy of your product, click “OK” to apply the Levels adjustment.
Step 5: Finalizing Your Masterpiece – Flattening and Saving
If you’re working with Photoshop and have created adjustment layers, you’ll need to “flatten” your image before saving it as a standard file format like .jpg. To do this, go to the ‘Layer’ menu and select ‘Flatten Image.’ This action merges all your layers into a single background layer. Now, your image is ready to be saved! Before saving, however, this is an excellent opportunity to make any final adjustments, such as cropping your image for better composition, resizing it for web optimization, or applying a subtle sharpen filter to enhance details. Always save a copy of your edited image, preserving your original capture. The transformation can be remarkable!
Take a look at the astonishing before and after photographs of Anna’s charming mouse cellist. The difference is truly astounding.
As you can clearly see, utilizing the precise adjustments available in Photoshop made a WORLD of difference, transforming a good photo into a truly dazzling product showcase!
Did you find our comprehensive tutorial on how to make a light box and effectively edit your product photos to make them shine insightful and helpful? We’d love to hear about your experiences and see your results! Please share your thoughts and questions in the comments section below!
At DIY Projects, we are passionate about fostering creativity and empowering individuals to explore their potential through hands-on projects. We love diving into cool DIY endeavors, whether it’s crafting unique items, enhancing home decor, transforming old objects into new treasures with upcycling ideas, discovering new recipes, or providing detailed tutorials for anything you can do yourself. This passion is the very foundation of our website. Our mission is to help people connect with their inner creative spirit and realize the vast array of possibilities within their grasp. We eagerly invite you to join our growing community of DIY enthusiasts, where inspiration and support are always just a click away. Stay connected with us and never miss out on new projects and tips by following us on Facebook, Twitter, Pinterest, and Instagram!
Looking for more ingenious DIY photography tips to elevate your craft? Then you absolutely need to check out…
11 DIY Photography Equipment Hacks to Transform Your Shots!