
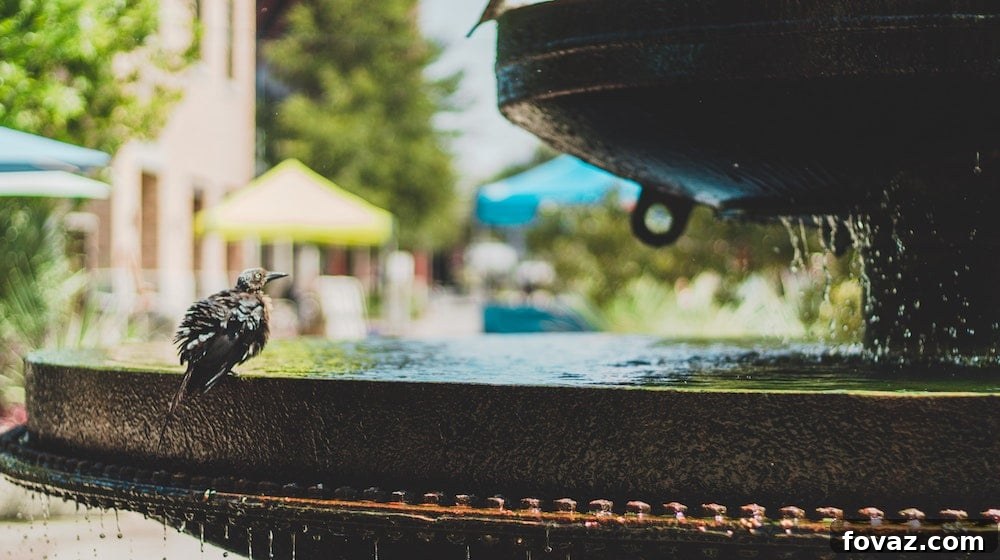
The gentle murmur of flowing water can transform any outdoor space into a tranquil retreat. While grand ponds may be out of reach for some, a charming backyard fountain offers an equally captivating alternative. These delightful water features are not just visually appealing; they also infuse your garden with soothing sounds and a sense of serenity. Imagine stepping into your backyard and being greeted by the peaceful cascade of water, instantly melting away the day’s stresses. A well-placed fountain becomes a focal point, drawing the eye and adding a touch of elegance to your outdoor living area. Beyond aesthetics, the movement of water can attract small birds, creating a lively and harmonious environment right outside your door.
Transform Your Backyard into a Serene Oasis: Build Your Own Two-Tier Fountain in 8 Easy Steps
Creating your own two-tier backyard fountain is a rewarding DIY project that’s much simpler than you might think. Forget about elaborate, expensive installations; with a few basic tools and supplies, you can construct a beautiful and functional water feature in just one weekend. This guide will walk you through the entire process, empowering you to add a unique, personalized touch to your outdoor landscape. Before diving in, take a moment to consider your available space and how your new fountain will integrate with your existing backyard landscaping. A two-tier fountain is an excellent choice for beginners, offering a classic aesthetic that complements a variety of garden styles.
Why Choose a DIY Two-Tier Backyard Fountain?
Opting for a handmade two-tier fountain comes with a host of benefits that extend beyond mere decoration:
- Enhanced Aesthetic Appeal: The multi-level design creates visual interest and a dynamic focal point in your garden. Water gracefully flows from the upper tier to the lower, creating a captivating display.
- Soothing Auditory Experience: The gentle splashing and bubbling sounds of water are naturally calming, helping to mask unwanted neighborhood noise and create a peaceful atmosphere perfect for relaxation or meditation.
- Attracts Local Wildlife: Fountains provide a much-needed water source for birds, butterflies, and other beneficial insects, turning your backyard into a lively mini-ecosystem.
- Cost-Effective Customization: Building your own fountain is often significantly more affordable than purchasing a pre-made one, allowing you to select materials and a design that perfectly fits your personal style and budget.
- Personal Satisfaction: There’s immense pride and satisfaction in creating something beautiful and functional with your own hands. This project is not just about the fountain; it’s about the joy of DIY.
- Versatility for Any Space: Unlike large ponds, a two-tier pot fountain is compact and can be placed on a patio, deck, or nestled within a garden bed, making it suitable for almost any size backyard.
Before You Start: Essential Planning and Considerations
A little planning goes a long way to ensure your fountain project is a success. Consider these points before gathering your supplies:
- Location: Choose a spot that is relatively level and has access to an electrical outlet for your pump (unless you opt for a solar pump). Consider visibility from your home and seating areas. Avoid placing it directly under trees, as falling leaves can clog the pump and dirty the water.
- Size and Scale: Ensure the size of your chosen pots complements the scale of your outdoor space. A fountain that’s too small might get lost, while one that’s too large can overpower the area.
- Material Choice: Ceramic pots offer a classic, elegant look. However, you could also use terracotta, glazed pottery, or even repurposed plastic containers, depending on your desired aesthetic and durability needs. Ceramic and glazed pots are generally more frost-resistant than unglazed terracotta.
- Water Source and Maintenance: Fountains require regular refilling due to evaporation and splash-out. Plan for easy access to a water hose. Consider how you will clean the fountain periodically to prevent algae buildup.
Tools You’ll Need:
This project requires minimal tools, making it accessible for even novice DIYers:
- Cordless Drill: Essential for drilling a precise hole in the plastic saucer to accommodate the pump tubing. Ensure you have appropriate drill bits suitable for plastic.
- Safety Glasses: Always wear safety glasses when drilling to protect your eyes from debris.
- Gloves: Protect your hands during handling of caulk and stones.
Supplies for Your DIY Fountain:
Gathering all your supplies beforehand will make the building process smooth and efficient:
- Two Ceramic Pots: You’ll need one larger pot for the base reservoir and one smaller pot for the upper tier. Ensure the smaller pot can comfortably sit on the plastic saucer and has a drain hole for the pump tube to pass through. Look for pots with existing drain holes in the bottom.
- Submersible Water Pump: Select a pump specifically designed for fountains. Consider its “GPH” (gallons per hour) rating; a higher GPH means more vigorous water flow. Most small fountains require a pump with a flow rate between 100-300 GPH. Ensure it comes with a long enough power cord.
- Rubber Drain Stoppers: These will be used to seal the existing drain holes in your large ceramic pot, turning it into a waterproof reservoir. Choose stoppers that fit snugly into the holes.
- Waterproof Caulk: High-quality silicone caulk or marine-grade sealant is crucial for creating a watertight seal around the drain stoppers. Opt for a clear or color-matching caulk.
- Plastic Saucer: This saucer will act as a stable platform for the upper pot and help distribute the water flow. It should be wide enough to support the smaller pot securely.
- Small Plastic Pot (approximately 7 to 8 inches): This pot will be inverted and placed at the bottom of the large ceramic pot to elevate the water pump, preventing it from sucking up debris and ensuring optimal water circulation.
- Decorative Stones or Pebbles: These serve multiple purposes: they hide the pump and tubing, reduce splashing, and add an aesthetic finish to your fountain. Choose smooth, non-porous stones.
- Optional: Fountain Nozzles: Many pumps come with interchangeable nozzles that create different water patterns (e.g., bell, mushroom, spray). You might want to explore these options for varied visual effects.
- Optional: Distilled Water or Fountain Treatment: Using distilled water can reduce mineral buildup, or you can use a commercial fountain treatment to prevent algae and mineral deposits.
Step-by-Step Guide: Building Your Elegant Two-Tier Fountain
Follow these detailed instructions to construct your beautiful water feature:
1. Prepare the Base Pot for Water Retention
Begin by ensuring your large ceramic pot can hold water without leaking. Locate the existing drain holes at the bottom of the pot. Firmly press the rubber drain stoppers into these holes from the inside of the pot. Apply a generous bead of waterproof caulk around the edge of each stopper, both where it meets the pot and along any seams. This creates a watertight seal. Allow the caulk to set according to the manufacturer’s instructions, typically for a few hours. Once dry, turn the pot over and apply another layer of caulk to the undersides of the stoppers for added security. It’s highly recommended to let this second application cure overnight to ensure a completely leak-proof reservoir.
2. Drill an Opening in the Plastic Saucer
Take your plastic saucer and determine its center. Using your cordless drill and an appropriate drill bit (check the diameter of your pump’s tube), carefully drill a hole in the exact center of the saucer. This hole needs to be just large enough for the pump’s water tube to pass through snugly. A clean, precise hole will ensure stability for the upper tier and a tidy appearance.
3. Position the Pump Elevation Pot
Place the smaller plastic pot upside down at the bottom of your large ceramic pot. This inverted pot acts as a stand, elevating your submersible water pump off the bottom. Elevating the pump prevents it from resting directly on the pot’s base, where sediment and debris tend to collect, which can clog the pump’s intake and shorten its lifespan. This also helps ensure consistent water flow.
4. Install the Submersible Water Pump
Carefully place your submersible water pump on top of the inverted plastic pot. Make sure the pump’s outlet tube, where the water will exit, is facing directly upwards. Gently uncoil the pump’s power cord and guide it discreetly over the rim of the large ceramic pot. Now, fill the large pot with water, pouring it slowly to avoid disturbing the pump. Fill it to a level just below the rim, leaving enough space to add your decorative stones without overflow.
5. Construct the Fountain’s Tiered Structure
With the pump in place and the large pot filled, it’s time to assemble the tiers. Carefully place the drilled plastic saucer on top of the large ceramic pot. Guide the pump tube through the hole you drilled in the saucer, ensuring it stands upright. Next, take your smaller ceramic pot and center it on top of the plastic saucer. Thread the pump tube through the drain hole of the smaller pot. Ensure both the saucer and the smaller pot are level and stable.
6. Attach Your Chosen Nozzle
Once the upper pot is in place and the pump tube is threaded through, it’s time to select and attach your fountain nozzle. Most submersible pumps come with a variety of interchangeable nozzles that produce different water patterns, such as a gentle dome, a bubbling effect, or a multi-stream spray. Choose the nozzle that best suits your aesthetic preference and firmly attach it to the end of the pump tube protruding from the smaller ceramic pot. Ensure it’s securely fitted to prevent leaks or dislodgement.
7. Enhance with Decorative Stones
Now for the finishing touches! Carefully place your chosen decorative stones or pebbles into both the large ceramic pot (around the inverted plastic pot and pump) and the smaller, upper ceramic pot (around the nozzle). Spread them evenly to cover the pump, tubing, and the plastic saucer. These stones serve to camouflage the internal workings of the fountain, reduce splashing, and add a beautiful natural element to the design. Choose stones that complement the color and texture of your ceramic pots.
8. Activate and Enjoy Your New Water Feature
With all components assembled and decorated, it’s time for the moment of truth! Double-check that all connections are secure and the pump’s power cord is safely positioned. Plug in the pump, and watch as water begins to circulate, flowing from the nozzle, cascading into the smaller pot, and then gracefully overflowing into the large base pot. Take a step back and enjoy the mesmerizing sight and soothing sounds of your brand-new, handmade two-tier backyard fountain!
Maintaining Your DIY Two-Tier Fountain for Lasting Beauty
To keep your fountain sparkling and functioning perfectly for years to come, follow these simple maintenance tips:
- Regular Water Level Checks: Water will evaporate, especially on hot or windy days. Check the water level daily or every few days and refill as needed to keep the pump fully submerged. Running a pump dry can cause serious damage.
- Cleaning: Periodically drain the fountain and clean the pots to prevent algae and mineral buildup. A mild bleach solution (diluted) or specialized fountain cleaner can be used, followed by a thorough rinse. Clean the pump’s intake filter regularly to ensure optimal flow.
- Winterization: If you live in a region with freezing temperatures, it’s crucial to winterize your fountain. Drain all water, clean the pots, remove the pump (store it indoors in a bucket of distilled water), and cover the pots or bring them indoors to prevent cracking due to ice expansion.
- Algae Prevention: Use an algaecide specifically designed for fountains if algae becomes a persistent problem. Alternatively, keeping the water circulating and out of direct, intense sunlight can help.
Customization Ideas and Advanced Tips
Your DIY two-tier fountain is just the beginning! Consider these ideas to further personalize and enhance your water feature:
- Add Lighting: Install submersible LED lights within the pots or around the fountain base to create a stunning nighttime display. Many small LED light kits are waterproof and easy to install.
- Incorporate Plants: For a lush look, place small potted aquatic plants (like water hyacinths or water lettuce) in the larger base pot, ensuring they don’t interfere with the pump. You can also surround the fountain with complementary terrestrial plants.
- Experiment with Materials: While ceramic is classic, explore options like weathered stone, copper, or even recycled glass for a unique aesthetic. Just ensure they are waterproof and durable.
- Solar Power Option: If you prefer to avoid electrical cords, consider investing in a solar water pump kit. These sun-powered pumps offer an eco-friendly alternative, allowing greater flexibility in fountain placement.
There you have it – a magnificent two-tiered backyard fountain, built entirely by your own hands! This project is a testament to the fact that creating beautiful garden features doesn’t have to be daunting or expensive. The satisfaction of enjoying a tranquil water display that you crafted yourself is truly unmatched. With a little creativity and a willingness to get hands-on, the possibilities for transforming your outdoor space are endless. Many avid DIY enthusiasts even tackle more complex projects like pondless fountains or continuous flow designs in a single weekend. Your new fountain is more than just a decoration; it’s an invitation to relax, reflect, and connect with nature in your very own backyard oasis.
For a visual guide to complement these steps, watch this helpful video tutorial from Lowe’s Home Improvement.
Click here for more inspiring DIY backyard projects.
Related DIY Projects to Inspire Your Outdoor Space:
A Simple Backyard DIY Pond Project For Beginners
This DIY Succulent Planter Will Make Walls And Gardens Look Beautiful
Simple And Easy DIY Vintage Teacup Planter For Your Indoor Garden
Featured image via thehappyhomebodies