
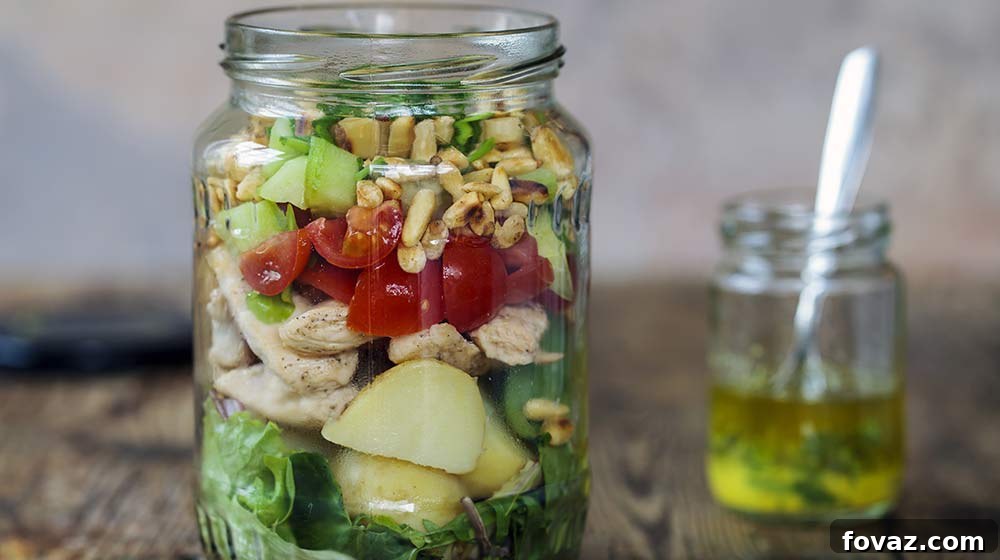
Are you striving to incorporate more fresh greens into your daily diet but often find yourself overwhelmed by the logistics of transporting a complete salad to work or school? The appeal of a vibrant salad often lies in its diverse array of textures and flavors – the crunch of nuts, the tang of dried berries, the creaminess of crumbled cheese. Yet, carrying multiple containers for each ingredient can be cumbersome, messy, and impractical for busy schedules. This common culinary dilemma now has a delightful and remarkably simple solution: the beloved mason jar salad!
Mason jar salads offer an ingenious, aesthetically pleasing, and highly practical alternative to traditional packed lunches. By strategically layering all your fresh ingredients within a single, airtight jar, you can effortlessly screw on the lid, tuck it into your bag, and enjoy a perfectly fresh and appetizing meal whenever hunger strikes. Say goodbye to soggy greens, inconvenient containers, and expensive takeout. Embrace the ease, health benefits, and delicious variety that mason jar salads bring to your daily routine.
Mastering Mason Jar Salads: Essential Basics for Perfect Layering
The secret to a truly outstanding and consistently fresh mason jar salad lies in meticulous layering. Following a specific order is paramount to ensure your salad ingredients remain crisp, vibrant, and delicious until the very moment you’re ready to eat. Think of it as constructing a miniature culinary masterpiece, layer by deliberate layer, where each component plays a crucial role in maintaining the salad’s integrity. Here are the fundamental “four commandments” to guide you in crafting impeccable mason jar salad recipes every time:
1. Start with the Dressing at the Bottom: This step is absolutely non-negotiable and forms the cornerstone of a successful mason jar salad. Pouring your chosen salad dressing—be it a vinaigrette, a creamy ranch, or a citrus-based concoction—into the very bottom of the jar creates a vital protective barrier. This crucial first layer guarantees that your more delicate vegetables and leafy greens don’t get prematurely soggy or wilted, ensuring they retain their delightful crunch and fresh texture when mealtime arrives.
2. Next, Add Hearty Grains, Proteins, or Chunky Vegetables: Directly above the dressing, layer your more robust and less absorbent ingredients. This could include a variety of cooked grains like fluffy quinoa, nutty brown rice, or tender pasta; substantial proteins such as grilled chicken, canned tuna, firm tofu, chickpeas, or hard-boiled eggs; or firm, non-absorbent vegetables like vibrant carrots, crunchy bell peppers, crisp cucumbers, or steamed broccoli florets. These ingredients act as a natural buffer, further shielding the more sensitive layers from the dressing’s moisture and maintaining the salad’s overall freshness and structural integrity.
3. Introduce Your Delightful Fixings and Toppings: This is where the magic of personalization truly happens and where you can add layers of flavor and texture! In this intermediate layer, strategically place smaller, drier ingredients that you want to keep separate from the dressing until serving time. Think flavorful crumbled cheese (feta, goat cheese, cheddar), various nuts (almonds, walnuts, pecans, cashews), dried fruits (cranberries, apricots, raisins), seeds (sunflower, pumpkin, chia), olives, pickled onions, or even a sprinkle of crunchy croutons. These elements contribute a wonderful array of textures and flavor complexities, staying perfectly dry and distinct until the moment you toss your salad.
4. Finally, Top with Leafy Greens and Delicate Herbs: Your freshest, most delicate components go in last, right at the very top of the jar. This ensures that your spinach, mixed greens, romaine lettuce, spring mix, or fresh herbs (like cilantro or parsley) remain light, airy, and completely un-mushed. By placing them on top, they are farthest from the dressing. When you’re ready to enjoy your meal, simply invert the jar into a bowl, and the greens will naturally cascade out, forming the perfect, crisp, and inviting base for your entire salad.
Embracing this golden layering formula is your ticket to consistently winning mason jar salads. This time-tested principle, in fact, applies to almost all salads designed for portability, guaranteeing a perfectly fresh and delicious bite with every forkful, every single time.
Unlock the Potential: Benefits and Tips for Amazing Mason Jar Salads
In our increasingly fast-paced world, the temptation to opt for convenient but often unhealthy fast food options for lunch is remarkably strong. However, making the conscious and proactive choice to pack your own lunch, especially in a mason jar, offers a multitude of invaluable benefits for your overall health, your personal finances, and even your daily peace of mind. Preparing your meals in advance empowers you to take full control over ingredients, portion sizes, and ultimately, your nutritional intake. And with the intuitive and aesthetically pleasing mason jar method, meal prep transforms from a tedious chore into an enjoyable and creative culinary endeavor.
Salad preparation should never be a source of stress or anxiety. These proven strategies and additional tips will make assembling your vibrant, healthy, and delicious mason jar salads an absolute breeze, ensuring success every time:
- Leverage Leftovers for Effortless Prep: Become a master of culinary efficiency by strategically planning your dinners with tomorrow’s lunch in mind. Ingredients like perfectly cooked rice, fluffy couscous, leftover pasta, hearty beans, nutritious lentils, grilled chicken, roasted vegetables, or baked salmon are excellent additions that provide substantial bulk and essential protein to your mason jar salads. Make it a regular habit to double your dinner portions; you’ll undoubtedly thank yourself when you have ready-to-go, pre-cooked components for a quick, healthy, and satisfying lunch the very next day.
- Adhere Strictly to the Layering Rules: As detailed in our “Mastering Mason Jar Salads” section above, correct and precise layering is the absolute cornerstone of preventing a soggy salad. Commit the four commandments of mason jar salad layering to memory – dressing first, then hard ingredients, followed by dry fixings and toppings, and finally, delicate greens – and you’ll consistently achieve perfect, fresh, and appetizing results that last for days.
- Embrace Advance Assembly for Stress-Free Mornings: The true beauty and convenience of mason jar salads truly shines when they are prepared ahead of time. Dedicate a small, focused window the night before work, school, or any busy day to assemble several jars. This proactive approach ensures you can simply grab a delicious, nutritious, and perfectly portioned meal from the refrigerator and head out the door without any morning rush, decision fatigue, or temptation to buy unhealthy alternatives. Procrastination often leads to unhealthy choices or simply forgetting your lunch entirely, so make advance preparation your new, empowering habit.
- Opt for Wide-Mouth Jars: While standard mason jars certainly work, investing in wide-mouth jars makes the layering process significantly easier and more enjoyable. They also facilitate much easier eating directly from the jar, if that’s your preference, or transferring the contents into a bowl with minimal fuss.
- Experiment with Variety to Keep Things Exciting: Don’t limit yourself to just one type of salad. The incredible versatility of mason jars allows for endless combinations of ingredients, flavor profiles, and culinary themes. Explore different cuisines (Mediterranean, Asian, Southwestern), seasonal produce, and a wide array of dressing styles to keep your lunches exciting, prevent meal fatigue, and discover new favorite combinations.
- Ensure Proper Sealing and Optimal Storage: Always ensure your mason jars are tightly sealed with their lids to maintain maximum freshness, prevent any leaks, and keep your ingredients crisp. Stored correctly in the refrigerator, most mason jar salads can last wonderfully for 3-5 days, making them an ideal and efficient solution for weekly meal preparation.
Discover Flavorful Mason Jar Salad Recipes That Are Lighter on Your Wallet
Why spend a fortune on restaurant lunches or expensive pre-made salads when you can effortlessly create gourmet-quality, delicious, and incredibly satisfying meals right at home for a mere fraction of the cost? These hand-picked mason jar salad recipes are not only budget-friendly but also packed with vibrant flavors and essential nutrients, making your midday meal something truly extraordinary to look forward to.
1. Deconstructed California Roll Salad
Craving the delicate, umami-rich flavors of sushi but want to avoid the expense of restaurant dining or the intricate fuss of rolling your own? This ingenious deconstructed California roll salad offers all the beloved tastes in an incredibly easy-to-assemble mason jar format. Layers of tender seaweed, perfectly seasoned rice, sweet and succulent crab meat, crisp cucumber matchsticks, and creamy, rich avocado come together to create a magnificent, satisfying salad that’s significantly more economical and convenient than its traditional restaurant counterpart.
- 4 whole 12-ounce mason jars (preferably wide-mouth for easier assembly)
- 2 cups white or brown rice (cooked according to package directions and cooled completely)
- 1 tablespoon rice vinegar
- 1 teaspoon granulated sugar
- 1 tablespoon soy sauce (consider low sodium for a healthier option)
- 2 ripe avocados (peeled, pitted, and diced into uniform, bite-sized chunks)
- 2 tablespoons fresh lemon juice (crucial for preventing avocado browning)
- 2 crisp cucumbers (peeled, seeds removed, and cut into small matchstick-sized pieces)
- 4 sheets nori seaweed (cut into small, manageable, bite-sized pieces)
- 1 cup lump crab meat (carefully picked over to ensure no shell fragments remain)
1. In a small saucepan, gently heat the rice vinegar and sugar over medium-low heat, stirring continuously until the sugar has completely dissolved. Avoid boiling. While your cooked rice is still warm, pour this vinegar-sugar mixture along with the soy sauce over it. Toss gently with a fork to combine all ingredients thoroughly, ensuring the rice is evenly coated. Allow the seasoned rice to cool completely to room temperature before proceeding with assembly.
2. To preserve the vibrant green color and freshness of your diced avocado, lightly brush or gently toss the avocado chunks with fresh lemon juice. This simple yet effective step prevents unsightly browning, keeping your salad visually appealing.
3. Now, meticulously assemble each mason jar following the crucial layering order to maintain freshness and distinct flavors:
- First (bottom) layer: Begin by placing 1/2 cup of the seasoned and completely cooled rice at the bottom of each jar.
- Second layer: Neatly add 1/2 cup of the crisp cucumber matchsticks over the rice.
- Third layer: Distribute one sheet of nori seaweed, cut into small pieces, evenly over the cucumber layer.
- Fourth layer: Carefully place 1/4 cup of the delicious lump crab meat on top of the nori.
- Fifth (top) layer: Finish each jar with 1/2 of a diced avocado, ensuring it rests at the very top.
Securely seal each jar with its lid and store them in the refrigerator until you’re ready to indulge. When it’s time to serve, simply invert the contents of a jar into a bowl, give it a gentle toss to combine all the beautiful layers and flavors, and savor your homemade deconstructed California roll salad!
For more detailed insights, variations, and to explore additional resources, you can visit the original source here.
2. Savory Spinach and Bacon Mason Jar Salads
Prepare yourself for a delightful explosion of flavors and a symphony of textures with these incredibly satisfying bacon-infused spinach salads. Not only are they remarkably simple to assemble ahead of time, making them the perfect solution for convenient, on-the-go meals, but they also boast a fantastic balance of salty, sweet, crunchy, and creamy elements. This recipe promises a truly exciting, satisfying, and wholesome lunch experience that you’ll eagerly anticipate.
What You’ll Need:
For the Dressing:
- ½ cup creamy mayonnaise (full-fat or light, according to preference)
- 2 tablespoons granulated sugar
- 2 tablespoons apple cider vinegar or white vinegar
- 1 teaspoon fine sea salt
For the Salad:
- 4 cups fresh baby spinach leaves (firmly packed)
- 1 medium red onion, finely diced
- 8 slices high-quality bacon (such as Hormel), cooked until wonderfully crispy and coarsely chopped
- 4 large hard-boiled eggs, peeled and roughly chopped
- 2 cups fresh mushrooms, thinly sliced
- 4 quart-size (32-ounce) mason jars (ideal for generous portions)
Directions:
1. In a small mixing bowl or a convenient measuring cup, vigorously whisk together all the dressing ingredients – the creamy mayonnaise, granulated sugar, vinegar, and salt – until the mixture is perfectly smooth, thoroughly combined, and slightly emulsified. Set this delectable dressing aside.
2. Distribute the prepared dressing evenly among the four mason jars, placing a generous few tablespoons at the very bottom of each jar. This ensures it forms the essential first protective layer, as per our layering guidelines.
3. Now, carefully divide the remaining salad ingredients among the jars, meticulously layering them in the precise order to maintain maximum freshness and prevent sogginess: first, add the finely diced red onion; next, layer the chopped hard-boiled eggs; followed by the thinly sliced mushrooms; then the irresistible crispy bacon pieces; and finally, generously top each jar with the fresh baby spinach leaves. Twist on the lids tightly to securely seal your beautiful salads and refrigerate them until you are ready to serve and indulge in this delightful creation.
3. Cranberry Walnut Green Salad With Maple Vinaigrette
For those days when you crave a quick, yet elegant and satisfying salad without the hassle of extensive chopping, this Cranberry Walnut Green Salad is your absolute ideal solution. It perfectly combines vibrant, fresh greens with the sweet burst of dried cranberries, the tangy counterpoint of crumbled feta cheese, and the delightful crunch of toasted walnuts, all harmoniously brought together by a homemade maple balsamic vinaigrette that requires no chopping whatsoever – just a simple shake!
What You’ll Need:
For the Salad:
- Approximately 4-6 cups fresh baby greens (spring mix, tender romaine, or your favorite salad blend)
- 1/2 cup dried cranberries (sweetened or unsweetened, depending on preference)
- 1/2 cup crumbled feta cheese
- 1/4 cup walnuts, lightly toasted for enhanced flavor and extra crunch
For the Maple Balsamic Vinaigrette:
- 1/4 cup extra virgin olive oil (high quality for best flavor)
- 1/4 cup good quality balsamic vinegar
- 1 tablespoon Dijon mustard (essential for emulsification and a hint of tang)
- 1 tablespoon pure maple syrup (for natural sweetness and a rich depth of flavor)
Directions:
1. **For the Vinaigrette:** Begin by preparing your exquisite dressing. Pour all vinaigrette ingredients – the robust olive oil, the rich balsamic vinegar, the zesty Dijon mustard, and the pure maple syrup – directly into a small mason jar. Secure the lid tightly and shake vigorously for about 30-60 seconds, or until the dressing is beautifully emulsified and creamy. This can be stored separately in its own jar, or you can proceed to use it as the first layer in your salad jars.
2. **To Assemble the Salads:** Following our layering guidelines for optimal freshness, begin each mason jar with a portion of the maple balsamic vinaigrette at the bottom. Then, carefully add the toasted walnuts, followed by the crumbled feta cheese, and then the dried cranberries. Finally, top each jar generously with the fresh baby greens, ensuring they are loosely packed to maintain their delicate structure. Seal tightly and refrigerate until ready to eat.
3. **To Serve:** When ready to enjoy this delightful salad, simply invert the jar into a large bowl. The dressing will elegantly cascade down, coating all the ingredients as they tumble out. Toss gently with salad tongs to ensure even distribution of all the wonderful flavors and textures, and serve immediately for a fresh and satisfying meal.
4. Hearty Chickpea Quinoa Salad
Packed generously with plant-based protein and essential fiber, this Chickpea Quinoa Salad is a wonderfully satisfying, incredibly nutritious, and remarkably flavorful option perfect for any meal of the day. It skillfully combines earthy, fluffy quinoa and hearty chickpeas with a vibrant medley of fresh, crisp vegetables, all tossed in a zesty, homemade dressing that truly awakens the palate. It’s an ideal choice for those seeking a wholesome, energizing, and delicious lunch or a light dinner.
What You’ll Need:
- 1 cup dry quinoa (which will yield approximately 3 cups once cooked)
- 1 pint colorful cherry tomatoes, halved or quartered
- 1 large cucumber, peeled, deseeded (if preferred), and diced into uniform pieces
- 1 sweet bell pepper (any color you like), cored, deseeded, and diced
- 1/2 cup cooked chickpeas (from a can, thoroughly rinsed and drained, or cooked from 1/4 cup dried chickpeas alongside the quinoa)
For the Homemade Salad Dressing:
- 2 cloves fresh garlic, minced or finely grated
- 5-10 fresh basil leaves, finely chopped (optional, but highly recommended for an aromatic boost)
- 2 tablespoons white wine vinegar
- Juice of half a fresh lemon
- 6 tablespoons extra virgin olive oil (high quality for rich flavor)
- Salt and freshly ground black pepper, to taste
Directions:
1. **Prepare the Quinoa:** Bring 2 cups of water to a rolling boil in a medium saucepan. Add the thoroughly rinsed quinoa, reduce the heat to low, cover the saucepan tightly, and simmer for 15 minutes, or until all the water is completely absorbed and the quinoa is tender. Remove the saucepan from the heat and let it sit (with the lid still on) for another 5 minutes to allow it to steam perfectly. Fluff the quinoa gently with a fork and allow it to cool completely to room temperature before mixing with the other ingredients.
2. **Prepare Vegetables and Combine:** While the quinoa cools, diligently dice all your fresh vegetables – the halved cherry tomatoes, diced cucumber, and diced sweet bell pepper. You can choose to peel and deseed the cucumber according to your personal preference. Once the quinoa is cool, gently stir in the diced vegetables and the cooked chickpeas, ensuring an even distribution.
3. **Craft the Dressing and Assemble:** In a separate, clean mason jar, combine all the homemade salad dressing ingredients: the minced garlic, finely chopped basil (if using), white wine vinegar, fresh lemon juice, extra virgin olive oil, and initial pinches of salt and pepper. Secure the lid tightly and shake vigorously until the dressing is beautifully combined and slightly emulsified. Pour this delicious dressing over the quinoa and vegetable mixture, tossing gently to ensure everything is evenly coated and every bite is flavorful. Taste and adjust seasoning with additional salt and pepper if needed, ensuring perfect balance.
4. **Layer for Mason Jars (Optional but Recommended):** If preparing for mason jar storage, add the dressing to the bottom of your jars as the first layer. Then, spoon in the vibrant quinoa and vegetable mixture. Top with any additional leafy greens you desire (like baby spinach or arugula) to complete the salad. Otherwise, serve immediately as a large, refreshing bowl salad.
5. Red, White, and Blue Mason Jar Salad (aka Fruit and Feta Salad)
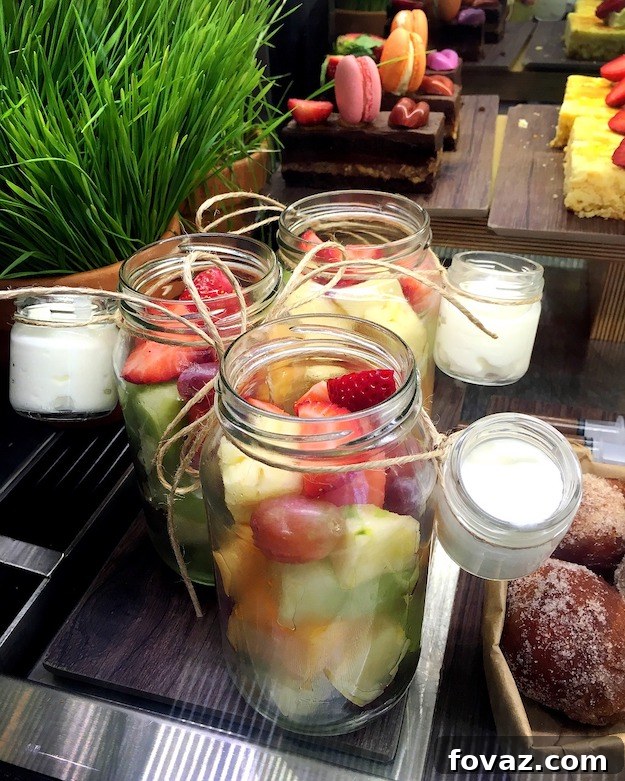
Celebrate vibrant flavors, stunning visual appeal, and delightful freshness with this incredibly refreshing Red, White, and Blue Mason Jar Salad, affectionately and descriptively known as the Fruit and Feta Salad. This delightful recipe beautifully combines the sweet, juicy burst of fresh fruits (strawberries and blueberries), the crispness of tender spinach, and the creamy, tangy notes of crumbled feta cheese, all harmoniously brought together by a light and zesty poppy seed dressing. It’s not just a treat for your taste buds but also a festive feast for the eyes, making it absolutely perfect for picnics, potlucks, summer gatherings, or even a patriotic celebration!
What You’ll Need:
- 2 cups fresh spring mix lettuce or baby spinach
- 1 cup fresh strawberries, hulled and neatly chopped
- 1/2 cup fresh blueberries
- 1/2 cup crumbled feta cheese
- 4 tablespoons prepared poppy seed dressing (store-bought for convenience or homemade)
- 2 wide-mouth mason jars (pint or quart size, depending on your desired portion size)
Directions:
1. To expertly assemble your beautiful and colorful mason jar salads, begin by pouring 2 generous tablespoons of the poppy seed dressing into the bottom of each of your two mason jars. This forms the essential first layer, protecting your other ingredients.
2. Next, carefully layer 1/2 cup of the chopped strawberries over the dressing in each jar. Follow this with 1/4 cup of the crumbled feta cheese, then 1/4 cup of the fresh blueberries. Finally, fill the remaining space in each jar generously with 1 cup of the fresh spring mix lettuce or baby spinach. Ensure the greens are loosely packed to avoid crushing and maintain their delicate texture.
3. Securely twist on the lids of your mason jars and refrigerate them until you’re ready to enjoy this delightful and visually stunning salad. To eat, simply invert the contents of the jar into a medium-sized bowl. If desired, give the salad a gentle toss to distribute the dressing and thoroughly mix all the wonderful ingredients together, ensuring every bite is perfectly balanced. Serve immediately and savor the burst of fresh, sweet, and tangy flavors!
Remember, the vibrant and versatile world of mason jar salads is entirely yours to explore! Don’t be afraid to mix and match ingredients creatively, introduce exciting new flavor profiles, and experiment with different dressings to keep your meals fresh and exciting. Quick, healthy, and incredibly satisfying lunches – whether for a demanding workday, a relaxing afternoon, or a fun outing – become effortlessly easy and genuinely enjoyable when you embrace an open mind and commit to a little bit of advance preparation. Happy layering and happy eating!
Loved these inspiring mason jar salad recipes and eager for more? Expand your culinary repertoire even further by discovering more delicious mason jar salad recipes and creative meal prep ideas!
Stay connected with our vibrant community and never miss out on new recipes, ingenious DIY projects, and valuable lifestyle tips! Follow us on Facebook, Twitter, Pinterestand Instagram!
Looking for even more creative inspiration? Check out these fantastic posts tailored for DIY enthusiasts and passionate food lovers:
Citrus and Goat Cheese Smoked-Chicken Summer Salad: A Refreshing Recipe
Quick & Easy DIY Mason Jar Crafts You Can Make in Under an Hour