
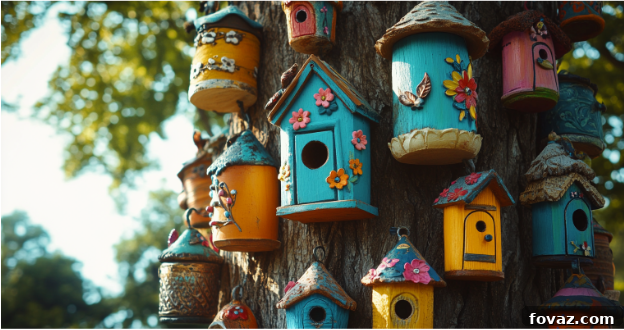
Build Charming DIY Birdhouses: A Fun & Educational Family Spring Project
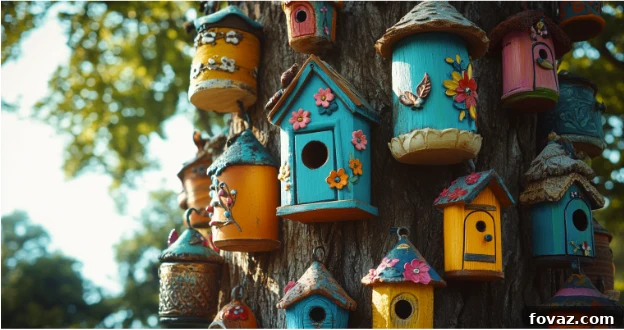
As spring awakens, days grow longer, flowers burst into bloom, and the air fills with the delightful chorus of birds. It’s an invigorating season, perfect for embarking on creative family adventures that connect us with the natural world. If you’re searching for an engaging, hands-on activity that offers both enjoyment and purpose, building DIY birdhouses with your children is an absolutely wonderful choice. This simple yet rewarding project allows you to bond with your kids while also providing much-needed shelter for local birds, transforming your backyard into a lively haven for feathered friends. Beyond the immediate fun, crafting a birdhouse presents a unique opportunity to instill in children valuable lessons about nature, wildlife conservation, patience, and the satisfaction of craftsmanship. So, gather your enthusiasm and your tools – let’s dive into creating beautiful and functional homes for our avian neighbors!
Why Building DIY Birdhouses with Kids is a Rewarding Experience
Crafting a homemade birdhouse extends far beyond a typical weekend craft; it’s a rich, multi-faceted educational experience that fosters creativity, problem-solving skills, and a profound appreciation for wildlife. Engaging in this kind of outdoor activity offers a myriad of benefits for children and adults alike, making it a truly enriching family project.
- Enhances Fine Motor Skills and Coordination: From holding a hammer (with supervision) to carefully applying paint, the various steps involved in building a birdhouse naturally improve hand-eye coordination and strengthen fine motor skills in developing children.
- Introduces Nature Education: This project serves as a fantastic gateway to learning about different bird species, their unique nesting habits, diets, and behaviors. It encourages kids to observe and ask questions about the natural world right outside their windows.
- Cultivates a Sense of Accomplishment: There’s immense pride and joy in seeing birds settle into a house built with your own hands. This tangible result provides children with a powerful sense of achievement and self-efficacy.
- Promotes Outdoor Exploration and Reduces Screen Time: In an age dominated by digital screens, a birdhouse project offers a compelling reason for kids to step outside, explore their backyard, and engage with the environment, promoting healthier habits and active play.
- Fosters Environmental Stewardship: By actively creating shelter for birds, children learn about the importance of protecting wildlife and their habitats, nurturing a lifelong respect for nature and conservation efforts.
- Encourages Teamwork and Communication: Building a birdhouse together requires collaboration, sharing ideas, and clear communication, strengthening family bonds and teaching valuable teamwork skills.
Ultimately, the lasting reward of this project isn’t just the birdhouse itself, but the shared memories created and the priceless experience of witnessing nature thrive because of your family’s thoughtful efforts. Seeing tiny fledglings eventually emerge from a handmade home is an incredibly heartwarming and unforgettable sight.
Your Comprehensive Guide to Building and Decorating Birdhouses
Ready for a hands-on adventure that sparks creativity and invites the wonders of nature right into your backyard? Building a DIY birdhouse is the perfect spring activity, combining ease, engagement, and abundant learning opportunities. This step-by-step guide will walk you through everything you need to know, ensuring your family’s birdhouse project is a soaring success!
Step 1: Gather Your Essential Supplies for a Sturdy Bird Sanctuary
Before you even pick up a tool, careful preparation is key. Having all your materials ready will make the building process smooth and enjoyable. Focus on durability and bird safety when selecting your items.
- Untreated Wooden Boards: Opt for woods like cedar, pine, redwood, or even reclaimed wood. These are durable and naturally resistant to rot. Crucially, avoid pressure-treated wood, as the chemicals used can be harmful to birds. Cedar is particularly excellent for its weather resistance and longevity.
- Fasteners: You’ll need either a hammer and galvanized nails (which resist rust) or strong, waterproof wood glue. For younger children, wood glue is often safer and easier, though nails provide greater long-term stability. Consider small screws for added strength, especially if the birdhouse will endure harsh weather.
- Drill and Screws (Optional but Recommended): A drill simplifies creating pilot holes for nails and is essential if you opt for screws. Always use appropriate safety gear, like safety goggles, when operating power tools.
- Hole Saw or Jigsaw: These tools are necessary for creating the bird’s entrance hole. A hole saw offers a perfectly circular opening, while a jigsaw allows for more custom shapes, though requires more skill. Ensure the entrance hole is smooth and splinter-free.
- Non-Toxic Outdoor Paint or Markers: Choose paints specifically labeled as non-toxic and weather-resistant, designed for outdoor use. Acrylic craft paints with a clear sealant, or exterior latex paints, are good options. Avoid painting the interior of the birdhouse, as birds prefer the natural wood texture inside.
- Hinges or Hooks (for Easy Cleaning): Installing small hinges on one side of the roof or base allows for easy access to clean out old nesting materials after the breeding season, which is vital for bird health and attracting new residents.
For an even more eco-friendly approach, consider repurposing materials like an old wooden crate, sturdy cardboard (though less durable for long-term outdoor use), or even large gourds. The National Wildlife Federation emphasizes that untreated, natural wood is always the safest and most recommended choice for any bird-related structure, free from potentially harmful chemicals and fumes.
Step 2: Constructing Your Birdhouse with Care and Precision
With your supplies gathered, it’s time to transform raw materials into a welcoming home. If you’re working with very young children, consider pre-cutting the wooden panels to simplify the assembly process and focus their involvement on the joining and decorating stages. Safety should be paramount at every step.
- Accurately Cut the Panels: You will typically need six distinct pieces: a front, back, two side panels, a sturdy base, and a protective roof. Standard dimensions for small birdhouses might be around 6x6x8 inches, but researching plans for specific bird species will yield the best results for attracting your desired residents. The front panel is where the magic happens – cut a precise entrance hole. For common small birds like chickadees, wrens, or nuthatches, a 1.25 to 1.5-inch diameter hole is ideal. Ensure the hole is placed high enough on the front panel (at least 4-6 inches from the floor) to deter predators.
- Assemble the Primary Structure: Begin by attaching the side panels to the front and back panels. Use nails or strong, waterproof wood glue, ensuring each joint is snug and secure. If using nails, pre-drilling pilot holes can prevent wood from splitting. Encourage children to assist by holding pieces steady, applying glue, or even gently tapping nails (with close adult supervision).
- Secure the Roof and Base: Fasten the bottom panel firmly to the assembled walls. This provides the foundation and floor for the nest. Next, attach the roof. If you’ve chosen to include hinges for easy cleaning, now is the time to secure them to one side of the roof and the birdhouse structure. An overhang on the roof is beneficial for providing extra shade and protection from rain.
- Smooth Rough Edges and Inspect for Safety: After assembly, meticulously sand down any splinters, sharp corners, or rough spots. This is crucial for the safety of both the children working on the project and, more importantly, for the delicate feathers and feet of the birds that will inhabit the house. A smooth, safe interior is paramount.
- Ensure Ventilation and Drainage: For bird health, drill a few small (1/4 inch) ventilation holes near the top of the side panels, just under the roof line, to prevent overheating. Also, drill a few small drainage holes in the base to prevent water accumulation, which can lead to mold and disease.
By following these steps, you’ll create a robust and bird-friendly structure ready for its final personalized touches.
Step 3: Unleashing Creativity Through Decoration and Personalization
Now comes the most exciting and imaginative part of the project—decorating! This is where your children can truly let their unique personalities shine. Encourage them to be as creative as possible, using colors and patterns that appeal to them, while keeping bird safety in mind. Remember to use only non-toxic, weather-resistant paints or stains to ensure durability and prevent harm to the birds.
Here are some inspiring decorating ideas to get those creative juices flowing:
- Nature-Inspired Themes: Opt for designs that mimic natural elements. Paint soft blues for the sky, various shades of green for leaves and vines, or earthy browns and grays to help the birdhouse blend seamlessly into its surroundings. You could even paint delicate flowers or realistic tree bark patterns.
- Bright and Welcoming Colors: While natural tones help a birdhouse blend in, a splash of vibrant color can also be appealing. Bright yellows, cheerful blues, and warm oranges can attract curious visitors and add a lively pop to your garden. Avoid very dark colors, which can absorb too much heat in direct sunlight.
- Personalized Touches: Let kids add their names (discreetly, perhaps on the back), draw fun patterns like polka dots or stripes, or create playful, whimsical designs. They could even paint tiny caricatures of their favorite bird species. Just ensure the paint is fully dry and cured before placing the birdhouse outside.
- Natural Adornments (with caution): While paint is primary, you might consider attaching natural, untreated elements like small twigs for decorative purposes (but avoid a perch directly under the entrance hole, as this can invite predators), smooth pebbles, or carefully dried leaves using non-toxic, waterproof glue. Ensure any additions are firmly secured and won’t detach and harm birds.
Bird Watching HQ suggests that while natural tones aid in camouflage, making the birdhouse feel safer to shy species, vibrant shades can indeed attract the attention of more outgoing and curious feathered visitors. The key is balance – creating an attractive house that is also a safe sanctuary.
Step 4: Selecting the Ideal Location for Your Feathered Friends
Once your beautifully decorated DIY birdhouse is completely dry and cured, finding the perfect placement is critical for its success. A well-chosen location will make birds feel secure and encourage them to move in. Follow these essential guidelines for optimal birdhouse placement:
- Optimal Height for Safety: Mount the birdhouse at least five to ten feet off the ground. This elevation helps protect nesting birds and their eggs from common ground predators like cats, raccoons, and snakes.
- Shaded and Quiet Spot: Choose a location that offers some shade, especially during the hottest parts of the day, to prevent the birdhouse from overheating. It should also be a relatively quiet area, away from heavy foot traffic, noisy play areas, or frequently used doors. Birds prefer privacy and minimal disturbance.
- Protection from Elements: Face the entrance hole away from prevailing winds (often north or east in many regions) to prevent cold drafts and rain from entering the interior. A slight tilt forward can also help shed rainwater more effectively.
- Secure Mounting: Firmly secure the birdhouse to a sturdy tree, a dedicated pole (with a predator baffle), or a strong fence post. Stability is key; a wobbling birdhouse can deter birds and even cause eggs or chicks to fall out. Avoid hanging it by a string, as it will sway too much.
- Consider Proximity to Food and Water: While not directly on the birdhouse, placing a bird feeder or a birdbath a reasonable distance away (e.g., 10-15 feet) can make your yard even more inviting, providing essential resources for potential residents.
- Attracting Specific Species: Research the nesting preferences of the birds you hope to attract. Wrens, for example, often prefer hidden spots amidst dense foliage, while bluebirds favor open areas with scattered trees. Knowing their habits will help you position the house to their liking. Avoid placing multiple birdhouses too close together, as many species are territorial.
Thoughtful placement significantly increases the chances of your birdhouse becoming a bustling home for a new bird family.
Step 5: The Joy of Observation and Ongoing Care
The most rewarding stage of your DIY birdhouse project is undoubtedly observing its new residents! Be patient, as it might take a few days, weeks, or even a full season before birds discover and decide to occupy their new home. Once they do, maintaining a respectful distance and observing quietly will provide endless fascination.
To make your yard even more appealing to a wider array of birds, consider these additional steps:
- Provide Supplemental Resources: Besides the birdhouse, offering a consistent supply of fresh water in a birdbath and a variety of birdseed in feeders can make your habitat irresistible.
- Plant Native Flora: Incorporate native plants, shrubs, and trees in your garden. These provide natural food sources (berries, seeds, nectar, insects) and additional shelter, creating a more holistic bird-friendly environment.
- Encourage a Bird Journal: Equip your children with a notebook and pencils. Encourage them to keep a bird journal, noting the dates they see different species, sketching their features, and documenting behaviors like feeding, nesting, and singing. This practice sharpens observation skills and fosters a deeper connection to nature.
- Regular Maintenance: After each nesting season (typically late summer or fall), it’s crucial to clean out the birdhouse. Remove old nesting materials, any unhatched eggs, or parasites. Use a stiff brush and a mild bleach solution (1 part bleach to 9 parts water), then rinse thoroughly and allow it to dry completely before the next season. This ensures a healthy and hygienic environment for future occupants.
According to The Audubon Society, maintaining a bird-friendly habitat that offers food, water, shelter, and nesting sites significantly increases the chances of attracting long-term visitors and contributing to local bird conservation efforts. Your birdhouse is just one piece of a thriving ecosystem you can help create.
Creating Lasting Memories with DIY Birdhouses
Creating DIY birdhouses is far more than just a weekend activity; it’s a meaningful and enriching journey for the entire family. It provides a wonderful opportunity to bond, learn, and contribute positively to the local ecosystem. With a bit of effort, creativity, and a dash of patience, your backyard can be transformed into a vibrant, lively haven for an array of feathered friends. The shared laughter, the concentrated effort, and the eventual joy of witnessing birds make a home in your handmade creation will forge lasting memories and instill a deeper connection to the natural world in your children.
The satisfaction of knowing you’ve provided a safe, cozy space for nature’s architects makes every step of the process incredibly worthwhile. It’s a testament to simple acts creating profound impacts.
Are you inspired to start building your own family birdhouse? We’d love to hear about your plans or see pictures of your completed projects! Share your experiences and tips in the comments below!
Frequently Asked Questions (FAQs) About DIY Birdhouses
1. What type of wood should I use for a birdhouse?
Cedar, pine, redwood, or reclaimed wood are excellent choices due to their durability and natural resistance to rot. Always use untreated wood, as pressure-treated wood contains chemicals harmful to birds.
2. How big should the entrance hole be?
For common small birds like wrens, chickadees, and bluebirds, a 1.25 to 1.5-inch diameter hole is ideal. Larger birds will require a bigger opening, so research the specific species you wish to attract.
3. Should I use nails or glue to assemble the birdhouse?
Galvanized nails provide superior durability and structural integrity for outdoor birdhouses. However, strong, waterproof wood glue can be used, especially for younger children’s involvement, but it may not last as long.
4. Should I add a perch to the birdhouse?
No, it’s generally best to avoid adding a perch directly below the entrance hole. Perches make it easier for predators to access the nest and do not benefit the birds, as they can easily enter and exit without one.
5. Where is the best place to put my birdhouse?
Choose a quiet, partially shaded area, at least five to ten feet above the ground. Ensure the entrance hole faces away from strong winds and that the birdhouse is mounted securely away from busy walkways or potential predators.
6. How often should I clean my birdhouse?
It’s recommended to clean your birdhouse after each nesting season, typically in late summer or early fall. This removes old nesting materials, parasites, and ensures a clean, healthy home for future occupants.
7. What type of paint is safe for birdhouses?
Always use non-toxic, outdoor-safe paint that is designed to withstand the elements. Avoid painting the interior of the birdhouse, as birds prefer the natural wood inside and fumes can be harmful.
8. How do I attract birds to the birdhouse?
Patience is key! You can increase your chances by placing a bird feeder or birdbath nearby (but not too close to avoid attracting predators) and by planting native trees and shrubs that offer natural food and shelter.
9. What birds are most likely to use a birdhouse?
Common cavity-nesting birds that frequently use birdhouses include chickadees, wrens, bluebirds, tree swallows, house sparrows, and finches. The size of the entrance hole will determine which species can enter.
10. What should I do if no birds move into my birdhouse?
Don’t be discouraged! It can take time for birds to discover and accept a new home. Review its location for predator exposure, shade, and sun. Sometimes, simply adjusting its placement or waiting for another nesting season is all that’s needed.