
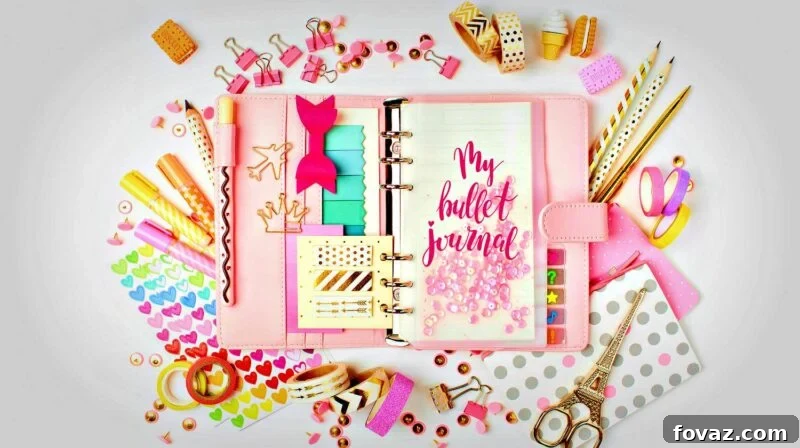
Washi tape DIY projects are a fantastic way to unleash your creativity, transforming ordinary items into personalized works of art. This versatile Japanese masking tape, known for its beautiful patterns, vibrant colors, and easy removability, is perfect for crafters of all skill levels. Whether you’re looking for simple crafts for kids, elegant home decor accents, or clever organization hacks, washi tape offers endless possibilities. We’ve compiled an extensive list of 100 creative and inspiring ways to use washi tape for your next craft project, ensuring you’ll find plenty of fun and easy ideas to get started!
RELATED: 4 Awesome Gift Wrapping Ideas | Gift Wrapping Tutorials
In this article:
- DIY Pencil Cup
- Easy Flower Vase Decor
- DIY Customized Page Dividers
- Washi Tape Bookmarks
- DIY Food Picks
- $1 Dry Erase Frame
- Washi Tape Twist
- Pinwheel Flowers
- Butterfly Crafts
- DIY Dot Wall
- Cord Organization
- DIY Wooden Bracelets
- Washi Tape Messages
- Pretty Tin Cans
- DIY Magnets
- Easy Plant Marker Tutorial
- Creative Clothespin
- DIY Geometric Heart
- Washi Tape Wrapped Pencils
- Easy Washi Wall Art
- Faux Rubik’s Cube Necklace
- Gift Tassel
- Word Garland
- Washi Tape Letters
- Simple Bookbinding Notebook DIY
- Herringbone Cellphone Cover
- Tea Lights
- Washi Tape Keyboard
- Flower Pot
- Feather Washi and Paper Earrings
- Decorated Hangers
- DIY Cactus Wall Art
- Flower Pens
- Pompom Garland
- Paintbrush Box
- Pendants
- Cups
- DIY Photobooth Strip Scrapbook
- Gift Box
- Flip Wallet
- Painted Wood Bangle Bracelets
- Hair Pins
- Globe Upcycle
- Washi Tape Light Switch Covers
- Word Art
- Magnet Board
- 5-Minute Handmade Card
- DIY Washi Tape Coat Tree
- DIY Wooden Washi Tape Earrings
- DIY Illuminated Table Numbers
- DIY Travel Journal
- Kitchen Spatula
- Washi Tape Mason Jar Solar Lamp
- Lamp
- DIY Honeycomb Decal
- Diamond Garland
- Washi Tape Key Covers
- Washi Tape Phone Chargers
- Window Treatment
- Binder Clips
- Wrapping Paper
- Clipboard
- Serving Tray
- DIY Laptop Cover
- Mini Wood Pallet Coasters
- Striped Frame
- Pickup Sticks
- Chopsticks
- Wine Charms
- Clock
- Nail Art
- Craft Stick Dolls
- Washi Tape Makeup Brushes
- Staircase
- Statement Necklace
- Wooden Table
- Washi Tape Clutch
- Calendar Marker
- Washi Heart Wall Decor
- Toy Car Track
- Ceiling Fan
- Upcycled Mint Tins
- Decorated Candle
- Wreath
- Legos
- Bookshelf
- Birdhouse Lamp
- Mousepad
- Makeup Brush Holder
- Chalkboard Frame
- Bike Helmet
- Stationery
- DIY Lamp from Cardboard and Washi Tape
- Mirror Frame
- Snake Craft
- Gift Bows
- Pebble Magnets
- 3D Card
- DIY Envelope
- Chore Chart
100 Creative Washi Tape DIY Projects You’ll Love Crafting
1. DIY Pencil Cup
Transform a simple tin can or glass jar into a personalized and cheerful DIY pencil cup, making it a perfect craft for kids. This easy washi tape project allows children to select their favorite patterns and colors from affordable sources like Walmart, Target, or Amazon, ensuring their desk accessory is truly unique. It’s an engaging activity that promotes both creativity and tidiness, teaching them to organize their space with style.
2. Easy Flower Vase Decor
Give your flower vases a fresh, unique look with a simple application of washi tape. Whether you choose to accent the rim, create stripes, or design intricate patterns, a pop of washi tape instantly elevates ordinary glass or ceramic vases. Consider using complementary tape designs to give all your vases a cohesive, signature style that brightens any room.
3. DIY Customized Page Dividers
Stay organized in school or at work with custom-made page dividers. This cool DIY project is excellent for color-coding subjects or categories, helping you quickly locate important notes and sections in your binders. Kids will especially love customizing their school supplies, making learning and organization a more colorful and enjoyable experience. The possibilities for designs are limitless, making each divider a mini canvas.
4. Washi Tape Bookmarks
Say goodbye to dog-eared pages with these charming washi tape bookmarks. An easy and practical craft, you can create them by cutting a corner off an old envelope or a sturdy cardstock and simply wrapping it with your favorite washi tape designs. This quick project is perfect for using up tape scraps and makes a delightful gift for fellow book lovers, ensuring your reading experience is both neat and stylish.
5. DIY Food Picks
Add a festive touch to appetizers, cupcakes, or bento boxes with homemade washi tape food picks. Simply attach a small strip of washi tape to a toothpick and fold it over, creating a mini flag. For an extra flair, snip a small triangle out of the end of the folded tape to mimic a real flag. These customizable picks are perfect for themed parties, holidays, or just making everyday meals a little more fun.
6. $1 Dry Erase Frame
Upcycle an old picture frame into a functional and decorative dry erase board for just a dollar. First, apply washi tape around the edges of the clear glass or plastic insert, then place it back into the frame. Voilà! You now have a stylish message board that the whole family can use for notes, reminders, or creative doodles. It’s an inexpensive way to add functionality and charm to your home decor.
7. Washi Tape Twist Ties
Create adorable and reusable twist ties perfect for sealing treat bags, organizing cables, or adding a decorative touch to gifts. To make these washi tape twist ties, sandwich a thin piece of craft wire between two strips of washi tape. You can choose a single complementary color or mix and match several washi tape designs to match your party theme or personal aesthetic, making them as decorative as they are practical.
8. Pinwheel Flowers
Bring a burst of playful charm to any space with these DIY pinwheel flowers. This fun craft is excellent for decorating parties, nurseries, or adding a whimsical touch to your desk. To ensure your pinwheel flowers stand tall and straight, secure the straw stems into a base of play dough or floral foam. Experiment with various washi tape patterns to create a vibrant bouquet that never wilts.
9. Butterfly Crafts
Craft beautiful and intricate butterfly wings using a selection of your favorite washi tape designs. The secret to achieving symmetrical and pretty butterfly wings lies in applying the tape strips horizontally. This method simplifies the alignment of patterns, ensuring both wings mirror each other perfectly. These colorful creations can be used as decorations, embellishments, or incorporated into various other craft projects.
10. DIY Dot Wall
Infuse your living space with a playful and modern vibe by creating a DIY dot wall. The key to making perfect circles for your dotted wall is to use a protractor set for precision. If you don’t have one handy, a small glass or any circular object can serve as a template; simply trace around its base with a pencil before applying the tape. This temporary and damage-free decor option is perfect for renters or those who love to frequently change their decor.
11. Cord Organization
Tired of tangled cables and guessing which cord belongs to what device? This clever washi tape cord organizer hack will save you a lot of time and frustration. Simply wrap a piece of washi tape around each cord and write a clear label on it. Use different patterns or colors to further categorize your cables, making identification instant and efficient.
12. DIY Wooden Bracelets
Kids will absolutely adore making and wearing these vibrant DIY wooden bracelets. To make popsicle sticks pliable enough to bend without breaking, soak them in water for at least two days until they are soft and malleable. Once bent into shape, decorate them with various washi tape patterns for unique, personalized accessories that are fun to create and wear.
13. Washi Tape Messages
Spread positivity and encouragement by creating personalized washi tape messages. This thoughtful DIY project starts with printing out uplifting messages in various fonts. Then, simply adhere strips of washi tape over the printed words, cut them out, and stick them wherever a little boost is needed. You never know when someone might need a few words of encouragement, making these perfect for journals, cards, or unexpected surprises.
14. Pretty Tin Cans
Transform ordinary, discarded tin cans into attractive and functional storage containers or decorative pieces. These upcycled tin cans can be adorned with washi tape, combined with other materials for varied textures, such as fabric or twine. Before you begin, having a clear concept and style in mind will help you choose the best washi tape patterns and colors, ensuring a cohesive and beautiful end result.
15. DIY Magnets
Craft custom magnets in any size, shape, and color to brighten up your refrigerator or magnetic board. To make sure your DIY magnets look professional, always cut the washi tape shapes slightly larger than your magnet base. This prevents the magnet from peeking out, giving your finished craft a clean and polished appearance. Perfect for personalized gifts or adding a pop of color to your kitchen.
16. Easy Plant Marker Tutorial
Label your herbs and plants with these charming and practical plant markers. You can easily make these plant markers from Creative Green Living by covering clothespins with washi tape. Don’t worry if you lack a label maker; a regular black Sharpie works perfectly for writing the plant names on the tape-covered surface, adding a rustic, handmade touch to your garden.
17. Creative Clothespin
Give plain clothespins a stylish makeover by covering them with washi tape, transforming them into decorative clips or magnets. For a seamless and quick crafting experience, it’s best to choose washi tape rolls that match the width of your clothespins. This eliminates the need for trimming, making these clothespin magnets even easier and faster to create.
18. DIY Geometric Heart
Craft a striking geometric heart wall art piece that adds a modern touch to any room. Begin this DIY by envisioning the desired proportions for your geometric heart. Once decided, use a ruler to meticulously outline the shape with washi tape, ensuring precise measurements and symmetry for both sides of the heart. This project showcases the versatility of washi tape in creating crisp, clean lines and contemporary designs.
19. Washi Tape Wrapped Pencils
Infuse personality into your everyday writing tools with washi tape-wrapped pencils. This DIY pencil design is incredibly simple: just cut the tape to the length of your pencil, press it down firmly to cover one side, and then repeat the process for the other side. You can mix and match various patterns or stick to a uniform design, creating unique pencils that stand out at school or the office.
20. Easy Washi Wall Art
Create minimalist yet impactful wall art using only black washi tape. This washi wall art DIY is perfect for adding a sophisticated accent to any brightly colored room. Featuring a simple triangle design, this project is accessible for virtually anyone, regardless of artistic experience, proving that even basic shapes can make a bold statement in your home decor.
21. Faux Rubik’s Cube Necklace
Accessorize your outfit with a playful and unique faux Rubik’s cube necklace you can easily DIY. This project offers a clever hack that avoids the tedious task of cutting out individual small squares. Instead, it guides you through a super simple yet neat method to create the classic cube pattern, resulting in a stylish and eye-catching piece of jewelry that sparks conversation.
22. Gift Tassel
Elevate your gift wrapping with charming handmade washi tape gift tassels. To craft this delightful gift tassel, begin by cutting several strips of washi tape and folding them lengthwise. Ensure that no sticky sides are exposed after folding. Gather the folded strips, tie them together at one end, and fan them out to create a vibrant and personalized embellishment for any present, making it extra special.
23. Word Garland
Spell out inspiring messages, names, or festive greetings with a custom washi tape word garland. The key to this project is using a pre-made template for your letters, allowing for consistent and clean shapes. Once you have your template, simply cover the letters with an assortment of colorful washi tape designs, then carefully cut them out. This DIY adds a personalized touch to parties, nurseries, or any room in your home.
24. Washi Tape Letters
Personalize your space with decorative washi tape monogram letters. For these washi-taped monogram letters, you can either adhere to a strict pattern for a polished look or let your creativity flow with a freestyle approach. We recommend allowing your artistic side to shine while maintaining a consistent color palette or theme to ensure the letters look cohesive and professionally crafted, making them a great personalized gift or home accent.
25. Simple Bookbinding Notebook DIY
Design your very own personalized notebook with this simple bookbinding DIY project. This craft offers complete customization, allowing you to choose not only the notebook cover and its washi tape design but also the ideal size and paper texture for the pages within. It’s a wonderful way to create a unique journal, planner, or sketchpad that perfectly suits your needs and aesthetic preferences, making it a truly special item.
26. Herringbone Cellphone Cover
Give your cellphone cover a chic and modern upgrade with a herringbone design using washi tape. Select three complementary colors or patterns of washi tape to create this intricate look. Since the herringbone pattern can be quite busy on its own, we suggest opting for plain tape designs and focusing on a harmonious color scheme to achieve a sophisticated and stylish cellphone accessory that truly stands out.
27. Tea Lights
Glam up an ordinary tea light candle by wrapping some washi tape around its base. To make this project from Alexismel TV even easier and more seamless, try to find washi tape that has the same width as your tea light candle. This simple addition instantly transforms a plain candle into a decorative piece, perfect for setting a cozy ambiance or enhancing your table decor.
28. Washi Tape Keyboard
Personalize your computer keyboard with a vibrant and eclectic washi tape makeover. This DIY project is ideal for touch typists who already know their keyboard layout by heart. Simply apply squares of washi tape to each key, creating a unique and personality-filled gadget. Choose contrasting colors or patterns to make a bold statement, turning your everyday keyboard into a true reflection of your style.
29. Flower Pot
Add a touch of charm and elegance to your indoor plants with a washi tape decorated flower pot. A simple rim of washi tape on a flower pot creates a super chic home for succulents, herbs, or any small plant. This subtly decorative touch makes a plain pot instantly more appealing and can easily be displayed in an office, on a bedside table, or as part of a window sill garden.
30. Feather Washi and Paper Earrings
Discover a unique way to create stunning earrings using washi tape and paper feathers. This creative DIY allows you to make earrings that are lightweight and fully customizable. Remember to sandwich the wire hook for the earring in between two strips of washi tape when attaching the paper feather piece to the jump ring. This ensures durability and a clean finish, resulting in beautiful, handmade accessories.
31. Decorated Hangers
Elevate your closet aesthetic and personalize your hangers with decorative washi tape. The key to personalizing these hangers with a polished look is to maintain a consistent direction when applying the tape strips across the entire project. If you start by applying the tape vertically, continue that pattern until the entire hanger is covered. This creates a uniform and visually appealing result, making your closet as stylish as your outfits.
32. DIY Cactus Wall Art
For lovers of wall art with a desert flair, this DIY cactus design is a must-try project. This vibrant cactus wall art utilizes three different colors of washi tape to create depth and visual interest. The geometric shapes and layered tape strips bring a modern and artistic touch to any room, adding a unique focal point without the need for painting or complex tools.
33. Flower Pens
Transform ordinary pens into elegant and charming flower pens. These DIY flower pens look especially classy when their stems are wrapped with gold or silver washi tape, giving them a polished and refined appearance. This simple yet sophisticated detail elevates a basic writing instrument into a beautiful accessory, perfect for gifting or adding a touch of glamour to your desk.
34. Pompom Garland
This pompom garland craft from Duck Brand is a fantastic last-minute decoration idea for parties or brightening up any space. When cutting your washi tape strips, ensure they are all the same length. This consistency is crucial for preventing any sticky surfaces from being exposed and for creating a neat, fluffy pompom. Gather and tie the center of the strips, then gently fluff them to form beautiful, colorful pompoms.
35. Paintbrush Box
Organize your art supplies with a beautifully decorated washi tape paintbrush box. This creative box DIY involves mixing and matching various washi tape designs with your own doodles. Start by adhering your favorite strips of tape in a pattern you like, then fill in any blank areas with unique hand-drawn embellishments. This project not only keeps your brushes tidy but also turns a simple storage box into a piece of art itself.
36. Pendants
Craft unique initial pendants that your friends will be amazed to learn were made with washi tape. If you plan to use black for your initials, we highly recommend choosing a washi tape design with a more vibrant or contrasting color for the background. This will make your initial pendant truly stand out, creating a personalized and stylish accessory that reflects your unique taste.
37. Cups
Add a festive splash of color to your next gathering with this simple paper cup decoration DIY. By merely applying a strip of washi tape around the rim or body of your cups, you can instantly elevate their appearance. This easy craft is perfect for themed parties, celebrations, or just making everyday drinks more enjoyable. With countless washi tape designs available, you can effortlessly match your cups to any occasion.
38. DIY Photobooth Strip Scrapbook
Preserve your cherished memories in a beautifully organized and personalized DIY photobooth strip scrapbook. This creative project allows you to arrange your photos with flair. You can even write little notes directly on top of the washi tape strips, adding context and heartfelt messages to help you document and relive those special moments. It’s a wonderfully personal way to keep your memories alive.
39. Gift Box
Transform plain gift boxes into stunning presents with just a little creativity and washi tape. Various items and techniques can be used to decorate your gift boxes, but washi tape offers an incredibly simple and versatile solution. With a few rolls of tape and a touch of inspiration, you’ll soon have a collection of beautifully adorned boxes ready for any party or special occasion, making your gifts even more memorable.
40. Flip Wallet
Save money and express your style by crafting this durable DIY duct tape flip wallet. While washi tape adds decorative elements, this project typically requires a few rolls of sturdy duct tape for its main structure. Once the basic wallet is formed, you can use washi tape to add patterns, stripes, or other personalized designs, making your DIY duct tape flip wallet from Simply Duck Designs truly unique.
41. Painted Wood Bangle Bracelets
Elevate a plain wooden bangle bracelet into a chic and stylish accessory with the help of washi tape and paint. The tape acts as a perfect stencil for your bracelets, ensuring that your paint lines are crisp and stay neatly within their boundaries. Experiment with geometric patterns or bold color blocks to create unique pieces that complement your wardrobe, making plain bangles effortlessly fashionable.
42. Hair Pins
Craft adorable and personalized hair pins in any design or color imaginable using washi tape. This simple DIY project allows you to transform plain bobby pins or barrettes into stylish hair accessories. After applying the washi tape, make sure to allow a couple of hours for them to dry completely before use, ensuring the tape adheres firmly and the pins are ready to add a charming touch to your hairstyle.
43. Globe Upcycle
Infuse new life into an old globe by transforming it with washi tape and a touch of paint. This creative upcycle project will not only make your globe more colorful but also serve as a striking decorative piece. Be warned: this inspiring craft might just ignite your wanderlust, making you dream of traveling the world even more as you admire your beautifully customized globe.
44. Washi Tape Light Switch Covers
Replace your drab and uninspired light switch covers with these fun and personalized alternatives. When disassembling a light switch, a flat-blade screwdriver proves highly effective for the job. Once the cover is removed, simply apply your favorite washi tape designs to create a fresh, vibrant look. This quick and easy update adds a surprising pop of decor to often overlooked areas in your home.
45. Word Art
Cultivate daily motivation and inspiration with personalized DIY word art. For this DIY word art project, choose a word that embodies a goal or positive attitude you wish to maintain throughout the year, whether it’s about career growth or personal well-being. This washi tape creation will serve as a constant, beautiful reminder for you to strive for your very best, adding both meaning and aesthetics to your space.
46. Magnet Board
Revamp a plain or boring magnet board by adding decorative touches with washi tape. Choose two opposite corners of the board and adorn them with strips of your favorite tape designs. Tuck the ends neatly to the back and secure them with a bit of glue for enhanced holding power. This simple trick transforms a utilitarian item into a stylish display piece, perfect for photos, notes, and other small keepsakes.
47. 5-Minute Handmade Card
Create a stunning handmade card in just five minutes with the magic of washi tape. The secret to making this card look even more artistic lies in the strategic placement of the tape pieces. Experiment with different angles and overlaps to create a unique, layered effect that gives the card a charming, homemade appeal. This quick and easy craft is perfect for any occasion, ensuring you always have a personalized card on hand.
48. DIY Washi Tape Coat Tree
This DIY washi tape coat tree is an ingenious and whimsical hack for adding a functional and decorative element to your entryway. It’s best to use clear adhesive hooks for this project, as they help maintain the illusion that hats and coats are magically hanging from a makeshift tree created entirely with washi tape. This creative solution adds a touch of artistic flair while providing a practical hanging space.
49. DIY Wooden Washi Tape Earrings
Craft unique and stylish wooden washi tape earrings that perfectly match your personal style. Before you start making these round earrings, it’s helpful to have a specific outfit or aesthetic in mind. This thoughtful consideration will make selecting the ideal washi tape design much easier, ensuring your handmade earrings flawlessly complement your chosen look, whether for casual wear or a special occasion.
50. DIY Illuminated Table Numbers
For restaurants or events, DIY your table numbers with a touch of elegance and washi tape. After decorating the different faces of your table numbers with various washi tape patterns, securely join the sides using additional tape. This not only adds a unique aesthetic but also creates a refined, illuminated effect when paired with a small light source. This simple yet sophisticated touch elevates the ambiance of any setting.
RELATED: 19 Cool DIY Photo Booth Props
51. DIY Travel Journal
Document your adventures and keep your travel memories vibrant with a personalized DIY travel journal. Washi tape is ideal for marking different pages, helping you categorize your experiences. Use distinct patterns or colors to highlight sections like “dishes to try,” “sights to see,” and “photos to take.” This organizational trick ensures you can easily revisit your favorite moments, making your travel journal both functional and beautifully unique.
52. Kitchen Spatula
Infuse a burst of color and personality into your kitchen by decorating your utensils with washi tape. Mix and match different sizes and patterns of tape to adorn the handles of your favorite utensils, such as a kitchen spatula. This simple detail adds a charming dash of individuality to often overlooked items, making your cooking space more vibrant and reflective of your style.
Kitchen Spatula Definition: A flat, flexible, and broad kitchen utensil used for lifting, spreading, and mixing ingredients in recipes or foods in general.
53. Washi Tape Mason Jar Solar Lamp
Embark on a rewarding two-in-one DIY project by creating a charming washi tape mason jar solar lamp. While it might seem like a challenge, the effort is truly worth it. You’ll enjoy both the creative process of designing your mason jar with washi tape and the satisfaction of building a functional solar lamp. The result is a beautiful, eco-friendly light source that adds ambiance to any outdoor space.
54. Lamp
Revitalize a dull or outdated lamp with the playful charm of washi tape. If you’re tired of your current lamp’s appearance, this project offers a simple and impactful solution. You can choose to line either the lampshade or the base of the lamp, or perhaps go all out and adorn both with a variety of washi tape patterns. This quick refresh breathes new life into your lighting fixtures, adding a personal touch to your home decor.
55. DIY Honeycomb Decal
Create a unique and quirky honeycomb decal that will look absolutely super cool in any room. To achieve an authentic honeycomb look, we highly recommend utilizing washi tape in various shades of gold and yellow. The geometric precision of the tape allows for a clean, modern design that is easily removable, making it a perfect, damage-free alternative to traditional wallpaper or paint, ideal for renters or those who love to redecorate.
56. Diamond Garland
Let your home shine bright like a diamond with this elegant washi tape diamond garland. To make the “jewels” stand out even more, consider using washi tape with metallic designs or glitter accents. This simple craft adds a touch of sparkle and sophistication to any celebration, party, or everyday decor. Hang it across a mantel, doorway, or window to instantly elevate the festive ambiance of your space.
57. Washi Tape Key Covers
Color code your keys with washi tape and eliminate the frustration of fumbling for the right one. Simply adhere your chosen washi tape pattern onto the base of the key and carefully trim the excess using a craft knife for a neat finish. This quick and practical DIY ensures you’ll never have to scramble looking for the correct key again, adding both convenience and a personalized touch to your keyring.
58. Washi Tape Phone Chargers
If you constantly find yourself forgetting who owns which phone charger, this clever little DIY trick is the perfect solution for you. All you need to do is wrap your favorite washi tape around the plug of your charger. Not only does this make your charger instantly identifiable, but you can also easily switch up the design every month if you grow tired of a particular pattern, keeping your accessories fresh and fun.
59. Window Treatment
Upgrade your windows and add a personalized touch to your curtains or blinds by applying a strip of washi tape. For a lasting finish, don’t forget to gently seal the tape into the fabric by applying light heat from an iron. This simple addition can dramatically change the look of your window treatments, introducing color, pattern, and a custom design that beautifully complements your home decor.
60. Binder Clips
Let your personality shine through your office supplies by decorating your binder clips with washi tape. If your chosen washi tape is thin or somewhat transparent, consider doubling up on the layers to achieve a more opaque and vibrant finish. This small detail can make a big difference in brightening up your workspace and adding a fun, customized element to your everyday organization.
61. Wrapping Paper
Personalize any birthday gift or special present with charming DIY wrapping paper. You can choose to arrange your washi tape in an intricate design, creating stripes, plaids, or geometric patterns, or simply stick on different pieces in varied sizes for a whimsical, patchwork effect. This creative approach ensures your gift wrapping is as thoughtful and unique as the present itself, making every recipient feel extra special.
62. Clipboard
Infuse some personality into a plain brown clipboard with the help of colorful washi tape. Experiment with various sizes and patterns, layering them or creating specific designs, until you achieve the exact look you desire. This simple yet effective makeover transforms a utilitarian office item into a stylish accessory that reflects your unique taste, making work and organization more enjoyable.
63. Serving Tray
Elevate your entertaining game by prettifying your serving tray with an array of washi tape strips. For added durability and to ensure your personalized tray lasts longer, consider coating it with a protective layer of Mod Podge once your design is complete. This simple step seals the tape, making the tray more resilient to spills and wear, ensuring it remains a stylish centerpiece for years to come.
64. DIY Laptop Cover
Prevent accidental mix-ups and express your individuality with a personalized DIY laptop cover. Adorning your laptop with washi tape ensures that you’ll always know which device is yours. Whether you opt for an abstract arrangement, a patterned design, or a specific theme, the most important outcome is that your laptop becomes uniquely identifiable. It’s a simple yet effective way to add character and prevent confusion in a busy environment.
65. Mini Wood Pallet Coasters
Protect your furniture in style with these adorable washi tape mini wood pallet coasters. For enhanced durability and to shield your mini pallet coasters from drink condensation, apply a layer of Mod Podge, followed by a clear acrylic sealer. Remember to wait until the Mod Podge is completely dry before spraying on the sealer. This ensures a waterproof and long-lasting finish, making your coasters both charming and functional.
66. Striped Frame
Create a chic and modern striped picture frame using washi tape. If you’re working with thin washi tape strips for this DIY project, a helpful tip is to first paint your picture frame white. This provides a clean and uniform background, allowing your colorful or patterned tape strips to stand out beautifully and create a crisp, professional-looking design that enhances your cherished photos.
67. Pickup Sticks
Recreate the classic game of Pickup Sticks with a fun washi tape twist! Gather some wooden skewers and decorate them with different washi tape patterns and colors to distinguish each stick. This is a delightful activity to enjoy with kids. Just be sure not to skip the crucial step of carefully snipping off the sharp end of each skewer to ensure safe play for everyone involved, making it a perfect family craft.
68. Chopsticks
Give your chopsticks a creative and personalized whirl by wrapping washi tape around one end. Remember to always apply the tape to the thicker, handle end of the chopstick, not the end used for eating. This simple decorative touch instantly elevates ordinary chopsticks, making them more enjoyable to use and adding a unique flair to your dining experience, whether for everyday meals or special occasions.
69. Wine Charms
DIY unique wine charms for your next get-together with friends. This simple craft allows everyone to easily identify their glass, preventing mix-ups and adding a personalized touch to your party. Cut small shapes or create mini flags with washi tape, then attach them to wine charm rings. The variety of washi tape patterns means you can tailor them to any theme or holiday, making every sip special.
70. Clock
Say good morning and break the habit of always being late with the help of a custom washi tape clock. This project makes for a great upcycling idea, especially when it cleverly incorporates old Scrabble tiles for the numbers, as seen in this tutorial. By adorning a plain clock face or creating a new one from scratch, you can design a functional and stylish timepiece that reflects your personal aesthetic.
71. Nail Art
Achieve intricate and unique nail art designs with the precision and versatility of washi tape. Measure a strip of washi tape to fit your fingernail, carefully lay it on, and trim any excess. Don’t worry if you make minor mistakes; a layer of top coat will help to smooth out and hide any small flaws on your nail art, leaving you with a polished and professional-looking manicure that’s easy to change whenever you like.
72. Craft Stick Dolls
Delight your children with these adorable washi tape craft stick dolls. This project is not only fun for them to play with but also for them to help create. Kids can actively participate in dressing up the dolls by choosing their favorite washi tape patterns and colors, fostering their creativity and fine motor skills. These personalized dolls make for fantastic imaginative play and can be easily customized for any character.
73. Washi Tape Makeup Brushes
If you share a room or simply want to add a personal touch to your beauty routine, personalize your makeup brushes with washi tape. You can either completely cover the handle for a bold statement or simply wrap a strip or two around it for a subtle accent. This quick and easy DIY helps you identify your brushes at a glance and adds a stylish flourish to your vanity, making them uniquely yours.
74. Staircase
Take your washi tape projects to the next level with a stunning staircase makeover. This transformative DIY project, as seen in this inspiring example, can turn an ordinary staircase into a vibrant focal point. For ease of application and a more dramatic effect, we advise opting for wide washi tape rolls. The broader size will simplify the covering process and make this ambitious project more manageable, yielding impressive results.
75. Statement Necklace
Craft a unique and eye-catching statement necklace using paperclips and washi tape. This washi tape paperclip necklace is incredibly easy to make, allowing you to experiment with various designs, such as a “V” shape or a triangle pattern. For an even more layered and sophisticated look, consider stacking multiple necklaces. This versatile project transforms simple office supplies into fashionable jewelry, perfect for adding a touch of personality to any outfit.
76. Wooden Table
Transform a plain wooden table into an instant eye-catching centerpiece with vibrant washi tape designs. By adding colorful patterns, stripes, or geometric shapes, you can easily change its look and make it truly unique. If you need a helpful reminder for rainbow colors, just think of the acronym: ROYGBIV (Red, Orange, Yellow, Green, Blue, Indigo, Violet). This simple DIY breathes new life into old furniture, making it both functional and a piece of art.
77. Washi Tape Clutch
Create a chic and personalized clutch from a clear poly envelope with this clever DIY project. After you’ve adorned the envelope with your chosen washi tape designs, remember to paint on a protective layer of craft sealer, like Mod Podge. This crucial step helps prevent the tape from peeling off, ensuring your personalized clutch remains durable and stylish for a long time, perfect for carrying your essentials with flair.
78. Calendar Marker
Mark your calendar efficiently and stylishly with different washi tapes for easier time management. This method is incredibly helpful when planning your travels: simply apply a strip of unique washi tape to the dates you’ll be out and about. Not only does this offer a clear visual representation of your schedule, but it also adds a colorful and personalized touch to your planner or wall calendar, making organization fun.
79. Washi Heart Wall Decor
Create a dazzling washi tape heart wall decor piece that adds a sparkling touch to any room. For this project, we highly recommend using wide washi tape rolls, as they make it easier to form clean square shapes. Remember to intentionally leave two small spaces bare within the heart’s design; this clever trick creates the illusion of a sparkling, radiant heart, adding depth and charm to your wall art.
80. Toy Car Track
Keep kids happily preoccupied with a DIY toy car track made directly on the floor using washi tape. This creative idea allows you to assign different colors for “road rules”: for example, use white washi tape for the main road, green for designated parking slots, and red for no-parking zones. This interactive craft not only encourages imaginative play but also introduces basic rules in a fun, hands-on way, all while being easily removable.
81. Ceiling Fan
Add a little quirk and unexpected charm to your ceiling fan with washi tape. This simple update can dramatically change the look of a room. For an even more unique and eclectic effect, consider using a different washi tape design on each of the fan blades. This quick and easy personalization transforms an ordinary fixture into a delightful focal point, bringing a subtle artistic touch to your overhead decor.
82. Upcycled Mint Tins
Give new life to empty mint tins by transforming them into practical and pretty storage containers. We particularly love turning these upcycled mint tins into miniature emergency sewing kits, perfect for popping into our bags. We’ve also heard they make a nifty storage hack for keeping earphones neatly coiled and tangle-free. Decorate them with various washi tape designs to make these small organizers as charming as they are useful.
83. Decorated Candle
Candles will look so much prettier with simple washi tape decorations. When adhering the tape to your candle, take care to smooth out any air bubbles that might get trapped underneath. This ensures a clean and professional finish, allowing the washi tape’s patterns to beautifully enhance the candle’s aesthetic. This quick DIY makes for elegant table decor or a thoughtful, personalized gift.
84. Wreath
Adorn your front door with a beautiful and unique spring wreath created from washi tape and upcycled items. This easy DIY wreath project is a fantastic way to welcome guests and celebrate the season. By combining various patterns and colors of washi tape with repurposed materials, you can craft a vibrant, eco-friendly decoration that stands out and showcases your creativity.
85. Legos
Transform your kid’s Legos into an engaging learning activity by adding washi tape. Apply tape with striped and polka-dotted designs to various Lego Duplo bricks. Then, encourage your little one to stack the different patterns, prompting them to determine which design has more Lego pieces. This creative approach to playing with Legos not only enhances fine motor skills but also introduces basic counting and pattern recognition in a fun, hands-on way.
86. Bookshelf
Add a nice personal touch to your bookshelf with a simple strip of washi tape. This subtle addition can significantly enhance the aesthetics of your reading nook or living room. Remember to consider your room’s existing color scheme and overall decor style when selecting which washi tape design to use for this project. A well-chosen tape can beautifully complement your books and decor, making your bookshelf a charming focal point.
87. Birdhouse Lamp
Help comfort children who are afraid of the dark by crafting them a cute little birdhouse lamp to serve as a whimsical nightlight. If you can find a washi tape design that perfectly matches the existing walls of your kids’ room, it will create a wonderfully cohesive and charming look. This project not only provides a gentle light source but also adds a playful, personalized element to their bedroom decor.
88. Mousepad
Fun Washi Tape Craft Ideas | Washi Tape Mousepad by DIY Ready at http://t.co/AP3A2hq7Q9http://t.co/mlHh7OPQSk pic.twitter.com/XvlGDe9aHu
— Inventive Housewife (@bravozulo_08b) June 9, 2015
If you struggle to find a mousepad design that perfectly suits your aesthetic, simply create your own with washi tape! For precise trimming of any excess washi tape, we suggest using an X-Acto knife to achieve a clean and professional finish for your mousepad. This DIY project allows for endless customization, ensuring your workspace is both functional and reflects your unique style.
89. Makeup Brush Holder
Keep your makeup brushes beautifully organized and easily accessible with this stylish makeup brush holder. This particular tutorial cleverly incorporates both washi tape and a white Sharpie to decorate a simple cup. The washi tape provides vibrant patterns and colors, while the Sharpie allows for additional doodles, labels, or personal touches, transforming an ordinary container into a chic and functional vanity accessory.
90. Chalkboard Frame
Enhance the charm of your chalkboard frame by lining its edges with strips of washi tape. For the most polished appearance, commit to a single direction for all sides of the frame, even if it feels tempting to take an easier route for the shorter edges. The overall aesthetic will be significantly improved if all tape directions are uniform, creating a cohesive and beautifully framed chalkboard perfect for notes or decor.
91. Bike Helmet
Inject a vibrant personality into an ordinary bike helmet with the delightful addition of washi tape. We absolutely adore how this bike helmet bursts with charm, especially with its predominant pink hues. The thoughtful pairing of pink washi tape and a canvas bow at the back makes it look as though it was custom-made for a princess, proving that safety gear can be both fun and stylish.
92. Stationery
Create elegant and personalized stationery, perfect for letter-writing or as a thoughtful gift for friends. This classic design is achieved by simply lining the top edge of your stationery with strips of washi tape. For a vintage feel, lightly rub the tape edges with an ink pad. This refined DIY project pairs wonderfully with a matching washi tape bookmark, creating a beautiful and cohesive set that exudes charm and thoughtfulness.
93. DIY Lamp from Cardboard and Washi Tape
Lamps don’t need to be expensive, especially when you can craft a unique one yourself. This DIY lamp made from cardboard is an innovative and budget-friendly project. Decorate it with washi tape in geometric patterns, and it will truly transform into a radiant gem. This creative endeavor proves that with simple materials and a touch of imagination, you can design a striking piece of home decor that’s both functional and artistic.
94. Mirror Frame
Transform a plain mirror frame into a stunning work of art using washi tape. This mirror frame DIY is an excellent way to add personality and style to any room. For precise and clean cuts, especially when dealing with corners and intricate designs, we highly recommend using a craft knife. Its ease of handling ensures more accurate results, giving your mirror a professional and polished finish.
95. Snake Craft
If you’re searching for engaging washi tape crafts for kids, you’ve hit the jackpot with this simply fun snake craft. This project is a guaranteed hit with little ones, offering a delightful way to explore creativity. We’ve found that googly eyes work best for giving your washi tape snake personality, but you can also easily draw the eyes on with a black Sharpie for a charming, handmade look, making it a versatile and exciting activity.
96. Gift Bows
Elevate your gift wrapping with charming DIY gift bows crafted from layers of curved washi tape. This DIY gift bow is created by meticulously placing curved strips of washi tape on top of each other. The more layers you add, the more intricate and voluminous the bow will appear, giving your presents a truly professional and handmade touch that stands out from the crowd.
97. Pebble Magnets
Create elegant and unique magnets by combining washi tape designs with smooth crystal pebbles. Since these pebbles can be quite small, we highly recommend using skinny yet strong magnets for this project to ensure they adhere securely. This DIY allows you to craft beautiful, personalized magnets that are perfect for decorating your fridge or magnetic board, adding a touch of natural beauty and customized style.
98. 3D Card
A 3D card will undoubtedly impress far more than a regular flat card. Just check out this tutorial from Creations with Christina, which features a charming washi tape flag in its background. The card also incorporates a clever cutout to reveal a different pattern underneath, adding depth and an element of surprise. This creative use of washi tape makes for a truly memorable and delightful handmade greeting.
99. DIY Envelope
Design your envelopes with stylish strips of washi tape to create your own personalized stationery. These customized envelopes will look incredibly chic, as each one beautifully reflects your unique personality and attention to detail. Whether for special occasions or everyday correspondence, a washi tape-lined envelope adds an elegant and thoughtful touch that makes receiving mail even more delightful.
100. Chore Chart
Assigning chores to kids will become a breeze with the help of this engaging washi tape chore chart. Encourage your children to pick one washi tape design and then have them select 1-2 chores per day. This visual and interactive method makes household tasks more fun and manageable, fostering responsibility and organization while allowing kids to personalize their chore-tracking system, making it a win-win for everyone.
Learn how to make your own washi tape! Press play on this video by Fantasvale Art Lab:
As you can see, the creative possibilities with washi tape are truly endless! We’ve only just scratched the surface with these 100 incredible DIY projects and are constantly discovering new ways to utilize this versatile tape. From simple decor to intricate crafts, washi tape empowers everyone to become an artist.
If you have unique washi tape creations or innovative ideas, we would be absolutely delighted to hear about them and see your work. Share your inspiration with our crafting community!
How do you use washi tape for your DIY projects? Let us know in the comments section below!
Up Next:
- 55 Easy Crafts To Make And Sell
- Save On Crafts | 31 Easy DIY Crafts
- 17 Healthy Super Bowl Recipes You Can Make For Game Day
Stay connected with us on Facebook, Twitter, Pinterest, and Instagram!
Ready to start crafting? Click HERE to Buy a fantastic selection of washi tape on Amazon!
Editor’s Note: This post was originally published on July 18, 2018, and has been updated for quality and relevancy.