
Crafting Heartfelt Connections: Your Ultimate Guide to Handmade Holiday Cards
In a world increasingly driven by digital communication, a tangible, thoughtful gesture can truly stand out. Handmade holiday cards offer a unique way to create heartfelt connections that mass-produced, store-bought versions simply cannot replicate. This year, move beyond generic designs and immerse yourself in the joy of crafting something truly unforgettable. Using a blend of classic techniques like stamping and watercolor, combined with the charm of recycled materials, you can craft eco-friendly cards brimming with personality, artistic flair, and genuine warmth.
Whether you’re a seasoned artisan or picking up crafting supplies for the very first time, this comprehensive guide will equip you with simple yet stunning methods to create holiday cards your friends and family will cherish for years to come. Prepare to infuse your holiday greetings with a personal touch that speaks volumes about your care and creativity.
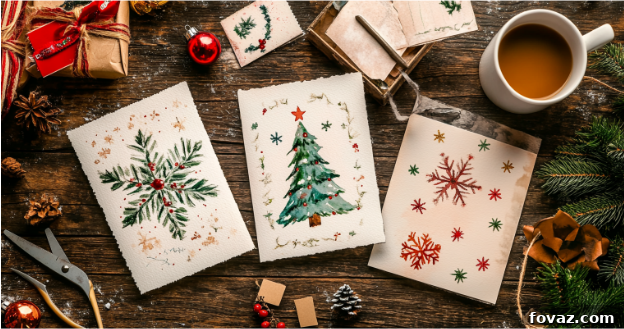
Why Handmade Holiday Cards Make an Unforgettable Difference
The decision to send a handmade holiday card is a powerful one, conveying a level of thoughtfulness and authenticity that pre-printed alternatives often miss. Each card becomes a miniature work of art, telling a unique story and demonstrating the time, effort, and affection you’ve invested. In an era saturated with generic greetings, these personal touches shine brightly, making your message resonate deeply with recipients.
Embracing Sustainability and Eco-Consciousness
Crafting your own holiday cards also offers a wonderful opportunity to support sustainable practices. By thoughtfully reusing recycled materials such as old calendars, discarded gift wrap, or even cereal boxes, you not only add unique textures and character to your designs but also significantly reduce waste. It’s a rewarding win-win scenario for both the environment and your creative spirit, transforming potential landfill items into beautiful expressions of holiday cheer.
The Joy of the Creative Process
Beyond the final product, the act of making these DIY holiday cards is a deeply satisfying and joyful activity in itself. Imagine a cozy evening: holiday music playing softly in the background, a warm mug of cocoa or spiced tea by your side, and you, completely immersed in a creative project. This isn’t merely about constructing cards; it’s about creating cherished memories, fostering mindfulness, and embracing the true spirit of the season through artistic expression. It’s a peaceful escape from the holiday rush, allowing you to connect with your inner artist and spread joy even before the cards are sent.
Your Simple Guide to Creating Stunning Handmade Holiday Cards
This holiday season, bypass the crowded aisles and predictable options of store-bought cards. Instead, dive headfirst into the immense satisfaction and festive joy of crafting your own. With just a dash of creativity and a few accessible supplies, you can design breathtaking, personalized greetings that your loved ones will undoubtedly treasure. This guide will walk you through simple techniques and provide essential tips to craft cards that truly stand out—absolutely no advanced artistic skills are required to achieve beautiful results!
Essential Supplies for Your Card Crafting Journey
Having the right tools and materials at hand is the key to making your card-making process smooth, enjoyable, and ultimately successful. Here’s a detailed look at what you’ll need to get started on your handmade holiday card adventure:
- Watercolor paints: These versatile paints allow for incredible artistic freedom. Choose soft pastels for a gentle, ethereal holiday scene, or opt for bold, vibrant tones for a modern, energetic design. Experiment with blending colors to create delicate gradients or keep them distinct for striking, contemporary patterns. A basic pan set is perfect for beginners.
- Paintbrushes: A selection of brushes will serve you well. Larger brushes are ideal for effortlessly covering backgrounds with washes of color, creating skies, or broad strokes. Smaller, fine-tipped brushes are indispensable for adding intricate details, crisp outlines, or delicate patterns like snowflakes or tiny stars.
- Rubber stamps: Stamps are fantastic for adding quick, professional-looking designs. Stock up on holiday-themed options such as elegant reindeer, classic wreaths, festive ornaments, or cheerful snowmen to infuse instant seasonal charm. Beyond specific holiday motifs, versatile designs like polka dots, stars, stripes, or geometric shapes can be adapted to suit any card design throughout the year.
- Recycled paper or cardstock: Embrace sustainability by using materials you already have. Old calendars provide sturdy bases and interesting graphics. Leftover gift wrap can add colorful patterns, and even cereal boxes or old greeting cards can be repurposed into unique card bases or decorative elements. The varied textures and existing prints on these materials can significantly enhance your designs and contribute to an eco-friendly aesthetic.
- Glue stick or double-sided tape: Reliable adhesives are crucial for keeping your layers secure and edges neat. A glue stick is excellent for general paper adhesion, while double-sided tape offers a strong, mess-free bond, perfect for attaching embellishments or creating multi-layered designs without visible adhesive.
- Scissors: A good pair of sharp scissors is essential for clean, precise cuts, ensuring your card edges and cut-out shapes look professional. For an added whimsical touch, consider investing in decorative-edge scissors that can create zigzags, scallops, or other fun patterns along your paper edges.
Optional extras for extra sparkle and flair: Consider adding glitter (eco-friendly options are available!), decorative ribbon, tiny bells, sequins, or even small buttons for that extra touch of festive magic and dimension.
💡 Tip: New to the art of watercolors? Don’t be intimidated! Many online resources offer fantastic beginner tutorials. For a great starting point, explore simple techniques with Tate’s watercolor tutorials to build your confidence and master basic washes and strokes.
Three Creative Techniques for Stunning Handmade Holiday Cards
Now that you have your supplies ready, let’s explore three distinct and accessible techniques that will allow you to create beautiful, personalized holiday cards with ease.
1. Stamping Holiday Cheer with Precision
Stamped designs are an absolute favorite and provide the perfect entry point for anyone dipping their toes into the delightful world of handmade holiday cards. With an extensive array of festive stamps available—ranging from intricate snowflakes and elegant holly leaves to cheerful Christmas trees and jolly Santa faces—you can effortlessly create a polished, professional-looking card without the pressure of complex freehand drawing. Stamping offers consistency and allows for beautiful repetitive patterns or a singular, impactful focal point.
- Prepare Your Card Bases: Begin by cutting your chosen recycled paper or sturdy cardstock into the desired card-sized pieces. Ensure the material is durable enough to hold the ink without bleeding through. Fold them cleanly to create your card blanks.
- Ink and Press Your Design: Select your stamp and an appropriate ink pad. Evenly ink your stamp by gently pressing it onto the ink pad. Then, carefully and firmly press the inked stamp onto your card, applying even pressure to ensure a clear, complete impression. Experiment with creating repeating patterns for a modern, textured look, or use one bold design as the central focal point of your card.
- Add Personal Messages and Embellishments: Once the ink is dry, add a heartfelt, handwritten greeting inside or on the front, such as “Peace and Joy,” “Season’s Greetings,” or a personalized message. For an extra touch of sophistication and sparkle, consider outlining your stamped design with metallic markers or adding a sprinkle of glitter while the ink is still slightly wet.
💡 Tip: Elevate your stamping by layering different ink colors for subtle gradient effects, or combine multiple, complementary stamps (e.g., a large tree with tiny stars) for added visual depth and a more intricate composition.
2. Painting a Watercolor Wonderland with Grace
Watercolors are unmatched for creating soft, elegant, and often ethereal designs that evoke the tranquility and beauty of the holiday season. Their translucent quality allows for beautiful layering and blending, making them ideal for capturing serene winter landscapes or delicate festive motifs.
- Sketch Your Vision: Begin by lightly sketching your desired design onto your cardstock with a pencil. A classic holiday scene like a snow-covered tree, a whimsical snowman, or a serene winter landscape works beautifully. Remember, your pencil lines should be very faint, as they will be erased or covered by the paint, ensuring a clean final look.
- Apply Flowing Colors: Dip your brush in clean water, then pick up a small amount of paint. Apply the colors to your sketch, allowing them to flow and blend naturally. Traditional holiday hues like various shades of green, cool blues, shimmering golds, and deep reds are excellent choices for festive themes. Build up layers for richer color or use more water for lighter, translucent effects.
- Refine and Detail: Once your watercolor layers are completely dry, it’s time to add the finishing details. Use a fine-tipped waterproof pen or a small brush with opaque paint to add crisp details like tiny ornaments on a tree, individual snowflakes falling, or precise outlines to define elements of your scene.
💡 Tip: For a truly magical and frosty texture, sprinkle a pinch of coarse salt onto wet watercolor paint. As the paint dries, the salt crystals absorb the pigment, creating beautiful, starburst-like patterns reminiscent of frost or snow. Gently brush off the dried salt once the paint is fully dry for an enchanting snowy effect.
3. Creating Dynamic Layered Collages
Creating layered collages is an incredibly fun and imaginative way to infuse your holiday cards with unique dimension, texture, and personality. This technique also provides a fantastic opportunity to give leftover materials a vibrant second life, perfectly aligning with eco-conscious crafting. Whether your vision is a cozy snowy winter scene, a classic holiday wreath, or an abstract festive design, collaging empowers you to experiment freely and customize each card, guaranteeing that no two will ever be exactly alike. It’s a budget-friendly, eco-conscious, and profoundly creative technique that truly allows your individual flair to shine.
- Cut and Curate Your Elements: Gather a variety of recycled materials such as glossy magazine pages, shiny foil from packaging, matte colored paper, or old wrapping paper. Cut out festive shapes like stars, ornaments, geometric forms, or abstract snippets. The key is to mix and match textures, patterns, and colors to create visual interest.
- Arrange Your Layers: On your card base, begin arranging your cut pieces in overlapping layers. Don’t immediately glue them down. Instead, experiment with different placements, rotations, and combinations until you find a composition that you love. This trial-and-error phase is crucial for achieving a balanced and engaging design.
- Secure and Embellish: Once satisfied with your arrangement, carefully attach each piece using your glue stick or double-sided tape. After the collage elements are secure, enhance your design with embellishments. Add small pieces of ribbon, buttons, sequins, or even strands of yarn. Finish with bold, handwritten lettering or a stamped message to add a final, polished touch that ties the whole composition together.
💡 Tip: Maximize visual impact by intentionally using contrasting colors and textures within your collage. For instance, place a matte, textured paper next to a smooth, shiny foil piece, or use a vibrant color against a muted background to make certain elements pop and create a more dynamic and engaging visual experience.
Finishing Touches to Spread the Cheer Even Further
Your beautiful handmade holiday cards are almost complete! The final step involves adding a truly personal and meaningful message inside each one. Beyond a simple signature, take a moment to share a cherished memory, express genuine gratitude, offer words of encouragement, or simply wish someone profound joy and peace for the season and the New Year. A personal anecdote or a specific compliment can transform a card into a treasured keepsake, forging a deeper connection with the recipient.
If you plan on mailing your exquisite creations, take precautions to protect them during transit. Place your cards in sturdy padded envelopes, or insert a piece of rigid cardboard to prevent bending and damage to any delicate embellishments. If you’re gifting your cards in person, consider pairing them with a small, complementary token, such as a homemade ornament, a festive bookmark, or a small bag of homemade cookies. This thoughtful pairing elevates the gesture and makes the gift even more special.
Handmade Holiday Cards: Cultivating Heartfelt Connections and Lasting Memories
Ultimately, handmade holiday cards are so much more than mere paper and ink. They are a delightful fusion of creativity, sustainable practice, and profound care. They are not just cards; they are tangible gifts of thoughtfulness, infused with love and personal energy, sent from your heart to theirs.
By harnessing the versatility of stamps, the elegance of watercolors, and the resourcefulness of recycled materials, you possess the power to create truly personalized cards that stand apart in their uniqueness and charm. These bespoke greetings transcend fleeting holiday greetings, transforming into cherished keepsakes that recipients will proudly display and fondly treasure for many years, serving as a warm reminder of your special bond.
Are you feeling inspired and excited to create your own unique handmade holiday cards this season? We’d love to hear from you! Please share your favorite crafting ideas, innovative techniques, or beloved traditions in the comments section below. Let us know how you plan to add a personal, unforgettable touch to your holiday celebrations this year. Your creative tips and insights might just spark inspiration in others, encouraging a whole community to embrace the joy of handmade art this festive season!
Frequently Asked Questions About Handmade Holiday Cards
Q: Can kids participate in making handmade holiday cards?
A: Absolutely! Card making is a fantastic family activity. Techniques like stamping and creating layered collages are particularly well-suited for children of all ages. Just ensure adult supervision, especially when using scissors, and consider eco-friendly glitter options for less mess and environmental impact.
Q: How can I prevent watercolor paper from curling or buckling?
A: The best way to prevent curling is to use heavier watercolor paper (at least 140lb/300gsm), which is designed to withstand moisture. Once your painted cards are completely dry, you can further flatten them by placing them under a stack of heavy books for a few hours or overnight.
Q: Are handmade cards typically more costly than store-bought ones?
A: Not at all! In fact, handmade cards can be very budget-friendly, often costing less than their store-bought counterparts. By strategically reusing materials like recycled paper, old magazines, fabric scraps, or repurposing existing stamps and paints, you can keep your expenses remarkably low while still creating stunning designs.
Q: What’s the best way to ensure my handmade cards arrive safely in the mail?
A: To protect your carefully crafted cards, especially those with delicate embellishments, consider using padded envelopes for extra cushioning. For added rigidity and to prevent bending, you can also insert a piece of sturdy cardboard (like from a cereal box) into the envelope alongside your card.
Q: What if I don’t consider myself artistic? Can I still make nice-looking cards?
A: Absolutely, yes! You don’t need to be a professional artist to create beautiful handmade cards. Techniques such as stamping, which relies on pre-made designs, and collage, which involves arranging pre-cut shapes, are incredibly forgiving and produce stunning results with minimal artistic skill. Focus on simple designs, clean lines, and heartfelt messages, and your cards will be cherished.