
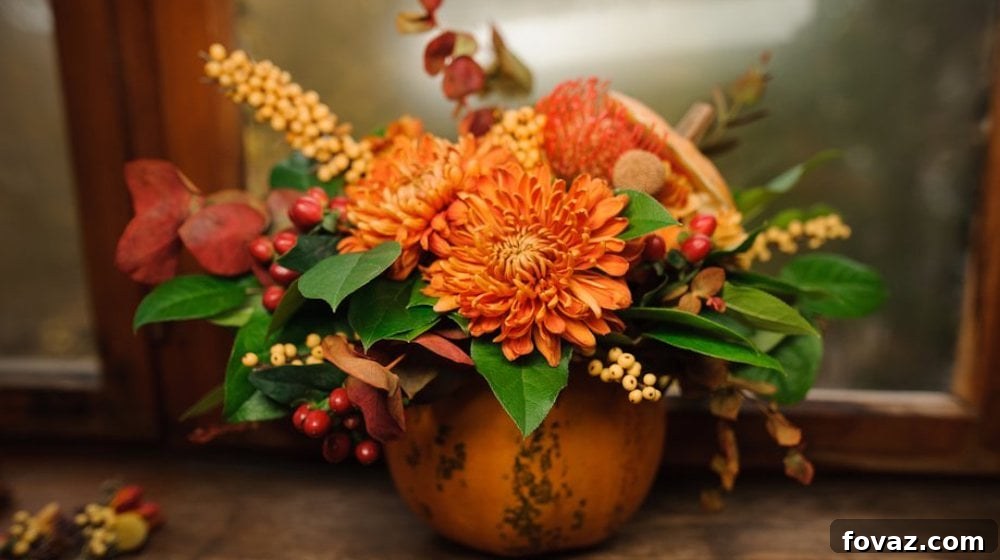
Easy Thanksgiving Centerpiece Ideas for an Unforgettable Table
Thanksgiving is a time for gratitude, delicious food, and cherished moments with loved ones. As you plan your holiday feast, don’t overlook the power of a beautifully adorned table to enhance the festive atmosphere. A thoughtfully designed centerpiece not only ties your decor together but also creates an inviting ambiance that makes guests feel truly welcome. Forget complicated arrangements and expensive florists; this comprehensive guide will show you how to craft stunning, budget-friendly Thanksgiving centerpieces using simple materials and minimal effort.
From the warm glow of creative candle projects to fresh floral designs nestled within seasonal pumpkins, we’ve rounded up a collection of inspiring ideas designed for ease and elegance. Each project emphasizes practicality, ensuring there’s ample room for serving dishes and lively conversation. We’ve also included essential safety notes and clever styling tips to help you build and display your creations with confidence. Get ready to impress your guests and elevate your holiday table with these charming DIY centerpieces!
RELATED: DIY Wooden Lantern Centerpiece for Your Next Soiree
Why These Thanksgiving Centerpiece Ideas Stand Out
- Quick and simple Thanksgiving centerpieces you can assemble with everyday materials and minimal preparation.
- A delightful mix of candle arrangements, vibrant florals, and low-profile designs that maximize space for both serving and engaging conversation.
- Every project comes with clear safety guidelines to ensure a hazard-free and enjoyable gathering for everyone.
- Perfect for any setting, whether you have limited table space or are working with a tight budget.
- Designed to complement your delicious holiday meal without overpowering the table.
Great Thanksgiving Centerpiece Ideas to Celebrate the Holidays
Thanksgiving truly embodies the essence of what matters most: the warmth of family, the joy of good friends, and the delight of comforting, homemade dishes. We cherish the classic traditions that accompany this special holiday, from heartwarming recipes to creating an inviting table setting that instantly puts guests at ease. A well-chosen Thanksgiving centerpiece plays a pivotal role in enhancing this setup by filling the space with visual interest and harmonizing colors or textures, making your entire table feel cohesive, organized, and utterly welcoming.
In this curated collection, you’ll discover innovative projects that transform common household items into captivating decor. Explore stunning candle setups that masterfully set a cozy, inviting atmosphere, and even a unique floral option built directly into a pumpkin for incredibly easy assembly. Every single idea is crafted to work seamlessly, even if you’re navigating the challenge of limited table space or adhering to a strict budget. Prepare to find your new favorite holiday decoration!
Thanksgiving Centerpiece Inspirations Everyone Will Adore
These centerpiece ideas are specifically designed to leave ample room for serving platters and easy passing of food, ensuring that nothing obstructs the meal or lively conversations once dinner commences. Furthermore, each project thoughtfully includes quick safety notes to guide you in building and setting up your decor securely and confidently. Enjoy crafting a beautiful, functional, and safe holiday table.
1) Butter Candle in a Bread Boule: A Culinary and Decorative Delight
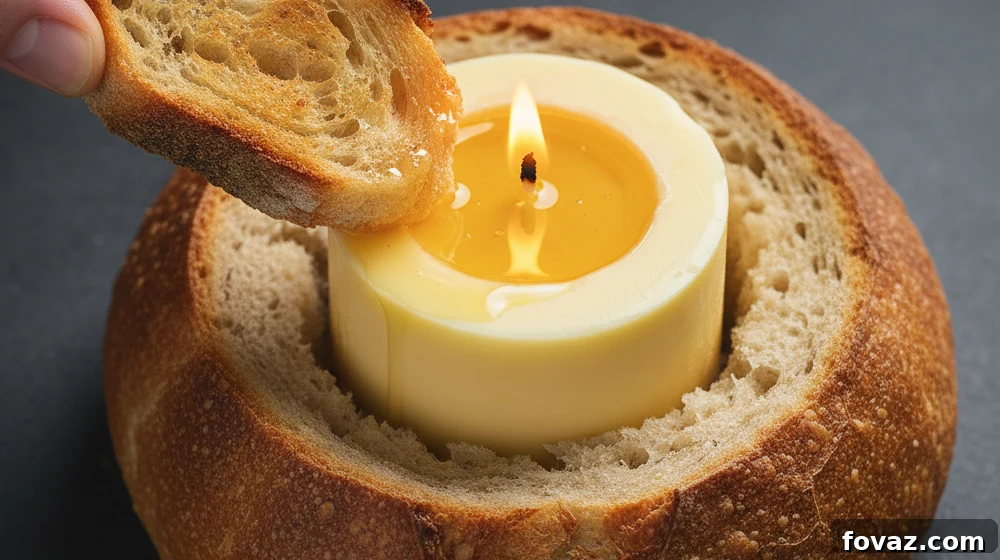
Imagine the delightful aroma filling your home: warm, crusty bread mingled with savory garlic butter, all emanating from a softly glowing flame. This innovative butter candle centerpiece isn’t just a decoration; it’s an interactive and edible experience that will undoubtedly become a conversation starter at your Thanksgiving table. It combines rustic charm with gourmet appeal, offering both visual warmth and a delicious accompaniment to your meal. This idea is surprisingly simple to create and leaves a lasting impression, showcasing your creativity and hospitality.
Materials:
Sourdough boule, unsalted butter (softened), roasted garlic (minced), fresh chopped herbs (like rosemary, thyme, or chives), a pinch of sea salt, a food-safe candle wick, a small plastic cup or metal mold (suitable for butter candle size), a paring knife, and a spoon.
Steps:
- In a bowl, whip the softened unsalted butter until fluffy. Incorporate the minced roasted garlic, chopped fresh herbs, and a pinch of sea salt until thoroughly mixed. This creates your flavorful butter candle “wax.”
- Prepare your butter candle mold: Thread the food-safe wick through the bottom of the small cup or metal mold. Secure the wick at the base by sealing the hole with a small amount of the whipped butter mixture to prevent leakage.
- Carefully fill the mold with your flavored butter mixture, ensuring the wick remains centered and upright. Chill the butter-filled mold in the refrigerator or freezer until the butter is completely solid and firm.
- Once the butter candle is solid, gently remove it from the mold. Using a paring knife, carefully core a well in the center of your sourdough boule, making sure the well is just large enough to snugly fit the butter candle.
- Place the solid butter candle inside the prepared well in the bread boule. Position it securely. Light the wick just before serving your meal, allowing the butter to slowly melt, creating a warm, fragrant dip.
Safety:
Always use only food-safe candle wicks designed for culinary applications. Position the candle securely within the bread and keep the flame well away from the bread crust and any loose linens or flammable decorations on your table. Never leave a lit candle unattended.
Styling Tip:
Present this culinary masterpiece on a large rustic wooden board. Surround it with small piles of warm, torn artisanal bread for dipping. Add a few small dishes of flaky sea salt, black pepper, or red pepper flakes for guests to personalize their butter. This creates a charming and interactive centerpiece.
2) Foam-Free Pumpkin Vase: A Sustainable Floral Statement
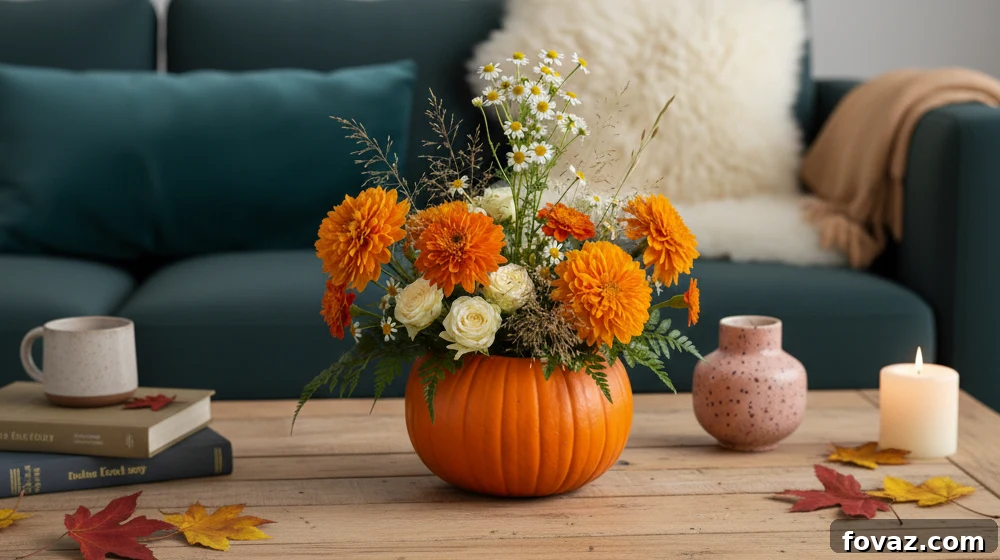
For a truly autumnal and sustainable floral display, transform a humble pumpkin into a stunning vase. This eco-friendly approach not only utilizes a seasonal harvest favorite but also avoids the use of floral foam, making it a greener choice for your Thanksgiving decor. The natural texture and rich color of the pumpkin provide a perfect backdrop for a vibrant array of fall flowers and foliage. It’s an effortlessly elegant centerpiece that celebrates the season’s bounty and adds a touch of rustic sophistication to your table.
Materials:
A medium-sized pumpkin (choose one with a flat base for stability), a small glass bowl or sturdy jar that fits inside the pumpkin, chicken wire or a floral pin frog, pruners, a sharp knife, a sturdy spoon or ice cream scoop, water, and an assortment of mixed fall stems (e.g., chrysanthemums, dahlias, eucalyptus, berries, dried leaves).
Steps:
- Using a sharp knife, carefully cut a wide opening around the top of your pumpkin. This opening should be large enough to comfortably insert and remove your inner bowl or jar. Scoop out all the flesh, seeds, and stringy bits from the pumpkin interior using your spoon, ensuring a clean cavity.
- Place your small bowl or jar inside the hollowed pumpkin. The rim of the bowl should ideally be slightly below or flush with the pumpkin’s opening. Fill the bowl almost to the top with fresh water.
- To provide structural support for your floral arrangement, form a loose ball of chicken wire and gently place it into the water-filled bowl, or position a floral pin frog securely at the bottom of the bowl. This will help hold stems in place.
- Begin arranging your mixed fall stems. Start with your greenery (like eucalyptus or olive branches) to establish the overall shape and structure. Next, add berry stems for texture and color. Finally, place your main blooms, distributing them evenly and considering varying heights and angles for a natural, abundant look.
Safety:
As pumpkins can degrade over time and potentially leak, always place your pumpkin vase on a decorative tray or a protective mat to prevent any moisture damage to your dining table or tablecloth. Check the water level daily and replace it to keep flowers fresh.
Styling Tip:
Opt for a cohesive fall color palette, incorporating rich hues like deep oranges,burgundies, rusts, and creams. Allow a few stems to gently bend and spill outward from the pumpkin, creating a soft, organic, and abundant look that feels plucked straight from a fall garden.
3) Bud-Vase Runner: A Minimalist and Elegant Lineup
Sometimes, less is truly more. A bud-vase runner offers a sophisticated and minimalist approach to Thanksgiving decor, allowing your individual floral choices to shine without overwhelming the table. This linear arrangement creates a beautiful visual flow down the center of your table, leaving ample space for serving dishes and maintaining clear sightlines for guest interaction. It’s a versatile design that can be adapted to various styles, from rustic farmhouse to modern chic, by simply changing the vase styles and floral selections. The delicate placement of single stems alongside flickering tea lights adds a touch of understated luxury and warmth.
Materials:
8–20 small bud vases (varying heights and shapes add visual interest), single stems of your favorite fall flowers (such as mums, roses, carnations, or scabiosa), small sprigs of aromatic greenery (like olive or rosemary), small tea lights or votive candles, and a table runner or a decorative wood plank to anchor the display.
Steps:
- Begin by selecting a variety of bud vases, mixing different heights, shapes, and textures to create a dynamic and visually appealing display. Arrange them in a loose line down the center of your table or along your chosen runner, spacing them evenly but allowing for some organic clustering.
- Fill each bud vase approximately two-thirds full with fresh water. Trim the stems of your chosen flowers and greenery to appropriate lengths, ensuring they stand upright and are proportionate to their respective vases. Aim for stems that are not too tall, to maintain clear visibility across the table.
- Place one single stem into each vase. When selecting your flowers, consider sticking to a cohesive color palette, perhaps two or three complementary fall colors. This creates a refined and harmonious look that is both simple and striking.
- To introduce a warm and inviting glow, carefully place small tea lights or votive candles in between the bud vases. Their soft flickering light will enhance the ambiance and make the individual blooms sparkle.
Safety:
When using real tea lights, ensure they are placed several inches away from any foliage, which can be flammable. Always use sturdy, heat-safe holders for your candles to prevent wax spills and fire hazards. Consider using LED tea lights for a completely worry-free and safe option, especially around children or pets.
Styling Tip:
Instead of a perfectly straight line, try clustering the bud vases in small, asymmetric groups along the runner. This creates a more organic, artistic, and satisfying pattern, breaking up the linearity and adding visual depth to your arrangement. Incorporate small decorative elements like miniature gourds or scattered nuts for added texture.
4) Floating Cranberries + Candle Jars: Festive and Bright
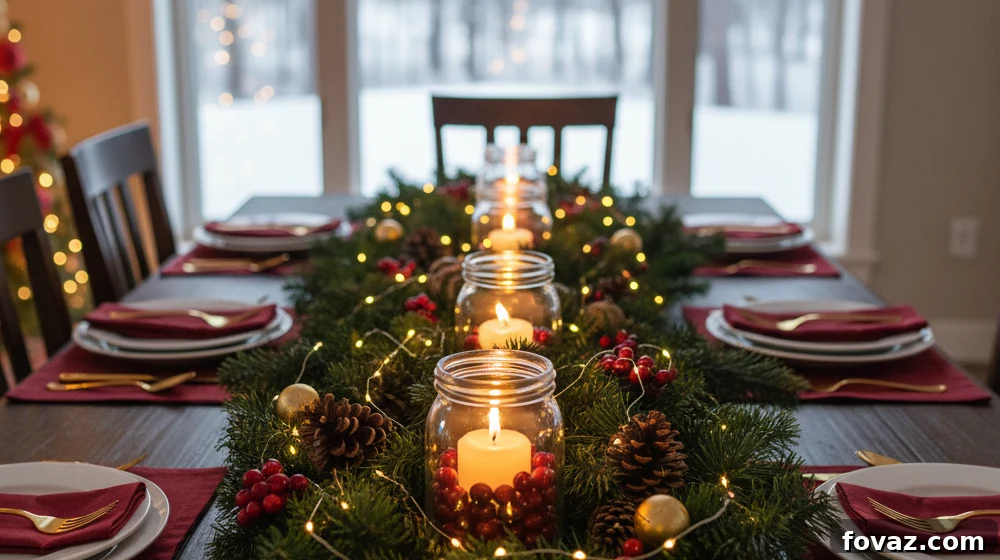
Embrace the vibrant colors and fresh scents of the season with this incredibly simple yet stunning centerpiece featuring floating cranberries and candles. This idea is a quintessential fall and winter decoration, perfect for adding a pop of festive red and a warm, inviting glow to your Thanksgiving table. The buoyant cranberries create a beautiful visual effect as they surround the delicate flame of a floating candle, while a sprig of rosemary or thyme adds a touch of natural elegance and a subtle, aromatic scent. It’s a low-effort, high-impact design that looks far more complicated than it is.
Materials:
Several clear glass jars, cylinders, or varying height vases; a bag of fresh cranberries; fresh rosemary or thyme sprigs; floating candles (small, disc-shaped); water; and an optional tray or table runner for grouping.
Steps:
- Begin by filling your chosen clear glass jars or cylinders approximately three-quarters full with fresh water. Ensure the water level is high enough to allow the cranberries and floating candles to sit beautifully.
- Carefully add a generous handful of fresh cranberries to each jar. The cranberries will float on the surface, creating a lovely festive red base for your candles. Then, gently place a single sprig of rosemary or thyme into each jar; the herbs will sink slightly or float among the cranberries, adding a touch of green and a pleasant aroma.
- Finally, place one floating candle on top of the water in each jar. The candles will rest on the surface, ready to be lit. For a more dynamic arrangement, group the finished jars together in odd numbers (e.g., three, five, or seven) along the center of your table or on a decorative tray.
Safety:
Always use heat-safe glass vessels to prevent cracking from the candle’s heat. Ensure the wicks of your floating candles are centered and trim them if necessary for a clean burn. Crucially, do not overfill the vessels; leave enough space from the rim to prevent water displacement and spills when the candle is placed or moved, and to keep the flame a safe distance from any nearby decorations. Never leave lit candles unattended.
Styling Tip:
To add visual interest and dimension, incorporate jars of varying heights into each cluster. This creates a more dynamic and professional look. For an extra touch of glamour and light reflection, arrange the entire grouping on a mirrored tray or a metallic runner. The reflective surface will amplify the warm glow of the candles and the vibrant color of the cranberries.
5) “Candle Plate” Drip Art Centerpiece: Rustic Elegance
This “Candle Plate” drip art centerpiece offers a dramatic yet effortlessly chic focal point for your Thanksgiving table. It embraces the timeless beauty of taper candles, creating an artistic display where the melted wax becomes part of the decor. The cascading drips evoke a sense of old-world charm and rustic elegance, perfect for a cozy holiday gathering. Alternatively, for those preferring a worry-free option, LED taper candles can replicate the visual appeal without the open flame or wax mess, maintaining the aesthetic. This centerpiece is surprisingly easy to assemble and can be customized with various candle colors and accompanying embellishments.
(Note: This design only creates the characteristic wax drips if you use real taper candles. Opting for LED tapers will remove the drip effect but will still provide a beautiful, consistent glow and maintain the overall aesthetic.)
Materials:
A heat-safe plate or shallow dish (ceramic or metal is ideal), 5–9 taper candle holders (varying heights can add interest), 5–9 taper candles in a single complementary color, museum putty or floral sticky clay for securing, a decorative charger plate or sturdy tray to protect your table, and a lighter (if using real candles) or LED tapers (if preferring no flame).
Steps:
- Take a small piece of museum putty (or floral sticky clay) and press it firmly onto the base of each taper candle holder. This will create a strong adhesive bond to your plate.
- Carefully attach each taper candle holder to the heat-safe plate, pressing down firmly to ensure they are securely anchored and will not slide or tip over. Arrange them in an organic cluster or a symmetrical pattern, as desired.
- Insert your chosen taper candles into their respective holders, ensuring they stand perfectly straight. This is crucial for even burning and elegant wax drips (if using real candles).
- Place the entire plate assembly onto a larger decorative charger plate or a sturdy tray. This not only adds another layer of visual interest but also provides essential protection for your dining table from any potential wax drips or heat.
- If you are using real taper candles, light them carefully just before your guests arrive. Allow them to burn for a period until the wax begins to beautifully drip down the sides, creating that iconic “drip art” effect. Monitor them closely.
- If you’ve opted for LED taper candles, simply turn them on and adjust their placement within the holders to mimic the warm, clustered glow of real candles, providing a safe and flameless alternative.
Safety:
If you are using real taper candles, *never* leave them unattended. Always ensure the setup is placed well away from any flammable materials such as curtains, linens, greenery, or anything that could heat up or catch fire. LED tapers are an excellent alternative as they completely eliminate the open-flame risk and are safe to use near foliage, fabrics, and around children or pets.
Styling Tip:
For a cohesive and sophisticated look, choose all your taper candles in one unified color palette – perhaps ivory, deep burgundy, burnt orange, or a muted sage green. Enhance the base of the centerpiece by scattering a few small, seasonal fruits like miniature pomegranates, persimmons, or decorative ornaments around the candle plate for added texture and dimension.
6) Taper-Candle Clusters with Tonal Greenery: A Warm Invitation
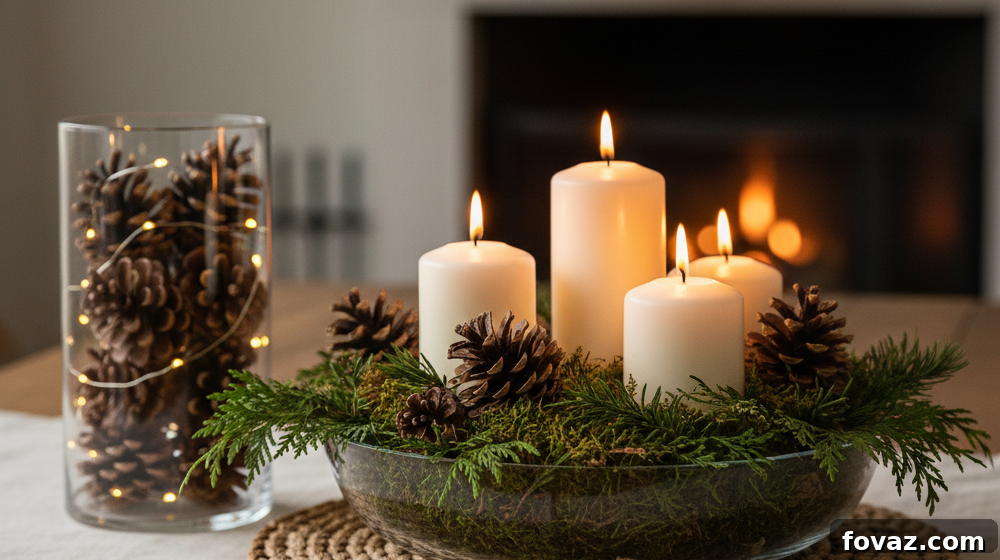
This centerpiece idea combines the timeless elegance of taper candles with the fresh, calming presence of natural greenery, creating a wonderfully warm and inviting atmosphere for your Thanksgiving celebration. The gentle glow of the candles, especially when arranged in varying heights, adds a dynamic visual interest, while the soft, tonal greens of eucalyptus or olive branches provide a sophisticated backdrop. It’s a versatile design that evokes a sense of natural beauty and understated luxury, perfect for creating a memorable holiday tablescape that feels both chic and welcoming. This arrangement is also highly adaptable, working beautifully in both modern and traditional settings.
Materials:
An assortment of taper candle holders (mix heights for visual appeal), neutral-colored LED taper candles (e.g., ivory, cream, soft gold – or real tapers if preferred), fresh eucalyptus or olive branches (or other fall greenery), optional mini pumpkins or persimmons for added color and texture, and a fabric table runner.
Steps:
- Begin by laying your chosen fabric runner down the very center of your dining table. This will serve as the foundation and anchor for your entire centerpiece, defining its length and width.
- Carefully arrange your taper candle holders along the runner. Instead of a perfectly rigid line, aim for a soft, organic flow. Group them in small clusters or space them somewhat irregularly to create a more natural and visually interesting composition.
- Insert your LED taper candles into their respective holders. To add depth and visual appeal, vary the heights of the candles. This creates a gentle rhythm, allowing the warm glow to rise and fall gracefully along the length of your centerpiece.
- Now, weave your fresh greenery (e.g., eucalyptus or olive branches) artfully around the bases of the candle holders. Let the branches drape and intertwine naturally, softening the lines and adding a lush, organic feel to the arrangement.
- For an extra pop of autumnal color and texture, strategically place small fruits such as mini pumpkins, gourds, or vibrant persimmons among the greenery and candles. Finally, turn on your LED candles to illuminate your beautiful creation.
Safety:
When using LED taper candles, you can rest assured that they are completely safe to use around greenery, fabric table runners, and even curious children or pets, as there is no open flame. If you choose to use real taper candles instead, it is critically important to keep all foliage and flammable materials well away from the flames. Additionally, ensure all candle holders are perfectly steady and stable to prevent accidental tipping.
Up Next: Discover More Holiday Inspiration
- 11 Easy Thanksgiving Desserts | Homemade Sweets You Can Make
- 21 Amazingly #Falltastic Thanksgiving Crafts For Adults
- Learn How To Make A Still At Home | DIY Self Reliance Project
Bring Your Thanksgiving Table to Life
Transforming your Thanksgiving table into a breathtaking display doesn’t require a hefty budget or complex skills. With these creative and accessible DIY centerpiece ideas, you can easily craft an inviting and memorable setting that perfectly complements your holiday feast. Whether you prefer the rustic charm of a butter candle, the natural elegance of a pumpkin vase, or the serene glow of clustered tapers, each project offers a unique way to celebrate the season’s beauty. By adding these personal touches, you’re not just decorating a table; you’re creating an atmosphere where cherished memories are made.
We encourage you to experiment with colors, textures, and natural elements to make each centerpiece truly your own. These ideas are designed to inspire, giving you the flexibility to adapt them to your personal style and existing decor. So gather your materials, enlist some help, and enjoy the creative process of preparing for your Thanksgiving celebration. A beautiful table is the perfect backdrop for gratitude, joy, and the warmth of togetherness.
What stems are you adding to your pumpkin vase?
🌼 Mums
🌸 Dahlias
🌿 Eucalyptus
🍁 Maple Branches