
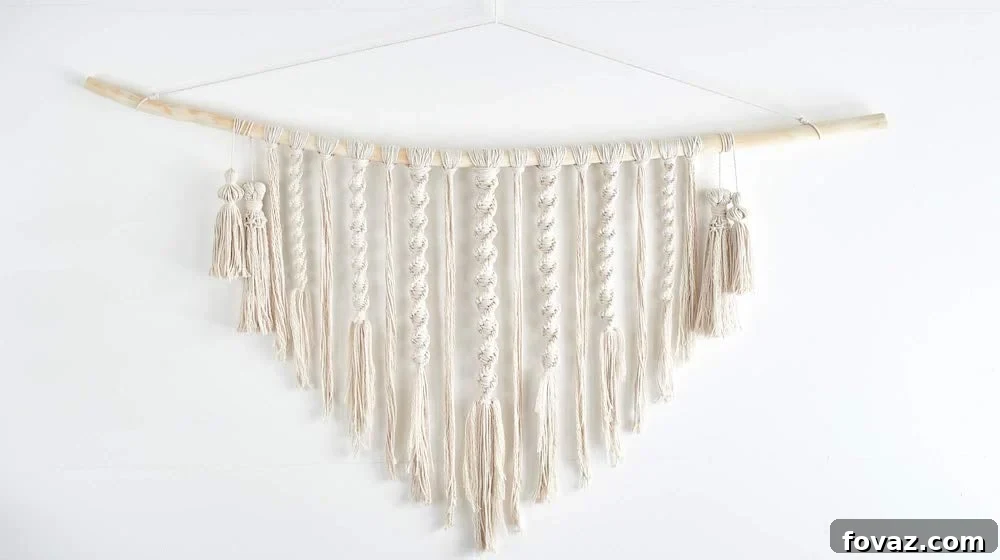
Are you ready to unlock the captivating world of macrame? This ancient art form, involving the intricate tying of knots, has seen a tremendous resurgence in popularity, transforming simple cords into stunning decorative pieces, wearable art, and functional home essentials. If you’ve ever felt overwhelmed by the thought of creating beautiful macrame designs, you’re in the perfect place. We understand that mastering the basics is the first step towards crafting your dreams, and that’s exactly what this comprehensive guide offers.
Far from being daunting, macrame is a wonderfully relaxing and rewarding craft. With just a few fundamental knots, you’ll be amazed at the complexity and beauty you can achieve. This tutorial is meticulously designed to simplify the learning process, ensuring that even absolute beginners can confidently tie their first macrame knots in no time. Forget the notion that macrame is only for seasoned crafters; with clear, step-by-step instructions, you’ll soon be breezily gliding through the process, ready to tackle personal projects for your home or thoughtful handmade gifts.
Mastering the Fundamentals: Four Essential Macrame Knots for Beginners
Macrame is an art where every creation begins with a single knot. Understanding these foundational knots is like learning the alphabet before writing a novel – they are the building blocks for every intricate pattern and design you’ll ever encounter. Once you’ve perfected these core techniques, a universe of creative possibilities will open up before you, allowing you to craft everything from elegant personal accessories and charming home decorations to robust furniture accents and unique gifts. The versatility of macrame is truly limitless!
Many aspiring crafters find macrame projects intimidating at first glance. However, by breaking down complex designs into their individual knot components, you’ll realize just how accessible this craft truly is. Our focus today is on four indispensable macrame knots: the Lark’s Head Knot (which we refer to as the Base Knot), the Square Knot, the Spiral Knot, and the Half-Hitch Knot. These aren’t just arbitrary choices; they represent the core mechanics of macrame, enabling you to form sturdy structures, create flat patterns, achieve captivating twists, and define precise lines. Think of them as your secret weapons for transforming simple cord into works of art. Let’s gather our materials and embark on this exciting crafting journey!
Essential Macrame Materials
Before we dive into the knotting process, let’s ensure you have everything you need. Macrame is a craft that requires minimal tools, making it a fantastic hobby to pick up without a huge initial investment.
- Macrame Cord or String: You’ll need eight lengths of cord. For beginners, we recommend using a medium-thickness single-strand cotton cord (around 3-5mm). Cotton is soft, easy to work with, and holds knots beautifully. You can experiment with various colors to add a personal touch to your practice piece. The length will depend on your desired project, but for learning these knots, having lengths of 2-3 feet each is a good starting point. Jute, hemp, or synthetic cords are also popular choices, each offering different textures and aesthetics.
- Mounting Rod or Dowel: This is crucial for securing your work as you tie knots. A wooden dowel, a sturdy tree branch, a metal ring, or even a curtain rod can serve as a mounting point. Ensure it’s stable and can withstand gentle pulling as you tighten your knots. A simple wooden dowel of about 10-12 inches (25-30 cm) is ideal for this tutorial.
- Sharp Scissors: For clean cuts.
- Measuring Tape: To accurately cut your cord lengths.
- Optional but Recommended: Masking tape or clips to secure the ends of your cord to prevent fraying, and a notepad to jot down your progress or design ideas.
Macrame Knotting Procedure: Your Step-by-Step Guide
Now that you have your materials ready, let’s begin the hands-on process of learning these essential macrame knots. Practice makes perfect, so don’t be afraid to untie and retie until you feel confident with each step.
Macrame Knot #1: The Lark’s Head Knot (Base Knot) – Your Foundation
The Lark’s Head Knot, often referred to as the Base Knot, is usually the very first knot you’ll learn in macrame. It’s used to attach your working cords to a mounting rod or ring, providing a secure starting point for almost all macrame projects.
Strands Required: One (1)
Step 1. Prepare Your Cord and Form a Loop
Take a single length of macrame cord. Hold both ends together, then find the exact middle point of the cord, forming a neat loop at the center.
Step 2. Position the Loop Over Your Mounting Rod
Lay the loop you’ve just created over the top of your mounting rod. Allow the two free ends of the cord to hang down in front of the rod.
Step 3. Thread the Ends Through the Loop
Gently pull the two free ends of the cord downwards and thread them through the loop you placed over the rod. Guide them completely through so they emerge from the bottom of the loop.
Step 4. Pull Tightly to Secure the Knot
Once the ends are threaded through, pull both ends of the cord firmly downwards. This action will tighten the loop around the mounting rod, securing your Lark’s Head Knot. Congratulations! This simple yet crucial knot is the starting point for countless macrame creations.
Macrame Knot #2: The Square Knot – The Versatile Weaver
The Square Knot is undoubtedly the most fundamental and versatile knot in macrame. It forms the basis for many flat patterns, textures, and structural elements in your projects. Once you master this, you’ll be able to create a vast array of designs.
Strands Required: Four (4)
Step 1. Prepare Two Base Knots
Start by attaching two Lark’s Head Knots (Base Knots) to your mounting rod, positioned side-by-side. This will give you a total of four individual hanging cords. For the Square Knot, we refer to the two outer cords as “working cords” and the two inner cords as “filler cords.”
Step 2. Form the First Half of the Square Knot (Left Side)
Hold the two middle (filler) cords straight. Take the leftmost working cord and cross it over the two filler cords, creating a shape that resembles the number “4.”
Step 3. Bring the Right Cord Through
Now, take the rightmost working cord. Pass it over the tail of the leftmost cord (the one forming the “4”). Then, loop this rightmost cord under the two middle filler cords from the back, and bring it up through the loop created by the “4” shape on the left side.
Step 4. Tighten the First Half
Gently pull both the left and right working cords outwards and upwards simultaneously. Ensure even tension to create the first half of your Square Knot. You’ll notice a neat half-knot forming.
Step 5. Form the Second Half of the Square Knot (Right Side)
To complete the Square Knot, we now mirror the process, starting from the opposite side. Take the rightmost working cord and cross it over the two middle filler cords, creating a reversed “4” shape.
Step 6. Bring the Left Cord Through and Complete
Take the leftmost working cord. Pass it over the tail of the rightmost cord (the one forming the reversed “4”). Then, loop this leftmost cord under the two middle filler cords from the back, and bring it up through the loop created by the reversed “4” shape on the right side. Pull both working cords firmly and evenly to complete your Square Knot. You should see a symmetrical, flat knot.
Macrame Knot #3: The Spiral Knot – Adding Twists and Turns
The Spiral Knot is essentially a continuous series of the first half of a Square Knot, always starting from the same side. This repetition creates a beautiful, flowing spiral effect, perfect for plant hangers, curtains, or decorative elements that need a dynamic twist.
Strands Required: Four (4)
Step 1. Prepare Two Base Knots and Form the Initial “4”
As with the Square Knot, begin by attaching two Lark’s Head Knots to your mounting rod, giving you four hanging cords. Again, identify your two outer working cords and two inner filler cords. Take the leftmost working cord and cross it over the two middle filler cords, forming the number “4” shape.
Step 2. Complete the First Half of a Square Knot
Take the rightmost working cord. Pass it over the tail of the leftmost cord, then under the two middle filler cords, and up through the loop created by the “4” on the left. Pull both working cords tightly and evenly to complete the first half of a Square Knot.
Step 3. Continue Tying a Series of Half Square Knots
Now, here’s the key to the Spiral Knot: instead of alternating sides as you would for a full Square Knot, you will repeatedly make the first half of the Square Knot, always starting from the same side (in our case, the left). So, take the leftmost working cord again, form another “4” over the filler cords, and complete the half-knot with the rightmost cord as before.
Step 4. Observe the Spiral Forming
As you continue to tie these half-knots (typically after 4 or 5 repetitions), you will notice your work naturally beginning to twist. The cords will rotate, forming a distinct spiral pattern. This beautiful, consistent twist is the hallmark of the Spiral Knot. Continue tying until you achieve your desired length or spiral effect.
Macrame Knot #4: The Half-Hitch Knot – Creating Lines and Texture
The Half-Hitch Knot is incredibly versatile, used to create diagonal, horizontal, or vertical lines, as well as textured patterns. It’s often used in combination with other knots to add structure, detail, and definition to macrame pieces.
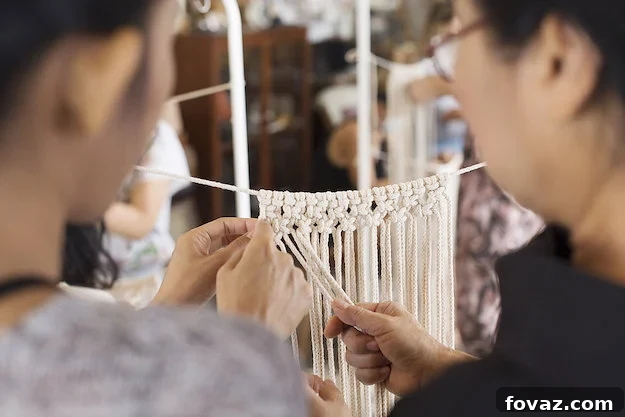
Strands Required: Six (6)
Step 1. Prepare Three Base Knots and Identify Your Guide Cord
Attach three Lark’s Head Knots to your mounting rod. This will give you a total of six hanging cords. For the Half-Hitch Knot, you’ll designate one cord as the “guide cord” and the others as “working cords.” The guide cord will be the foundation around which the other cords are tied. You can choose to position your guide cord diagonally (as commonly shown) or horizontally.
Step 2. Create a “U” Shape with the First Working Cord
Let’s assume your guide cord is the leftmost cord. Take the second cord from the left (your first working cord). Bring this working cord under the guide cord, then up and over it, forming a “U” shape with its end resting on top of the guide cord.
Step 3. Thread the Working Cord Through the “U” Loop
Now, bring the same working cord (the second from the left) around the guide cord from the front, passing it through the loop of the “U” shape you just created.
Step 4. Pull the First Half-Hitch Tightly
Pull the working cord upwards and to the right, tightening it securely around the guide cord. This completes your first Half-Hitch. Ensure it is snug against the guide cord.
Step 5. Complete the Second Half-Hitch with the Same Cords
To make a complete double Half-Hitch (which is standard for stability and appearance), repeat Steps 2-4 with the exact same working cord and guide cord. You’ll form another “U” and thread the cord through, pulling it tight. You should now have two identical Half-Hitches, side-by-side, formed by the second cord around the first (guide) cord.
Step 6. Proceed to Knot with Succeeding Cords
Now, move to the third cord from the left. Use this as your new working cord and repeat the process from Steps 2-5, tying two Half-Hitches around your original guide cord. Continue this pattern down the line, using each subsequent cord as a working cord to tie two Half-Hitches around the main guide cord, until all six cords have contributed to the line of Half-Hitches. This will create a clear, textured line across your project, either diagonal or horizontal depending on how you held your guide cord.
To further enhance your understanding and see these knots in dynamic action, here’s a helpful video from Hallmark that vividly demonstrates the creation of macrame knots:
You’ve done it! These four basic macrame knots – the Lark’s Head, Square, Spiral, and Half-Hitch – are the essential foundation for nearly every macrame project you can imagine. It’s almost as meditative and rewarding as knitting, but without the need for needles, making it incredibly accessible. Now that you’ve mastered these core techniques, you are perfectly equipped to start combining them, experimenting with different patterns, and bringing your own unique macrame designs to life.
Don’t be afraid to get creative! Practice these knots until they feel natural in your hands, then start envisioning how they can transform your space. Adorn your home with beautiful macrame wall hangings, create charming plant hangers, or craft intricate coasters. These handmade pieces are not only beautiful but also wonderful conversation starters at your next gathering. Macrame also offers a thoughtful and personalized option for gifting, making holidays and special occasions even more memorable. You now hold the fundamental knowledge to embark on an endless journey of macrame artistry.
Was this your first foray into making macrame knots, or are you an experienced crafter? We’d love to hear about your experiences, challenges, or current macrame projects! Please share your thoughts and tips in the comment box below. I enjoy reading and replying to your insights between my own crafting sessions. Thank you for joining us, and happy knotting!
Ready to expand your macrame skills further? Discover how to create charming macrame friendship bracelets. Click here to learn more!
Stay connected with our vibrant crafting community! Follow us on Facebook, Twitter, Pinterest, and Instagram for daily inspiration, new tutorials, and crafting insights!
Featured Image via amywikelstudio