
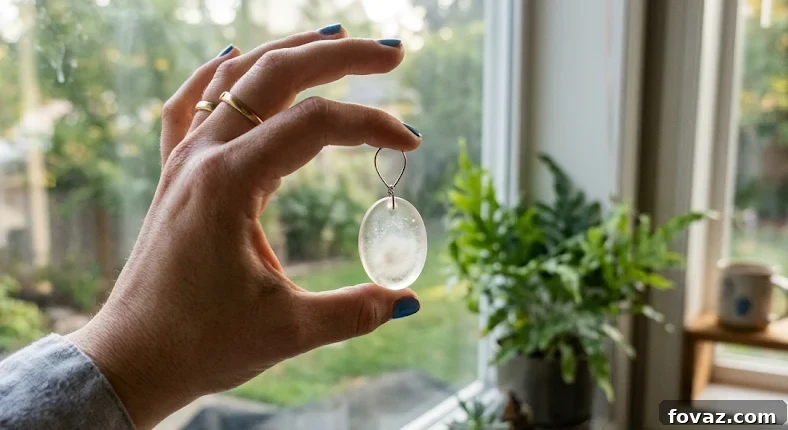
At A Glance: Cloudy Resin Jewelry Fix
Cloudy resin jewelry usually results from one of three causes: moisture trapped in the mold or on the embed, using a two-part epoxy under a UV lamp, or inconsistent measuring and pouring. Moisture creates a frosted, milky finish that runs through the piece. Epoxy will not cure properly under a UV lamp and will remain soft or tacky. Inaccurate measuring or uneven pours create varied cure depths and patchy cloudiness on the surface.
Identify which situation matches your failed pour, then follow the specific fix for that cause.
Your resin likely turned cloudy because of a specific, fixable reason—not because of a lack of skill.
If you’re searching for a cloudy resin jewelry fix, you’re probably holding a piece that looked clear in the mold and came out hazy, milky, or frosted. That experience is common, especially for beginners, and it almost always ties back to one of three variables. Before buying more supplies, determine which variable caused the cloudiness. Most solutions are inexpensive or free.
Here are the three common causes:
- Moisture in the mold or on the embed
- Using epoxy resin under a UV lamp
- Inaccurate measuring or temperature-related viscosity changes
Match what you see in your piece to the list, then read the corresponding section below.
Cause 1: Moisture in the Mold or on the Embed
This is the most frequent cause of cloudy resin jewelry and commonly trips up beginners working with botanicals or silicone molds.
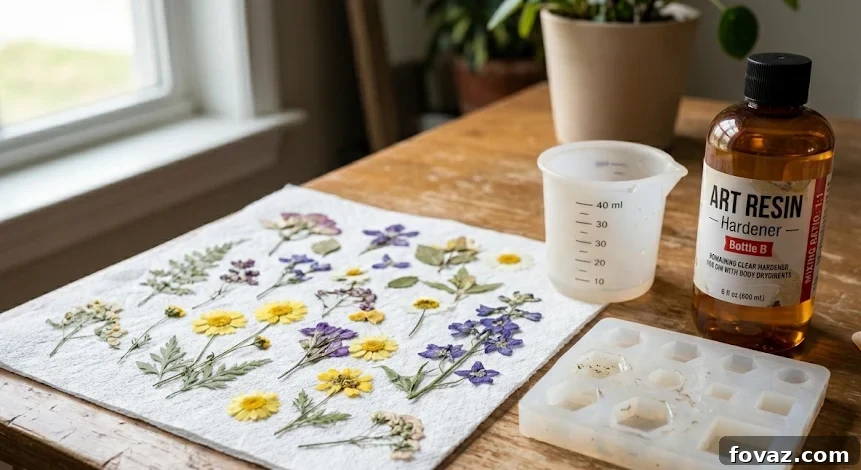
Silicone molds can retain humidity. If you pour into a mold that still has moisture in the cavity, or if you place a botanical embed that hasn’t fully dried, the resin reacts to that moisture during cure. The result is a milky or frosted appearance that often extends throughout the piece rather than forming discrete bubbles.
In short: the resin didn’t “go bad”—the presence of water did.
Many makers assume the cloudiness is a chemical failure of the resin itself, but that’s rarely the case. When a finished piece shows a consistent frosted look, especially around an embed, begin your troubleshooting with moisture.
The fix: Wipe the mold cavity with a clean, dry cloth before each pour and let it air for 20–30 minutes. You can also pass a heat gun briefly across the opening at a safe distance — two seconds from about six inches will help evaporate surface moisture without deforming the mold. For botanical embeds, ensure they are completely dry before embedding: pressed flowers and thin petals dry quickly, but thicker stems or bulky centers require longer pressing. If you dried items yourself, give them an extra day; if purchased pre-dried, leave them on a paper towel for an hour before use. These small steps remove moisture as a variable and cost nothing.
Thicker plant material traps more water. For stems or denser flowers, press under weight for two weeks when possible rather than just a few days—this reliably eliminates residual moisture.
Cause 2: Using Epoxy Resin Under a UV Lamp
This mistake produces more cloudy and uncured pours among first-time buyers than almost any other single error.
What typically happens: you buy a kit labeled “craft resin,” assume it will cure under a UV lamp, and place your poured piece under the light. The surface may harden while the interior stays soft, or the entire piece remains tacky or milky regardless of how long you leave it under the lamp.
The reason is simple: epoxy resin cures through a chemical reaction between two components, while UV resin cures when exposed to UV light. A UV lamp will not cure a two-part epoxy. Unfortunately, marketing terms like “craft resin” can include either product, and packaging does not always make the cure method obvious.
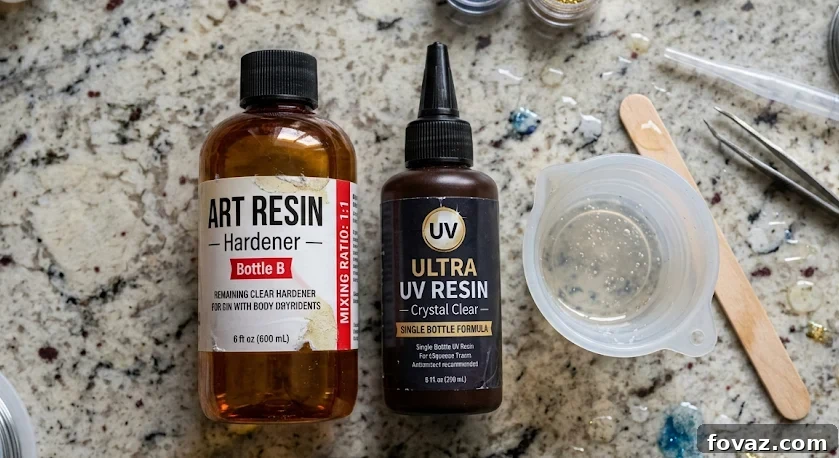
To prevent this error, check the product before you pour. If the kit includes two bottles or lists a mixing ratio (for example 1:1 or 2:1), it’s a two-part epoxy and will not cure under a UV lamp. If it’s a single bottle with no ratio, it is probably UV-cure resin—verify the product name and cure method before use.
If you discover you used the wrong type, you don’t need a new technique—just the correct product. Order UV resin for lamp cures or reserve your epoxy for projects that cure chemically over time. Both resin types have valid uses: epoxy is better for deeper pours and large pieces because it self-levels during a longer cure window; UV resin is ideal for small, detailed jewelry pieces because it cures quickly and holds shape.
Cause 3: Inaccurate Measuring
Measuring matters for both epoxy and UV resins, but for different reasons. With epoxy, precise ratios are essential to a full cure. With UV resin, the critical factor is viscosity and how consistently the resin fills the mold.
UV resin thins when warm and thickens when cold. Pouring directly from the bottle can produce variable amounts depending on room temperature, how long the bottle has been sitting, and how high you hold it above the mold. Those variables change how the resin spreads in the cavity and how evenly the UV light penetrates during cure. Uneven cure depth is a common cause of patchy cloudiness, especially in thicker sections of the mold.
This issue tends to appear more in cold environments. Cold resin pours slower and pools unevenly, so if your problem began during a colder season, temperature-related viscosity is likely part of the cause.
The fix: Use a graduated silicone cup to measure and dispense resin. Pour the resin into the cup first, confirm the quantity, then transfer it to the mold. This adds only thirty seconds to your prep and removes an important variable. If you’re working in a cold room, place the resin bottle briefly in a bowl of warm (not hot) water for two to three minutes to bring it back to room temperature—this improves flow without overheating the product.
The Label Problem Nobody Warns You About
The single most common mistake behind a cloudy pour is trusting the label “craft resin” without confirming the cure method.
Before you pour, inspect the bottle or box. If mixing ratio instructions appear anywhere, it’s a two-part epoxy—save it for projects that don’t use a UV lamp. If the package is a single bottle with no ratio, confirm that the product cures under UV light before using it with a lamp. This quick check takes two minutes and prevents the frustration of an uncured, milky pour.
Retail starter kits often emphasize the word “resin” on the front while mixing instructions are relegated to the side or back. If you aren’t familiar with the differences, it’s an easy, but avoidable, mistake.
What to Do Right Now
Take the failed piece out and examine it under bright light.
If the cloudiness is concentrated around an embed or along the mold edge, moisture is the likely culprit. If the piece feels soft or tacky anywhere, you likely used the wrong resin type for your lamp. If the cloudiness is uneven and patchy across the surface, inconsistent measuring or temperature-related viscosity is the probable cause.
Note which cause matches what you see. That tells you what to change and whether you need to order a different product before your next pour.
Conclusion
Fixing cloudy resin jewelry rarely requires new tools or a different workspace. Most of the time it takes one small change: thoroughly drying the mold and embeds, switching to the correct resin type for your curing method, or using a simple silicone measuring cup and controlling resin temperature. A failed pour is not a sign that resin jewelry is too difficult; it means one specific variable was off.
Identify the variable, correct it, and your next pour will reveal whether the fix worked. Most makers who land on a troubleshooting guide like this find that one adjustment is enough to produce a piece they’re happy with.
Frequently Asked Questions
Why did my resin come out milky even though I followed the instructions?
Most kit instructions explain the cure process but not the prep conditions. A milky result usually stems from something that happened before the pour: a damp mold, a wet embed, or a mismatch between resin type and curing method.
Can I fix a cloudy resin piece after it’s already cured?
Generally no. Once UV resin is fully cured, internal cloudiness is difficult or impossible to reverse.
Does humidity in the room cause cloudy resin jewelry?
High ambient humidity can affect surface cures, but direct moisture from the mold or embed is a more common cause of internal cloudiness.
How long should I cure UV resin to avoid cloudiness?
Under-curing usually causes tackiness rather than cloudiness. If the piece is fully hard but cloudy, the issue is likely moisture or a product mismatch—not cure time.
What wattage UV lamp do I need for resin jewelry?
For jewelry-scale molds, a higher-wattage lamp gives more reliable cures. Lower-wattage lamps may leave the center under-cured even if the surface looks set.
Is cloudy resin jewelry still sellable?
Minor frosting can sometimes be used as a matte effect, but internal cloudiness is generally a quality issue and not recommended for sale.
Hot Take on Resin Starter Kits
Craft resin kits that do not clearly label whether they are epoxy or UV resin create confusion for beginners. Opinions vary on responsibility, but checking the packaging for mixing ratios or the cure method before buying is a simple step that prevents many failed pours.
- Yes: Selling unlabeled kits to beginners is irresponsible.
- No: Buyers should research their purchases.
- Retail placement matters: kits sold near UV lamps increase the risk of mismatch.
- Regardless, a failed pour teaches useful lessons.