
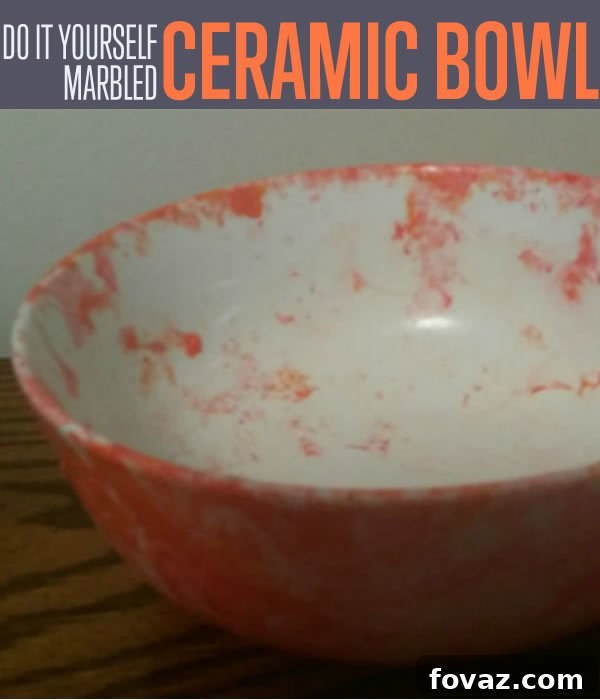
Unlock Your Creativity: A Comprehensive Guide to Crafting Stunning DIY Marbleized Bowls
Transform ordinary household items into breathtaking pieces of art with the captivating technique of nail polish marbling. This incredibly simple yet profoundly satisfying craft allows you to create unique, personalized decor items that will undoubtedly impress anyone who sees them. Whether you’re looking for a special touch to your home decor or a thoughtful, handmade gift for a housewarming, a marbleized bowl is the perfect solution. Prepare to be amazed by how easily you can achieve professional-looking results, turning this fun project into a delightful addiction!
The beauty of nail polish marbling lies in its endless customization. You control the intensity and complexity of your design by varying the amount of nail polish used. From delicate, ethereal swirls to bold, vibrant patterns, each dip promises a one-of-a-kind masterpiece.
Why Marbleized Bowls Are a Must-Try DIY Project
In a world of mass-produced goods, creating something with your own hands offers unparalleled satisfaction and a distinctive appeal. Here’s why you should dive into the world of marbleized bowls:
- Unique Home Decor: Add a splash of color and an artistic touch to any room. Your marbleized bowl will be a conversation starter and a true reflection of your personal style, impossible to replicate perfectly.
- Perfect Handmade Gifts: Impress friends and family with a thoughtful, personalized gift. A custom marbleized bowl makes an ideal present for birthdays, anniversaries, weddings, or housewarmings, showcasing your effort and creativity.
- Budget-Friendly Crafting: This project utilizes readily available and inexpensive materials, making it an accessible craft for everyone, regardless of budget.
- Therapeutic and Fun: The process of watching colors swirl and transform is incredibly calming and meditative. It’s a fantastic way to unwind and unleash your inner artist.
- Upcycling Potential: Give new life to old, plain bowls, jars, or vases that might otherwise go unused. This eco-friendly approach transforms forgotten items into stunning decorative pieces.
Essential Supplies for Your Marbling Adventure
Before you begin your creative journey, gathering all your supplies is crucial. Having everything ready will allow you to work efficiently and ensure the best results. Here’s a detailed list of what you’ll need:

- Inexpensive Nail Polishes: This is the star of the show! Don’t splurge on high-end brands, as you’ll use a significant amount. For a single bowl, expect to use a good portion of 1-3 bottles, depending on the desired color intensity and the size of your item. Experiment with various colors – complementary hues create harmonious blends, while contrasting colors offer striking patterns. You can use one, two, three, or even more colors, but be mindful not to overcrowd your design; sometimes less is more for an elegant marble effect. Consider metallic or glitter polishes for an extra sparkle!
- Your Chosen Item to Marbleize: A bowl, jar, or vase will work perfectly. Ceramic bowls are excellent, but plastic bowls and glass items also yield fantastic results. Ensure your item is clean, dry, and free of any dust or residue for optimal polish adhesion. Consider the shape and surface of your item; smoother surfaces generally take polish better.
- Deep Aluminum Baking Pan or Container: This is where the magic happens! Crucially, do NOT use pans from your kitchen that you intend to use for food again. Nail polish can leave residues that are difficult, if not impossible, to remove and could contaminate food. Opt for a dedicated craft pan, like a large disposable turkey roasting pan or a deep plastic bucket, ensuring it’s deep enough to fully immerse your item for an even marble effect.
- Rubber Gloves: While getting your hands dirty might be part of the fun for some, this project definitely requires protection. Nail polish can be stubborn to remove from skin and nails. Rubber gloves will keep your hands clean and safe from chemicals, allowing you to focus on your artistry without worrying about stained fingers.
- Toothpicks or Craft Sticks (Optional but Recommended): These small tools are useful for gently swirling the nail polish on the water’s surface to create intricate patterns before dipping your item. While not strictly necessary (you can achieve beautiful results by simply dripping the polish strategically), a toothpick allows for more control over your designs.
- Clear Acrylic Sealer (Spray or Brush-On): This is an absolute must-have for the finishing touch. Once your marbleized item is dry, applying a clear sealer will protect the nail polish from chipping, scratching, and fading, ensuring the longevity of your beautiful creation. Look for a sealant that offers a durable, non-yellowing finish.
- Lukewarm Water: The temperature of your water is critical. Nail polish disperses best and creates the most beautiful swirls in lukewarm water. Water that is too cold will cause the polish to sink or clump, while water that is too hot might make it dry too quickly on the surface. Aim for a temperature that feels slightly warm to your touch, around body temperature.
- Drop Cloths or Newspaper: Protect your work surface! Nail polish can spill, drip, or splash, so cover your area thoroughly to prevent unwanted stains.
- Paper Towels and Acetone/Nail Polish Remover: Have these on hand for quick clean-ups and to correct any small mistakes before the polish dries.
Step-by-Step Guide: Crafting Your Marbleized Masterpiece
Follow these detailed steps to create your own stunning marbleized bowls. Remember, speed and preparation are key!
Step 1: Meticulous Preparation of Your Workspace
Once you’ve gathered all your supplies, there’s no time to waste. Set up your designated crafting area by laying down drop cloths or newspaper to protect any surfaces you don’t want stained. Ensure your space is well-ventilated, as nail polish fumes can be strong. Next, open all the bottles of nail polish you plan to use – this will allow for quick pouring when the time comes. Finally, fill your deep aluminum pan with lukewarm water. As mentioned, the temperature is vital; it helps the nail polish spread evenly across the surface of the water, creating those mesmerizing swirls. Don’t forget to put on your rubber gloves!
Step 2: Unleashing the Colors onto the Water’s Surface
Now for the artistic part! Carefully pour or drip your chosen nail polishes directly onto the surface of the lukewarm water. You’ll immediately notice the colors expanding and spreading, forming beautiful, organic patterns. Drip from a slight height to help the polish disperse. If you wish to ‘swirl’ the colors further, now is the moment to do so. Gently use your toothpick or craft stick to create intricate designs. Work quickly! If you wait too long, the nail polish will begin to crystallize and harden on the water’s surface, preventing it from adhering smoothly to your bowl.
Step 3: The Magical Dip – Transferring the Design
With your nail polish design ready on the water’s surface, it’s time to dip your item. For a bowl, it’s often easiest to hold it from the inside, ensuring your fingers don’t interfere with the design. Slowly and smoothly lower your bowl into the water, allowing the nail polish film to wrap around its surface. For an all-over marble effect, you might gently spin the bowl as you immerse it, or simply dip it straight down. The goal is to let the polish adhere fully to the desired areas of your item. Once dipped, carefully lift the bowl straight out of the water.
Step 4: Inspecting and Refining Your Marbled Creation
Upon pulling your bowl out, don’t worry if you notice small clumps or uneven areas. Sometimes these textures add to the unique, organic charm of the marbleized effect. If you prefer a smoother finish, you can gently wipe away any excess clumps with your gloved fingers immediately after dipping. This is another crucial reason for wearing rubber gloves! At this stage, you can assess your design. If you’re not entirely satisfied or desire more coverage, you can always clean the surface of the water (by dragging a toothpick through it to collect residual polish) and repeat the process by adding more polish and dipping your bowl again.
Step 5: Drying for Durability
Once you are happy with your marbleized design, carefully set the bowl down on a protected surface (like newspaper or a cooling rack) and allow it to air dry completely. This step requires patience. Depending on the thickness of the nail polish application and humidity levels, drying can take several hours, or even overnight. Ensure the bowl is in a stable position where it won’t be accidentally touched or smudged during the drying process. A fully dry surface is essential for the final sealing step.
Step 6: Sealing for Lasting Beauty and Protection
After your marbleized bowl has thoroughly dried, the final and most important step is to apply a clear acrylic sealer. This step is vital for making certain that the nail polish design doesn’t chip, scratch, or fade over time. Hold the spray sealer about 6-8 inches away from the bowl and apply several light, even coats, allowing each coat to dry completely before applying the next. If using a brush-on sealer, apply thin, even layers. Work in a well-ventilated area for this step. The sealer will cure the polish, making your stunning creation more durable and ready for display.
Expert Tips for Flawless Nail Polish Marbling
Achieving consistently beautiful results comes with a few tricks of the trade:
- Optimal Water Temperature: Aim for water that is comfortably warm, around 70-75°F (21-24°C). Too cold, and the polish will sink; too hot, and it will dry too fast.
- Fresh Nail Polish: Use relatively new, liquid nail polish. Thick or old polish won’t spread as well on the water’s surface. If your polish is a bit thick, you can try adding a tiny drop of nail polish thinner (not remover!) but be careful not to thin it too much.
- Color Combinations: Plan your colors. Analogous colors (next to each other on the color wheel) create subtle blends, while complementary colors (opposite on the color wheel) offer high contrast and vibrancy. Test combinations on a piece of scrap paper if you’re unsure.
- Practice Makes Perfect: Don’t be afraid to experiment. Start with a less important item or a spare piece of plastic to get a feel for the technique before marbling your main project.
- Ventilation is Key: Always work in a well-ventilated area, especially when using nail polish and acrylic sealer, to avoid inhaling fumes.
- Quick Cleanup: Have acetone or nail polish remover and paper towels nearby for any immediate spills or to clean residual polish from the water surface between dips.
- Embrace Imperfections: Remember, marbling is an organic process. Each piece will be unique. Embrace the ‘happy accidents’ as part of the charm!
Creative Variations and Uses for Your Marbleized Creations
While marbleized bowls are stunning, don’t limit your creativity! This versatile technique can be applied to a variety of objects:
- Other Decorative Objects: Experiment with picture frames, small decorative statues, ceramic coasters, glass votive candle holders, or even plain ceramic tiles for unique accents.
- Jewelry Dishes: Smaller bowls are perfect for holding rings, earrings, and other trinkets on your dresser or nightstand.
- Pencil Holders: Marbleized jars or tall vases make stylish and personalized desk organizers.
- Plant Pot Covers: Transform a plain plant pot into a vibrant holder for your indoor plants. Remember to place a separate, food-safe pot inside, as the marbleized item itself is not waterproof or safe for direct soil contact long-term without additional specific sealing.
- Gift Packaging: Marbleize small, sturdy boxes for truly unique and memorable gift packaging.
Important Safety and Care Instructions
While your marbleized creations are beautiful, it’s crucial to remember some key safety and care guidelines:
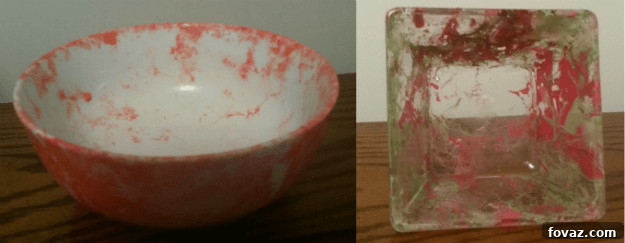
- NOT Food Safe: This is paramount. The nail polish and acrylic sealer are not food-grade materials and contain chemicals that should not come into contact with edible items. Do NOT put anything directly in your marbleized bowl that you plan on eating, unless it’s wrapped in its original packaging, like Hershey’s Kisses or individually wrapped candies. This project is strictly for decorative purposes.
- Decorative Use Only: Primarily, these bowls are intended for decorative use. They make excellent catch-all dishes for keys, jewelry, or display pieces.
- Gentle Cleaning: To clean your marbleized bowl, simply wipe it gently with a soft, damp cloth. Avoid harsh chemicals, abrasive scrubbers, or prolonged soaking in water, as these can damage the sealed nail polish finish.
- Avoid Extreme Temperatures: While the sealer offers protection, try to avoid placing your item in direct, prolonged sunlight or in extremely hot environments, which could potentially cause fading or warping over time.
Unleash Your Inner Artist Today!
Creating your own marbleized bowls is a wonderfully rewarding experience that combines simplicity with stunning artistic results. With just a few basic supplies and this comprehensive guide, you’re well-equipped to transform ordinary objects into extraordinary pieces of art. Each marbleized item you create will be a testament to your creativity and a unique addition to your home or a cherished gift for someone special. So, gather your polishes, set up your workspace, and get ready to dip into the mesmerizing world of nail polish marbling!
Looking for More Creative DIY Home Decor Ideas?
If you’ve enjoyed this project and are eager to explore more ways to personalize your living space with handmade touches, check out some of our other popular DIY home decor tutorials: