
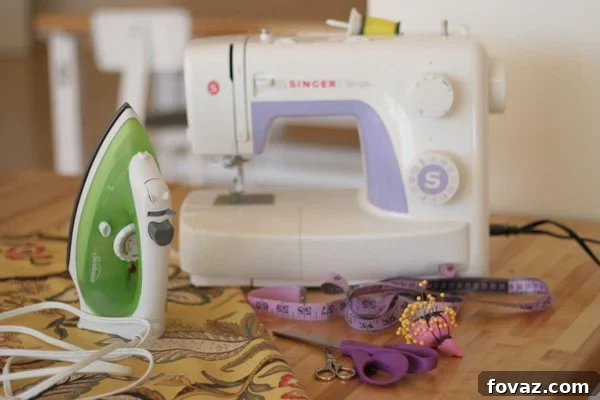
How to Make Curtains & Pillows | Your Ultimate Home Makeover Tutorial
Lesson 18: Mastering Curtain Sewing Techniques – Crafting Stunning Striped & Color Block Curtains
Welcome back to our comprehensive series on transforming your living space through the art of sewing! This is part 2 of 3 in our focused lessons dedicated to stylizing your homemade curtains, and it’s where we dive into truly personalized design. In this detailed tutorial, we’ll explore how to seamlessly combine different fabrics to create dynamic striped curtains and sophisticated color-blocked curtain panels. Imagine adding an immediate touch of drama and bespoke elegance to any room, all thanks to your creative vision and newfound skills. This technique isn’t just about mixing materials; it’s about harnessing color, texture, and pattern to craft window treatments that are as unique as your home.
Using two or more distinct fabrics on your curtains, whether through bold stripes or elegant color blocking, offers an unparalleled opportunity to inject personality and flair into your decor. Get ready to unleash your creativity! You can strategically use these designs to introduce vibrant pops of color that highlight other elements in your room, or to manipulate visual perception, drawing the eye upwards to emphasize high ceilings or creating a sense of height in a smaller space. Beyond aesthetics, this method is also incredibly practical. It’s an ingenious way to utilize fabric scraps that might otherwise go to waste, transforming them into beautiful, functional pieces of art. Embrace sustainability and style in one go!
The beauty of adding stripes or color-blocking lies in its ability to achieve truly custom-colored curtains. In a world of mass-produced decor, finding a single strip of fabric that perfectly matches the exact color pattern you’ve envisioned for your dream room can be nearly impossible. By combining fabrics yourself, you overcome this limitation, opening up an infinite palette of possibilities. You become the designer, dictating every shade, every texture, and every line to perfectly complement your existing decor or inspire an entirely new theme.
This deep dive into multi-fabric curtain design is Lesson 2 of 3 in our specialized curtain sewing techniques module. Make sure you don’t miss the final installment – hit next below for Lesson #3! And remember, there are many more invaluable tutorials waiting for you in our overarching How to Make Curtains & Pillows Series, designed to empower you with skills for a total home makeover. Explore the full curriculum by clicking the links below!
CLICK HERE to See What’s Next! >>
<< CLICK HERE to go back to the Table of Contents
This is Lesson 18: How to Sew Color Block Curtain Panels | Advanced Curtain Sewing Techniques, an integral part of our free “How to Make Curtains & Pillows For Total Home Makeover” package! Our mission at DIY Projects is to empower you to fill your homes with incredible, handcrafted DIY creations that you can proudly say you made yourself. We firmly believe that a personalized home is a happy home, and these sewing patterns and creative ideas are meticulously designed to inspire you to redecorate your living space and ultimately bring your dream home to life. Imagine stepping into a stylish, custom-decorated sanctuary that perfectly reflects your taste and personality, a space where every detail has been thoughtfully chosen and expertly crafted by your own hands. There’s an immense sense of accomplishment and joy that comes with enjoying something you’ve made, a feeling of “I made this!” that truly transforms a house into a home.
Why Embrace Striped and Color Block Curtain Design?
Opting for striped or color-blocked curtains goes far beyond simply choosing a pattern; it’s a strategic design decision that can dramatically enhance the aesthetic and feel of any room. This technique offers a unique blend of customization, visual impact, and practicality, making it a favorite among interior designers and DIY enthusiasts alike. By thoughtfully combining fabrics, you gain complete control over your window treatments, ensuring they perfectly align with your vision and complement your existing decor.
Unlocking Unprecedented Customization and Unique Style
One of the primary advantages of sewing your own striped or color-blocked curtains is the unparalleled level of customization. Forget settling for limited store-bought options that might not quite match your exact color scheme or desired aesthetic. When you choose your own fabrics, you can select specific hues, textures, and patterns that perfectly harmonize with your furniture, wall colors, and overall theme. This allows for a truly bespoke look, making your windows a focal point that screams ‘you’. Whether you’re aiming for a subtle, elegant stripe or a bold, contrasting color block, the creative freedom is limitless.
Adding Visual Drama and Dynamic Impact
Stripes and color blocks are powerful tools for creating visual interest and drama in a room. Vertical stripes can draw the eye upward, making ceilings appear higher and rooms feel more spacious. Horizontal stripes, on the other hand, can widen a narrow window or room, adding a sense of breadth. Color blocking can define distinct zones within a curtain panel, creating a modern, architectural feel. The interplay of different colors and textures can add depth and complexity, preventing a room from feeling flat or monochromatic. This technique is especially effective in rooms that might otherwise lack a strong focal point, instantly elevating the design.
Budget-Friendly and Sustainable Decor Solutions
Beyond their aesthetic appeal, striped and color-blocked curtains offer practical benefits, including cost-effectiveness and sustainability. This method is brilliant for utilizing smaller pieces of fabric – those beautiful remnants from previous projects, discounted scraps, or even repurposed textiles. Instead of letting these valuable materials go to waste, you can transform them into stunning, high-impact window treatments. This not only reduces waste but can also significantly lower the overall cost of your curtain project, making high-end custom looks accessible on a DIY budget. It’s a win-win for your wallet and the planet!
Mastering Interior Design Principles with Ease
Incorporating striped or color-blocked curtains is also an excellent way to practice and apply fundamental interior design principles. You’ll learn about color theory by selecting complementary or contrasting shades, explore balance and proportion by determining stripe widths and block placements, and understand how different textures can add depth to a space. This hands-on experience builds your design confidence, allowing you to create more cohesive and aesthetically pleasing environments throughout your home. It’s an opportunity to experiment and develop your personal style, turning design challenges into creative triumphs.
Designing Your Dream Striped or Color Block Curtains
The journey to creating breathtaking striped or color-blocked curtains begins long before you touch your sewing machine. It starts with thoughtful design and meticulous planning. This phase is crucial for ensuring your finished curtains not only look fantastic but also perfectly suit your room’s dimensions and aesthetic goals. Let’s delve into the key considerations for designing your personalized window treatments.
Fabric Selection: A World of Possibilities
Choosing the right fabrics is paramount. Consider not just the color and pattern, but also the weight, drape, and care requirements of each material. For curtains, medium-weight fabrics like cotton, linen, or blends often work best, offering a good balance of structure and flow. If you’re mixing fabrics, ensure they have similar care instructions and shrinkage rates to prevent issues after washing. Think about texture too: combining a smooth cotton with a textured linen or a subtle jacquard can add an extra layer of sophistication and visual interest without overwhelming the design. Swatch samples are your best friends here – hold them up to your window, in various lighting conditions, to see how they interact.
Color Theory and Pattern Play for Harmony or Contrast
The magic of striped and color-blocked curtains lies in the interplay of colors and patterns. You can opt for a harmonious scheme, using different shades within the same color family for a subtle, elegant effect. Alternatively, go for a bold contrast, pairing complementary colors or stark neutrals with vibrant hues to create a striking statement. If you’re incorporating patterns, consider their scale: a large-scale floral paired with a thin stripe can be beautiful, but too many busy patterns might clash. Remember the 60-30-10 rule of decorating: 60% dominant color, 30% secondary color, and 10% accent color. Your curtains can embody this principle, or serve as the accent themselves.
Stripe Width and Placement: Creating Visual Illusions
The width and placement of your stripes or color blocks significantly impact the visual effect. Thin, uniform stripes can create a delicate, classic look, while wide, asymmetrical blocks offer a modern, abstract appeal. Vertical stripes can enhance the perceived height of a room, making low ceilings feel taller. Horizontal stripes can make a narrow window appear wider or add a sense of expansiveness to a small space. Think about where you want the color blocks to fall – perhaps the darkest color at the bottom to anchor the curtain, or a vibrant stripe positioned at eye level to draw attention to a particular view. Experiment with sketches or even tape strips of paper onto an existing curtain to visualize different layouts.
Measuring and Planning Your Panels with Precision
Accurate measurement is critical for professional-looking results. Before cutting any fabric, determine the finished length and width of your curtain panels, taking into account hem allowances and seam allowances for each fabric piece. If you’re combining multiple fabrics, calculate the individual cutting dimensions for each strip or block, ensuring they add up correctly to your desired panel size. Don’t forget to factor in pattern repeats if you’re using patterned fabrics, to ensure they align beautifully across seams. A detailed cutting plan will save you time, reduce waste, and prevent costly mistakes.
Essential Techniques for Sewing Multi-Fabric Curtains
Once your design is finalized and your fabrics are carefully selected and measured, it’s time to bring your vision to life at the sewing machine. While the precise steps will vary slightly depending on your specific design, understanding the fundamental techniques for joining different fabrics will ensure a professional and durable finish. The key here is precision and attention to detail, transforming individual fabric pieces into a cohesive and stunning curtain panel.
Preparing Your Fabric Pieces for Joining
Before you even think about stitching, proper fabric preparation is essential. Pre-wash and dry all your fabrics according to their care instructions to pre-shrink them and prevent distortion after your curtains are made. This is especially important when mixing different types of fabric, as they may shrink at different rates. Once dry, press all fabric pieces thoroughly to remove any wrinkles and ensure they are perfectly flat. Accurately cut each strip or block using sharp fabric shears or a rotary cutter and mat. Mark seam allowances clearly if needed, and consider serging or zigzagging the raw edges of each piece if your fabric frays easily, to prevent unraveling during the sewing process and ensure longevity.
Precision Seaming for Professional Results
The heart of multi-fabric curtain making lies in creating strong, neat, and invisible seams. Place your first two fabric pieces right sides together, aligning the edges perfectly. Pin them securely along the seam line, adding more pins than you might typically use to ensure no shifting occurs. Stitch with a consistent seam allowance, using a straight stitch and a thread color that matches your fabrics. For added strength and a clean finish, backstitch at the beginning and end of each seam. Once sewn, press the seams open or to one side, depending on the fabric and desired drape. Pressing is a crucial, often overlooked step that helps your seams lie flat and contributes significantly to the professional appearance of your finished curtain. Repeat this process for all subsequent fabric pieces, ensuring each join is as precise as the last.
Finishing Touches and Expert Hemming
With all your fabric pieces joined, the next step is to add the finishing touches that give your curtains a polished, custom-made look. This includes hemming the sides and the top and bottom of your curtain panels. For the sides, a double-fold hem (folding the raw edge over twice) typically provides a clean and durable finish. For the top, you might create a rod pocket, add grommets, or attach curtain tape for hooks, depending on your chosen hanging method. The bottom hem is perhaps the most visible, so take extra care here. A deep double-fold hem (e.g., 2-inch double fold) adds weight to the curtain, helping it hang beautifully. Always measure and press your hems meticulously before stitching them down, ensuring they are perfectly straight and even across the entire width of the panel. These details elevate your handmade curtains from good to truly exceptional.
Transform Your Home: The DIY Projects Philosophy
At DIY Projects, we’re more than just a resource for tutorials; we’re a community dedicated to inspiring and empowering individuals to create the homes of their dreams. Our “How to Make Curtains & Pillows For Total Home Makeover” package, including this detailed lesson on striped and color-blocked curtains, is crafted with the belief that everyone deserves to live in a space that truly reflects their unique personality and style. We want you to be able to fill your homes with amazing handmade DIY crafts that not only look fantastic but also carry the priceless sentiment of being made by your own hands. This journey of crafting and decorating is about personal expression, confidence, and the joy of seeing your creative visions come to life.
Our hope is that these sewing patterns and ideas serve as catalysts, igniting your imagination and inspiring you to redecorate your living space with passion and purpose. Imagine a personalized, stylish home, decorated exactly to your liking, a sanctuary where every cushion, every curtain, and every decorative accent tells a story. Come home happy, surrounded by beauty you’ve created, and revel in the deep sense of accomplishment that comes with saying, “I made this.” This feeling is at the heart of the DIY movement, a testament to skill, creativity, and dedication.
We believe in inspiring dreams and encouraging craftiness in all aspects of life, fostering a spirit of creation that extends beyond sewing. We’re passionate about supporting your journey as a maker and helping you discover the endless possibilities that handmade decor offers. To stay connected on all things made by hand, be sure to subscribe to our social media channels. Join our vibrant community on Facebook, get inspired by countless visual ideas on Pinterest, see behind-the-scenes and finished projects on Instagram, and get quick tips and updates on Twitter. Let’s create something beautiful together!