
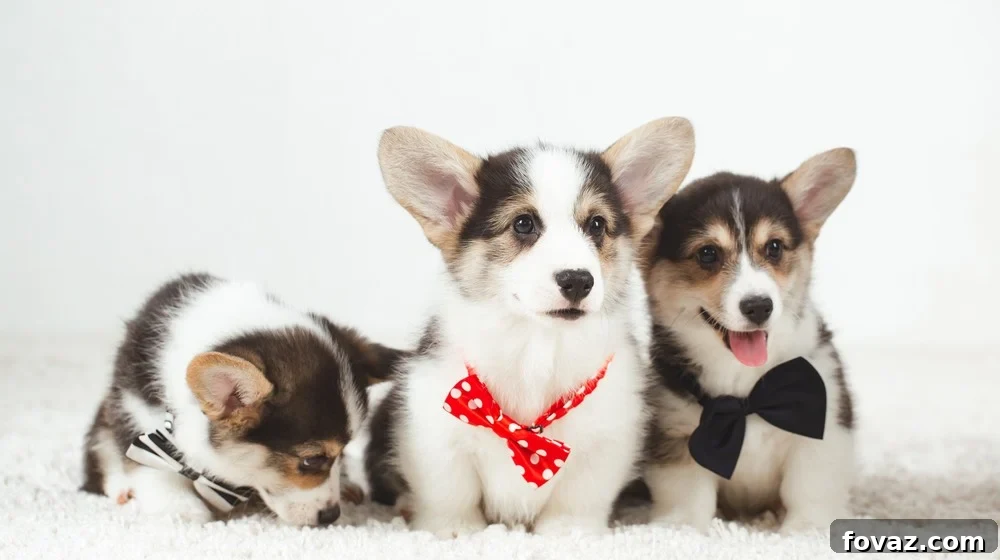
How to Make a Dog Bow Tie: A Step-by-Step DIY Guide for Stylish Pups
Want to add a touch of charm and personality to your furry friend’s look? A handmade dog bow tie is the perfect accessory to elevate their style, whether for special occasions, holiday photos, or just everyday cuteness. Not only is it a fun and rewarding DIY project, but it also allows for complete customization, ensuring your canine companion stands out in the most adorable way. If you’ve been searching for an easy, step-by-step guide on how to make a dog bow tie, you’ve come to the right place. This comprehensive tutorial will walk you through everything you need to create a unique and durable accessory for your beloved pet, using simple materials and basic sewing skills.
DIY Dog Bow Tie: Crafting the Perfect Accessory for Your Pet
Making a dog bow tie yourself offers numerous benefits beyond just the aesthetic appeal. It’s a fantastic way to save money on pet accessories, which can often be surprisingly expensive. Furthermore, crafting allows you to choose high-quality, comfortable fabrics that are safe for your dog, especially if they have sensitive skin or allergies. Imagine creating matching bow ties for different seasons, holidays, or even to coordinate with your own outfits! This project is suitable for beginners and seasoned crafters alike, promising a delightful outcome that will surely earn your pup endless compliments. Get ready to unleash your creativity and fashion a bespoke bow tie that truly reflects your dog’s unique spirit.
Supplies Needed to Make a Dog Bow Tie:
- Cotton Fat Quarter or Scrap Fabric: Choose a durable yet comfortable cotton fabric in a fun pattern or color. A fat quarter (typically 18×22 inches) provides more than enough material, or you can use scraps from other projects. Consider your dog’s size and personality when selecting the fabric – bold patterns for outgoing pups, subtle prints for a more refined look.
- Fusible Interfacing (Light to Medium Weight): This crucial material gives the bow tie its structure and stiffness, ensuring it holds its shape beautifully. Fusible interfacing has an adhesive on one side that bonds to fabric when ironed, making it easy to use for beginners.
- Needle & Thread: A basic hand sewing needle and a strong polyester thread will be sufficient for this project. Choose a thread color that matches or complements your fabric for a seamless finish.
- Iron and Ironing Board: Essential for bonding the interfacing and creating crisp creases, giving your bow tie a professional appearance.
- Fabric Scissors: Sharp fabric scissors are vital for clean, precise cuts, which contribute significantly to the overall neatness of your finished bow tie. Avoid using these scissors on paper to keep them sharp!
- Ruler or Measuring Tape: For accurate measurement of your fabric pieces.
- Fabric Marker or Chalk: To draw your cutting lines clearly on the fabric.
- Elastic Band (approx. 1/2 inch wide): This will be used to attach the bow tie securely to your dog’s collar. The length will depend on the width of your dog’s existing collar.
Before you begin, gather all your supplies in one organized workspace. Having everything ready will make the crafting process much smoother and more enjoyable. Pay attention to the quality of your materials, as they will directly impact the longevity and appearance of your homemade dog bow tie.
Step-by-Step Directions to Craft Your Dog Bow Tie
Follow these detailed instructions carefully to create a charming and durable bow tie for your canine companion. Each step is designed to be straightforward, ensuring a successful outcome even if you’re new to sewing.
1. Cut 2 Rectangles From the Fabric
Begin by laying your chosen cotton fabric flat and smooth. Using your ruler and fabric marker or chalk, meticulously draw two distinct rectangles. The first rectangle, which will form the main body of the bow tie, should measure 10 inches by 6 inches. The second, smaller rectangle, intended for the centerpiece that cinches the bow, should be 6 inches by 2 inches. Take your fabric scissors and carefully cut along the marked lines. Precision in this initial cutting step is crucial, as it sets the foundation for a well-proportioned and symmetrical bow tie. These dimensions are suitable for a medium-sized dog; adjust proportionally for larger or smaller breeds (e.g., 8×5 for smaller dogs, 12×7 for larger dogs).
2. Cut 2 More Rectangles From the Interfacing
Next, take your fusible interfacing. Just as you did with the fabric, measure and cut two identical rectangles from the interfacing. One piece should be 10 inches by 6 inches, mirroring your main bow tie fabric piece, and the other 6 inches by 2 inches, matching your centerpiece fabric. It’s important that these interfacing pieces are the exact same size as your fabric pieces to ensure a smooth, even bond in the next steps. The interfacing will provide the necessary structure, preventing your bow tie from looking limp.
3. Iron the Back Side of the Fabric
Now, prepare your fabric for bonding. Lay one of your fabric rectangles (starting with the larger 10″x6″ piece) wrong side up on your ironing board. Carefully place the corresponding interfacing piece (10″x6″) on top of the fabric. Ensure that the shiny, adhesive side of the fusible interfacing is facing down, making direct contact with the wrong side of your fabric. This is critical because if the shiny side touches your iron, it will melt onto the iron’s plate, creating a sticky mess and potentially damaging your iron and project. Double-check this placement before proceeding.
4. Create Bow Stiffness by Bonding Fabric and Interfacing
With the interfacing correctly positioned on the fabric, use your preheated iron to bond the two layers together. Apply even pressure and move the iron slowly across the entire surface, following the manufacturer’s instructions for your specific interfacing (usually a medium-hot setting with steam). The heat from the iron will activate the adhesive, permanently bonding the interfacing to the cotton fabric. This step is fundamental to achieving the desired crispness and stiffness for your dog’s bow tie, ensuring it maintains its elegant shape and durability through all of your pet’s adventures. Repeat this process for the smaller 6″x2″ fabric and interfacing pieces.
5. Start With the Larger Rectangle and Create a Crease
Once both fabric pieces are bonded with interfacing and have cooled, take the larger 10″x6″ rectangle. Fold it in half lengthwise, often referred to as “hotdog style,” bringing the two 10-inch edges together. Align the edges perfectly to ensure a straight fold. Press this fold firmly with your iron to create a sharp, distinct crease down the center. This crease will serve as a crucial guideline for subsequent folding steps. After ironing, unfold the fabric piece so it lays flat again, revealing the crisp central crease.
6. Fold Both Sides Towards the Middle Crease
With the main fabric piece unfolded and the central crease visible, carefully take one of the long raw edges and fold it inward towards the middle crease. Align the edge precisely with the crease. Once aligned, press this folded section flat with your iron. Repeat this process for the opposite long raw edge, folding it inward to meet the central crease. Both raw edges should now be neatly tucked into the center, creating a narrower strip of fabric with clean, finished edges. Ironing these folds firmly will help them hold their shape and contribute to the bow tie’s overall neatness.
7. Fold the Piece in Half the Other Way and Repeat
Now, take the piece you’ve just folded and ironed, which should be a narrower strip. Fold this piece in half the other way, perpendicular to your previous folds – often called “hamburger style” – bringing the two shorter (6-inch) ends together. Press this new fold with your iron to create another sharp crease. Unfold it, and then repeat the process from steps 5 and 6: fold both short sides into this new middle crease and iron flat. This series of folds creates a more compact, layered piece, which is essential for giving the bow tie its characteristic full and structured appearance.
8. Create That Bow Tie Shape by Pinching
At this stage, your fabric piece should be a compact rectangle with all raw edges neatly folded inward. Take your needle and thread, but don’t knot it yet. Locate the very center of this folded fabric piece. Using your fingers, firmly pinch the fabric in the middle, gathering it tightly. This pinching action will instantly cause the fabric to fan out on either side, beginning to form the familiar “figure-eight” or hourglass shape of a classic bow tie. The tighter and more centered your pinch, the more defined and elegant your bow tie shape will be.
9. Sew the Bow Tie to Secure the Form
Once you’ve achieved the desired pinched shape, it’s time to secure it. Keeping the pinch firmly in place, take your threaded needle and begin hand sewing directly through the center of the pinched fabric. Use small, secure stitches, wrapping the thread around the pinched area multiple times. You can use a simple running stitch or a whipstitch to consolidate the fabric. The goal here is to create a strong, tight bind that holds the bow tie’s form permanently. Reinforce your stitching by going back and forth a few times, then tie off your thread with a secure knot, ensuring the bow tie will maintain its elegant shape. For more detailed hand sewing tips, you can refer to resources like sewing.com’s DIY bow tie collar guide.
10. Create the Middle Part with the Smaller Rectangle
Now, turn your attention to the smaller 6″x2″ fabric rectangle, which has also been fused with interfacing. This piece will become the central band of your bow tie, covering the stitched pinch and adding a polished finish. Take this smaller rectangle and fold it lengthwise into thirds. To do this, fold one long edge inward, then fold the opposite long edge inward, overlapping the first fold slightly, so that the strip is approximately 1 inch wide. Press these folds flat with your iron. The aim is to create a neat, narrow strip of fabric with no raw edges visible, which will neatly wrap around the bow tie’s center.
11. Wrap the Small Rectangle Around the Bow Tie Center
With your neatly folded 1-inch wide strip ready, position the main bow tie piece in front of you. Take the folded strip and carefully wrap it around the very center of the main bow tie, covering the area where you pinched and sewed. Ensure the strip is centered both horizontally and vertically. Wrap it tightly to create a snug fit and a crisp, defined middle section for the bow tie. This step not only conceals your hand stitching but also gives the bow tie its finished, professional look.
12. Sew the Centerpiece Into Place
Once the smaller strip is wrapped tightly and centered around the bow tie, flip the bow tie over to the back. Overlap the ends of the small strip slightly and hand sew them securely together. Use small, strong stitches to ensure the strip is firmly attached and won’t unravel. You can also sew the strip directly to the back of the bow tie’s main body for added security. Take your time with this step, making sure your stitches are neat and the strip is firmly fixed, as this connection will hold the entire bow tie together. Trim any excess thread and admire your perfectly formed bow tie!
13. Add Elastic and Tie It to Your Dog’s Collar
The final step is to create a way to attach the bow tie to your dog’s collar. Take your elastic band (about 1/2 inch wide is ideal). The easiest method is to measure the width of your dog’s collar. Cut a piece of elastic that is roughly twice the width of the collar, allowing for a loop. Form a loop with the elastic and hand sew the ends securely to the back of the bow tie’s centerpiece. Make sure the elastic loop is taut but still allows the collar to slide through easily. This ensures the bow tie sits upright and securely on the collar without flopping around. Alternatively, you could sew a small strip of fabric into a loop or use Velcro for attachment, but elastic offers flexibility and ease of use. Once the elastic is sewn, slide your dog’s collar through the loop, and your stylish pup is ready to show off their new accessory!
Tips for a Perfect Homemade Dog Bow Tie
- Fabric Choices: While cotton is recommended for its ease of use and durability, feel free to experiment with other non-stretch fabrics like flannel for a softer look, denim for rugged charm, or even specialty fabrics for festive occasions. Always consider your dog’s comfort and any potential skin sensitivities.
- Interfacing Weight: For a very stiff bow, opt for a medium-to-heavy weight fusible interfacing. For a slightly softer, more casual bow, a light-weight interfacing might suffice. Adjust based on the desired rigidity.
- Sizing Adjustments: The provided dimensions (10″x6″ and 6″x2″) are a good starting point for medium dogs. For larger breeds, increase dimensions by 20-30% (e.g., 12″x7″ and 7″x2.5″). For smaller breeds, decrease by 20-30% (e.g., 8″x5″ and 5″x1.5″). Always visualize the size against your dog’s collar before cutting.
- Stitching Reinforcement: Especially for active dogs, reinforce your hand stitching in the center and where the elastic is attached. Strong, tight knots and multiple passes with the needle will prevent the bow tie from falling apart.
- Care and Cleaning: Most cotton bow ties can be hand-washed with mild soap and air-dried. Avoid machine washing if there are delicate embellishments or if the interfacing might degrade.
Troubleshooting Common Issues
- Bow Tie is Too Floppy: This usually means your interfacing wasn’t bonded properly, or you used a too-light weight interfacing. Ensure your iron is hot enough and apply sufficient pressure during bonding.
- Centerpiece Not Neat: If the central wrap looks messy, try folding it more precisely into thirds and ironing it very flat before wrapping. Ensure it’s pulled tightly when sewn.
- Bow Tie Falls Off Collar: This indicates the elastic loop is too loose or not sewn securely enough. Remeasure your dog’s collar width and sew the elastic more firmly to the bow tie.
Variations and Customization Ideas
The beauty of DIY lies in customization! Here are some ideas to make your dog’s bow tie truly unique:
- Embellishments: Add small, pet-safe buttons, rhinestones, or iron-on patches to the center of the bow. Ensure they are securely attached and won’t pose a choking hazard.
- Layered Bows: Create two bow ties of slightly different sizes and layer them for a fuller, more dramatic look.
- Seasonal Themes: Use holiday-themed fabrics for Christmas, Halloween, or Fourth of July. Floral patterns for spring, plaids for autumn.
- Matching Sets: Make a matching bow tie for your dog and a hair clip or brooch for yourself or your kids!
- Personalization: Embroider your dog’s initial or a small paw print onto one of the bow tie flaps before assembling.
Creating a handmade dog bow tie is a delightful project that allows you to express your love for your pet through craftsmanship. With this detailed guide, you have all the tools and knowledge to embark on this creative journey. Your dog will undoubtedly appreciate the stylish upgrade, and you’ll have the satisfaction of knowing you made it yourself. So, pick out that perfect fabric, fire up your iron, and get ready to add a dash of dapper to your dog’s wardrobe!
Watch the Live tutorial Videos on Thursdays in our Exclusive Facebook Group live Thursdays at 1pm PST for more crafting inspiration and real-time guidance!
Don’t forget to tag us on Instagram and Facebook with your furry friend’s stylish new bow tie for a chance to be featured on our pages! We love seeing your creations and happy pets.
Stay connected with our vibrant crafting community on our exclusive Facebook Group for more tips, tricks, and project ideas.
Subscribe to our DIY Projects Youtube Channel for a treasure trove of more engaging DIY Project Videos to spark your next creative endeavor.
You Might Also Like These Related DIY Projects:
- 11 Easy To Make DIY Dog Toys For Your Furry Friend
- 15 Homemade Low Fat Dog Treats For National Pet Day
- 21 DIY Dog Clothes And Coats You Should Make