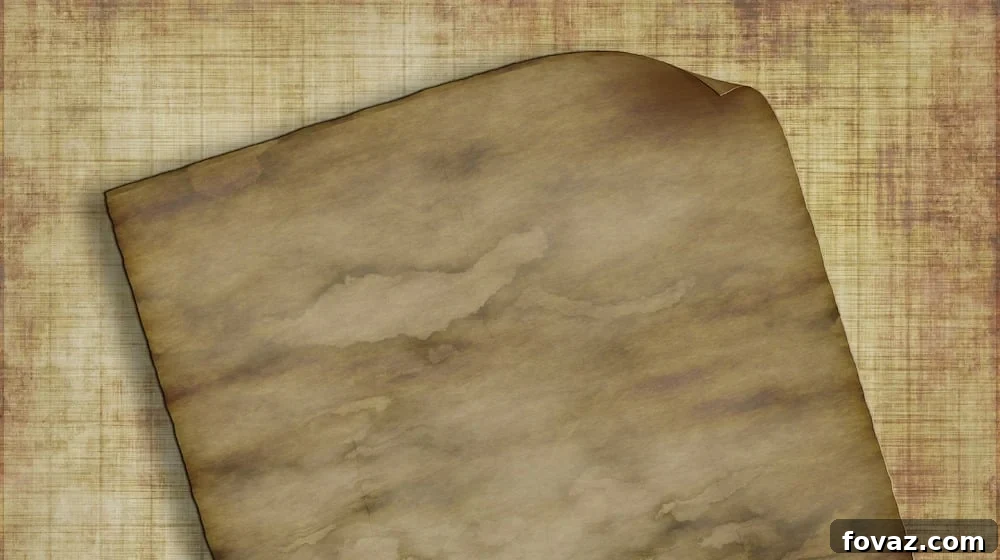
In a world increasingly dominated by digital screens, there’s a unique charm in the tangible, the textured, and the time-worn. Crafting projects often call for that special touch, a hint of history, or a dash of antique elegance that only truly aged paper can provide. If you’ve ever found yourself wondering how to imbue ordinary paper with the captivating essence of time, transforming it into a piece that speaks of forgotten tales or ancient maps, then your quest ends here. Today, we’re diving deep into the art of making paper look old, turning simple sheets into vintage masterpieces perfect for an array of creative endeavors – from heartfelt old letters and mysterious treasure maps to stunning scrapbook layouts and unique art projects.
The Allure of Vintage: Why Age Your Paper?
The appeal of vintage aesthetics is undeniable. It evokes a sense of nostalgia, history, and unique character that modern, pristine paper simply cannot replicate. Aged paper adds depth and authenticity to any project, telling a story even before a single word is written or an image is placed upon it. Whether you’re a seasoned crafter, a budding artist, or simply looking to add a personalized, old-world touch to a gift, learning how to age paper is a simple yet incredibly rewarding skill.
Imagine sending a birthday invitation that looks like it’s been pulled from an ancient scroll, or creating a journal whose pages feel as though they’ve witnessed centuries of secrets. From elaborate junk journals and historical document replicas to whimsical party decorations and personalized gifts, the applications for beautifully aged paper are virtually limitless. It’s a quick, easy, and cost-effective way to elevate your creative output and add a layer of sophistication and intrigue that truly sets your work apart.
Understanding the Basics: How Paper Ages Naturally
Before we dive into the DIY methods, it’s helpful to understand why paper naturally ages. Over time, paper undergoes a process of oxidation and degradation, often due to exposure to light, air, and acidic environments. This leads to the yellowing, browning, and embrittlement we associate with antique documents. Our DIY techniques essentially accelerate and mimic these natural processes, allowing us to achieve that coveted aged look in a matter of minutes or hours, rather than decades.
The beauty of these methods lies in their simplicity and the use of everyday household items. You don’t need special chemicals or expensive equipment to achieve stunning results. With just a few common kitchen ingredients and a touch of creativity, you can transform ordinary paper into a visually rich, historically resonant piece ready for your next project. Let’s explore the classic and most effective method: staining with coffee or tea.
The Classic Coffee & Tea Staining Method: A Comprehensive Guide
The coffee and tea staining method is by far the most popular and accessible way to age paper, yielding beautifully authentic results with minimal effort. This technique allows for a wide range of tones, from subtle creaminess to deep, rich browns, depending on the strength of your staining agent and application method.
Gathering Your Supplies: Essential Tools for Paper Aging
Before you begin your paper aging adventure, make sure you have all your materials ready. Having everything at hand will make the process smooth and enjoyable.
- Paper: The type of paper you choose can significantly impact the final look. Standard printer paper (80gsm) is easy to work with and absorbs stains well. For a more substantial feel, try cardstock. Watercolor paper can also be used, offering a unique texture and robust feel, though it may require more stain. Experiment with different weights and finishes to find what works best for your project.
- Shallow Trays or Cookie Sheets: These will hold your staining solution and allow you to fully immerse the paper. Opt for non-reactive materials like plastic or glass to avoid any unwanted chemical reactions with the coffee or tea. The size should be large enough to lay your paper flat without excessive bending.
- Hot or Cold Coffee/Tea: This is your primary aging agent.
- Coffee: Brew a strong batch of coffee. The stronger the brew, the darker and more intense the stain will be. Instant coffee can also be used, simply mix a generous amount with hot water until dissolved. Coffee typically imparts warm, rich brown tones.
- Tea: Strong black tea bags (English Breakfast, Earl Grey) work wonderfully, offering reddish-brown hues. Green tea or herbal teas can produce more subtle, yellowish, or even greenish tints, adding versatility to your palette. Simply steep several tea bags in hot water until you achieve a dark, concentrated liquid. Let it cool slightly before use to avoid burning yourself or damaging the paper.
- Paint Brush or Sponge: For applying the staining solution directly onto the paper, especially for localized effects or if you prefer not to fully immerse the sheet. A foam brush or a natural sea sponge can create interesting textures.
- Drying Method:
- Blow Dryer: Excellent for quick drying and can induce subtle warping or curling, which adds to the aged effect.
- Oven: For even faster drying and a slightly crisper, more brittle feel. Use the lowest temperature setting and monitor closely to prevent burning. (Caution: Adult supervision and extreme care are essential if using an oven.)
- Sunlight/Air Dry: The most natural and gentle drying method, though it takes longer. Air drying can result in a flatter sheet.
- Paper Towels or Old Cloths: For blotting excess liquid, cleaning up spills, and protecting your work surface.
- Optional Additional Supplies:
- Crumpling Tools: Your hands are perfect! Crumpling the paper before staining adds natural creases and wrinkles.
- Sandpaper or Fine-Grit Emery Board: For lightly distressing edges or surfaces after drying.
- Ink Pads (Brown/Sepia): For subtle edge distressing or smudge marks.
- Wax Seal Kit: For an ultimate antique touch, especially for letters or scrolls.
- Gloves: To protect your hands from staining, though coffee/tea stains are generally easy to wash off.
- Protective Surface: A plastic tablecloth or old newspapers to cover your work area.
The Step-by-Step Process: Bringing Your Paper to Life
Once you have all your materials, it’s time to start the transformation:
- Prepare Your Workspace: Lay down newspaper or a plastic sheet to protect your table from potential stains. This process can be a little messy, but it’s part of the fun!
- Prepare Your Staining Solution: Brew your coffee or tea. For coffee, aim for a strong, dark brew. For tea, steep 3-5 black tea bags in a cup of hot water until the liquid is very dark. Let it cool slightly so it’s warm, not scalding hot. Pour the solution into your shallow tray.
- Pre-Distress Your Paper (Optional but Recommended): If you want a truly authentic, time-worn look, gently crumple your piece of paper into a ball. Then, carefully flatten it out again. This creates natural wrinkles and creases that will absorb the stain differently, adding depth and character. You can also lightly tear the edges for a frayed, ancient scroll effect.
- Apply the Stain:
- For Even Coverage: Carefully submerge the entire sheet of paper into the coffee or tea solution in your tray. Ensure it’s fully saturated. Let it soak for 30 seconds to several minutes, depending on the desired darkness. The longer it soaks, the darker the stain.
- For Splotchy/Uneven Effects: Use a paintbrush or sponge to dab, brush, or drip the solution onto the paper. This allows for more artistic control, creating natural variations in tone and texture, mimicking water damage or age spots. You can also sprinkle instant coffee grounds directly onto wet paper for concentrated dark spots.
- Add More Character (Optional): While the paper is still wet, you can further distress it. Gently fold it, add more crinkles, or even carefully flick some extra drops of coffee/tea onto specific spots for a deeper, uneven tone.
- Remove Excess Liquid: Carefully lift the paper from the tray. Hold it over the tray for a moment to let the majority of the liquid drip off. Then, gently blot both sides with paper towels or an old cloth to remove any standing liquid and prevent puddling during drying.
- Dry Your Paper:
- Air Drying: Lay the paper flat on a clean, dry surface (like a wire rack or parchment paper) or hang it on a clothesline. This method is slow but generally results in a flatter, more even dry.
- Blow Dryer: For quicker results, use a blow dryer on a low to medium heat setting, moving it constantly to prevent scorching. This can create interesting curls and textures.
- Oven Drying: (Use with extreme caution!) Place the paper on a baking sheet lined with parchment paper. Heat your oven to its lowest setting (around 150-200°F / 65-95°C). Place the sheet in the oven and leave the oven door slightly ajar to allow moisture to escape. Check frequently (every 1-2 minutes) until the paper is dry and crisp. Do NOT leave unattended.
- Final Touches: Once completely dry, you can add more distress. Lightly sand the edges for a worn look, use an ink pad to smudge the corners, or carefully singe the very edges with a lighter (extreme caution and adult supervision required! Always have water nearby!) for a burnt, ancient map effect.
Tips and Tricks for Perfect Vintage Paper
Achieving that ideal aged look often comes down to experimentation and a few clever techniques:
- Experiment with Strength: Don’t be afraid to try different strengths of coffee or tea. A lighter brew for a subtle antique finish, a darker one for a grungier, more historic feel.
- Layering for Depth: For a deeper, more varied tone, apply a light coat, let it dry, and then apply a second, stronger coat in certain areas.
- Creative Distressing: Before staining, consider tearing the edges unevenly, folding the paper repeatedly, or even gently crumpling it to create natural creases that catch the stain beautifully. After drying, a light touch with sandpaper can soften edges or create subtle scuffs.
- Adding Splotches and Rings: For an authentic “spilled drink” look, intentionally drip a few drops of undiluted coffee or tea onto the wet paper. You can also place the rim of a coffee cup directly onto the paper to create a faint ring mark.
- Variety of Hues: While coffee offers warm browns, black tea can give reddish-browns. Try turmeric for a vibrant yellow, or even a dilute beet juice for a faint reddish tint (though these may fade over time or react differently).
- Safety First with Heat: If using a blow dryer or oven, always monitor the paper closely to prevent scorching or burning. If using an open flame for singeing edges, work in a well-ventilated area, have water nearby, and exercise extreme caution.
Common Mistakes to Avoid
While the process is forgiving, being aware of common pitfalls can help ensure your project’s success:
- Over-Soaking: Leaving paper in the solution for too long can make it extremely fragile and difficult to handle once wet, leading to tearing or excessive warping when dry.
- Uneven Application (Unless Desired): If you’re aiming for a uniform antique look, ensure the paper is fully submerged or the stain is applied evenly. Blotting helps prevent streaks.
- Forgetting Workspace Protection: Coffee and tea can stain surfaces. Always use a protective layer like newspaper or an old tablecloth.
- Impatience During Drying: Rushing the drying process, especially with too high heat, can lead to uneven drying, excessive curling, or even damage to the paper.
- Using Reactive Trays: Avoid metal trays that might react with the coffee/tea, potentially leaving unwanted marks on your paper. Stick to plastic, glass, or ceramic.
Unleash Your Creativity: Applications for Aged Paper
Now that you’ve mastered the art of aging paper, what incredible projects can you bring to life? The possibilities are endless:
- Historic Letters and Scrolls: Perfect for personalized messages, role-playing game props, or unique invitations that truly stand out.
- Intriguing Treasure Maps: Burn the edges, add cryptic symbols, and roll it up for an authentic pirate adventure prop or party favor.
- Scrapbooking and Junk Journals: Use aged paper as background pages, tags, pockets, or to create ephemera that adds a rich, vintage texture to your memory keeping.
- Artistic Backgrounds: A unique canvas for drawing, painting, collage, or mixed media art, adding an instant layer of character to your creations.
- DIY Home Decor: Frame a piece of aged paper with a meaningful quote, create vintage-style labels for jars, or craft unique holiday ornaments.
- Themed Event Invitations: For historical events, fantasy-themed parties, or even rustic weddings, aged paper invitations set the perfect tone.
- Bookbinding Projects: Create covers or endpapers for handmade journals and notebooks that feel ancient and cherished.
- Photography Props: Add depth and storytelling to still-life or portrait photography with authentic-looking documents.
Visual Learning: Watch the Full Tutorial
Sometimes, seeing is believing, and a visual guide can solidify your understanding of the process. The video below, created by DontEverstopLearning, offers a fantastic, straightforward demonstration of how to turn common paper into a vintage masterpiece. Watch closely to pick up on nuances in application and drying techniques that can further enhance your results. Happy crafting!
Share Your Creations!
So, what do you think? Did you find this comprehensive guide on making paper look old helpful and inspiring? Are you ready to dive into your next art project with a stack of beautifully aged paper? We’d love to hear about your experiences and see your amazing creations! Share your thoughts and photos in the comments section below. Your insights and ideas could inspire fellow crafters!
Don’t forget to connect with us and share your DIY journey on social media. Follow us on Facebook, Twitter, Pinterest, and Instagram for more creative ideas, tutorials, and inspiration. We’re excited to see what you craft!
Discover More Creative DIY Projects!
If you enjoyed this tutorial, you’re sure to love these other fantastic DIY ideas:
- 15 Creative Toilet Paper Roll Crafts For Kids
- 10 Beautiful Construction Paper Flowers | DIY Flower Craft Ideas
- 10 Inspiring DIY Rolled Paper Crafts From Recycled Magazines