
Transform Plastic Waste into Practical Home Decor: Your Ultimate DIY Stool Guide
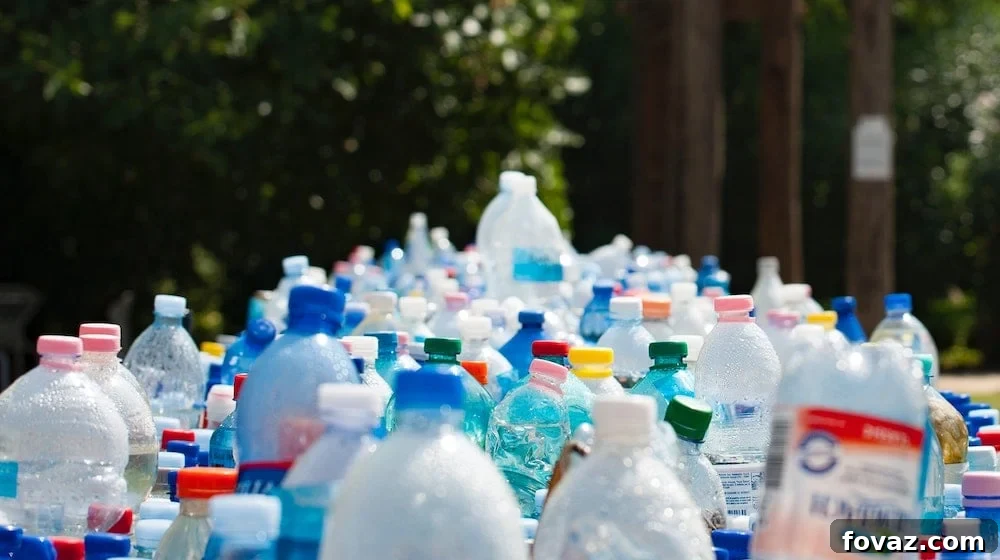
In a world grappling with ever-increasing plastic waste, finding innovative ways to reduce our environmental footprint is more important than ever. What if we told you that those empty plastic bottles, often destined for recycling bins or, worse, landfills, could be repurposed into a functional and stylish piece of furniture for your home? This isn’t just about crafting; it’s about embracing sustainability, unleashing your creativity, and making a tangible difference, one bottle at a time. Get ready to turn your “trash” into a treasure – a sturdy, comfortable, and undeniably unique stool!
Why Upcycle Plastic Bottles? The Environmental & Economic Benefits
Upcycling, the process of transforming discarded items into new products of higher quality or environmental value, is a powerful tool in the fight against waste. Plastic bottles, in particular, present a significant challenge. Billions are consumed globally each year, and while recycling programs are vital, many still end up polluting our oceans and landscapes, taking hundreds of years to decompose. By choosing to upcycle them into something useful like a stool, you contribute to:
- Waste Reduction: Directly diverting plastic from landfills and incinerators.
- Resource Conservation: Less demand for virgin materials means fewer natural resources are extracted and processed.
- Energy Saving: Upcycling often requires less energy than traditional recycling processes that involve melting and reshaping.
- Reduced Pollution: Less manufacturing from scratch leads to reduced air and water pollution.
- Economic Savings: Creating furniture from waste materials significantly cuts down on purchasing new items, saving you money.
- Personal Empowerment: There’s immense satisfaction in knowing you’ve created something beautiful and practical with your own hands, contributing to a more sustainable lifestyle.
This project isn’t just a craft; it’s a statement. It demonstrates how everyday items can have a second life, sparking conversations about sustainability and inspiring others to look at their “waste” in a new light. Let’s gather our materials and embark on this rewarding journey!
Essential Materials for Your Eco-Friendly Stool Project
Before diving into construction, ensure you have all the necessary items at hand. The beauty of this DIY project lies in its accessibility, often utilizing items you might already have around the house or can easily acquire. Quality materials ensure a durable and comfortable final product.
- 19 Clean Plastic Bottles: Opt for sturdy, uniformly sized bottles (e.g., 1.5L or 2L soda bottles). Ensure they are thoroughly washed and completely dry inside to prevent mold or odors.
- Heavy-Duty Duct Tape: Essential for securely binding the bottles together, providing initial structural integrity. Choose a strong, wide tape for best results.
- Two Plywood Boards: Approximately 1/2 to 3/4 inch thick. These will form the top and bottom of your stool, providing a solid, flat surface for sitting and stability.
- Circular Saw: For precisely cutting the plywood boards into perfect circles matching the diameter of your bottle base. Safety first when operating power tools!
- Electric Drill: Necessary for driving screws through the plywood and into the bottle caps/bases.
- Wood Screws: A selection of screws long enough to pass through the plywood and securely anchor into the plastic bottles.
- Polyester Wadding: Also known as batting or quilt wadding. This thick, soft material provides the initial layer of cushioning around the bottle structure, making it comfortable.
- Polyester Fiber Fill: Similar to stuffing used in pillows, this adds extra plushness and a soft dome to the top of your stool.
- Durable Polyester Lining Fabric: This will be the inner layer of your stool cover, helping to shape and protect the wadding and fiberfill. Choose a sturdy fabric that can withstand tension.
- Heavy-Duty Staple Gun and Staples: Crucial for firmly attaching the wadding and fabric layers to the plywood base, ensuring a taut, professional finish.
- Needle and Strong Thread: For hand-sewing the wadding and, if preferred, the fabric cover.
- Measuring Tape or Ruler: For accurate measurements of your bottle base and fabric.
- Marker Pen: For marking cutting lines on plywood and fabric.
Gathering these items meticulously will set you up for a smooth and successful project. Once you have everything ready, we can begin the transformation!
Step-by-Step Guide to Building Your Recycled Bottle Stool
Step 1: Forming the Core Bottle Base
Begin by selecting seven of your clean, dry plastic bottles. Arrange these bottles in a circular pattern, with one bottle at the center and the remaining six surrounding it tightly. This configuration creates a robust and stable core for your stool. Once you’re satisfied with the arrangement, grab your duct tape. Wrap the tape securely and repeatedly around this initial cluster of seven bottles, making sure they are bound together as tightly as possible. The aim is to create a compact, immovable unit that forms the very heart of your stool’s structure.
Step 2: Reinforcing the Stool’s Foundation
With your core base established, take the remaining twelve plastic bottles. Carefully arrange these twelve bottles around the outside of the central seven-bottle cluster. Maintain a snug fit, ensuring there are no gaps between the inner and outer layers. Once positioned, use your duct tape to wrap around the entire assembly of nineteen bottles. Apply multiple layers of tape, spiraling both horizontally and diagonally, to ensure every bottle is firmly integrated into a single, cohesive unit. The tighter you wrap, the more stable and durable your finished stool will be.
Step 3: Precisely Cutting the Plywood Boards
Now that your bottle base is formed, it’s time to create its sturdy top and bottom. Measure the exact diameter of your taped bottle assembly. This measurement is critical for ensuring a perfect fit. Using a marker, transfer this diameter onto your two plywood boards, drawing two precise circles. With extreme caution, use your circular saw to cut out these two plywood circles. These will serve as the strong, flat surfaces that sandwich your bottle core, providing the structural integrity needed for a functional stool.
Step 4: Positioning the Plywood Supports
Once your two plywood circles are perfectly cut, carefully position them onto your bottle structure. Place one plywood circle on the very bottom of the bottle base, aligning its edges with the circumference of the taped bottles. Then, place the second plywood circle on the very top of the bottle base, again ensuring it aligns perfectly. This “sandwiching” technique locks the bottles in place, creating a solid foundation for the stool’s cushioning and upholstery.
Step 5: Marking for Secure Attachments
To ensure a robust connection between the plywood and the bottle base, you’ll need to drill screws. Before drilling, make precise markings on the top plywood circle. Start by marking the exact center, and then evenly space out approximately five additional marks around the edges of the circle. These six strategically placed marks will act as guides, ensuring that your screws are distributed evenly for maximum stability and strength.
Step 6: Drilling and Securing the Top Plywood
With your marks in place, it’s time to secure the top plywood. Carefully use your electric drill to drive screws through each of the six marked points on the top plywood circle. As you drill, ensure the screws pass not just through the plywood but also directly into the caps of the plastic bottles below. This connection is vital, as it firmly anchors the plywood to the bottle structure, preventing any movement and significantly enhancing the stool’s sturdiness and longevity. Make sure each screw is tightened securely.
Step 7: Repeating the Securing Process on the Bottom
To achieve comprehensive stability, you must replicate the securing process on the bottom of the stool. Carefully flip the entire bottle base upside down, exposing the bottom plywood circle. Repeat Steps 5 and 6: make six precise markings (one in the center, five around the edges) and then carefully drill screws through these marks. Ensure these screws penetrate the bottom of the plastic bottles. Double-check that all screws, both top and bottom, are exceptionally tight to prevent any wobbling or detachment of the plywood boards over time.
Step 8: Applying the Initial Wadding Layer
Now, let’s move on to the comfort layers. Take your polyester wadding and wrap it tightly around the entire side surface of your bottle base. Ensure the wadding covers the sides completely and evenly. Trim off any excess wadding, leaving enough to overlap slightly. Once wrapped, carefully hand-sew the two vertical ends of the wadding together using your needle and strong thread. Tug firmly on the wadding as you sew to ensure a snug, smooth, and firm fit around the bottle structure. This layer provides the initial plushness and hides the bottle contours.
Step 9: Securing the Wadding to the Plywood
After the side wadding is secured, fold the excess wadding from the top and bottom edges over onto the plywood circles. The goal here is to create a seamless, soft edge. Using your heavy-duty staple gun, firmly fasten the folded wadding to the plywood. Work your way around the entire circumference, pulling the wadding taut as you staple. This step ensures the wadding stays in place, creating a consistent and comfortable surface for the next layers of padding and fabric.
Step 10: Adding Plushness with Polyester Fiber Fill
Flip your stool base right-side up. Now, scoop a generous amount of polyester fiber fill and strategically place it on the top plywood circle. Arrange it to create a pleasing, slightly domed cushion effect. To prevent the fiber fill from shifting or falling out, use your needle and thread to lightly tack it down. Sew a few stitches connecting opposite edges of the fiber fill to the wadding underneath. This helps to keep the fill centered and maintains the desired shape, ensuring a soft and inviting surface.
Step 11: Cutting the Polyester Lining Fabric
With the padding in place, it’s time to prepare the inner lining of your stool cover. Carefully measure the height of your stool (including the wadding and fiber fill) and the diameter of the top. Transfer these measurements onto your polyester lining fabric. You will need to cut three pieces: two perfect circles for the top and bottom of the stool, and one rectangular piece for the side. The rectangle’s length should match the circumference of your stool, and its width should match the height, allowing for seam allowances.
Step 12: Assembling the Lining Fabric Cover
Take your rectangular fabric piece. Fold it in half lengthwise, ensuring the raw edges meet, and sew these edges together to form a cylinder. This will be the side panel of your cover. Next, take one of your fabric circles and carefully align its raw edge with one of the raw edges of the fabric cylinder. Pin them together and sew them securely. You now have a partially assembled cover that resembles a cylinder with one closed end. If you have access to a sewing machine, this step will be significantly faster and result in stronger seams.
Step 13: Fitting and Adjusting the Stool Cover
Carefully slide the partially sewn fabric cover over your stool base. Ensure the sewn circle aligns perfectly with the top of your stool. Once it’s in place, meticulously double-check the fit of the entire cover. It should be snug but not so tight that it strains the fabric. Flip the stool over and gently stretch the fabric taut over the bottom plywood. This is your opportunity to make any minor adjustments, ensuring the fabric sits smoothly and evenly, free from wrinkles or sags, creating a professional appearance.
Step 14: Securing the Fabric Cover
With the fabric cover now snugly fitted, it’s time to secure it permanently. Fold the excess lining fabric and wadding from the bottom over onto the underside of the plywood. Using your heavy-duty staple gun, begin stapling the fabric firmly to the plywood. Work your way around the entire perimeter, pulling the fabric taut as you go. Focus on securing the edges first, then add staples across the entire underside to ensure the fabric remains tight and secure, giving your stool a polished and long-lasting finish.
Step 15: Adding the Final Protective Layer
For a perfect finish and added functionality, take your remaining fabric circle. Position it over the stapled underside of the stool, covering the exposed plywood, staples, and raw fabric edges. This not only provides an additional layer of floor protection, preventing scratches, but also gives your stool a clean, professional look from all angles. Fold the raw edges of this final fabric circle under for a neat finish, then use your staple gun to attach it securely to the plywood, completing your sustainable masterpiece.
Your DIY Stool: A Testament to Creativity and Sustainability
And there you have it! From a collection of discarded plastic bottles, you’ve crafted a functional, comfortable, and visually appealing stool. Place it in your living room, bedroom, or even a child’s play area; its versatility and unique story will undoubtedly make it a conversation starter. Trust us, no one will ever guess that this stylish piece of furniture began its life as recycled plastic bottles – until you proudly reveal the ingenuity behind its creation.
This project is a powerful reminder that when you recycle plastic bottles, you’re not merely reducing the world’s burgeoning trash problem. You’re also unlocking your potential for creativity, saving money on new purchases, and actively contributing to a more sustainable and resourceful way of living. Every bottle transformed is a step towards a greener planet and a testament to the endless possibilities of upcycling.
Want to see the entire process in action? Press play on the full video tutorial below:
Do you actively recycle plastic bottles in your home? We’d love to hear about your innovative solutions and what you and your family do with them! Share your ideas by leaving us a comment below.
Inspired to continue your upcycling journey? Discover more amazing uses for recycled items! How about giving beer bottles a new lease on life next? Here’s a roundup of things you can use them for!
Stay connected with us on Facebook, Twitter, Pinterest, and Instagram for more inspiring DIY projects and sustainable living tips!
Feature image via Morena’s Corner