
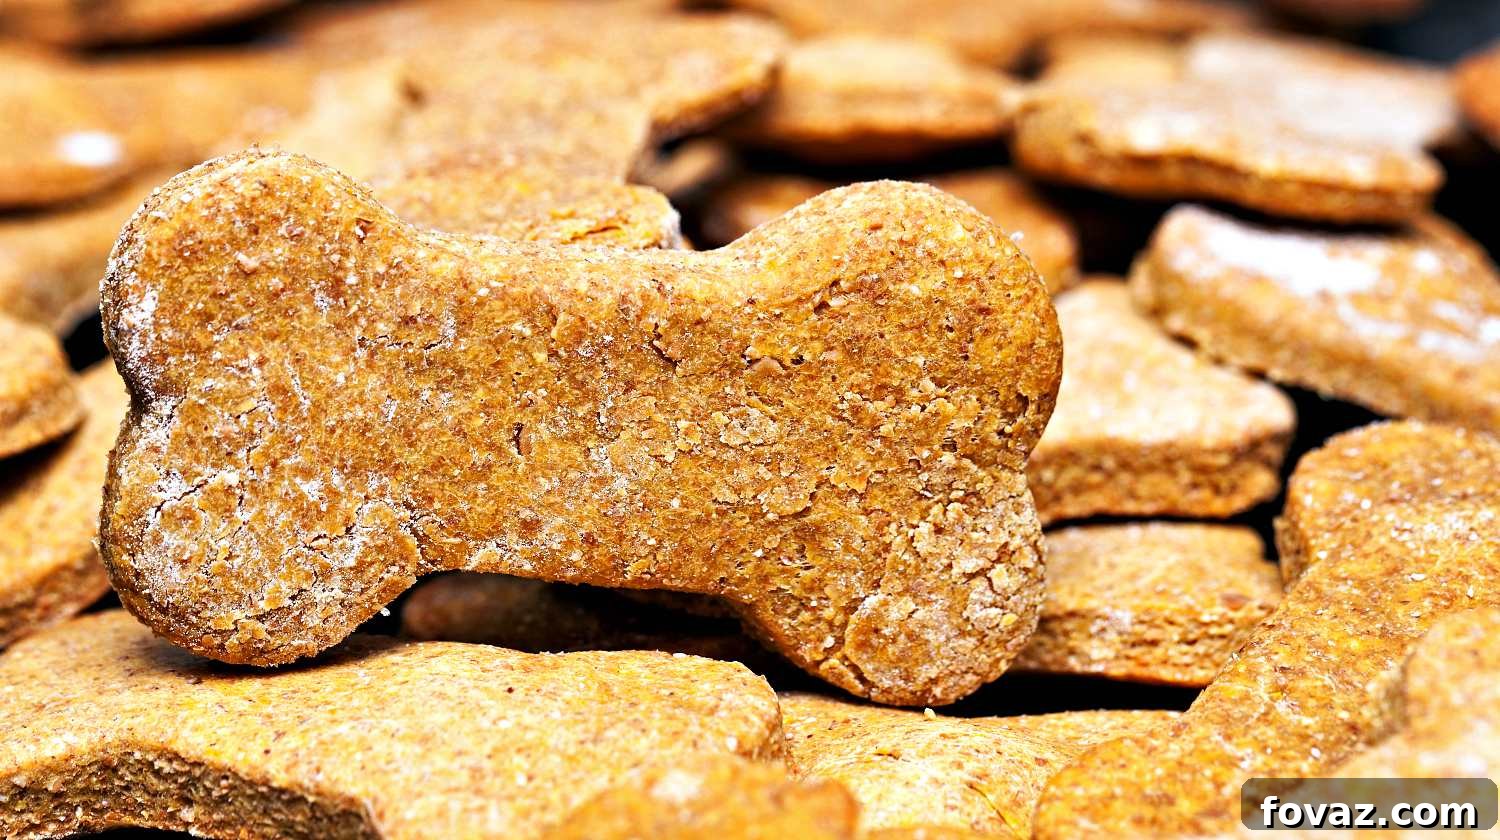
Homemade Dog Biscuits: The Ultimate Guide to Healthy & Delicious Pet Treats Your Dog Will Love
Watching your dog’s tail wag with pure, unadulterated joy is one of life’s simplest and most rewarding pleasures. What if you could be the direct source of that happiness, right from your own kitchen, with treats that are not only irresistibly delicious but also incredibly healthy and made with love? This comprehensive guide will empower you to make homemade dog biscuits that will have your canine companion doing happy dances, showering you with wet kisses, and giving you their enthusiastic stamp of approval!
Crafting your own dog treats is far more than just a fun activity; it’s a profound way to express your affection, ensure optimal nutrition, and even stretch your budget further. It’s time to bid farewell to store-bought treats that often come packed with questionable ingredients, artificial additives, and unnecessary fillers. Instead, embrace the wholesome, homemade goodness that puts you in control. We’ll meticulously walk you through an incredibly easy-to-follow recipe, offering a wealth of tips, creative variations, and crucial advice to guarantee your furry family member receives nothing but the very best. Get ready to bake a batch of happiness!
RELATED: How To Make Dog Treats | 21 Healthy Recipes Of Homemade Dog Treats
Why Choose Homemade Dog Biscuits for Your Beloved Canine Companion?
Unparalleled Control Over Ingredients for Optimal Health
In our modern lives, our pets are no longer just animals; they are cherished family members, integral to our daily existence. Just as we meticulously consider what goes into our own meals, the same discerning approach should extend to what we feed our four-legged friends. Commercial dog treats, while undeniably convenient, frequently contain a bewildering array of artificial colors, synthetic preservatives, cheap fillers, and often ambiguous by-products. These ingredients, over time, can contribute to a host of health issues for your dog, ranging from chronic allergies and digestive upset to skin irritations and even behavioral changes.
By embarking on the journey of crafting homemade dog biscuits, you gain absolute and transparent control over every single ingredient. This empowers you to actively avoid common canine allergens such as corn, soy, wheat, or specific proteins if your dog exhibits sensitivities. You can consciously select high-quality, human-grade ingredients, ensuring your treats are free from unwanted chemicals, pesticides, and artificial additives. This profound level of ingredient transparency and control is simply unattainable with mass-produced alternatives, offering invaluable peace of mind and directly contributing to your dog’s long-term health, vitality, and overall well-being. It’s truly a testament to the love you have for them.
Tailored Nutrition and Precision Dietary Management
Every dog is a unique individual, possessing a distinct personality, energy level, and, crucially, specific dietary needs and preferences. Whether your furry friend needs to manage their weight, suffers from a sensitive digestive system, or requires particular nutrients to address a health concern, homemade treats provide the ultimate flexibility to tailor recipes precisely. You have the freedom to incorporate beneficial superfoods like plain pumpkin puree for digestive health, ground flaxseed for vital Omega-3 fatty acids, or finely grated carrots for an extra boost of vitamins and fiber. For dogs facing specific medical conditions such as diabetes, kidney disease, or pancreatitis, you can meticulously adjust fat, protein, or carbohydrate levels as advised by your trusted veterinarian, creating a truly therapeutic snack.
This unparalleled customization ensures that the treats you bake not only tantalize your dog’s taste buds but also actively support their specific health requirements. It transforms snack time into an opportunity for personalized nutrition, lovingly delivered and thoughtfully considered, contributing positively to their holistic health journey.
A Budget-Friendly, Engaging, and Rewarding Alternative
Beyond the undeniable health advantages, embracing the art of making your own dog biscuits can prove to be significantly more economical in the long run. The recurring cost of purchasing premium, healthy dog treats from specialized pet stores can rapidly accumulate, particularly if you have an enthusiastic snacker or multiple canine companions. Basic kitchen staples such as flour, eggs, and bouillon are generally inexpensive and, when combined, can yield a substantial batch of wholesome treats for a mere fraction of the price of a small bag of commercial biscuits. This financial prudence allows you to provide high-quality treats without breaking the bank.
Furthermore, the entire process of baking for your beloved dog is an incredibly rewarding and engaging activity that can be enjoyed by the entire family. Children can delight in helping with the mixing and cutting out fun shapes, fostering a deeper sense of responsibility and connection with their pet. The delightful aroma of freshly baked treats permeating your home is an added bonus, creating a warm and inviting atmosphere. Most importantly, witnessing your dog’s sheer excitement and gratitude for something you painstakingly made yourself is a truly priceless experience, solidifying the special bond you share.
The Simple & Wholesome Homemade Dog Biscuit Recipe Your Pet Will Adore
This foundational recipe has been meticulously designed to be straightforward and easily executable, utilizing common kitchen staples. Its simplicity makes it the perfect starting point for first-time dog treat bakers, offering a solid base that is wonderfully adaptable. Once you’ve mastered these basics, you’ll feel confident to experiment with countless creative variations.
What You Will Need:
- 2 ½ cups white flour (or opt for whole wheat flour for an added boost of fiber, vitamins, and essential nutrients, enhancing the overall health profile of your treats)
- 1 tsp. salt (use this sparingly or consider omitting entirely if your dog has known sodium sensitivities or specific dietary restrictions; a small amount can enhance flavor but isn’t strictly indispensable for canine palatability)
- ½ cup hot water (the heat is crucial for efficiently dissolving the bouillon cube, ensuring even flavor distribution throughout the dough)
- 1 large egg (serves as an excellent natural binder, helping the ingredients coalesce into a cohesive dough, and contributes valuable protein)
- 1 chicken or beef bouillon cube (it is imperative to ensure this is low sodium or specifically formulated for dogs; alternatively, unsalted chicken or beef broth provides a healthier, controlled-sodium option)
- Baking sheet (you may need one or two, depending on the size of your batch and your oven’s capacity)
- Cookie cutter (a classic bone shape is always a winner and instantly recognizable, but feel free to unleash your creativity with any fun, pet-themed, or festive shapes!)
- Large mixing bowl and sturdy spoon/mixer (a stand mixer with a dough hook can make the mixing process even easier)
- Rolling pin (essential for achieving an even dough thickness)
- Parchment paper (highly recommended for lining your baking sheets; it prevents sticking, ensures easy removal of biscuits, and simplifies cleanup)
Ingredient Notes & Considerations: While standard white flour yields perfectly acceptable results, making the switch to whole wheat flour will significantly boost the fiber content, adding beneficial vitamins and minerals, thereby making your homemade dog biscuits even more nutritious. If your dog suffers from a gluten sensitivity or allergy, consider alternative flours such as oat flour, rice flour, or even a specialized gluten-free flour blend, though these alternatives may necessitate minor adjustments to the liquid content due to differing absorption rates. Regarding the bouillon, always prioritize low-sodium options or, ideally, use unsalted chicken or beef broth to maintain a healthy sodium intake for your pet. The egg is not just a binder; it also contributes essential protein, helping to create a stable and well-textured dough that holds its shape beautifully during baking.
Homemade Dog Biscuits Recipe Instructions: Step-by-Step Guide
Step 1. Preheat Oven and Prepare Flavorful Bouillon Broth
Your baking adventure begins by carefully preheating your oven to a precise 350°F (175°C). This crucial step ensures that the oven reaches and maintains the correct temperature by the time your biscuits are ready for baking, guaranteeing even cooking and optimal texture. While the oven warms up, measure your ½ cup of water and place it into a microwave-safe bowl. Heat the water until it becomes very hot, just shy of a rolling boil – this high temperature is vital for the swift and complete dissolution of the bouillon cube, ensuring its rich flavor is uniformly distributed. Once the water is sufficiently hot, carefully drop your chosen chicken or beef bouillon cube into the water and stir continuously until it has completely dissolved, forming a flavorful broth. If you’ve opted for unsalted broth instead of a cube, simply warm it slightly to enhance its blendability with the other ingredients.
Step 2. Thoroughly Mix All Ingredients for a Perfect Dough
Now, gather all your prepared ingredients. In a large, sturdy mixing bowl, combine the measured flour (whether you’re using white or whole wheat), the optional salt (if included), the lightly whisked egg, and your freshly dissolved bouillon mixture. Using a robust spoon, a powerful stand mixer fitted with a dough hook, or even your clean hands, begin to stir and mix everything together with diligence and care. The primary objective is to achieve a consistent, well-integrated dough. It should be pliable but not overly sticky. If you find the dough appears too dry and crumbly, struggling to come together, add a tiny splash more warm water, one teaspoon at a time, until it reaches the desired consistency. Conversely, if the dough proves too sticky or difficult to handle, gradually sprinkle in a little more flour until it forms a workable, smooth dough that effortlessly pulls away from the sides of the bowl. Gently knead the dough for a minute or two to ensure all components are thoroughly incorporated and the dough achieves a uniform, smooth texture.
Step 3. Expertly Roll and Cut Your Delightful Dog Biscuits
Prepare your work surface by lightly sprinkling it with a fine layer of flour – this simple step is essential to prevent the dough from stubbornly sticking. Transfer your freshly mixed dough from the mixing bowl onto the floured surface. Employing a rolling pin, carefully roll out the dough to an even thickness, aiming for approximately ¼ to ½ inch. Remember, the thickness you choose will directly influence the final texture of your baked biscuits: a thinner roll will yield crispier, crunchier treats, while a thicker roll will result in chewier, more substantial bites. Once the dough is uniformly rolled, seize your favorite cookie cutter – a classic bone shape is eternally popular, but feel free to use circles, squares, or even whimsical festive shapes for extra flair! Begin cutting out your dog biscuits with precision. Gently and carefully transfer each cut biscuit to your baking sheet, which you’ve wisely lined with parchment paper for effortless removal and a much simpler cleanup process. Collect any remaining dough scraps, re-roll them, and continue cutting out more biscuits until every last bit of dough has been transformed into a delightful treat.
Step 4. Bake Your Homemade Dog Biscuits to Golden Perfection
With your baking sheets now laden with beautifully shaped homemade dog biscuits, it’s time for the magic to happen in the oven! Carefully place the baking sheets into your preheated 350°F (175°C) oven. Allow them to bake for approximately 30 minutes. It’s wise to keep a vigilant eye on them, especially towards the end of the baking cycle. The biscuits should achieve a lovely light golden-brown hue and feel firm and solid to the touch when gently pressed. The exact baking time can vary slightly based on the nuances of your specific oven and the thickness of your individual biscuits. For those who prefer an extra-crispy biscuit, you can extend the baking time by an additional 5-10 minutes. Alternatively, for a truly hardened, long-lasting crunch, turn off the oven completely after the initial baking time, crack the oven door slightly (you can prop it open with a wooden spoon), and allow the biscuits to sit in the cooling oven for an extra hour or two, or even overnight, to dry out further. Once baked to your desired crispness, carefully remove the biscuits from the oven and transfer them immediately to a wire rack to cool down completely. They will continue to firm up and develop their characteristic crunch as they cool.
Creative Variations & Tailoring for Your Pup’s Unique Palate
This fundamental recipe serves as an excellent and reliable starting point, but the true excitement and personalization begin when you venture into experimenting with a delightful array of flavors and ingredients! Customizing your homemade dog biscuits allows you to perfectly cater to your dog’s distinct tastes, address their specific nutritional requirements, and make each treat even more special and meaningful.
Delicious Flavor Boosters & Wholesome Additions:
- Irresistible Savory Delights:
- Cooked Bacon Bits: Fry up a couple of slices of bacon until crispy, then blot away any excess grease with paper towels, crumble them finely, and mix them directly into the dough for an utterly irresistible smoky flavor and texture.
- Shredded Cheese: Incorporate a quarter to half a cup of finely shredded cheddar, a sprinkle of pungent parmesan, or any other mild, dog-safe cheese into the dough. Cheese imparts a delightful aroma and a taste that most dogs enthusiastically adore.
- Peanut Butter: Add 2-3 generous tablespoons of natural, unsweetened peanut butter to your wet ingredients. Peanut butter is a universally beloved dog favorite, but it is absolutely critical to always double-check the label for xylitol, an artificial sweetener that is profoundly toxic and life-threatening to dogs.
- Liver Powder or Nutritional Yeast: For a significant nutrient boost and an intense, earthy savory flavor that dogs find captivating, a tablespoon of liver powder or nutritional yeast can be seamlessly mixed into your dough.
- Nutrient-Rich Fruity & Veggie Goodness:
- Pureed Pumpkin: A quarter cup of plain, unsweetened pumpkin puree (ensure it’s not pumpkin pie filling, which contains spices and sugar) is a fantastic addition for promoting healthy digestion and contributes a lovely earthy flavor and welcome moisture to the biscuits.
- Grated Carrots or Zucchini: Finely grate about a quarter cup of fresh carrots or zucchini and gently fold them into the dough. These additions provide a valuable source of vitamins, minerals, and dietary fiber.
- Unsweetened Applesauce: A few tablespoons of unsweetened applesauce can be used to replace some of the liquid component in the recipe, lending a subtle touch of natural sweetness and enhancing moisture.
- Blueberries: A small handful of fresh or thawed frozen blueberries can be gently folded into the dough, offering a powerful burst of antioxidants.
- Subtle Herbal Touches (Always in Moderation):
- Fresh Parsley: A teaspoon of finely chopped fresh parsley can be a wonderful addition, known for its natural ability to help freshen your dog’s breath.
- Rosemary: A tiny pinch of dried rosemary can offer beneficial antioxidant properties (use very sparingly, as strong herbs can be potent for dogs).
Thoughtful Dietary Adaptations for Specific Needs:
- Grain-Free Options: If your dog has a known grain sensitivity or allergy, you can effectively substitute the white or whole wheat flour with suitable alternatives such as oat flour, rice flour, almond flour, or even coconut flour. It is important to note that these flours absorb liquid differently, so you will likely need to adjust the amount of water or broth accordingly. Begin with slightly less liquid than the recipe calls for and add it gradually until you achieve the correct dough consistency.
- Low-Fat Biscuits: To create low-fat treats, consciously omit any high-fat additions like cheese, bacon, or excessive peanut butter. Ensure you are using low-sodium, unsalted broth instead of conventional bouillon cubes, and consider using only egg whites instead of whole eggs to further reduce fat content.
- Allergy-Friendly Customization: If your dog suffers from specific protein allergies (e.g., to chicken or beef), ensure your bouillon or broth is derived from a suitable alternative, such as a vegetable broth, or a hypoallergenic protein source recommended by your vet. Meticulously select any other added ingredients to scrupulously avoid known allergens.
Optimal Storage Strategies for Enduring Freshness and Longevity
Once your delectable homemade dog biscuits have completely cooled to room temperature, implementing proper storage techniques is absolutely paramount. This ensures they retain their crispness, maintain their inviting flavor, and last as long as possible. The ideal storage method will largely depend on how quickly your dog typically devours their treats and your desired level of crispness.
- Airtight Container at Room Temperature: For immediate consumption, typically within 3-5 days, store your cooled biscuits in an airtight container at room temperature. A standard cookie jar, a sealed plastic container, or a glass jar with a tight-fitting lid works perfectly. This method effectively prevents them from going stale and helps to preserve their pleasant texture.
- Refrigeration for Extended Freshness: If you’ve enriched your biscuits with moist or perishable ingredients such as pumpkin puree, fresh cheese, or crumbled meat, or if you simply wish to extend their shelf life for up to 1-2 weeks, refrigeration is the recommended course of action. Place them in an airtight container or a resealable bag before storing them in the refrigerator.
- Freezing for Long-Term Storage: For larger batches, to maximize longevity, or to always have a supply on hand, freezing is an exceptional option. This method allows your homemade dog biscuits to remain fresh for up to 2-3 months. To freeze them effectively, arrange the completely cooled biscuits in a single layer on a baking sheet and place them in the freezer until they are frozen solid. Once frozen, transfer the solid biscuits to a freezer-safe bag or an airtight container, ensuring as much air is removed as possible to prevent freezer burn. Thaw them at room temperature for a few minutes or in the refrigerator overnight as needed before serving.
- Drying Out (Dehydrating) for Enhanced Crunch and Shelf Life: For biscuits that are remarkably crispy and boast an even longer shelf life at room temperature, you can perform a gentle “dehydration” step. After the initial baking is complete, simply turn off your oven, crack the oven door slightly (you can use a wooden spoon to prop it open a couple of inches), and leave the baked biscuits inside for an additional 1-2 hours, or even overnight. This low-heat, extended drying process removes significantly more moisture, resulting in a harder, crunchier biscuit that is less susceptible to spoilage, making them perfect for longer storage.
Safety First: Essential Considerations for Homemade Dog Treats
While the act of making homemade treats is inherently healthier and more thoughtful, it is absolutely paramount to prioritize your dog’s safety above all else. Always keep these critical points firmly in mind:
- Verify All Ingredients are Strictly Dog-Safe: Never, under any circumstances, use ingredients that are known to be toxic or harmful to dogs. This includes, but is not limited to, chocolate, grapes, raisins, xylitol (a common artificial sweetener found in many human products like peanut butter, gum, and some baked goods), onions, garlic, avocado, macadamia nuts, and alcohol. If you are ever in doubt about the safety of an ingredient, a quick online search from a reputable source or, even better, a call to your veterinarian is always the wisest and safest course of action.
- Moderation is Absolutely Key: Even the healthiest, most wholesome homemade treats should always be given in moderation. Treats are intended as supplemental rewards, not as a replacement for your dog’s balanced daily meals. As a general guideline, treats should constitute no more than 10% of your dog’s total daily caloric intake to prevent unhealthy weight gain and ensure they continue to receive comprehensive nutrition from their regular, balanced dog food.
- Introduce New Treats Slowly and Carefully: If your dog is trying a new treat for the first time, or if a recipe incorporates new ingredients they haven’t had before, always start by offering a very small amount. Carefully observe your dog for any signs of digestive upset, allergic reactions, or unusual behavior for 24-48 hours before offering more.
- Consult Your Veterinarian: This cannot be stressed enough: If your dog has any pre-existing underlying health conditions, known allergies, specific food sensitivities, or is currently on a special prescribed diet, always, always consult your veterinarian before introducing any new foods or treats, even those you’ve prepared at home. Your vet can provide tailored, expert advice based on your dog’s unique health profile and needs.
- Supervise Snacking Closely: It is always a good practice to supervise your dog while they are enjoying any treat, especially if it’s a hard biscuit. This ensures they chew appropriately and helps to prevent any potential choking hazards.
Your beloved pup will undoubtedly reward your efforts and the delicious results with an outpouring of affection. Prepare yourself for an abundance of enthusiastic tail wags, joyful barks, and plenty of appreciative, slobbery wet kisses! These are the priceless moments that make all the effort truly worthwhile.
We genuinely wish you the best of luck in making these delightful homemade dog biscuits! We would be absolutely thrilled to hear what your little pooch thinks of them and eager to learn about any creative twists or secret ingredients you add to make them uniquely yours.
RELATED: 21 DIY Dog Clothes And Coats You Should Make
There’s truly no more heartfelt or personal way to spoil the ones you love than by creating something special and tailor-made with your own hands. And why should our cherished furry family members be any different? Baking homemade dog treats isn’t just about preparing a simple snack; it’s a beautiful act of investing love, meticulous care, and vital health benefits into every single bite. By doing so, you’ll not only enjoy significant savings compared to continually purchasing expensive store-bought options, but you’ll also gain invaluable peace of mind, knowing precisely what wholesome goodness your beloved canine companion is consuming. After all, dogs are far more than just pets; they are loyal, cherished companions, and integral family members who unquestionably deserve the very best we can offer.
Are you feeling inspired to give this wholesome homemade dog biscuits recipe a try? Do you have a unique flavor idea, a clever substitution, or a valuable tip that you believe other dog parents would absolutely love to hear? We’d be truly thrilled to know all about it! Please share your baking stories, creative triumphs, and helpful insights with our vibrant community in the comments section below! Your experiences could inspire countless others!
Up Next for Your DIY Pet Adventures:
- 25 DIY Projects Your Pet Will Love
- 9 Ways To Calm Your Dogs During Thunderstorms
- 23 Awesome DIY Pet Projects to Keep Your Furry Friends Happy
Stay connected with us on Facebook, Twitter, Pinterest, and Instagram!

Editor’s Note: This post was originally published on January 5, 2016, and has been updated for quality and relevancy.