
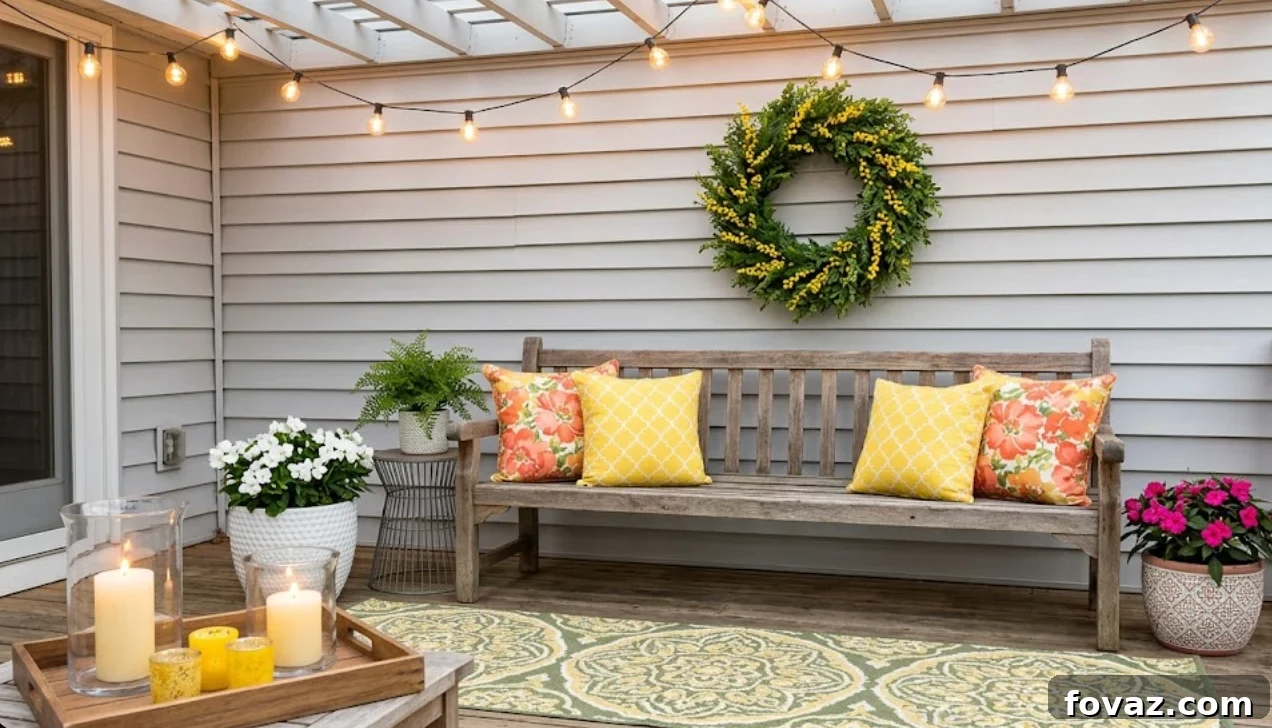
Transform Your Outdoor Oasis: A Complete Spring Patio Makeover on a Budget
At a Glance: Achieve a Stunning Spring Patio Transformation Without Breaking the Bank
- Discover how to select one powerful anchor piece that defines your patio’s aesthetic before you spend a single dollar.
- Learn a crucial 20-minute drainage check to prevent your beautiful new rug from turning into a moldy mess by mid-summer.
- Explore three real-world budget tiers—$150, $300, and $500—to guide your spending and maximize impact.
- Master a step-by-step process designed to turn a weekend project into a completed reality, not a month-long saga.
Have you ever started a home improvement project with the best intentions, only for it to spiral into weeks of late-night fixes and unexpected expenses? As one homeowner lamented, “I aimed for a weekend refresh and ended up with a month of late-night fixes.” That common trap is precisely what we’re here to help you avoid today. This comprehensive guide is designed to ensure your Saturday project truly concludes by Sunday night, leaving you with a beautifully refreshed patio to enjoy.
Imagine enjoying a high-end looking patio all summer long, even as August heat sets in, all while sticking to a budget under $300. It’s not just a dream—it’s an achievable reality with the right plan and a focused approach. This article will walk you through a streamlined, budget-conscious spring patio makeover that delivers maximum impact with minimal fuss.
RELATED: 6 Spring Home Makeovers: Micro-Updates You Can Finish This Weekend – For more quick refresh ideas around your home.
Your Essential Shopping List: What You’ll Need for a Budget Patio Refresh
Success in any DIY project starts with preparation. Before you even think about design, gather your basic cleaning and prep materials. Then, based on the anchor option you choose in Step 2, you’ll select the specific items needed for that focus area. Remember, you won’t need all three sets of anchor materials, only the one that aligns with your chosen centerpiece.
Core Preparation & Styling Essentials
These items are fundamental for any patio makeover, ensuring a clean slate and comfortable finishing touches:
- One Stiff Push Broom: Essential for clearing debris and preparing your patio surface for cleaning or painting. Choose one with durable bristles for effective scrubbing.
- One Gallon of Concrete Degreaser or All-Purpose Outdoor Cleaner: Critical for removing dirt, grime, moss, and oil stains. A clean surface is paramount for any subsequent treatments like painting or sealing.
- One Roll of Painter’s Tape: Perfect for masking off areas if you’re painting or staining, ensuring crisp, clean lines. Opt for a tape designed for outdoor use if possible.
- One Box of Contractor Trash Bags: Heavy-duty bags are a must for disposing of debris, old cushions, or packaging materials efficiently.
- One 9 by 12 Outdoor Rug Rated for Weather: An outdoor rug instantly defines a space and adds warmth and texture. Ensure it’s specifically designed to withstand rain, sun, and foot traffic without molding or fading.
- Four to Six Weatherproof Cushions or Pillows: These add comfort and a pop of color. Always choose materials explicitly labeled as “weatherproof” or “outdoor” to prevent mildew and fading.
- Two Folding Chairs and a Small Table (Thrifted is Perfectly Fine): These provide foundational seating. Sourcing these second-hand from places like Facebook Marketplace or yard sales is an excellent budget-friendly strategy. Focus on solid frames that can be easily cleaned or painted.
Anchor Option One: Painted or Stained Concrete Floor
Transforming your patio floor provides the biggest visual change for the least amount of money. This option breathes new life into tired concrete surfaces.
- One Gallon of Concrete Stain or Porch Paint in a Single Color: Choose a product specifically formulated for concrete, offering durability and weather resistance. Stains penetrate the surface for a more natural look, while paints provide a solid, opaque finish.
- One 9-inch Roller Frame and Two Roller Covers: Opt for roller covers designed for smooth to semi-smooth surfaces, suitable for concrete. Having two allows for a clean switch if one gets overloaded or if you need a second coat.
- One 2-inch Angled Brush for Edges: Crucial for precise application around walls, columns, and other obstacles where a roller can’t reach.
- One Paint Tray: A sturdy paint tray makes loading your roller and brush much easier and cleaner.
Anchor Option Two: String Light Grid Overhead
Create an inviting, ambient atmosphere with a stunning display of string lights. This option is perfect if your patio floor is already in good condition.
- Two Strands of 48-foot Commercial-Grade LED String Lights: Commercial-grade lights are more durable and typically designed for outdoor, all-weather use. LED options are energy-efficient and last longer. Ensure they are rated for outdoor installation.
- One Pack of Heavy-Duty Cup Hooks or Eye Screws (Eight Pieces): These provide secure mounting points for your string lights. Choose based on whether you’re attaching to wood (eye screws) or masonry (anchors + eye screws/hooks).
- One Roll of Steel Guide Wire, Fifty Feet: For creating a taut grid, especially over larger areas, a guide wire helps prevent sagging and ensures a professional look.
- One Outdoor Timer That Plugs Into a GFCI Outlet: An outdoor timer adds convenience, allowing your lights to turn on and off automatically. Always plug outdoor electrical items into a Ground Fault Circuit Interrupter (GFCI) outlet for safety.
Anchor Option Three: One Oversized Planter or Plant Wall
Inject natural beauty and a vibrant focal point with a generously sized planter or a simple plant wall. This works especially well for smaller patios or those needing a touch of green.
- One Roll of Landscape Fabric: This is used to line the inside of planters, preventing soil from escaping while allowing water to drain.
- One 40-pound Bag of Gravel: A layer of gravel at the bottom of large planters ensures proper drainage, preventing root rot.
- Two 1 Cubic Foot Bags of Outdoor Potting Soil: Choose a high-quality potting mix formulated for outdoor container plants, providing essential nutrients and good drainage.
- One Large Planter That is 18 Inches Wide or Larger: The size of the planter is key to creating a significant visual impact. Larger planters also provide more stability and a better environment for plant growth.
- Two or Three Starter Plants: Select plants that are suitable for your local climate and the amount of sunlight your patio receives. Consider a mix of sizes and textures for visual interest.
Essential Tools for a Smooth Project
Having the right tools on hand makes any DIY project easier and safer.
- Tape Measure: For accurate measurements of your patio, rug, and light placements.
- Pencil and Paper for Your Sketch: Planning on paper helps visualize your layout and prevents costly mistakes.
- A Marble or a Small Ball (You’ll Use it to Check the Slope): An ingenious, low-tech way to assess your patio’s drainage slope.
- Drill and Drill Bits (Only if You’re Hanging Lights or Building a Planter): Necessary for installing hooks for lights or drilling drainage holes in planters.
- Work Gloves: Protect your hands from dirt, chemicals, and splinters.
- Safety Glasses: Always protect your eyes, especially when cleaning, drilling, or handling chemicals.
Your Five-Step Plan for a Flawless Spring Patio Makeover
This systematic approach breaks down your patio transformation into manageable steps, ensuring efficiency and lasting results.
Step 1. Run the Crucial Twenty-Minute Surface Check
Before you commit to a single purchase, invest twenty minutes in evaluating your patio’s fundamental health. Skipping this critical step is the most common reason patio makeovers fail or cost more than expected down the line. Walk your patio and conduct these four quick, but vital, checks:
- Post-Rain Water Check: Observe your patio the morning after a significant rain. Mark any spots where water is still pooling or sitting. Persistent standing water indicates poor drainage and can lead to mildew, rot, and eventual surface damage.
- Crack Measurement: Carefully inspect the surface for cracks. Measure the widest crack. Anything wider than a standard pencil (approximately 1/4 inch or 6mm) is more than a cosmetic issue; it signifies a potential structural problem that needs professional attention before any decorative overlays.
- Dark Stain Patterns: Look for persistent dark stain patterns on the concrete or pavers. These marks often indicate areas where water sits for the longest periods, fostering mildew, algae, or efflorescence.
- Slope Assessment with a Marble: Place a marble or a small ball on the slab and watch its movement. Ideally, it should roll gently away from your house, indicating a proper slope for drainage. If it rolls toward your house, you have a serious drainage issue that could direct water towards your foundation, potentially causing severe damage.
If any one of these four checks reveals a significant problem (e.g., major cracks, water pooling towards your house), you absolutely need to address the underlying surface issue before you decorate over it. Attempting to hide these problems with aesthetic upgrades is a waste of money and can lead to more costly repairs later. For serious issues, consult a professional (see “When to Hire a Pro”).
Step 2. Pick Your One Defining Anchor Piece
The secret to a high-impact, low-budget patio makeover is focus. Your anchor is the single, dominant visual element around which all other choices on your patio will orbit. This strategic decision prevents an overwhelming shopping list and ensures a cohesive design. You only get to pick one main anchor for this budget-friendly transformation:
- The Painted or Stained Concrete Floor: Costing typically under $80 in materials, this option provides the most dramatic visual shift for the lowest cost. It creates a fresh, clean canvas and works seamlessly under any furniture or decor you add later. It’s ideal for patios with sound but visually unappealing concrete.
- The String Light Grid Overhead: If your patio floor is already in good shape, or if you’re looking to create an enchanting evening ambiance, string lights are an excellent choice. At under $60, they offer incredible value for the atmosphere they create, transforming your patio into a cozy outdoor living room after sunset.
- One Oversized Planter or Plant Wall: Priced at under $100, a large, thoughtfully placed planter (or a small collection making a “plant wall”) works best on a small patio that benefits from a clear, vibrant focal point. It introduces natural elements, color, and life, drawing the eye and making the space feel more intentional and lush.
Commit to one of these three options. The other two can then become small, complementary accents if your budget allows, rather than competing features that dilute the overall impact and stretch your resources.
Step 3. Plan Meticulously on Friday Night, Shop Smart on Saturday Morning
Efficiency is key to staying on budget and finishing on time. Dedicate a focused thirty minutes on Friday night to meticulous planning:
- Measure Your Patio: Get accurate dimensions for your space. This is crucial for selecting the right size rug, determining the length of string lights, or assessing the scale of your anchor planter.
- Sketch the Layout on Paper: Don’t just visualize—draw it out! A simple sketch helps you experiment with furniture placement, anchor orientation, and traffic flow. This step can reveal potential issues before you start moving heavy items.
- Lock In Your Anchor Choice: Reconfirm your primary anchor piece and visualize how it will integrate with your existing space.
- Write the Full Shopping List with Prices: Research approximate prices for each item on your list. This helps you track your budget in real-time. Look for deals online, but prepare to buy locally.
On Saturday morning, armed with your precise list and budget, make one efficient trip to a single store (or two at most, if absolutely necessary). The golden rule here is simple: if an item is not explicitly on your meticulously prepared list, it does not come home with you. This single discipline is often the crucial difference between completing a $300 project and unexpectedly spending $520 or more due to impulse buys.
Step 4. Install Your Anchor with Precision on Saturday Afternoon
Saturday afternoon is dedicated to the physical transformation—installing your chosen anchor piece. Follow these specific instructions for a durable and professional finish:
- If your anchor is the floor (painted or stained concrete):
- Begin by thoroughly sweeping away all loose debris.
- Scrub the concrete vigorously with your stiff push broom and concrete degreaser/outdoor cleaner. This removes dirt, grime, and oils, which is vital for proper adhesion of paint or stain.
- Allow the surface to dry completely. This can take several hours, or even a full day, depending on humidity and ventilation. Do not proceed until it’s bone dry.
- Carefully tape the edges of your patio where it meets the house, walls, or other permanent structures using painter’s tape.
- Roll on two thin coats of stain or paint, rather than one thick coat. Thin coats cure more evenly, adhere better, and significantly outlast thick, uneven applications that are prone to peeling. Allow adequate drying time between coats as per product instructions.
- If your anchor is string lights:
- Mount your heavy-duty cup hooks or eye screws into sturdy wooden fascia boards or into masonry using appropriate anchors. Ensure they are spaced evenly to create your desired grid pattern.
- Never hang string lights directly from gutters, as this can damage the gutter or cause the lights to sag and fail.
- If using guide wire, string it tautly between your mounted hooks, then attach your string lights to the guide wire using small zip ties or additional hooks for support.
- Always plug your lights into an existing GFCI (Ground Fault Circuit Interrupter) outlet for essential electrical safety. Never attempt to splice or modify outdoor wiring yourself; if you need a new outlet, call a licensed electrician.
- If your anchor is a large planter:
- If your planter doesn’t have pre-drilled drainage holes, carefully drill several in the bottom using an appropriate drill bit. Proper drainage is paramount for plant health.
- Line the inside of the planter with landscape fabric. This prevents soil from washing out through the drainage holes while allowing excess water to escape.
- Add a 2-3 inch base layer of gravel at the bottom. This further aids drainage and prevents soil from compacting around the drainage holes.
- Fill the planter with your chosen outdoor potting soil, leaving a few inches from the top.
- Plant your chosen starter plants, ensuring their root ball is level with the soil surface. Water thoroughly. A planter without adequate drainage will cause root rot and kill every plant in it by the peak of summer.
Step 5. Style on Sunday, and Then Know When to Stop
Sunday is for styling, softening, and enjoying the fruits of your labor. This is where your patio truly comes to life, but remember the critical “stop” rule to maintain your budget and aesthetic vision:
- Lay the Outdoor Rug Down First: Position your weather-rated outdoor rug to define the central seating area or pathway. It grounds the space and adds immediate warmth.
- Place Your Furniture on Top of It: Arrange your thrifted (or existing) folding chairs and small table on the rug. Experiment with different configurations until you find a layout that promotes conversation and provides easy access.
- Add the Cushions and Soft Goods Last: Introduce your new weatherproof cushions and pillows. These are your opportunity to add pops of color, texture, and ultimate comfort.
- Smart Sourcing Strategy: Always prioritize thrift for furniture frames (from Facebook Marketplace, yard sales, or even curb finds) as their structure can often be cleaned, repaired, or repainted. However, for anything that directly touches the weather or needs to withstand elements consistently—like cushions, outdoor fabrics, specialized fasteners, durable finishes, and lighting fixtures—always buy new. The initial savings from used, weather-exposed items are almost always negated by the cost of premature replacement or constant maintenance.
- Capture the Moment: Take your “after” photos during the “golden hour” (just after sunrise or before sunset) when the light is soft and beautiful. This will make your newly refreshed patio look its absolute best.
- Then Stop: Resist the urge to add “just one more thing.” Over-accessorizing can lead to clutter, detract from your anchor piece, and inevitably push you over budget. The beauty of a budget makeover lies in its simplicity and intentionality.
Three Budget Tiers: What $150, $300, and $500 Actually Get You
Understanding what different budget levels can achieve helps manage expectations and guides your choices. Here’s a breakdown of what you can realistically expect at various price points for your spring patio makeover.
| Tier | Total Approximate Cost | Anchor Transformation | Soft Goods & Seating | Lighting & Ambiance | Overall Feel & Longevity |
|---|---|---|---|---|---|
| Minimum Impact | About $150 | Repainted or thoroughly cleaned concrete floor (DIY paint/stain) | Thrifted rug & DIY cushion covers (basic fabric) or upcycled existing cushions, thrifted seating frames | Basic $20 string lights (entry-level, less durable) | A noticeable refresh, cleaner and brighter. Good for renters or a very temporary solution. Requires more DIY effort for soft goods. |
| Mid-Tier Refresh | About $300 | Professionally stained or meticulously painted floor plus one significant oversized planter as a focal point | Brand new, weather-resistant outdoor rug & thoughtfully chosen thrifted seating frames (potentially painted/refurbished), new weatherproof cushions | Dimmable commercial-grade LED string lights for superior ambiance and durability | A comfortable, stylish, and inviting space with good longevity. Feels intentional and well-designed, offering a great return on investment. |
| Quality Upgrade | About $500 | Sealed and stained concrete floor (for enhanced durability) plus a pair of strategically placed planters or a larger plant feature | All new, high-quality weatherproof outdoor rug and a matching set of new, durable outdoor cushions (for existing seating or newly sourced frames) | Dimmable commercial-grade LED string lights with an integrated timer for effortless control | A highly cohesive and polished outdoor living area. The focus is on quality materials that promise extended enjoyment and minimal maintenance for seasons to come. |
Each tier builds upon the last, offering more durability, style, and convenience. The “Mid-Tier” often strikes the best balance between cost and impact for most homeowners looking for a significant refresh.
When to Set Aside the DIY and Hire a Professional
While this guide focuses on empowering you with DIY solutions, it’s crucial to recognize the boundaries of weekend projects. Some issues are simply not suitable for a budget DIY fix and require the expertise of a licensed professional. Ignoring these red flags can lead to far greater expenses and safety hazards down the road:
- Slab cracks wider than a pencil: These often indicate deeper structural issues with your foundation or sub-base, which a simple patch job won’t fix.
- Concrete that is visibly lifting, heaving, or sinking: This is a strong indicator of soil movement, erosion, or poor sub-base preparation. A professional can assess and address these complex problems.
- Water that consistently flows toward your house’s foundation: This is a critical drainage issue that can lead to basement flooding, foundation damage, and mold growth. A landscaping or concrete specialist can properly regrade your patio.
- Any need for a new outdoor electrical outlet or circuit: Electrical work, especially outdoors where it’s exposed to the elements, must be performed by a licensed electrician to ensure safety and compliance with building codes. Never attempt to install or modify outdoor wiring yourself.
These are the moments where attempting to save $200 with a quick fix can ultimately cost you the entire project, or even significantly more in home repairs. Invest in professional help when necessary; it’s an investment in your home’s integrity and your family’s safety.
The Bottom Line: Enjoy Your Outdoor Space This Season
A beautiful, inviting patio doesn’t require a massive budget or endless weekends. The key to a successful spring patio makeover lies in strategic planning, focused execution, and knowing when to stop. Pick your powerful anchor piece this weekend, making a single, impactful choice that defines your space. Prioritize the crucial twenty-minute surface check before you even think about driving to the store; this foundational step protects your investment.
Keep your first spring patio makeover small enough to realistically finish on Saturday, leaving Sunday for styling and enjoyment. The true test of your efforts, and the ultimate reward, will always be the next hard rain and how beautifully your revitalized patio handles it. Get ready to enjoy countless hours outdoors in your transformed space!
We love seeing your transformations! Post your before and after photos on Pinterest and tag us, because we reshare inspiring reader patios all spring long. Catch our weekly project drops on Facebook for new ideas and daily inspiration on Instagram to keep your DIY spirit thriving.
Frequently Asked Questions About Budget Patio Makeovers
How much does a spring patio makeover cost?
A spring patio makeover on a budget can range significantly based on your choices. On the low end, a basic refresh can cost about $150, focusing on cleaning, repainting, and thrifted soft goods. For a more solid mid-tier update with new weather-resistant items and a strong anchor, you’re looking at around $300. A high-quality, near-new version with enhanced durability and more new components can run closer to $500. The final figure heavily depends on how much of your existing surface you can retain and reuse, and how many soft goods (like cushions and rugs) you can thrift or upcycle versus buying new.
Can you truly do a spring patio makeover in one weekend?
Absolutely, yes! A spring patio makeover is entirely achievable in one weekend, provided you adhere to a disciplined plan and, crucially, select a single anchor piece. The recommended schedule is: Friday night for meticulous planning, sketching, and list-making; Saturday for all the building and installation of your anchor and main elements; and Sunday for styling, adding soft goods, and enjoying the finished space. Projects that extend beyond a single weekend often lose momentum and frequently stretch into four weekends or more, or even remain unfinished.
What is the first step in a spring patio makeover on a budget?
The very first and most critical step in any spring patio makeover, especially on a budget, is a thorough twenty-minute drainage and surface check. This involves looking for indicators such as standing water after rain, cracks wider than a standard pencil, and ensuring the patio’s slope directs water away from your house’s foundation. If any of these issues are present, you must address the underlying base problems before purchasing any decorative items. Attempting to simply decorate over a faulty surface is the most common way people waste money on patio projects, as the cosmetic changes will quickly deteriorate or fail.
What is the best anchor for a small patio makeover?
For most small patios, a painted or stained concrete floor serves as the best and most impactful anchor. It offers the largest visual transformation for the lowest cost, essentially providing a clean, fresh canvas. This updated floor also acts as a versatile base that complements any future furniture or decor you choose to add. If your patio floor is already in excellent condition, then adding a stunning string light grid overhead becomes the next best choice, creating an intimate and inviting atmosphere for evenings.
Is it cheaper to buy outdoor furniture or DIY it?
The most intelligent and budget-friendly approach is a hybrid strategy: thrift the sturdy frames of outdoor furniture and buy new components for anything that will be directly exposed to the weather. Platforms like Facebook Marketplace, local yard sales, and even curbside finds are excellent sources for durable seating frames, tables, and other structural pieces that can often be cleaned, sanded, or repainted. However, items such as cushions, all types of fasteners, protective finishes, and lighting fixtures should always be purchased new. The cost of repeatedly replacing failed or degraded used weatherproof items almost always exceeds any initial savings you might have gained from secondhand gear.
Hot Take Poll: Your Thoughts on Budget Patio Makeovers
Is a $300 spring patio makeover actually worth the effort, or are you just delaying a real backyard overhaul?
- Worth it: Because one focused weekend and $300 can buy you an entire summer of enjoyment outdoors, significantly improving your quality of life right now.
- Waste of time: Because you should save up more and invest in a comprehensive, “do it right once” backyard overhaul that lasts for many years.
- It depends: Because this type of quick, budget-friendly refresh is perfect for renters or those with limited long-term plans, but a potential skip for homeowners planning a major landscape investment.
Drop your pick and tell us why you chose it in the comments section below. We genuinely read every single response and value your perspective!