
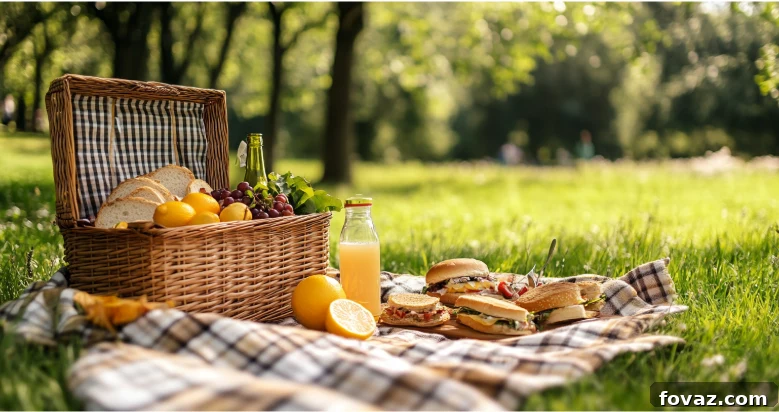
Embrace Spring: Craft Your Perfect DIY Picnic Experience
Spring awakens a natural desire to reconnect with the outdoors, and there’s no better way to celebrate its arrival than with a beautifully orchestrated picnic. Imagine stepping into the crisp, refreshing air, surrounded by blooming nature, sharing delicious food and laughter with cherished company. While store-bought picnic supplies offer convenience, the true magic of an outdoor meal often lies in the personal touch. Crafting your own picnic essentials—from a unique, handwoven basket to a cozy, durable blanket and simple, delightful recipes—transforms a simple outing into an unforgettable experience. Not only does this infuse your picnic with character and charm, but it also promotes sustainability, allowing you to reuse your bespoke items for countless future adventures.
This comprehensive guide will walk you through creating a stylish, practical, and truly personalized picnic setup. We’ll delve into the art of crafting a sturdy basket, sewing a comfortable and weatherproof blanket, and preparing an array of mess-free, delicious foods. Get ready to elevate your spring outings and create lasting memories, all while enjoying the satisfaction of your own handmade creations.
DIY Picnic Essentials: Curate Your Ideal Outdoor Gathering
A successful picnic transcends mere sustenance; it’s an immersive experience designed to delight all your senses. The ambiance, comfort, and ease of your setup are paramount, whether your destination is a sun-drenched park, a serene beach, or the intimate setting of your own backyard. By taking the DIY approach, you gain complete control over the aesthetic and functionality of your picnic gear. These handmade essentials not only ensure a comfortable and organized outing but also inject a unique personality into your outdoor dining. Let’s explore the fundamental components that will help you design a flawless and memorable al fresco meal.
Craft a Distinctive and Durable Picnic Basket
The heart of any picnic is its basket—a functional yet charming vessel that keeps your culinary treasures and essentials neatly organized. While repurposing an existing basket is a sustainable choice, the satisfaction of weaving one from scratch is unparalleled. The process, though it may seem intricate, is remarkably rewarding, yielding a sturdy and aesthetically pleasing basket that truly reflects your personal style. It’s more than just a container; it’s a statement piece that will accompany you on many joyful excursions.
Materials for a Handwoven Basket:
- Rattan Reeds or Willow Branches: Opt for high-quality, flexible reeds or branches suitable for weaving. These natural materials offer both durability and classic picnic charm.
- Large Bowl or Mold: Essential for establishing a consistent and sturdy base shape for your basket.
- Sharp Scissors or Pruners: For clean cuts, ensuring the structural integrity of your weave.
- Pliers: Helpful for bending thicker reeds and securing tight connections.
- Damp Cloth or Spray Bottle: To keep your weaving materials pliable and easy to work with throughout the process.
- Fabric for Lining (Optional but Recommended): Choose a durable, washable fabric like canvas, linen, or a patterned cotton to add a layer of protection and cleanliness, preventing small items from slipping through and adding a decorative touch.
Step-by-Step Weaving Guide:
- Preparation: Begin by soaking your rattan reeds or willow branches in warm water for at least 30 minutes. This significantly increases their flexibility, making them much easier to bend and weave without breaking.
- Base Creation: Place a large, overturned bowl or a custom mold on a flat surface. Use this as your guide to carefully form the base of your basket. Start by creating a sturdy cross-weave pattern for the bottom, ensuring it’s tightly packed and stable.
- Building the Sides: Once your base is secure, gradually begin weaving upwards, incorporating vertical stakes around the perimeter. Weave horizontal rows of softened reeds through these stakes, ensuring each row is pulled taut and sits snugly against the previous one. Consistency is key for a uniform and strong basket.
- Shaping and Finishing: As you weave, gently shape the sides of the basket to your desired height and form. Once you reach the top, carefully weave in the ends of the reeds to create a clean, finished edge. You might want to incorporate a sturdy handle by braiding thicker reeds or attaching a pre-made handle.
- Drying and Lining: Allow the completed basket to air dry completely. This process will make the rattan or willow rigid and strong. Once dry, cut and sew your chosen fabric liner to fit snugly inside, securing it with a few stitches or fabric adhesive to prevent it from shifting. This liner not only protects your food but also adds a touch of personalized style.
If the idea of weaving from scratch feels daunting, repurposing an old wicker basket is an excellent alternative that still offers a rewarding DIY experience. A simple clean, a fresh coat of paint in a cheerful spring color, and a vibrant new fabric liner can completely transform an outdated basket into a charming picnic essential. For comprehensive guidance on rejuvenating an old wicker basket, you might find inspiration and practical steps from resources like Storables.
Sew a Comfortable and Weatherproof Picnic Blanket
A high-quality picnic blanket is indispensable for any outdoor excursion. It defines your personal space, protects you from damp ground, and adds a crucial layer of comfort, transforming a simple patch of grass into a cozy dining area. Crafting your own blanket not only guarantees durability but also allows for complete customization in terms of size, fabric choice, color, and design, ensuring it perfectly complements your picnic aesthetic.
Supplies for Your Custom Picnic Blanket:
- Main Fabric (2-3 Yards): Choose a durable, comfortable outdoor fabric such as heavy-duty cotton canvas, ripstop nylon, or a weather-resistant polyester blend. Consider patterns and colors that evoke spring or complement your basket.
- Waterproof Backing (2-3 Yards): Essential for preventing moisture from seeping through. Excellent choices include vinyl, oilcloth, PUL fabric (polyurethane laminate), or even a robust, thin tarp material.
- Sharp Scissors or Rotary Cutter: For precise, clean cuts through both layers of fabric.
- Sewing Machine: Equipped with a heavy-duty needle suitable for thicker fabrics.
- Matching Polyester Thread: Polyester is strong and resists moisture better than cotton.
- Measuring Tape and Fabric Clips/Pins: For accurate measurements and securing layers.
Simple Sewing Instructions:
- Prepare Fabrics: Lay your main fabric and the waterproof backing fabric on a large, clean surface with their right sides (the side you want to be visible) facing each other. Ensure they are perfectly aligned and smooth out any wrinkles.
- Pinning: Secure the edges with fabric clips or pins, placing them every few inches to prevent the layers from shifting during sewing.
- Sewing the Perimeter: Using your sewing machine, stitch around the entire perimeter of the blanket with a straight stitch, leaving a seam allowance of about half an inch. Remember to leave a gap of approximately 6-8 inches along one side. This opening is crucial for turning the blanket right side out. Reinforce the beginning and end of your stitches at the opening.
- Trimming Corners: Carefully trim the corners diagonally close to the stitching, being careful not to cut through the seam. This reduces bulk and ensures sharp, neat corners when turned.
- Turning and Finishing: Reach through the opening and gently pull the entire blanket right side out. Use a blunt tool (like a chopstick or turning tool) to push out the corners cleanly. Press the edges flat, ensuring the opening seam is neatly folded inwards to match the rest of the edge.
- Topstitching for Durability: To give your blanket a polished finish and added durability, topstitch around the entire perimeter, about a quarter-inch from the edge. This step also securely closes the opening. You might also consider adding a criss-cross or diagonal topstitch pattern across the blanket for extra stability and a decorative touch.
No-Sew Picnic Blanket Option:
For those who prefer a no-sew solution, a thick fleece blanket makes a fantastic base. Simply trim the edges neatly with pinking shears to prevent fraying and add a decorative wavy edge. For added water resistance, you can lay a separate, thin plastic shower curtain or tarp underneath your fleece blanket when you set up your picnic. Alternatively, use a large piece of outdoor canvas fabric and apply iron-on hem tape along the edges for a clean, finished look without a single stitch.
Pack Delectable and Effortless Picnic Foods
The culinary aspect is central to any successful picnic. The best picnic foods are not only delicious but also incredibly easy to prepare, pack, transport, and consume, ideally without the need for extensive cutlery or elaborate setups. Focus on items that hold up well to travel, are resilient to temperature changes, and offer a delightful variety of flavors and textures.
Irresistible Picnic-Friendly Food Ideas:
- Gourmet Mason Jar Salads: These are a picnic revelation! Layer your dressing at the very bottom, followed by hard vegetables (carrots, cucumbers), grains (quinoa, pasta), protein (grilled chicken, chickpeas), softer vegetables, and finally, delicate greens on top. This layering technique keeps everything fresh and prevents sogginess until you’re ready to shake and serve.
- Artisan Mini Sandwiches and Wraps: Ditch the soggy bread! Opt for slider buns, small baguettes, or tortilla wraps. Fill them with robust ingredients like sliced turkey, ham, cheese, roasted vegetables, and a smear of pesto or hummus. Cut them into bite-sized portions for easy handling.
- Vibrant Fruit Skewers: A refreshing and colorful treat. Thread a variety of seasonal berries, grapes, melon cubes, pineapple chunks, and kiwi onto skewers. They’re naturally sweet, hydrating, and easy to eat. A small container of yogurt dip or honey-lime dressing can add an extra flourish.
- Homemade Lemonade and Infused Waters in Reusable Bottles: Prepare a batch of fresh lemonade, iced tea, or fruit-infused water (with cucumber and mint, or berries and citrus). Store them in sturdy, reusable glass or BPA-free plastic bottles with secure caps to prevent spills. Freezing them overnight can help keep them cold longer and act as mini ice packs.
- Hearty Granola Bars or Oatmeal Cookies: For a delightful sweet treat that travels exceptionally well, homemade granola bars or chewy oatmeal cookies are perfect. They provide sustained energy and satisfy a sweet tooth without being overly messy. Consider adding nuts, dried fruit, or chocolate chips for extra flavor and texture.
- Savory Hand Pies or Empanadas: These portable pastries, filled with vegetables, cheese, or meat, are fantastic for picnics. They are self-contained, easy to eat with hands, and can be enjoyed warm or at room temperature.
- Assorted Cheese and Cracker Board (Deconstructed): Pack a variety of hard cheeses, whole-grain crackers, and perhaps some olives or sun-dried tomatoes separately. Assemble a mini board upon arrival for a sophisticated touch.
For those seeking even more culinary inspiration, a vast collection of picnic-friendly recipes is available online, offering a plethora of ideas to cater to every dietary preference and taste bud.
Essential Tips for a Seamless Picnic Experience:
- Temperature Control: Always pack perishable items in an insulated cooler bag with plenty of ice packs. Keep cold foods separate from warm foods, and try to keep your cooler in the shade.
- Utensils and Plates: Opt for reusable bamboo or compostable cutlery and plates to minimize waste. Don’t forget napkins (cloth ones are eco-friendly!) and a small trash bag.
- Hydration is Key: In addition to your prepared drinks, bring extra water bottles, especially if you’re active or it’s a warm day.
- Bug Repellent: A small bottle of eco-friendly bug spray or citronella candles (if allowed and safe) can make a big difference in comfort. Mesh food covers are also a great idea.
- Comfort Enhancements: Consider bringing small, foldable cushions, a lightweight beach chair, or even a yoga mat for extra padding under your blanket, enhancing overall comfort.
Craft Memories: Make Your DIY Picnic Unforgettable
By investing your creativity and effort into crafting your own picnic essentials—a charming, handmade basket, a comfortable and durable blanket, and an array of delightful, homemade snacks—you elevate a simple outdoor meal into a truly personal and rewarding experience. The satisfaction derived from using items you’ve made yourself adds an unparalleled layer of enjoyment to your spring and summer outings. Beyond the immediate pleasure, you’ll accumulate a collection of reusable, sustainable, and cherished items that will serve as companions for countless future adventures.
Embrace the spirit of DIY, connect with nature, and savor the unique moments created by your own hands. Happy picnicking!
What DIY picnic essential are you most excited to create, or what’s your go-to tip for a perfect outdoor meal? Share your insights and inspire fellow picnic enthusiasts in the comments below!
Frequently Asked Questions About DIY Picnics
Planning the perfect DIY picnic often comes with questions. Here are some common queries and their answers to help you prepare for your next outdoor adventure:
-
What’s the best material for a DIY picnic basket?
Rattan and willow branches are traditional and excellent choices due to their durability, lightweight nature, and natural aesthetic. They become flexible when soaked, making them ideal for weaving. If repurposing, look for a wicker basket with a strong, intact frame that can be cleaned and painted.
-
How can I make my DIY picnic blanket waterproof and comfortable?
To ensure waterproofness, sew a layer of vinyl, oilcloth, or PUL fabric to the underside of your main blanket fabric. For a no-sew option, simply place a dedicated plastic shower curtain or a thin tarp underneath your chosen blanket. Comfort comes from selecting a soft yet durable top fabric like canvas or a thick cotton blend.
-
What are some eco-friendly alternatives for picnic supplies?
Embrace sustainability by using reusable bamboo or stainless steel cutlery, cloth napkins, and beeswax wraps instead of plastic cling film. Mason jars are perfect for drinks and salads, reducing the need for single-use containers. Consider packing food in reusable silicone bags.
-
What’s the best way to keep food fresh and safe during a picnic?
An insulated cooler bag with several ice packs is essential for perishable items like cheeses, meats, and dairy. Pack cold foods in airtight containers and store the cooler in the coolest, shadiest spot available. Pre-chilling food before packing also helps maintain temperature.
-
Can I really make a no-sew picnic blanket that’s still stylish?
Absolutely! A thick fleece blanket with edges trimmed using pinking shears (for a decorative, fray-resistant edge) works wonderfully. Alternatively, a large piece of outdoor canvas fabric can be finished with iron-on hem tape for a clean, tailored look without any stitching.
-
What are the best types of drinks to pack for a picnic?
Homemade lemonade, iced tea, fruit-infused water, or sparkling water with fresh herbs are excellent choices. For maximum coldness, prepare your drinks the day before and freeze them in reusable bottles overnight. They’ll act as ice packs and gradually thaw, providing refreshing sips.
-
How can I effectively keep bugs away from my picnic food and area?
Strategically place citronella candles (if safe and permitted) or small bowls of sliced citrus with cloves around your picnic area. Use mesh food tents to cover your dishes. A homemade bug repellent spray with essential oils like lemon-eucalyptus can also be effective for personal use.
-
What’s the easiest way to transport a picnic blanket?
Roll your blanket tightly and secure it with a stylish leather strap, a canvas belt, or a piece of rope. Many DIY blankets can also be designed with integrated carrying straps or folded compactly to fit into a large tote bag or the picnic basket itself.
-
How can I make my picnic experience even more comfortable?
Beyond a soft blanket, consider bringing lightweight, foldable camping chairs or compact seat cushions for extra back support. A small, inflatable pillow or even rolled-up sweaters can provide additional comfort for lounging. Choosing a shaded spot is also key.
-
What are some simple yet delicious dessert options that travel well for a picnic?
Cookies (like chocolate chip or shortbread), brownies, blondies, and homemade granola bars are perfect due to their sturdy nature. For a fresher option, pre-cut fruit salads or individual yogurt parfaits layered in mason jars (dressing/yogurt on bottom) are delightful and travel-friendly.
-
What kind of entertainment should I bring to a picnic?
Simple entertainment enhances the experience. Consider bringing a deck of cards, a frisbee, a soft ball, a good book, or a portable speaker for background music. Binoculars for birdwatching or a journal for sketching can also add a touch of tranquility.
-
How do I choose the perfect location for my DIY picnic?
Look for spots with natural shade from trees, a relatively flat and dry surface, and beautiful views. Check for accessibility, proximity to restrooms, and any local park rules regarding picnicking or open flames. Consider the time of day and sun’s direction.
-
What essentials should I pack in a small first-aid kit for my picnic?
A basic first-aid kit is always a good idea. Include adhesive bandages, antiseptic wipes, pain relievers, allergy medication, and any personal prescriptions. Sunscreen and aloe vera gel are also highly recommended.