
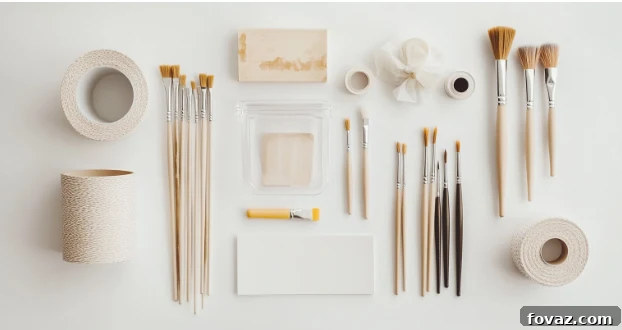
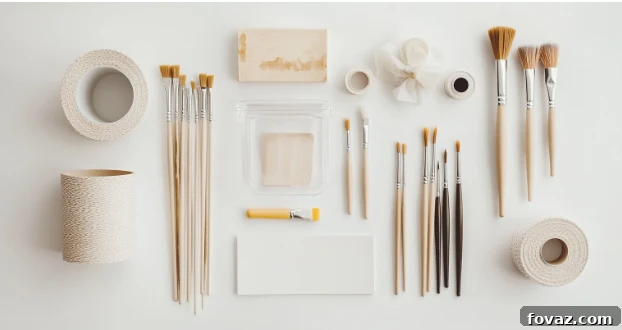
Do you dream of a vibrant, inspiring craft space where creativity flows freely, not stifled by chaos? While the joy of crafting is undeniable, a cluttered workspace can quickly turn that joy into frustration. Imagine: markers vanishing under furniture, fabric piles threatening to topple, and glitter—the sparkly nemesis—finding its way into every nook and cranny. If your collection of craft supplies feels overwhelming and out of control, you’re not alone. The good news is, transforming a messy craft zone into an organized haven is not only achievable but also incredibly rewarding. With a few smart, space-saving storage solutions, you can conquer the clutter, find exactly what you need when inspiration strikes, and reclaim your creative sanctuary.
Unlock Your Creativity: Mastering Craft Supply Organization 🎨
Nothing saps creative energy faster than a disorganized craft space. The constant hunt for misplaced tools, the mountain of fabric scraps, or the mystery of where that specific shade of paint went can derail your entire project. If you’re tired of rummaging through endless clutter and dreaming of an efficient, aesthetically pleasing craft area, it’s time for a change. This comprehensive guide will equip you with practical, space-saving strategies to streamline your materials, allowing you to dedicate your precious time and energy to the art of creation, rather than the search for supplies.
Step One: The Essential Craft Supply Declutter 🗂️
Before any organizing efforts can truly take root, a thorough decluttering session is paramount. Think of this as clearing the canvas before you paint your masterpiece. Start by pulling everything out and sorting each item into three distinct categories: “Keep,” “Donate,” and “Toss.” This initial purge is crucial for understanding what you truly have and what you actually use. Be ruthless but honest with yourself.
- Toss: Immediately discard anything broken, dried out, expired, or unusable (e.g., broken scissors, dried glue, pens that no longer write, empty paint tubes).
- Donate: Items that are still perfectly functional but no longer serve your crafting style or passion can find a new home. Consider donating to local schools, charities, community centers, or fellow crafters.
- Keep: Only retain items that you genuinely love, frequently use, or have a concrete plan to use in an upcoming project.
A helpful question to ask during this process is: “Would I buy this item today if I saw it in a store?” If the answer is no, it likely doesn’t deserve a spot in your precious collection. Once you’ve bravely eliminated unnecessary items, the subsequent steps of organizing your craft supplies will become significantly simpler and more effective. For additional expert advice and inspiration on how to approach your craft declutter, renowned resources like The Spruce offer excellent tips and detailed guides.
Visibility is Key: Embrace Clear Storage Containers
How many times have you inadvertently purchased duplicate supplies simply because you couldn’t locate the originals buried deep within opaque bins? Transparent storage containers are your secret weapon against this common crafting conundrum. They offer an instant visual inventory, allowing you to see exactly what you have at a glance, saving you both time and money.
Consider incorporating a variety of clear options:
- Clear Jars: Perfect for small embellishments like buttons, beads, sequins, glitter, or even various types of small hardware. Group similar items for maximum efficiency.
- Labeled Plastic Bins: Ideal for larger collections of yarn, fabric scraps, paper pads, or stamping supplies. The clear material lets you see the contents, while labels provide an extra layer of detail.
- Stackable Clear Drawers: Excellent for organizing different types of pens, markers, adhesives, or small tools, keeping them neatly separated yet easily accessible.
To elevate your organization, add clear, concise labels. You don’t need a sophisticated label maker; a simple piece of painter’s tape and a permanent marker can work wonders! This system not only streamlines your workflow but also keeps your materials pristine and visible, ensuring you’re always aware of your crafting arsenal.
Go Vertical: Maximize Wall Space with Smart Storage Solutions 🏡
If your desktop is overflowing and your floor space is precious, remember to look up! Walls are often an underutilized storage goldmine in any craft area. Leveraging vertical space is a game-changer for small rooms or shared spaces, allowing you to store a significant amount of supplies without encroaching on your working area.
Explore these effective wall storage ideas:
- ✅ Pegboards: A versatile solution that can be customized with various hooks, cups, and shelves to hold scissors, rulers, washi tape, spools of thread, and even small craft tools. The flexibility of pegboards means you can rearrange them as your supply needs evolve.
- ✅ Magnetic Strips: Incredibly useful for securing small metal items like tweezers, dies, metal rulers, small cutting tools, or even organizing a collection of metal charms. Mount them near your workspace for quick access.
- ✅ Floating Shelves: Provide elegant storage for jars filled with beads, neatly stacked craft books, art brushes, spools of ribbon, or even displaying finished miniature projects for inspiration. They keep items within reach while maintaining a clean, open aesthetic.
- ✅ Wall-Mounted Baskets or Pockets: Great for storing rolls of vinyl, larger fabric pieces, or even stacks of scrapbook paper.
This vertical approach not only keeps your essential tools and materials within arm’s reach but also contributes to a visually appealing and inspiring craft environment. For a wealth of additional clever storage hacks and creative ideas for your craft room, Better Homes & Gardens offers a fantastic collection of craft organization insights.
Tame the Tangle: Drawer Dividers for Neat Storage
Drawers, while offering hidden storage, can quickly devolve into a chaotic jumble without proper management. Small items tend to disappear beneath piles of miscellaneous supplies, turning a simple search into a frustrating treasure hunt. The solution? Drawer dividers. These simple tools create designated compartments for different items, ensuring everything has its own tidy home.
Implement dividers to separate specific categories:
- Markers & Pens: Keep them organized by color or type (e.g., alcohol markers, gel pens, fine-liners) in individual slots.
- Adhesives: Designate sections for glue sticks, liquid glues, tape runners, and specialty adhesives.
- Small Embellishments: Create compartments for brads, eyelets, charms, buttons, and other tiny decorative elements.
- Paper & Cardstock: Use dividers to separate different weights, finishes, or colors of paper.
You don’t need to invest in expensive custom organizers! Repurpose common household items like jewelry boxes, clean tea cartons, small plastic containers, or even cut-down cardboard boxes as custom dividers. This ingenious yet simple trick ensures everything remains tidy, protected, and instantly accessible, allowing you to maximize the utility of every drawer.
Freedom of Movement: Rolling Carts for Easy Mobility
Not everyone is blessed with a dedicated craft room, and that’s perfectly fine! A rolling storage cart is an incredibly versatile and flexible solution for crafters in multi-purpose spaces, apartments, or those who enjoy crafting in various areas of their home. Fill it with your most frequently used items, then simply wheel it out when creativity calls and tuck it away neatly when your project is complete. This setup makes crafting effortless, minimizes setup and cleanup time, and keeps your living space looking impeccable.
To optimize your rolling cart, arrange items by category, making it a truly efficient mobile workstation:
- 🖌️ Top Shelf: Reserve this for your immediate essentials. Think scissors, craft knives, rulers, frequently used adhesives, small tools, and pens. These are the items you reach for constantly.
- 📜 Middle Section: Ideal for materials that require easy access but might be slightly larger, such as standard-sized paper, cardstock pads, smaller fabric bundles, sketchbooks, or frequently used stamp sets.
- 🎨 Bottom Tier: Perfect for heavier or bulkier items like paint bottles, larger glues, glitter shakers, larger embellishment containers, or specialty papers. Its lower center of gravity makes the cart more stable.
Rolling carts come in various sizes and materials, from slim plastic options to sturdy metal models. Choose one that best fits your space and the volume of supplies you need to store. It’s an excellent investment for maintaining an organized and adaptable crafting habit.
Protecting Your Assets: Tidy Fabric and Paper with Smart Solutions
Fabric and paper, the foundational elements for many crafts, require specific storage solutions to prevent creases, wrinkles, fading, or damage. Proper storage not only preserves their quality but also makes them easier to browse and select for your next project.
Consider these simple, effective methods:
- 🧵 Fabric Storage:
- Hanging File Folders: Fold larger fabric cuts neatly over acid-free hanging file folders and store them in a file cabinet or dedicated hanging file bin. This keeps them flat and visible, much like an organized library.
- Rolled in Baskets: For smaller cuts or fat quarters, roll them tightly and store them upright in clear baskets or bins. This prevents creasing and allows for easy selection.
- Bolt Storage: If you have yardage, consider wrapping it around comic book boards or mini-bolts to keep it wrinkle-free and stackable.
- Plastic Bins: For dust and moisture protection, especially for larger fabric stashes, use clear, airtight plastic bins.
- 📜 Scrapbook Paper & Cardstock Storage:
- Magazine Holders: Excellent for storing 12×12 inch scrapbook paper pads or smaller paper stacks vertically, keeping them flat and easy to access.
- Vertical File Organizers: Similar to magazine holders but often with more compartments, these are perfect for sorting paper by color, theme, or collection.
- Flat Drawers or Trays: If space allows, acid-free flat drawers or archival storage boxes keep individual sheets perfectly flat and protected from light damage.
- Desktop Organizers: For smaller paper scraps or frequently used cardstock, a tiered desktop organizer can be invaluable.
Implementing these specialized storage techniques ensures your materials remain flat, pristine, and instantly ready for your next burst of creative inspiration. Protecting your investment in these vital supplies also means less waste and more enjoyment.
The Ultimate Secret to Organizing Craft Supplies Like a Pro
Achieving a clutter-free and highly functional craft space isn’t just about aesthetics; it’s about empowering your creativity and reducing stress. By strategically utilizing clear containers, maximizing wall storage, implementing drawer dividers, and leveraging the flexibility of rolling carts, you can build an efficient, inspiring, and incredibly productive workspace. These well-thought-out solutions not only save you precious time that would otherwise be spent searching for supplies but also significantly reduce frustration, allowing you to immerse yourself fully in the joy of making.
Remember, the journey to an organized craft space is continuous. Regular decluttering, a “one in, one out” policy, and consistently putting things back in their designated spots will help maintain your newfound order. An organized space is a happy space, and a happy space fosters limitless creativity.
Now, I’d love to hear from you! What are your go-to strategies for keeping your craft supplies perfectly organized? Share your favorite tips, clever hacks, and must-have organization products in the comments section below! Let’s inspire each other to create more and stress less! 🎨✨
FAQs: Your Top Questions on Craft Organization Answered
1. How do I start organizing craft supplies if I have an overwhelming amount of clutter?
The most effective first step is a thorough declutter. Begin by removing everything from your storage areas and sorting items into three crucial categories: Keep, Donate, and Toss. Be honest about what you actually use and love. Discard anything that is dried out, broken, expired, or hasn’t been used in several years. This initial purge is essential for reducing the sheer volume of items you need to organize, making the subsequent steps much more manageable and less intimidating.
2. What’s the best way to store small craft supplies like beads, buttons, or sequins?
For tiny items, clear containers, labeled bins, and specialized drawer dividers are your best friends. Clear containers like small jars, bead organizers with individual compartments, or stackable clear plastic boxes allow for easy visibility. Labeling each container clearly ensures you can quickly locate specific items without having to open every single one. Consider organizing by color, size, or material for added efficiency.
3. How do I organize craft supplies effectively in a small space or apartment?
When space is limited, the key is to think vertically and multi-purpose. Maximize wall storage with solutions like pegboards, floating shelves, and wall-mounted baskets to get items off your desk and floor. A rolling cart is another excellent solution, providing portable storage for frequently used items that can be wheeled out for crafting and tucked away discreetly when not in use. Additionally, consider furniture with built-in storage, such as ottomans or benches with hidden compartments.
4. What’s the best way to store fabric to prevent wrinkles and damage?
Proper fabric storage is crucial. For larger cuts, fold fabric neatly over acid-free hanging file folders and store them in a file drawer or hanging file bin to keep them flat and easily visible. Smaller cuts and fat quarters can be rolled tightly and stored upright in clear bins or baskets. For yardage, consider wrapping it around comic book boards or mini-bolts. Always store fabric away from direct sunlight to prevent fading and in a cool, dry place to avoid mold or mildew.
5. How can I prevent my craft space from becoming messy again after I’ve organized it?
Maintaining an organized craft space requires consistent habits. Implement a “clean up as you go” rule, putting items away immediately after use. Assign a designated place for every single item and commit to always returning it to its home. Consider a “one in, one out” policy for new purchases. Regularly schedule small “tidy-up” sessions (e.g., 15 minutes at the end of each week) to prevent clutter from accumulating again. Consistency is key to long-term organization.
6. Can I use household items to organize craft supplies without buying expensive organizers?
Absolutely! Repurposing household items is a brilliant and budget-friendly way to create functional storage. Think outside the box: mason jars are perfect for beads or buttons; old spice racks can hold glitter or small paint bottles; shoe organizers (hanging over a door or inside a closet) can store yarn, fabric, or rolls of vinyl; and clean tea cartons or jewelry boxes make excellent drawer dividers. Get creative with what you already own!
7. What’s the best way to store scrapbook paper to keep it flat and protected?
To prevent curling, creasing, and damage, store scrapbook paper flat or vertically. Use vertical file holders or magazine racks for 12×12 inch paper pads or smaller stacks. Acid-free flat drawers or archival storage boxes are ideal for individual sheets, protecting them from dust, light, and humidity. Desktop tiered organizers are great for frequently used scraps or cardstock. Group papers by color, theme, or collection for easy retrieval.
8. How do I store markers and pens to keep them from drying out and easily accessible?
For most markers (especially alcohol-based ones), store them horizontally to ensure the ink saturates both ends of the nib evenly, preventing them from drying out prematurely. Use divided bins, pen cups, or specialized marker storage units that allow for horizontal orientation. Organize them by color family for quick selection, making your creative process much smoother.
9. How do I create effective labels for my craft supplies?
Clear and consistent labeling is crucial for any organization system. You can use a dedicated label maker for a professional look, but simple solutions work just as well. Washi tape and a fine-tip marker, handwritten tags, or even printed labels taped onto containers are perfectly effective. Ensure labels are concise, descriptive, and visible, indicating exactly what’s inside each bin or drawer.
10. How often should I declutter and reorganize my craft supplies to maintain order?
While a deep declutter might happen less frequently (e.g., once or twice a year), it’s beneficial to do smaller reorganizations or “tidy-ups” much more often. A good rule of thumb is to declutter at least once a year, or whenever your workspace starts feeling overwhelming, or you notice you’re struggling to find items. Regular mini-declutters (e.g., sorting through one drawer per month) can prevent major overhauls.