
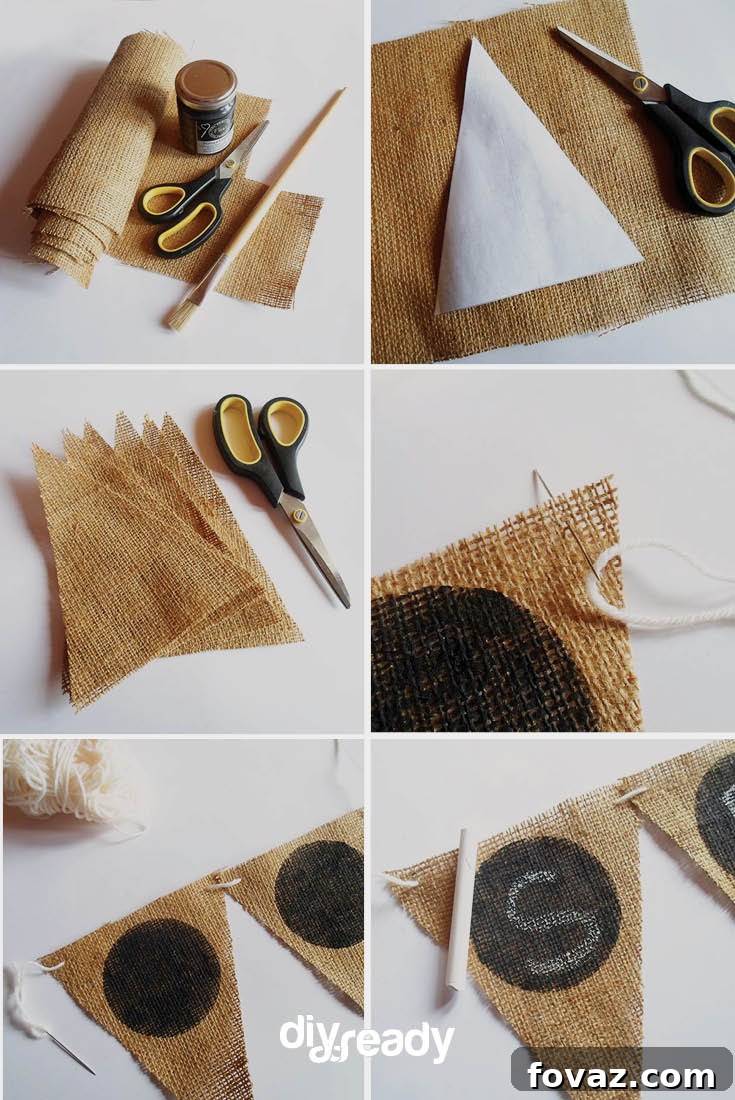
DIY Chalkboard and Burlap Bunting: Create Charming and Customizable Party Decorations
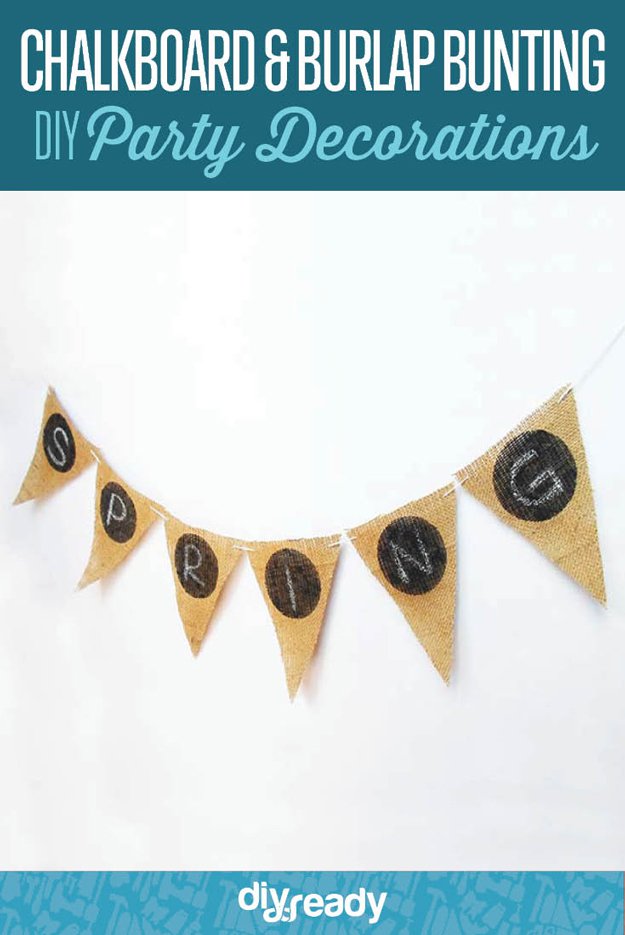
Transform any celebration into a memorable event with a handmade touch! This comprehensive tutorial guides you through creating beautiful and customizable burlap bunting banners adorned with chalkboard paint. Perfect for adding rustic charm to country weddings, birthday parties, baby showers, or any special occasion, this DIY project is not only easy to make but also incredibly versatile. Discover how to combine the timeless appeal of burlap with the interactive fun of chalk paint to craft unique party decorations that can be reused and re-imagined time and time again.
Unleash Your Creativity with Customizable Burlap Bunting
Have you ever considered the delightful synergy of burlap and chalkboard paint? Burlap, a wonderfully textured and classic material, offers a rustic elegance that is perfect for any season or theme. Its durability and natural aesthetic make it an ideal choice for decorative buntings, allowing you to create banners that are both beautiful and long-lasting. But what truly sets this project apart is the addition of chalkboard paint.
Traditional buntings are often static, bearing a single message or design. However, with chalkboard elements, your banner becomes an adaptable canvas! Imagine a party decoration that can effortlessly transition from a “Happy Birthday” banner to a “Welcome Home” greeting, or even serve as a unique menu display. This project empowers you to change your message or artwork as often as you like, making it an incredibly sustainable and cost-effective solution for all your celebratory needs. Get ready to dive into a project that promises not only a stunning final product but also a truly addictive experience with chalk paint!
Essential Supplies for Your Burlap Banner Project
Before we begin crafting, gather all the necessary materials. Having everything at hand will ensure a smooth and enjoyable DIY experience.
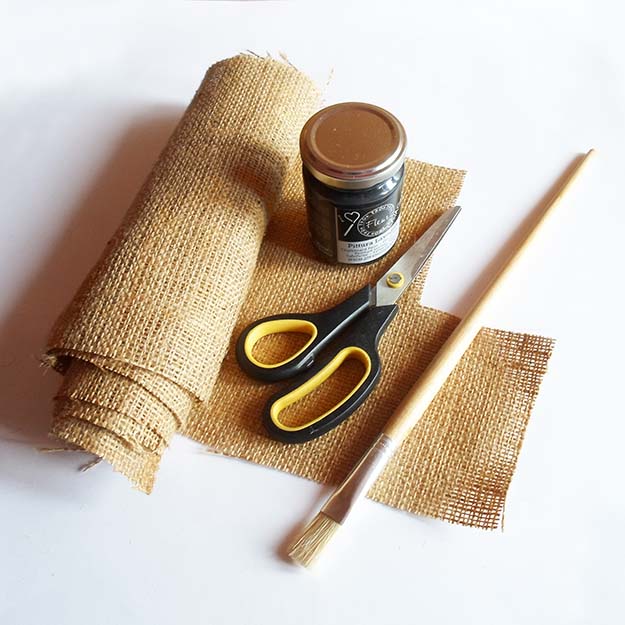
- Burlap: Choose a medium-weight burlap that is easy to cut and paint. You can find this at most craft or fabric stores. Consider purchasing a roll or a larger piece to ensure consistency across all your flags.
- Chalk paint: The star of this project! Black chalkboard paint is classic, but feel free to experiment with other colors if you desire. If you’re feeling extra crafty, you can even learn how to make your own chalk paint here!
- Scissors: A sharp pair of fabric scissors will make cutting burlap much easier and cleaner.
- Paper: Standard printer paper or cardstock works perfectly for creating your flag and stencil templates.
- Sponge: A small craft sponge or foam brush is ideal for dabbing the chalk paint evenly onto the burlap, especially when using a stencil.
- Paintbrush: A small detail paintbrush will be useful for touch-ups and refining the edges of your chalkboard circles.
- Yarn or twine: Select a sturdy yarn or rustic twine that complements the burlap. Consider the length you’ll need for your desired banner size, plus extra for tying.
- Embroidery needle: A large-eye embroidery needle will help you thread the yarn or twine through the burlap flags easily.
- Pencil: For tracing outlines and marking measurements.
- Ruler (optional): While not strictly necessary, a ruler helps ensure perfectly straight lines for your flag template, giving your bunting a more polished look.
- Chalk: Of course! White chalk is traditional, but colored chalks can add an extra pop to your messages.
Step-by-Step Guide: Crafting Your Chalkboard Burlap Bunting
Follow these detailed instructions to create your beautiful and personalized bunting. Precision and patience are key, especially during the cutting and painting phases.
Step 1: Design Your Bunting Flag Template
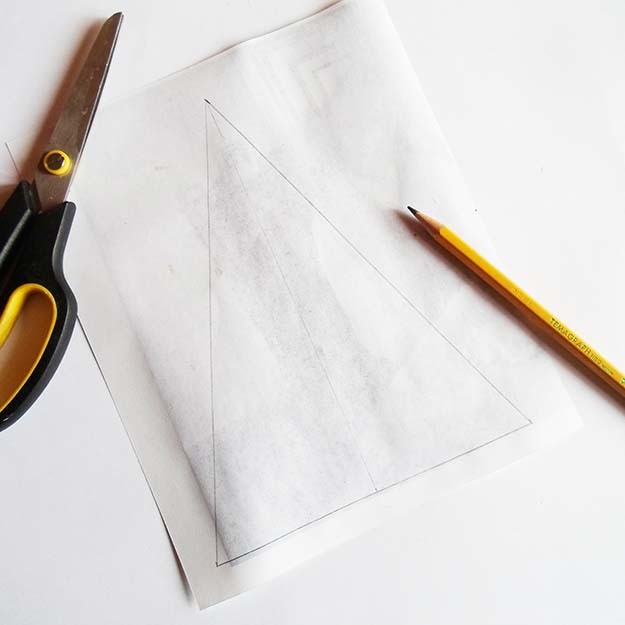
Begin by creating a template for your burlap flags. On a piece of paper, draw a triangle. The size is entirely up to your preference and the scale of your event. For reference, a common size, like the one used in this tutorial, is approximately 7 inches wide by 5.5 inches tall. Feel free to adjust these dimensions to make larger statement pieces or smaller, more delicate flags. While a ruler is not essential, using one will help you achieve perfectly straight lines, which can lead to a more uniform and professional-looking bunting. This template will be the blueprint for all your burlap flags.
Step 2: Prepare for Cutting Burlap Flags
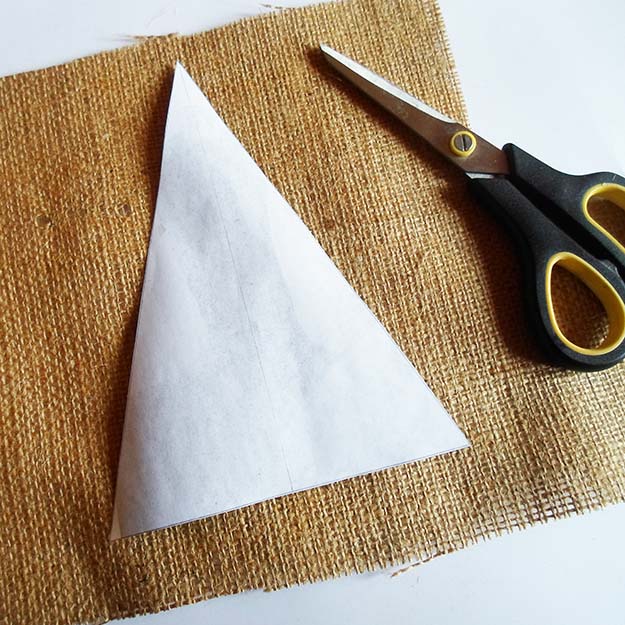
Once your paper triangle template is ready, carefully cut it out using your scissors. Lay this newly cut paper template flat onto your burlap fabric. Ensure the burlap is smooth and free of wrinkles to get an accurate outline. Positioning the template efficiently on the burlap will help minimize fabric waste, especially if you’re making many flags.
Step 3: Cut Your First Burlap Flag
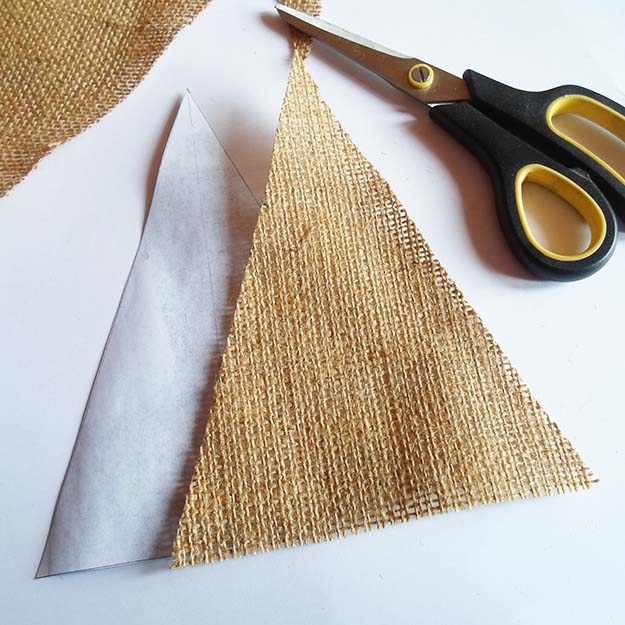
With the paper template firmly in place on the burlap, begin to cut around its outline. To prevent the template from shifting while you cut, you can hold it down firmly with one hand, or secure it temporarily with a few small pieces of scotch tape. Take your time to make clean, precise cuts. The cleaner your cuts, the more refined your individual burlap flag will appear. This first flag serves as the perfect model for the rest of your bunting.
Step 4: Create Multiple Burlap Flags
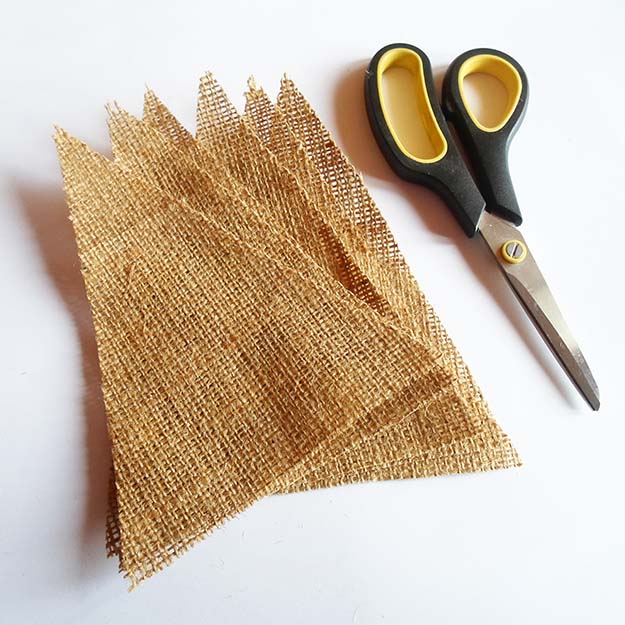
Now, repeat the cutting process to create additional burlap flags. The number of flags you need will depend on the message you want to spell out and the overall length you desire for your bunting. For example, if you’re spelling “WELCOME,” you’ll need seven flags. Aim for consistency in shape and size for all your flags. Using the same paper template for each cut ensures uniformity, which is crucial for a cohesive and professional-looking banner.
Step 5: Prepare the Chalkboard Circle Stencil
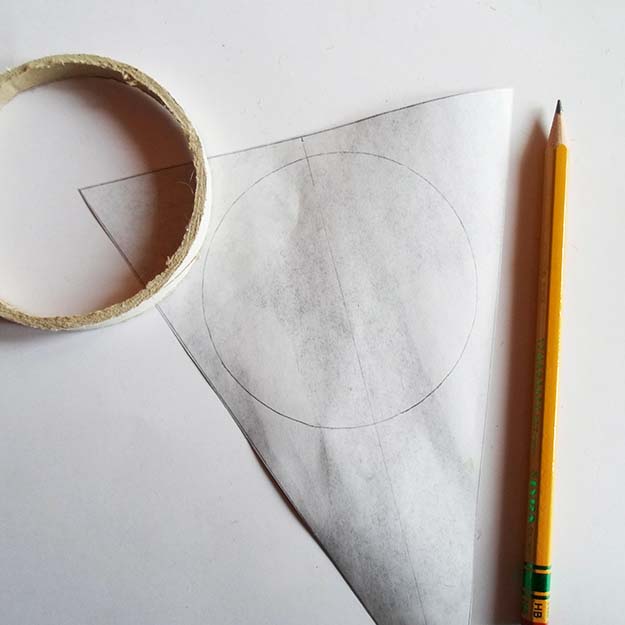
This step focuses on creating the stencil for your chalkboard circles. Find a circular object that fits nicely within the center of your paper triangle template, leaving a reasonable border. This could be a small plate, a lid, a cookie cutter, or even a roll of tape. Place this circular object in the middle of your paper triangle and carefully trace its outline with a pencil. This will define the shape and size of your chalkboard writing surface on each flag.
Step 6: Cut Out the Circle Stencil
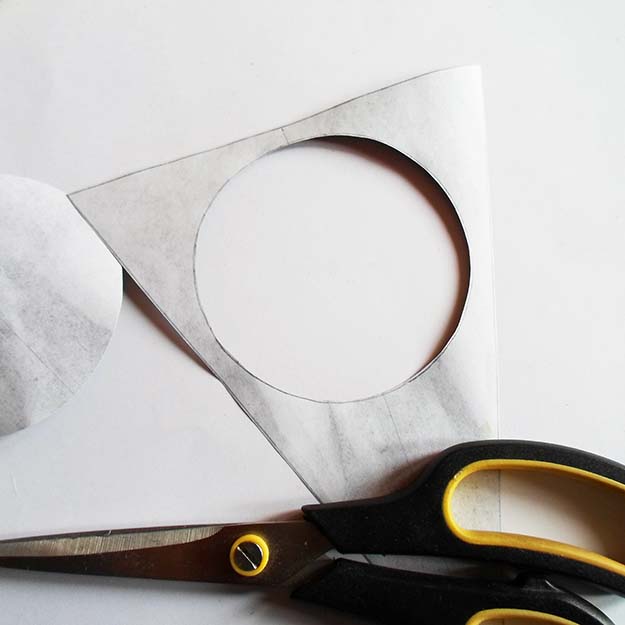
Using your scissors, carefully cut out the circle you just traced from the center of your paper triangle template. To make the initial cut easier, you might find it helpful to fold the paper slightly or make a small incision in the middle of the circle, then proceed to cut outwards towards your traced line. This paper template, now with a circular cutout, will serve as your stencil for applying the chalk paint to each burlap flag. Accuracy here is paramount, as a clean stencil will result in crisp, well-defined chalkboard circles.
Step 7: Apply Chalk Paint to Burlap Flags
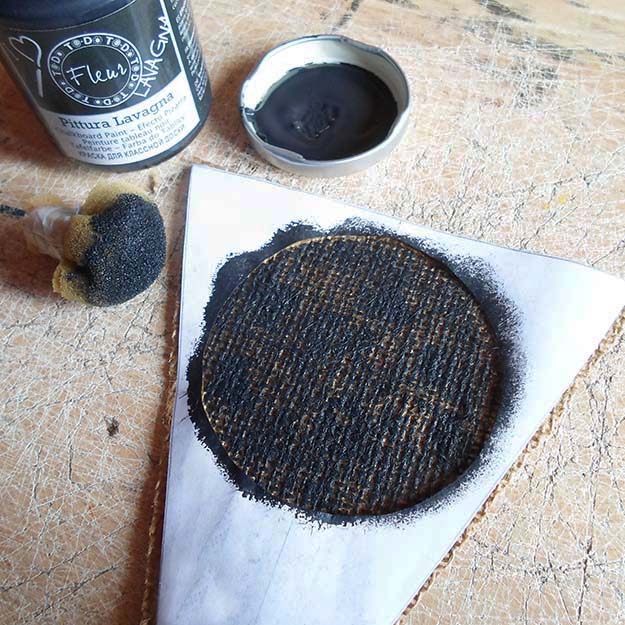
Align your newly created stencil precisely with one of your burlap flags, ensuring it’s centered and straight. Dip your small sponge into the chalk paint and begin dabbing the paint onto the circular cutout. Apply the paint in light, even layers, dabbing repeatedly to ensure good coverage. Burlap is a highly absorbent material, so you’ll need to dab multiple times to achieve a solid, opaque black circle. Throughout this process, make sure the stencil does not shift, which would result in blurry edges. As paint can bleed through burlap, protect your work surface by laying down newspaper or crafting on an old table, just as demonstrated.
Step 8: Refine and Dry Painted Flags
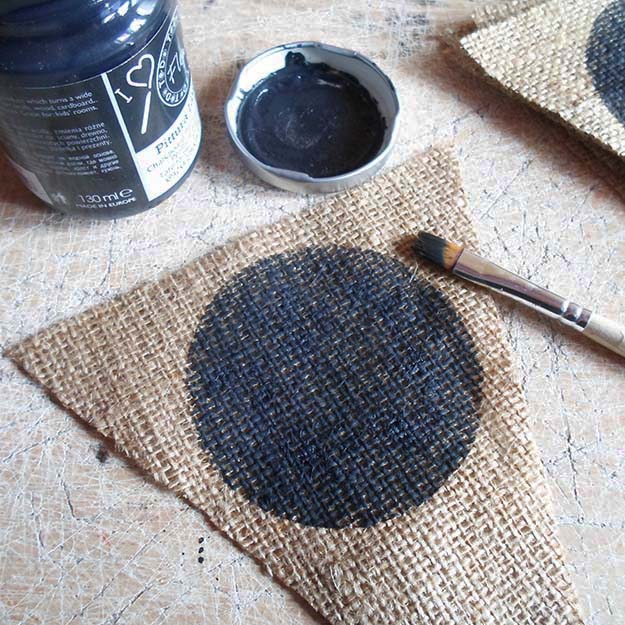
Once you’re satisfied with the paint coverage on your first flag, carefully lift and remove the stencil. If needed, use your small paintbrush to touch up any edges or fill in any sparse areas, refining your black chalkboard circle. Repeat this entire painting process for all the remaining burlap flags. After painting each flag, lay them flat in a well-ventilated area to dry completely. Drying time may vary depending on humidity and paint thickness, so allow ample time to prevent smudging.
Step 9: Begin Threading Your Bunting Flags
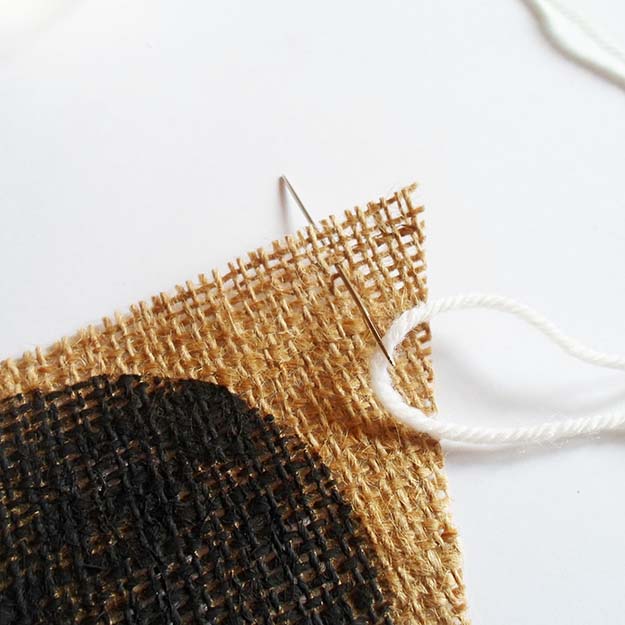
With your flags dry, it’s time to assemble your bunting. Take your chosen yarn or twine and thread it through the eye of your embroidery needle. Pick up your first burlap flag. Insert the needle near one of the top corners of the flag, pushing it from the front to the back. As shown in the image, starting from the front allows the main length of your yarn to be hidden behind the flags, giving your bunting a cleaner, more finished appearance. Pull a significant length of yarn through, leaving enough on the front side to loop back.
Step 10: Complete the First Flag’s Threading
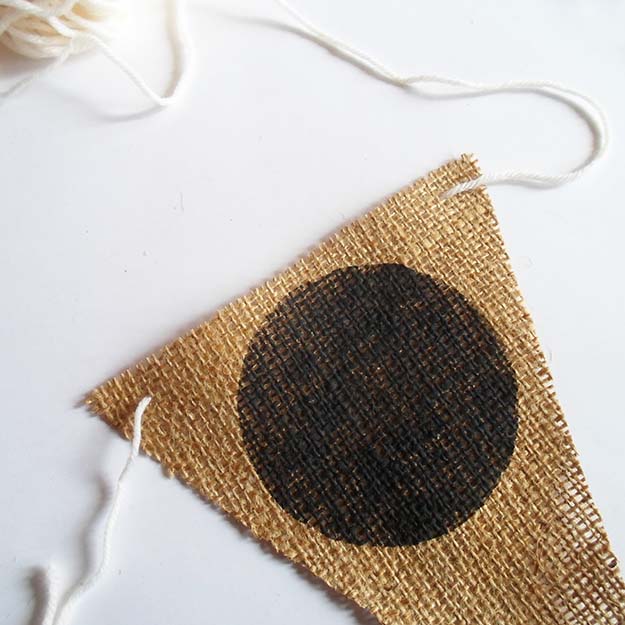
After pushing the yarn through the first corner from front to back, pull it across the back of the flag. Then, insert the needle into the opposite top corner of the same flag, pushing it from the back to the front. This creates a loop of yarn across the top back edge of the flag, securely attaching it to the main string. Pull the yarn through completely to snug the flag onto the string, ensuring it sits flat and straight.
Step 11: Add Remaining Flags to the Bunting
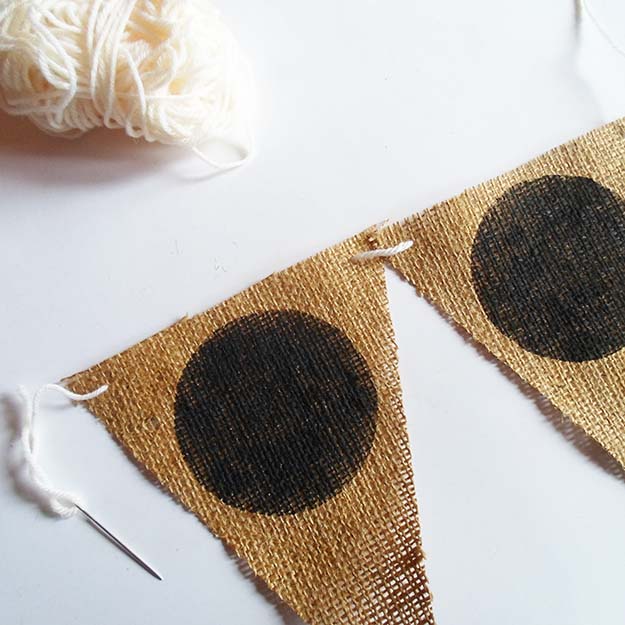
Continue the process by taking your next burlap flag and repeating steps 9 and 10 to attach it immediately adjacent to the first one. Once you’ve added a few flags, gently pull the main yarn string to slide the already attached flags down, creating space for subsequent flags. This method allows you to evenly space your flags and arrange them in the correct order for your message. Keep adding all your flags until your entire message is ready to be displayed.
Step 12: Secure Your Bunting Ends
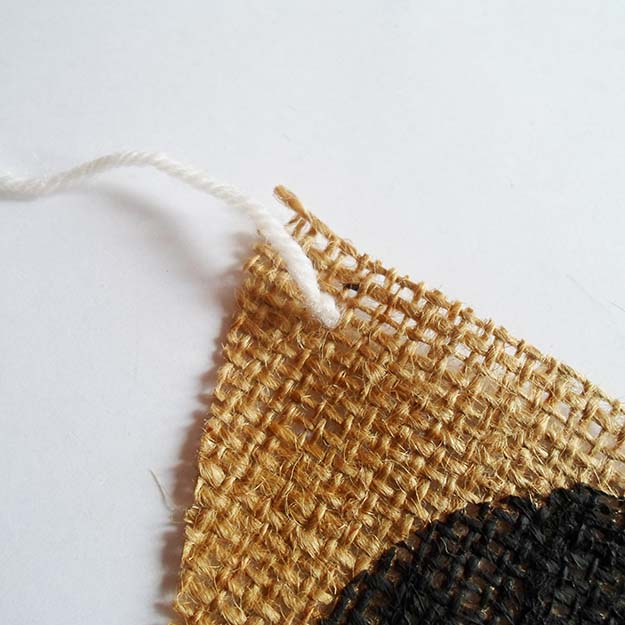
Once all your flags are threaded onto the yarn, it’s time to secure them permanently. Tie a sturdy knot at both ends of the bunting, close to the outermost flags. This prevents the flags from sliding off the string and helps maintain their spacing. Make sure to leave a generous “tail” of yarn on each side of the knots, roughly 7 inches long. These tails are essential for tying your finished bunting wherever you wish to display it, whether on a mantelpiece, across a doorway, or as a backdrop for your party.
Step 13: Personalize Your Chalkboard Bunting
The moment of truth has arrived! Grab your chalk and let your creativity flow. Write your desired message, draw intricate designs, or simply add artistic flourishes to each black chalkboard circle. Your new, cool chalkboard burlap bunting is now complete and ready to be displayed proudly! This truly customizable banner will add a unique, handmade touch to any event, making it extra special.
Tips for Success and Creative Customization
To ensure your chalkboard burlap bunting stands out, here are some additional tips and ideas:
- Varying Flag Shapes: While triangles are classic, consider experimenting with other shapes like pennants, rectangles, or even more intricate designs for your burlap flags.
- Colored Chalk Paint: Don’t limit yourself to black! Chalk paint comes in a spectrum of colors. Imagine pastel chalkboard circles for a baby shower or vibrant hues for a children’s birthday.
- Patterned Burlap: For an added layer of visual interest, use burlap with a subtle pattern or even mix plain and patterned flags.
- Ribbon Instead of Yarn: A decorative ribbon can be used instead of yarn or twine for a different aesthetic, perhaps a satin ribbon for a more formal event.
- Artistic Chalk Designs: Beyond simple lettering, explore calligraphy, small illustrations, or decorative borders with your chalk. You can find many chalk art tutorials online for inspiration.
- Themed Decorations: Tailor your bunting to specific holidays or themes. For Halloween, paint orange circles and draw spooky motifs. For Christmas, use red or green chalk paint and write festive greetings.
- Care and Maintenance: To keep your bunting looking its best, gently wipe off chalk with a damp cloth when changing messages. Store it flat or rolled to prevent wrinkles and damage.
Join Our DIY Community!
We hope you thoroughly enjoyed this tutorial on creating your very own DIY chalkboard and burlap bunting! We love hearing about your creative endeavors. Please share your thoughts and experiences with these unique DIY party decorations in the comments section below. Do you have any other cool DIY projects you’re passionate about, or perhaps some ingenious tips for crafting? We’d be thrilled to hear them and might even feature your ideas in future posts!
At DIY Projects, our passion is empowering people to connect with their creative side and discover the joy of making things themselves. From craft projects and home decor ideas to upcycling tutorials and delicious recipes, we believe in the power of hands-on creation. Let’s build a vibrant community of DIY enthusiasts where inspiration is just a click away. Stay connected with us and share your journey on
Facebook,
Twitter,
Pinterest, and
Instagram!
Explore More Inspiring DIY Projects:
Looking for your next creative challenge? Dive into more of our fantastic DIY tutorials and ideas: