
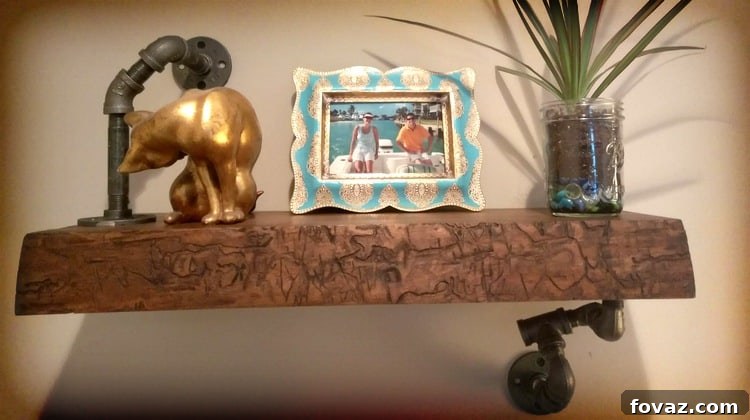
The allure of industrial design has always resonated with me, largely due to my passion for salvaging materials and repurposing them into unique creations. In today’s design landscape, where reclaimed wood and black pipe accents are highly sought after, their influence can be seen across various styles. This guide details how to craft a simple yet stunning industrial shelf, prominently featuring a captivating live edge slab – a perfect blend of raw nature and robust urban aesthetics.
Crafting a Distinctive Industrial Shelf with a Live Edge Slab
Embrace the fusion of rustic charm and industrial grit with this DIY project. A live edge slab provides an organic, one-of-a-kind surface, while black iron pipes lend that quintessential rugged, utilitarian feel. This shelf isn’t just a storage solution; it’s a statement piece, reflecting a hands-on approach to home decor and a deep appreciation for authentic materials.
Materials Needed:
- Live Edge Wood Slab: Select a piece of hardwood (e.g., walnut, oak, maple) of your desired length and depth. Consider its thickness for weight and stability, typically 1.5 to 2 inches.
- Black Iron Pipe Fixtures:
- Two (or more, depending on shelf length) floor flanges for wall mounting.
- Two (or more) short pipe nipples (e.g., 6-8 inches) to connect flanges to elbows.
- Two (or more) 90-degree elbows.
- Two (or more) long pipe nipples (e.g., 8-12 inches) to support the shelf.
- Two (or more) threaded pipe caps or additional flanges for the underside of the shelf.
- (Optional) T-fittings for potential future expansion of shelving.
- Wood Stain: A color that complements your space and enhances the wood grain (e.g., dark walnut, classic gray).
- Wood Sealer/Finish: A durable clear coat (e.g., matte polyurethane or oil finish) to protect the wood without adding excessive shine.
- Mounting Hardware: Appropriate screws for attaching flanges to wall studs (e.g., 2.5-3 inch wood screws) and shorter screws for attaching the slab to pipe fixtures.
- (Optional) Epoxy: For securing pipe joints if stability is an issue.
- (Optional) Wood Filler: To address larger cracks or imperfections in the slab.
Tools Needed:
- Chisel Set: Essential for bark removal and detailed cleaning. Both dull and sharp chisels will be useful.
- Thick Angled Paint Scraper: Aids in removing stubborn bark and debris.
- Stud Finder: Crucial for safely mounting heavy shelves into wall studs.
- Hammer: For tapping chisels or for general adjustments.
- Saw (Circular, Table, or Miter Saw): For cutting the slab to your desired length.
- Sander (Orbital and Detail): For preparing the wood surface for staining. Various grits of sandpaper (120, 150, 220, 320).
- Power Drill with Various Circular Bits: For optional weight reduction and drilling pilot holes.
- File and Needle: For meticulously clearing out worm tracks and small crevices.
- Measuring Tape and Pencil: For accurate measurements and markings.
- Level: To ensure your shelf is perfectly horizontal during installation.
- Safety Gear: Eye protection, gloves, dust mask, and hearing protection are highly recommended.
- Handle resists deformation, most solvents, and corrosive liquids.
- Carbon alloy steel blades are 3 In. (76 mm) long.
- Precision ground blade with lacquered coating for corrosion protection.
- Cutting edge is honed and ready for use right off the shelf.
- Durable and comfortable polypropylene handle.
Buy on Amazon
Step 1: Selecting and Preparing Your Live Edge Slab
The foundation of your industrial shelf is the live edge slab itself. I began my journey by visiting a local sawmill or lumber yard, which often boasts an impressive selection of unique live edge wood. A “live edge” refers to wood that retains its natural, untrimmed edge, often complete with bark, giving it an organic and rustic appeal. When choosing your slab, inspect it for character. Look for interesting grain patterns, natural curves, and unique features. Don’t shy away from the discount section; often, these pieces have minor imperfections like discolorations or small cracks that, with a bit of ingenuity, can be incorporated into the design or easily rectified. For instance, the slab I selected had some discoloration on one side, which I confidently assessed could be either trimmed, sanded, or stained over, allowing me to secure it at a favorable price. Consider the wood species – hardwoods like walnut, oak, or maple are durable and offer beautiful grains. Ensure the slab is fully dried and stable to prevent future warping or cracking. Measure your desired shelf length and width, keeping in mind the weight implications for mounting.
Step 2: Carefully Removing the Bark
While some live edge pieces benefit from retaining their bark, for an industrial aesthetic that leans towards clean lines and texture rather than overt rusticity, bark removal is often preferred. This step reveals the true character of the wood’s edge, creating a refined yet natural look. If you don’t possess a specialized drawknife, a combination of chisels and paint scrapers works effectively.
Start with a set of dull chisels. The goal is to gently pry and scrape the bark away without marring the underlying wood. Using sharp chisels at this initial stage risks digging too deeply and damaging the natural edge, which you want to preserve. As I carefully removed the bark, the stunning true wood edge began to emerge. To my delight, it revealed numerous wormholes, tunnels, and markings. These natural “imperfections” are treasures in live edge woodworking, adding incredible design elements and a story to the piece. Therefore, extreme caution was taken to remove the bark while leaving as much of these intricate patterns intact as possible. As you get closer to the wood’s surface, switch to sharper chisels and a thick, angled paint scraper for more precise and delicate removal, working along the grain to avoid splintering.
Step 3: Meticulously Clearing Out Worm Debris
The fascinating worm tracks embedded in live edge wood are a hallmark of its natural beauty, but they require careful cleaning. When wood-boring insects tunnel through a slab, they leave behind “frass” – a fine, sawdust-like waste. Removing this debris is critical for several reasons: Firstly, frass is a different material than solid wood and will absorb stain unevenly, resulting in patchy coloration. Secondly, over time, this loose debris can fall out, taking the stain with it and creating unsightly gaps. Most importantly, clearing these tunnels allows the intricate, three-dimensional aspect of the worm tracks to truly shine, transforming a mere imperfection into a captivating design feature.
This process can be meticulous, but the payoff in the finished product is immense. For larger tracks and holes, the edge of a small file or a dental pick proves effective. When working on these delicate areas, exercise extreme caution with sharp objects to avoid scoring the pristine wood edge that you intend to feature. For the smaller, more intricate tunnels and pinholes, a fine needle becomes an indispensable tool. Although this step can be tedious and time-consuming, the enhanced definition and depth it brings to the live edge are well worth the effort, ensuring a professional and polished appearance that truly highlights the wood’s natural artistry.
- Comfort Grip: For enhanced control and reduced fatigue with the ergonomically designed comfort grip.
- Compact Design: Navigate cramped corners and tight spaces with the compact design made for detailed and precise work.
- Corded: Corded design offers unlimited runtime and continuous power for even the biggest jobs.
- Detail Finger Attachment: Allows access to hard-to-reach spots.
- Detail Sanding Pad: For fitting into odd and awkward angles.
Buy on Amazon
Step 4: Optional Weight Reduction for Enhanced Stability
High-quality hardwood slabs are inherently beautiful, but they can also be remarkably heavy. For shelves, especially those mounted with industrial pipe fixtures, reducing the overall weight can significantly alleviate strain on both the hardware and the wall structure. After cutting my slab to a manageable 24-inch length (from a larger piece), the weight still hovered around 30-35 lbs. To make it more manageable and ensure long-term stability, I opted for an optional weight reduction step.
This involved strategically removing material from the underside of the slab. While I utilized a drill press with a custom guide for precision and ease, a standard power drill can achieve similar results. The process involves drilling a series of overlapping holes using progressively larger circular bits, starting with the largest and then moving to smaller ones to clear out the remaining wood. The image below illustrates this progression, moving from right to left, with the goal of creating a hollowed-out section similar to the leftmost result. Once the drilling was complete, I used chisels to knock out any remaining wood between the holes, creating a continuous channel. This method successfully removed approximately 3-4 inches of wood from the slab’s thickness, reducing its weight by nearly 10 lbs. This reduction makes the shelf easier to install and ensures the fixtures can support it securely without undue stress.
Step 5: Sanding and Preparing for Staining
Proper sanding is paramount for achieving a professional finish on any woodworking project, and this industrial live edge shelf is no exception. The goal is to create a smooth, consistent surface that will absorb stain evenly and feel pleasant to the touch. Always begin with a coarser grit sandpaper and progressively work your way up to finer grits. I started with a 150-grit sandpaper, which is my standard go-to for the initial sanding phase, effectively removing any tool marks, minor imperfections, and remnants from previous steps. Following this, I transitioned to a 220-grit sandpaper to refine the surface further, smoothing out the microscopic scratches left by the coarser grit.
For the flat surfaces of the slab, an orbital sander is an invaluable tool, providing efficient and uniform sanding. However, for the intricate live edge face, especially where the unique wormy texture resides, hand sanding is essential. This allows for meticulous control, enabling you to work carefully around and within the crevices, preserving those beautiful natural design elements without sanding them away. Every single one of those carefully cleaned wormholes and tracks required individual attention with the small needle once more after sanding, to ensure they were completely free of dust and debris before staining. This meticulous preparation ensures the wood is perfectly conditioned to receive the stain, allowing its natural beauty to truly shine through.
- RICH EVEN COLOR – Minwax Wood Finish is a deep penetrating, oil-based wood stain that provides beautiful color and enhances the natural wood grain in one coat.
- QUICK DRYING – Staining interior wood has never been quicker. The special formula allows it to deeply penetrate wood pores within 5 minutes of application, resists lapping, and dries in two hours.
- EASY TO APPLY – Use a clean cloth or wood stain brush to apply this wood stain in the direction of the grain. Wait 5-15 minutes and wipe away excess stain.
- CLASSIC GRAY WOOD STAIN – This gray wood stain provides a beautiful, rich gray color. On trend and with a modern look, this light gray stain looks great on a wide variety of projects.
- A BRAND YOU CAN TRUST – Minwax is America’s leading brand of wood finishing and wood care projects.
Buy on Amazon
With all the worm debris meticulously cleared and the entire surface smoothly sanded, your industrial shelf is now perfectly prepped and ready for the transformative touch of stain and sealant.
Step 6: Staining and Sealing for Durability and Aesthetics
The choice of stain plays a crucial role in defining the final character of your industrial live edge shelf. Given that my intention was to pair this beautiful wood with black iron pipes, I opted for a darker stain to create a cohesive and robust aesthetic. A rich walnut stain was selected, as it beautifully deepens the wood’s natural tones while providing a striking contrast to the industrial hardware. Applying the stain with a clean rag allows for better control and penetration, resulting in a more even finish. I applied three coats over a couple of days, allowing ample drying time between each application. This multi-coat approach not only enhances the color depth but also helps to reveal any lingering worm debris that might have been missed, as it will appear as a slightly different shade, allowing for final touch-ups.
Once the staining was complete and fully cured, the next vital step was to protect the wood. While a glossy finish might suit some projects, the inherent appeal of an industrial look lies in its raw, unpolished character. Therefore, I deliberately avoided any high-sheen products. Instead, I chose a matte polyurethane sealer. This particular finish offers robust protection against moisture, wear, and tear, ensuring the longevity of the shelf, while preserving the natural, subdued aesthetic. Again, three thin coats were applied over several days, allowing for proper curing. The matte finish perfectly complements the industrial vibe, and it beautifully accentuates the intricate details of the worm tracks, which now stand out even more prominently against the rich, stained wood.
Step 7: Selecting and Installing Robust Hardware
The strength and visual appeal of your industrial shelf depend heavily on the selection and proper installation of its hardware. My live edge slab was 24 inches long, a common dimension. Standard wall studs are typically spaced 16 or 24 inches apart on center. To ensure maximum stability and load-bearing capacity for such a heavy shelf, it’s crucial to anchor the fixtures directly into wall studs, not just drywall. My plan was to attach the pipe fixtures towards the ends of the shelf, necessitating careful measurement to align with the studs. To achieve a secure mounting, I needed to position the fixtures slightly inward from the slab’s ends to hit the 16-inch on-center studs.
To finalize the hardware design, I spent a good half-hour at the local hardware store, experimenting with various black iron pipe pieces, angles, sizes, and thicknesses, holding up my slab to visualize the final look. Ultimately, I settled on ¾-inch pipes, which offer an ideal balance of strength and industrial aesthetic without appearing overly bulky. For the bottom attachment point, I opted for a T-attachment with one open side. This thoughtful detail provides a practical future-proofing option, allowing for seamless connection if I decide to add another shelf below it, creating a continuous, modular shelving unit.
Installation began with locating the wall studs using a reliable stud finder. After marking their centers, I drilled small pilot holes to confirm their exact positions. This step is non-negotiable for heavy shelves; wall anchors alone are insufficient and pose a significant safety risk. With the stud locations confirmed, I first attached only the floor flanges securely to the wall using robust wood screws. Once the flanges were firmly in place, I assembled the remaining pipe fixtures, threading them onto the installed flanges. This modular approach ensures that the initial wall connection is solid before adding the complexity of the full pipe structure.
- Penetrates and waterproofs when used as a finishing system in multiple coats on its own or in conjunction with Waterlox Original Satin Finish or Waterlox Original High Gloss Finish.
- Produces a medium sheen appearance (75° gloss level when finished; fades to a 50-55° gloss level in 3-6 months).
- Forms a protective yet elastic finish against common household spills, moisture and foot traffic.
- Our most versatile product. Many customers use only this product for all coats of finish.
- Our oldest and truly “original” product, since 1910.
Buy on Amazon
Step 8: Attaching the Live Edge Slab to the Hardware
With the pipe fixtures securely mounted to the wall, the final structural step involves attaching the prepared live edge slab to its industrial supports. Precision here is key to ensuring a level and stable shelf. First, carefully lift the finished slab into position, aligning it with the top flanges of your pipe fixtures. Use a pencil or a sharpie marker to meticulously trace the outline of each flange’s four screw holes onto the underside of the wood slab. This ensures accurate placement for your pilot holes.
Once all eight points (four for each flange) are marked, remove the slab. Select a drill bit that is slightly smaller than the diameter of your chosen screws. This prevents the wood from splitting and allows the screws to bite firmly. Drill all eight pilot holes to the appropriate depth. Creating pilot holes makes the final attachment significantly easier and reduces the risk of damaging your beautifully finished wood or stripping screw heads when working in a confined space. Finally, carefully place the shelf back onto the pipe fixtures, align the pilot holes with the flange holes, and securely fasten the slab using your chosen screws. Double-check for levelness and tightness, making any minor adjustments needed to ensure a rock-solid industrial shelf.
Step 9: Decorate and Learn from Experience!
Once your robust industrial live edge shelf is firmly in place, the most enjoyable part begins: decorating! This type of shelf provides a fantastic canvas for displaying books, plants, unique art pieces, or other decorative items that complement its raw, natural charm. Think about balancing the organic feel of the wood with the ruggedness of the metal. For example, delicate potted succulents can create a beautiful contrast against the dark wood and pipe, while vintage-inspired books or industrial-style accessories can further enhance the aesthetic.
Troubleshooting and Lessons Learned:
Every DIY project offers opportunities for learning and refinement. Here are a few challenges encountered during this build and tips to help you avoid them:
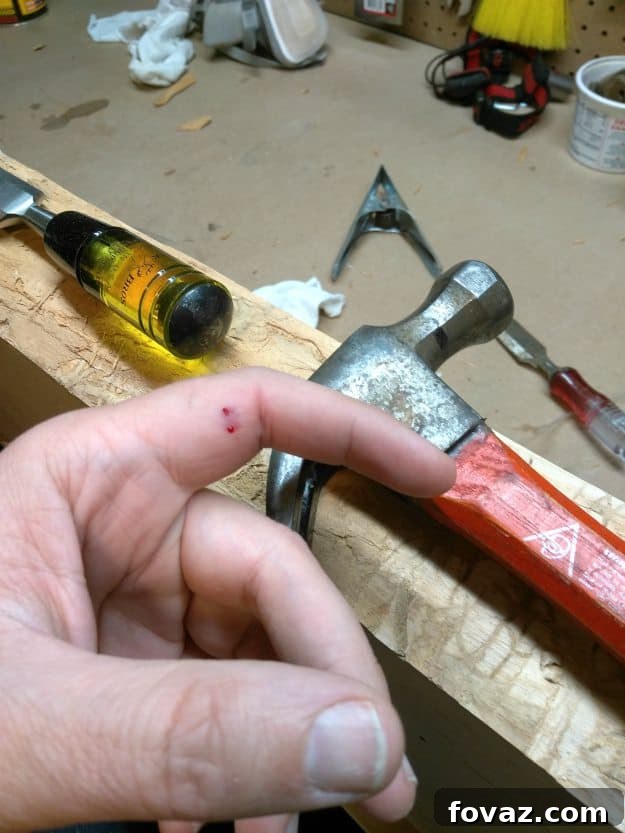
- Bark Removal Precision: The initial stage of bark removal proved to be quite tricky. In my eagerness, I occasionally cut too deeply, inadvertently removing more of the precious wood and intricate worm tracks than intended. A key takeaway here is to always work with extreme patience and gentleness, especially when nearing the wood’s surface. Utilize dull chisels for the bulk removal and save the sharper tools for the finer, more controlled scraping. And always remember: chisels are incredibly sharp tools; handle them with the utmost care and appropriate safety gear (gloves!).
- Protecting the Cured Wood: In between the staining and sealing stages, a minor oversight led to some water splashes on the shelf, resulting in faint, localized stains. This highlights the critical importance of protecting your workpiece at every stage. Even when dry, stained wood can be susceptible to watermarks before a protective sealant is applied. Always cover your project with a tarp or plastic sheeting, especially if it’s in an area where spills or moisture are possible.
- Ensuring Pipe Fixture Stability: Despite tightening all threaded pipe joints as much as possible by hand, the specific angles of the bottom fixture meant that some connections weren’t as rigidly secured as they should have been. Over time, this caused the shelf to gradually push down on the right side, leading to a slight twisting of the fixtures. To rectify this, a strong epoxy was applied to all threaded joints. This permanently bonds the connections, preventing any unwanted movement and ensuring the shelf remains perfectly level and stable. For future projects, consider using a pipe wrench for maximum initial tightening, or proactively apply a thread locker or epoxy to critical joints, especially for heavier installations.
- J-B WELD ORIGINAL: The Original Cold Weld two-part epoxy system that was designed as an alternative to torch welding.
- CURE AND SET TIME: After mixing the tubes at a 1:1 ratio, it takes 4-6 hours to set and 15-24 hours to cure. Once cured, J-B Weld Original can be tapped, filled, sanded, molded and drilled.
- VERSATILE & DEPENDABLE: J-B Weld Original is steel reinforced, has a tensile strength of 5020 PSI and can withstand temperatures up to 550 degrees Fahrenheit (287 degrees Celsius).
- SURFACE APPLICATIONS: Metal, Plastic & PVC, Wood, Concrete, Ceramic & Tile and Fiberglass.
- DO IT YOURSELF: Big or small, you can DIY it with J-B Weld. Our heavy duty epoxy and adhesives repair & restore it right the first time.
Buy on Amazon
For a visual guide on constructing a DIY industrial shelf, watch this helpful video by Mr. Fix It:
What are your thoughts on creating a unique DIY industrial shelf using a beautiful live edge slab? Share your questions, tips, and experiences in the comments section below.
Up Next: 13 Simple Living Room Shelving Ideas