
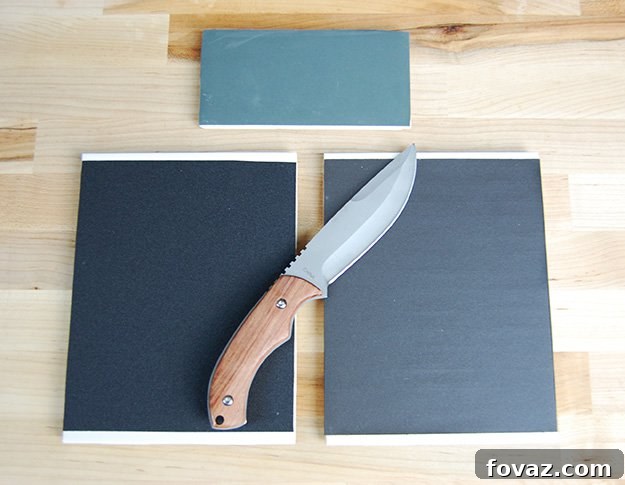
Craft Your Own Professional-Grade DIY Knife Sharpening Kit at Home
Are your kitchen knives so dull they struggle to slice a ripe tomato, let alone cut through tougher ingredients? A dull knife isn’t just inefficient; it’s a safety hazard, requiring more force and increasing the risk of slips. While a good set of sharpening stones is essential for maintaining a sharp edge, premium kits can be prohibitively expensive. Moreover, traditional sharpening stones often develop an inconvenient “bowl” shape over time, necessitating yet another costly flattening stone to restore their effectiveness.
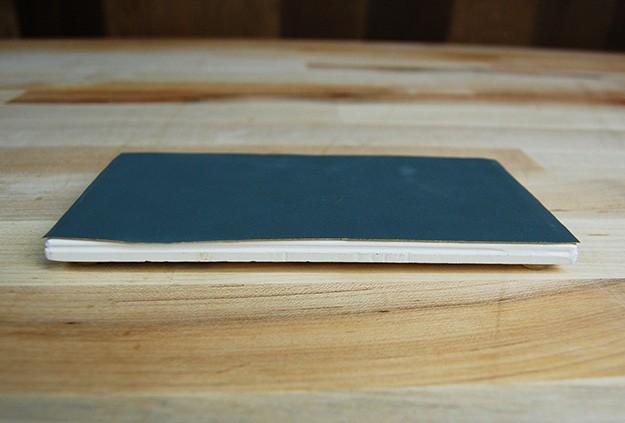
DIY Knife Sharpening Kit: Inexpensive & Easy to Make at Home
But what if you could achieve professional-level sharpness for all your knives without breaking the bank? We’ve developed an ingenious, cost-effective DIY knife sharpening kit that leverages readily available materials to create a system that performs exceptionally well. This homemade solution not only saves you money but also sidesteps the common pitfalls of traditional sharpening methods, ensuring your blades remain razor-sharp, just like the day you bought them.
Why a DIY Knife Sharpening Kit? The Smart Alternative
Our innovative DIY knife sharpening kit offers numerous advantages over conventional sharpening stones. Forget about expensive initial investments or the long-term cost of replacing worn-out stones and flattening plates. This do-it-yourself system is crafted from ordinary bathroom tiles and high-grit sandpaper, materials that are both affordable and easy to acquire. Unlike sharpening stones that can warp or develop hollows from repeated use, our sandpaper-tile system maintains its flat surface, providing consistent sharpening results every time.
The beauty of this homemade knife sharpener lies in its simplicity and effectiveness. It’s capable of putting such a fine edge on your blades that you could literally shave with them. When the sandpaper eventually wears out, simply peel it off and replace it, effectively giving you a brand-new sharpening surface for mere pennies. This eliminates the “going bad” or “bowling” problems associated with traditional stones, offering a sustainable and high-performing solution for knife maintenance.
How to Make a Homemade Knife Sharpener
Materials You’ll Need for Your Homemade Knife Sharpener
Gathering the right supplies is the first step to crafting your own high-performance knife sharpening kit. Most of these items can be found at your local hardware store, automotive shop, or even online. Here’s a comprehensive list of what you’ll need:
- Container of Acetone: Commonly found as nail polish remover, acetone is crucial for thoroughly cleaning the tile surfaces, ensuring optimal adhesion for the sandpaper.
- Strong Adhesive Spray: A high-quality spray adhesive is key to securely bonding the sandpaper to the tiles. Look for brands known for strong, long-lasting bonds.
- Variety Pack of High-Grit Sandpaper: This is the heart of your sharpening system. You’ll need a range of grits, primarily focusing on 800, 1,000, and 2,000 grit. For extremely dull or damaged knives, a coarser 200-400 grit might be useful. The higher the grit number, the finer the abrasive, leading to a sharper, more polished edge. Ensure you purchase “wet/dry” sandpaper, as water will be used during the sharpening process.
- Scissors or Utility Knife: For precisely trimming the sandpaper to fit your tiles.
- Cotton Cloths: Essential for applying acetone and wiping surfaces clean.
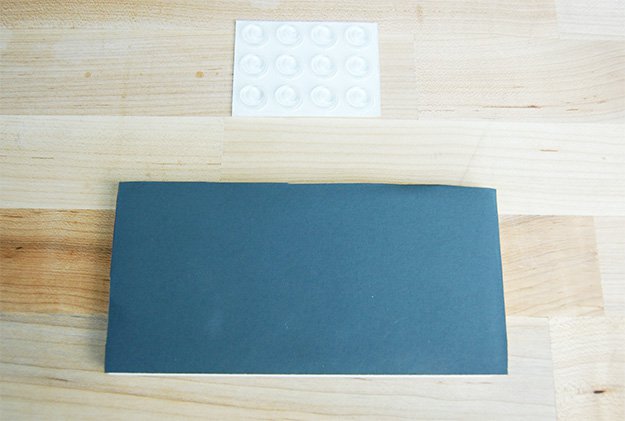
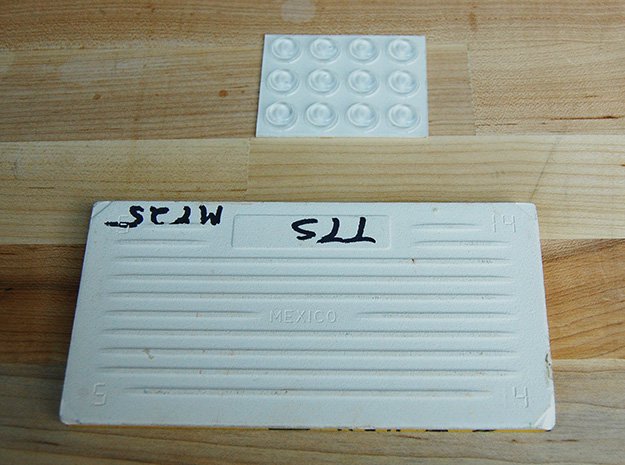
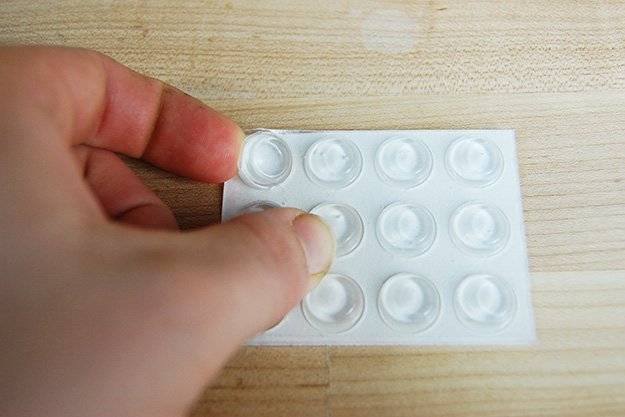
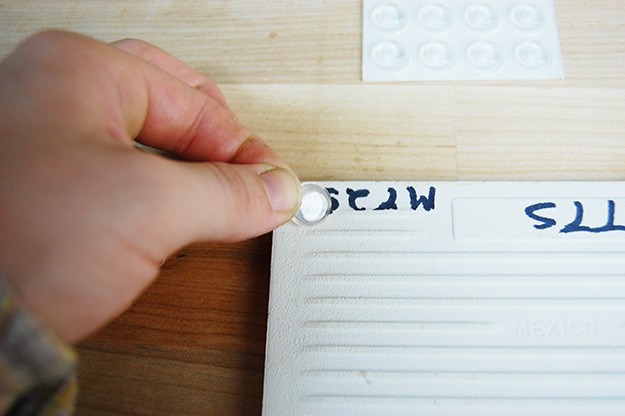
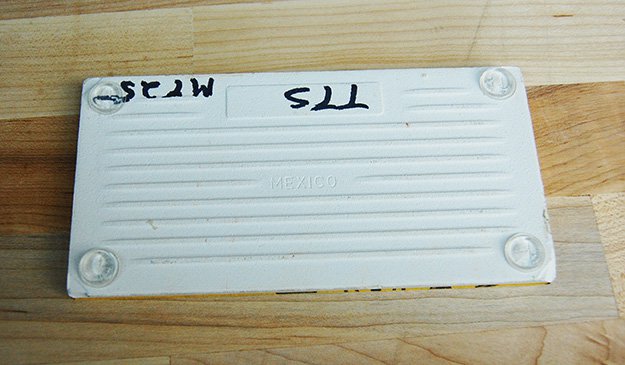
- Rubber Bumpers (Optional but Recommended): Small, self-adhesive rubber feet to place on the bottom of your tiles. These prevent slipping during sharpening and allow for safe, stackable storage of your finished kit.
- 5 Smooth Bathroom Tiles: Standard, flat ceramic or porcelain bathroom tiles make an excellent, stable base for your sharpening surfaces. Choose tiles with a perfectly flat and smooth surface.
- Wax Paper: Used during the curing process to protect the sandpaper and ensure even pressure.
Understanding sandpaper grit is vital for effective sharpening. While 200-400 grit is excellent for repairing heavily damaged or extremely dull blades, the true magic for achieving a refined, razor-sharp edge happens with higher grits. For a utility edge, 800-1,000 grit is often sufficient. However, if your goal is a mirror-polished, hair-popping edge capable of shaving, investing in 2,000 grit sandpaper (or even higher) is highly recommended. You’ll progress through the grits from coarsest to finest.
Step-by-Step Guide: Building Your Custom Sharpening Tiles
Creating your DIY knife sharpening kit is a straightforward process that yields professional results. Always work in a well-ventilated area, especially when using acetone and spray adhesive.
Step 1: Prepare Your Workspace and Clean the Tiles
Begin by setting up your workspace in a clean, well-ventilated area. This is crucial for safety when working with acetone, which has strong fumes. Take one of your cotton cloths, dampen it with a small amount of acetone, and thoroughly wipe down the surface of each bathroom tile. The goal is to remove any dust, residue, or manufacturing film that could hinder the adhesive from bonding properly. Once cleaned, allow the acetone to fully evaporate from the tiles, which should only take a few minutes, leaving a perfectly clean and dry surface.
Step 2: Expertly Apply Sandpaper to Tiles
Working in your well-ventilated area, take one bathroom tile and one sheet of sandpaper (start with your coarsest grit). Apply an even, generous coat of spray adhesive to one side of the bathroom tile. Immediately after, spray a similar coat onto the back (non-abrasive side) of the sandpaper sheet. Consult your adhesive’s instructions for recommended drying times before mating surfaces – typically, a few minutes for the adhesive to become tacky. Carefully align the sandpaper over the tile, ensuring it is centered and straight, then press down firmly across the entire surface to create a strong, even bond. Trim any excess sandpaper that extends beyond the tile’s edges using your scissors or a utility knife for a clean finish.
Step 3: Secure and Cure for Lasting Performance
Once the sandpaper is attached, place a sheet of wax paper directly on top of the sandpaper-covered tile. This layer prevents any heavy objects from sticking to the abrasive surface. Now, place a substantial, flat weight (such as a stack of heavy books or another flat, dense object) evenly on top of the wax paper. This compression step is vital as it forces out any air bubbles and ensures a complete, firm bond between the sandpaper and the tile. Allow the tile to sit under this weight for at least one to two hours, or as recommended by your adhesive’s instructions, to allow the adhesive to fully cure and set.
Step 4: Assemble Your Complete Grit Progression Set
Repeat steps 1 through 3 for each of your remaining bathroom tiles, using different grits of sandpaper. It’s crucial to create a set that progresses from coarser grits (e.g., 200-400 for repair, 800 for initial sharpening) to finer grits (1,000, 2,000 for refining and polishing). As you complete each tile, clearly label it with the corresponding sandpaper grit. This will allow you to quickly identify and select the appropriate tile based on the current condition of the knife you’re sharpening. Remember to allow adequate curing time for all tiles before putting your new DIY sharpening kit to use.
Mastering the Art of Knife Sharpening with Your DIY Kit
Having a well-made DIY sharpening kit is only half the battle; knowing how to use it correctly is key to achieving truly sharp knives. If you’re new to knife sharpening, consider watching a few instructional videos to grasp the fundamentals before starting. Patience and practice are your best tools here.
Understanding Knife Sharpening Basics
Sharpening involves abrading metal from the knife’s edge to form a new, sharp point. The goal is to create a consistent, acute angle on both sides of the blade. As you sharpen, a tiny burr, or wire edge, will form on the opposite side of the blade you’re working on. This burr indicates that you’ve reached the apex of the edge. You’ll then switch sides to remove this burr and form a new one, gradually refining it until the edge is perfectly symmetrical and burr-free.
The Proper Sharpening Technique: The “Pull Only” Method
When using your DIY sandpaper sharpening tiles, always employ a “pull only” motion. This means you should only draw the knife towards you, never push it forward into the sandpaper. Pushing the blade against the abrasive grit can tear or damage the sandpaper, drastically reducing the lifespan of your sharpening tile. By consistently pulling the knife back across the surface at your chosen sharpening angle, you’ll effectively abrade the metal and create a clean, sharp edge without damaging your homemade sharpener.
The Importance of Lubrication (Water is Key!)
Since you’re using “wet/dry” sandpaper, water is your best friend during the sharpening process. Always use water as a lubricant on your sandpaper tiles. Water helps to flush away the metal particles (swarf) that are generated during sharpening, preventing them from clogging the abrasive surface. This keeps the sandpaper cutting efficiently and also helps to keep the blade cool, preventing overheating. Simply splash a little water onto the sandpaper surface before and during sharpening.
Navigating Different Grits for Optimal Sharpness
Your DIY kit is designed for a progressive sharpening approach:
- Coarse Grits (e.g., 200-400): Only use these for severely dull, chipped, or damaged blades that require significant material removal to establish a new edge. Spend enough time here to remove chips and set the primary angle, but don’t overdo it.
- Medium Grits (e.g., 800-1,000): These will be your most frequently used tiles. They are perfect for routine sharpening of moderately dull knives and for refining the edge established by coarser grits. This is where you’ll do the bulk of your sharpening work.
- Fine Grits (e.g., 2,000+): Use these to polish the edge, remove any remaining burr, and achieve a truly razor-sharp finish. A few light passes on these grits will bring your knife to its ultimate sharpness, capable of slicing effortlessly through paper or even shaving hair.
Testing for Razor Sharpness
After sharpening, test your knife’s edge carefully. A common method is the “paper test”: hold a sheet of paper by one edge and try to slice through it with your knife. A truly sharp knife will cut through the paper smoothly without tearing or snagging. Another common test is trying to shave a bit of hair from your arm; a very sharp blade will do so effortlessly.
Essential Safety Precautions
You’ll be working with extremely sharp objects. Always exercise extreme caution. Keep your fingers away from the blade’s edge. Sharpen slowly and deliberately. When handling newly sharpened knives, treat them with the utmost respect. We want you to enjoy your incredibly sharp knives, not get injured by them!
Maintaining Your DIY Sharpening Kit
One of the great advantages of this DIY kit is its easy maintenance. When a sheet of sandpaper becomes worn, clogged, or damaged, simply peel it off the tile. Any residual adhesive can be removed with a cotton cloth dampened with acetone, restoring the tile to its original clean state, ready for a fresh sheet of sandpaper. This means your sharpening kit has an almost indefinite lifespan, only requiring inexpensive sandpaper replacements.
Enhance Your Kit: Optional Additions and Tips
Consider adding small, self-adhesive rubber bumpers to the bottom corners of each sharpening tile. These bumpers serve a dual purpose: they prevent the tiles from sliding around on your workbench during sharpening, providing a stable and safer platform. Additionally, they allow you to safely stack your tiles without the abrasive surface of one tile damaging the sandpaper of another. This makes storage convenient and protects your investment.
Ready To Make Your Own DIY Knife Sharpening Kit?
Finding the right grade of sandpaper locally can sometimes be a challenge. While some hardware stores might carry basic grits, finer grits like 1,000 or 2,000 are often found in automotive supply stores, or most conveniently, online. I personally had to visit a couple of automotive shops before finding the specific high-grit sandpaper needed for this project. To save you time and potentially money, I’ve curated a list of my favorite picks for supplies, often available at competitive prices through online retailers.
Here are my favorite picks for supplies:
Sandpaper Pack: Assorted Grade
3M(TM) Wetordry(TM) Sandpaper, 03006, 3-2/3 in x 9 in, Assorted, 5 sheets per pack
Sandpaper Pack: Assorted Grade
3M 03024 Imperial Wetordry 3-2/3″ x 9″ Sandpaper with Assorted Grit Sizes, (Pack of 5)
Spray Adhesive: Super 77 (my favorite)
3M 77 Super Multipurpose Adhesive Aerosol, Clear 16.75 Oz. Aerosol Can
Conclusion: Embrace the Sharpness!
There’s immense satisfaction in taking a dull, struggling knife and transforming it into a precision cutting instrument. This DIY knife sharpening kit offers an accessible, affordable, and highly effective way to keep all your blades in peak condition. By following these simple steps, you’ll not only save money but also gain a valuable skill and ensure your kitchen and workshop tasks are safer and more efficient. So, gather your materials, follow our guide, and prepare to enjoy the unparalleled performance of truly sharp knives!
Like this post? Your Feedback Matters!
We love hearing from our readers! If you found this guide helpful or have your own tips for sharpening, please share them in the comments below. Your feedback helps us create more content you’ll love. The more interest we receive, the more likely we are to dive into similar DIY projects and guides.