
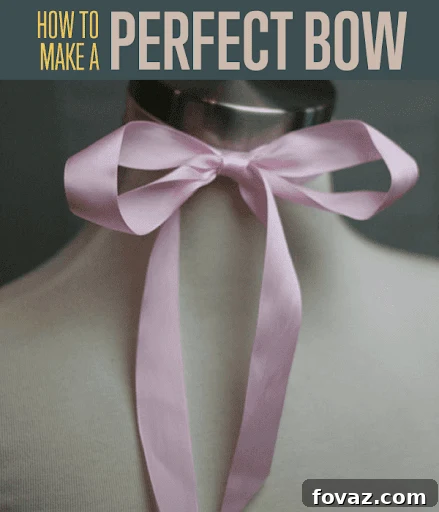
Bows are incredibly versatile and a fundamental element in both crafting and everyday decor. From elegantly wrapping a gift to adding a charming touch to your hairstyle, cinching the waist of a dress, or accenting your favorite accessories, knowing how to make a beautiful bow is a truly useful skill that you’ll find yourself reaching for time and again. This comprehensive guide will walk you through the process of creating a classic bow using satin ribbon, a timeless choice for a refined finish. We’ll also explore how to craft a fuller, more dynamic double bow. For those interested in more structured designs, especially for decor and packages, you can also view our detailed tutorial on how to make a bow out of wired ribbon here, which offers a different approach for achieving voluminous and lasting shapes.
Master the Art: How to Make a Perfect Ribbon Bow
Unlock Your Creativity: Why Learn to Tie Bows?
Beyond their aesthetic appeal, handcrafted bows offer a touch of personal flair that store-bought alternatives simply can’t match. Mastering this seemingly simple craft empowers you to customize gifts for any occasion, tailor fashion accents to your exact style, and infuse your home decor with bespoke charm. It’s a cost-effective skill that opens up a world of creative possibilities, allowing you to transform ordinary items into something extraordinary with just a length of ribbon and a few simple steps. The satisfaction of crafting something beautiful with your own hands is truly rewarding, and bow-making is an accessible entry point into the delightful world of DIY projects and personal expression.
Essential Supplies You’ll Need to Make a Perfect Bow:
- Ribbon! The heart of your bow, and arguably the most important choice. While this tutorial primarily features elegant satin ribbon, the techniques shared here are adaptable to almost any type of ribbon. The choice of ribbon significantly influences the final look, feel, and structural integrity of your bow.
-
Here’s an expanded guide to some of the many wonderful ribbons you’ll discover at your local craft store, each with unique properties and ideal applications:
- Wired Ribbon: This type features a thin, pliable wire meticulously sewn along its edges. This internal wire makes it incredibly versatile, allowing you to easily bend, shape, and fluff your bow, and ensuring it retains its form beautifully. It’s perfect for creating bows with significant volume, crisp loops, and dramatic flair, making it ideal for wreaths, large gift packages, floral arrangements, and any decoration where you want the bow to hold a specific, lasting shape.
- Satin Ribbon: Renowned for its smooth, lustrous finish, typically on one or both sides (single-faced or double-faced satin), this ribbon exudes elegance and sophistication. It drapes beautifully, making it an excellent choice for classic, soft bows, hair accessories, delicate garment embellishments, and luxurious gift wrapping. Its soft, flowing texture is gentle, making it particularly suitable for items that will be worn or touched.
- Acetate Ribbon: Characterized by its somewhat stiff, plastic-like texture and often a glossy, crisp finish, acetate ribbon is frequently utilized in professional floral arrangements and packaging. It offers a clean, structured, and somewhat rigid look, though it’s less pliable and forgiving than fabric ribbons. It’s a durable choice for bows that need to withstand handling and maintain a sharp appearance.
- Curling Ribbon: A unique crimped ribbon, typically made from polypropylene, designed specifically to curl beautifully when pulled taut over a sharp edge (such as a scissor blade). It’s a playful and festive option, commonly used for embellishing balloons, small gifts, party favors, and adding whimsical accents with its characteristic spiraling curls.
- Grosgrain Ribbon: Identified by its distinctive ribbed, corded texture, grosgrain is a sturdy, durable, and densely woven ribbon that holds its shape remarkably well. It’s a fantastic choice for crafting hair bows, headbands, pet accessories, and adding a subtle yet appealing textural element to gifts, scrapbooking, and sewing projects.
- Sheer or Organza Ribbon: Transparent or semi-transparent, these delicate ribbons add a light, ethereal, and sophisticated touch. They are often used for weddings, baby showers, or any occasion where you desire a subtle yet elegant bow that enhances without overpowering the item it adorns. Their translucent quality creates a beautiful layering effect.
- Velvet Ribbon: Soft, plush, and undeniably luxurious, velvet ribbon is ideal for adding a touch of opulence and richness. Its deep pile and vibrant color saturation make it perfect for holiday decor, formal gifts, vintage-inspired accessories, and upscale craft projects.
- Burlap Ribbon: For a rustic, natural, or farmhouse aesthetic, burlap ribbon is an excellent choice. Its coarse, textured weave and earthy tones are perfect for outdoor-themed decor, country weddings, floral arrangements, and crafts that evoke a charming, organic feel.
- Scissors: A pair of sharp, high-quality scissors is indispensable. Clean, precise cuts are crucial not only for aesthetic appeal but also to prevent the ribbon from fraying, ensuring your bow has a professional and polished finish.
- Your Hands: Your most important and versatile tools! With a little patience and practice, your hands will expertly guide and shape the ribbon into its desired form, making bow-tying a truly intuitive and enjoyable craft.
Step-by-Step Guide: How to Make a Simple, Elegant Bow Out of Satin Ribbon
This method is straightforward and creates a timeless, symmetrical bow perfect for almost any application. Follow these steps closely for a beautiful and consistent result, focusing on gentle handling and even tension.
Step 1: Prepare and Cut Your Ribbon Length
Begin by cutting a generous length of ribbon. It is a golden rule in crafting that it’s always better to have too much ribbon than too little, as you can always trim off excess, but you can’t add more once it’s cut! The precise amount you need will depend heavily on the desired size of your finished bow and the width of your chosen ribbon. As a general guideline: for a medium to large, substantial bow, a yard (approximately 36 inches or 90 cm) is a very good starting point. For smaller, delicate bows, 18-24 inches (45-60 cm) should typically suffice. Thinner ribbons generally require less length to create a bow of a given size, while wider ribbons demand more material to achieve proportionally full loops and attractive tails. Always consider the scale of your project – a tiny bow for a hair clip will naturally require far less ribbon than a grand, decorative bow for a large gift or a festive wreath. Aim for a length that allows you to create two ample loops and two elegant tails without feeling rushed or constrained.
Step 2: Form the Initial Loop
Take your prepared ribbon and form a single, graceful loop, resembling the shape of an “awareness ribbon.” Position the point where the ribbon crosses itself firmly between your left thumb and forefinger (if you are right-handed; reverse if left-handed, adjusting instructions accordingly). It is essential that the loose end of the ribbon coming from your right hand (this is your “working end”) falls neatly behind or underneath the loop you’ve just created. This initial hold is absolutely crucial for correctly setting up the foundational structure of your bow and ensuring it ties evenly. Throughout this step, strive to keep the ribbon relatively flat and untwisted as you form this first loop, as this will contribute to a neat and professional appearance in your final bow.
Step 3: Bring the Working Ribbon Over the Front
Now, take the ribbon that you are holding in your right hand (the working end) and bring it smoothly and gracefully over the front of the initial loop you just formed. Continue the motion by wrapping it around towards the back, guiding it with care to avoid any creases, kinks, or twists in the ribbon. The primary objective here is to establish the foundation for your second loop, ensuring a fluid, continuous motion that helps maintain the pristine integrity and sheen of your satin ribbon. This action effectively creates a central “knot” or pivot point in the very center of your developing bow, where the two loops will ultimately meet.
Step 4: Push the Ribbon Through the Center Opening
As you bring the ribbon from your right hand around the back and it reappears at the front, you will clearly notice a small, distinct opening that has been formed in the center of your initial criss-cross. Using your index finger, or the tip of your thumb, gently but firmly push the working end of the ribbon entirely through this opening, moving it from the front to the back. It is critically important to maintain the ribbon in a folded or pinched state as you push it through; this action will simultaneously form your second loop and prevent the ribbon from twisting awkwardly. This precise step is where the two distinct, symmetrical loops of your bow truly begin to take their elegant and recognizable shape.
Step 5: Pull Tight and Form the Basic Bow Structure
Once the working end of the ribbon has been successfully pushed through the opening, gently pull both new loops outwards and upwards. Apply steady, even tension to carefully tighten the knot you’ve created in the center of the bow. As you pull, almost magically, your ribbon will transform before your eyes, taking on the familiar and pleasing shape of a basic, well-formed bow. Strive for symmetry at this stage, endeavoring to ensure both loops appear equal in size and that the central knot is snug enough to hold its shape but not so tight that it distorts or wrinkles the delicate ribbon. This is the pivotal moment when your creative endeavor truly comes to life!
Step 6: Refine and Adjust Your Bow’s Shape and Proportions
Now that you have the basic structure of your bow, it’s time for the artistic and personalized touch – meticulous adjustment! Gently pull, tug, and manipulate the loops and the tails until you are completely satisfied with the bow’s overall shape, fullness, and precise proportions. Fluff the loops to add desirable volume and ensure they stand out gracefully and evenly. Adjust the length and angle of the tails so they fall elegantly and symmetrically. Pay close attention to achieving balance; ensure both loops are roughly the same size, that the knot is centered, and the tails hang evenly. Do not be afraid to experiment with slight variations or to gently coax the ribbon until your bow looks perfectly balanced, polished, and beautifully expresses your vision. This is where your personal touch truly shines through, transforming a simple knot into a work of art.
Step 7: Finish with Perfectly Clipped Tails
To provide your bow with a professional, crisp, and polished finish, take your sharp scissors and carefully clip the ends of the ribbon tails. You have several stylish options here: you can cut them at a sharp angle for a classic pointed look, create a sophisticated swallowtail or “V” notch (by folding the tail lengthwise and cutting at an angle towards the fold), or simply trim them straight across for a more minimalist aesthetic. Angled or V-cuts are particularly popular as they not only enhance the visual appeal but also significantly help in preventing the ribbon from fraying over time, contributing to the longevity and neatness of your bow. Ensure both tails are cut to an equal length and style for optimal balance and a cohesive visual appeal.
Congratulations! You’ve just mastered the art of tying a perfect, elegant ribbon bow. With a little practice, you’ll be able to consistently create beautiful bows every single time, adding a sophisticated and personal touch to all your gifts, crafts, and decorative projects.
Now that you’ve got the basics down, it’s time to unleash your creativity and explore new dimensions! Experiment with different types of ribbon – try the structured elegance of wired ribbon, the rustic charm of burlap, or the playful bounce of curling ribbon. Explore a spectrum of colors, captivating patterns, and various sizes. You’ll be amazed at the endless possibilities for customization. To take your bow-making skills to the next level and add more visual interest and fullness, let’s explore how to craft a double-layered bow.
Advanced Bow Making: How to Create a Fuller, More Dimensional Double Bow
A double bow offers significantly increased volume, depth, and visual interest compared to a single-layered bow. This technique is absolutely fantastic for making a more impactful statement, whether adorning a special gift, enhancing a hair accessory, or as an integral part of a grand floral arrangement. You have the creative freedom to use two pieces of the same ribbon for extra lushness and uniformity, or you can combine different colors, textures, or even widths to create a truly unique, dynamic, and multi-faceted piece that catches the eye. The underlying process largely mirrors that of tying a single bow, but with a clever initial setup involving managing two ribbon layers simultaneously.
Step 1: Prepare Your Double Layer Ribbon
To create a visually appealing double bow, you’ll effectively be working with two ribbons treated as one unit. The most straightforward way to achieve this is to begin with a single, longer piece of ribbon and carefully fold it over itself lengthwise, ensuring you have two layers stacked perfectly aligned. Alternatively, you can take two entirely separate pieces of ribbon of the same desired length and neatly layer them on top of each other. If you choose the latter method, dedicate extra attention to ensuring they are meticulously aligned and stay together throughout the process. Measure out the amount of ribbon you would typically use for a single bow, and then effectively double that length for each layer to account for the extra volume and additional loops. For instance, if you would normally use 1 yard for a single bow, you would start with a 2-yard piece folded in half, or two separate 1-yard pieces meticulously layered.
Step 2: Cut the Folded Ribbon (Optional, but Recommended for Distinct Tails)
If you started with a single long piece of ribbon that you folded in half, you currently have a continuous, double-layered loop. To create two distinct pieces that will form separate, more manageable tails for your double bow, take this long, double-layered ribbon, fold it in half again at its midpoint, and cut it cleanly. Now you will have two equal-length pieces of ribbon, each already composed of two neatly layered segments, ready to be worked with. If you began with two separate pieces of ribbon, simply ensure they are neatly stacked and aligned before proceeding. This optional cutting step ensures that you have distinct, separate ends for the tails of your double bow, making adjustment and styling much easier later on.
Step 3: Form the Initial Double Loop
Just as we did with the single bow, begin by forming an initial loop, but this time, hold both layers of ribbon together as one cohesive unit. Keep your left thumb (or your dominant hand’s thumb) firmly pressed over the exact point where the double-layered ribbon crosses. The working end of the ribbon in your right hand should fall gracefully behind or underneath this initial double loop. It is crucial to maintain consistent tension and meticulous alignment between the two layers of ribbon throughout this step to prevent them from slipping, twisting, or separating during this foundational stage of your bow creation.
Step 4: Bring the Double Ribbon Over the Front
Carefully take the double-layered ribbon that is in your right hand and bring it smoothly over the front of the initial double loop you’ve just formed. Continue to guide it around towards the back in a fluid motion. As you execute this step, it is imperative to ensure that both layers of ribbon move together as a single, coordinated unit, staying flat, untwisted, and neatly stacked. This action serves to build upon the foundational structure of your bow, meticulously preparing it for the creation of the second set of loops. Patience, gentle handling, and constant attention to the alignment of the layers are key here to achieving a beautiful, layered result.
Step 5: Push the Double Ribbon Through the Opening to Form the Second Set of Loops
As the double ribbon from your right hand completes its journey around from the back and reappears at the front, you will clearly see the central opening that has been created. Using your index finger, carefully push the entire double ribbon through this opening, moving it from the front to the back. It is absolutely vital to keep both layers of ribbon folded neatly and aligned as you push them through this aperture. This critical action simultaneously creates the second set of loops for your double bow, effectively ensuring the rich, full, and multi-dimensional appearance you are aiming to achieve with this layered technique.
Step 6: Pull Tight and Reveal Your Full Double Bow
With the second set of double loops now successfully formed, gently but firmly pull both new double loops outwards and upwards. Apply even, consistent tension to meticulously tighten the central knot, coaxing your double-layered ribbon into its full, voluminous formation. As you pull, you will immediately observe the lush volume and enhanced dimension that your layered creation offers. Ensure that the central knot is securely fastened, and allow the loops to naturally begin taking on a symmetrical and appealing shape. This is the moment your double bow truly comes to life with its impressive fullness!
Step 7: Adjust and Fluff Your Double Bow for Maximum Impact
This step is particularly crucial for a double bow, as it allows you to maximize its visual impact and artistic appeal. Take your time to meticulously pull, fluff, and shape all four loops (two distinct loops from each layer) and the tails until you are entirely satisfied with the bow’s overall aesthetic. Thoughtfully arrange the layers so that both are beautifully visible and complement each other harmoniously. Perhaps you want the bottom layer to subtly peek out just a bit, or for contrasting colors or textures to show through prominently. Ensure all loops are even, full, and that the tails fall gracefully. Do not hesitate to gently manipulate and sculpt the ribbon to achieve the precise desired fullness, flair, and artistic balance.
Step 8: Clip the Double Bow Tails for a Polished Finish
Finally, using your sharp scissors, meticulously clip the tails of your newly created double bow. Cutting the ends at an elegant angle, or creating a neat and classic “V” notch (also known as a swallowtail), not only provides a crisp, professional, and aesthetically pleasing finish but also significantly helps to prevent the ribbon’s fibers from unraveling over time. This extends the lifespan and maintains the pristine appearance of your bow. Ensure that both sets of tails are cut to a consistent length and style, which is essential for enhancing the overall balance and refined elegance of your beautiful, full double bow.
Embrace the simple yet profound art of tying bows, and discover the delightful variety, personalization, and creative satisfaction they can bring to every aspect of your life – from festive packages and thoughtful gifts to charming everyday fashion accents and sophisticated home decor. With these detailed techniques and a little practice, you’re now well-equipped to create stunning, professional-looking bows for any occasion and project!
Creative Applications and Pro Tips for Your Handcrafted Bows:
Now that you’ve mastered the art of tying both single and double bows, the possibilities for integrating them into your life are truly endless! Here are some inspiring ideas and expert tips to fuel your next bow-making project and help you refine your craft:
- Elevate Gift Wrapping Elegance: Transform any present into a masterpiece with a beautifully handcrafted bow. Use luxurious satin for birthdays and anniversaries, sturdy wired ribbon for large holiday gifts that need extra structure, or delicate sheer ribbon for baby showers and spring celebrations.
- Fashion Forward Accents: Create stunning hair bows for all ages, effortlessly embellish plain headbands, or add a chic and personalized accent to belts, handbags, and even everyday shoes or formal attire.
- Charming Home Decor Touches: Integrate bows into your interior design by tying them around curtain tie-backs, decorative vases, elegant candle holders, or use them to adorn wreaths, garlands, and centerpieces for seasonal or everyday decor.
- Wedding and Event Embellishments: Bows are an indispensable element for special occasions. They are perfect for decorating wedding favors, tying onto chair sashes, enhancing floral arrangements, adding charm to bridal accessories, or creating aisle decorations.
- Scrapbooking and Card Making Delight: Craft miniature bows from thinner ribbons to add a delightful three-dimensional element and textural interest to your handmade cards, scrapbook layouts, and other paper crafting projects.
- Experiment with Textures: For double bows, don’t shy away from combining different ribbon textures. Try pairing a delicate sheer ribbon with a structured grosgrain, or a lustrous satin with a plush velvet, to create rich textural contrast and visual depth in your designs.
- Add Exquisite Embellishments: Once your bow is perfectly tied and shaped, consider attaching small charms, sparkling beads, elegant faux pearls, a tiny sprig of fresh or artificial greenery, or even a personalized button to the center for an extra special and unique touch.
- Prevent Ribbon Fraying: For ribbons that are particularly prone to fraying, especially those made from natural fibers or with looser weaves, you can lightly dab the freshly cut ends with a fabric sealant (available at craft stores) or a tiny amount of clear nail polish to effectively secure the fibers and maintain a neat edge.
- Store Ribbons Neatly: Keep your precious ribbon stash organized and free from tangles and unsightly creases. Wrap leftover ribbon around cardboard spools, clothespins, or dedicated ribbon organizers. This makes it easier to see what you have and keeps your supplies in pristine condition for your next project.
Like This Guide? Explore More Bow-Tying Tutorials!
Check out our related articles for even more bow-making inspiration:
How to Make a Round Bow | How to Tie Beautiful Bows with Ribbon