
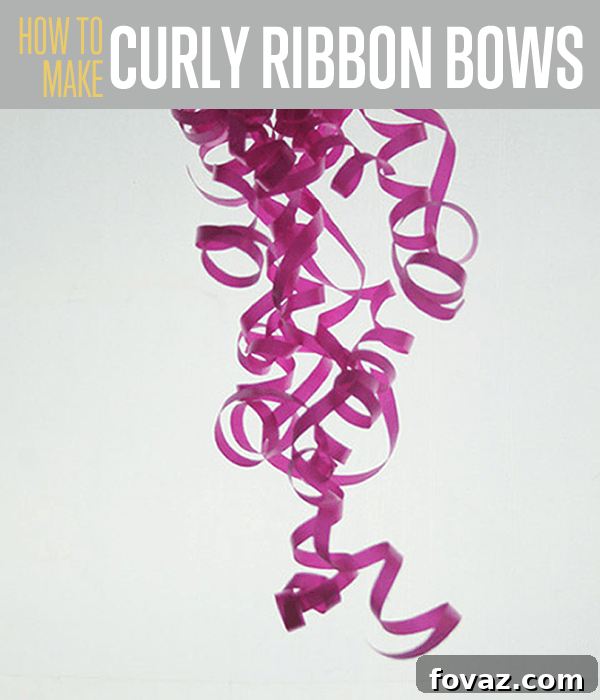
How to Curl Ribbon Like a Pro: The Ultimate Guide for Perfect Curls
The ability to effortlessly transform a flat piece of ribbon into a cascade of bouncy curls is one of those delightful crafting tricks that truly adds a touch of magic to any project. Whether you’re wrapping a special gift, decorating for a festive occasion, or adding flair to a craft, perfectly curled ribbon elevates the ordinary to extraordinary. This simple yet effective technique is not only easy to learn but also incredibly satisfying to master. In just a few moments, you can create professional-looking curls that will impress everyone.
I distinctly recall the first time I witnessed ribbon curling – I was just a child, and it seemed nothing short of sorcery! My mother would take a plain, flat ribbon, draw it taut between her thumb and a scissor blade, and as if by enchantment, it would spring into elegant spirals. That moment sparked a lifelong fascination with simple craft techniques that yield stunning results. Now, you too can unlock this secret and become a ribbon-curling wizard. This comprehensive guide will walk you through every step, ensuring you achieve perfect curls every single time.
Why Learn to Curl Ribbon? The Magic and Versatility
Curling ribbon is more than just a decorative flourish; it’s a fundamental skill that unlocks a world of creative possibilities. Here’s why mastering this technique is a game-changer for any crafter or gift-giver:
- Elevate Gift Wrapping: A beautifully wrapped gift with bouncy ribbon curls instantly communicates care and attention to detail, making the present feel even more special before it’s even opened.
- Festive Party Decorations: From balloons to party favors, curled ribbon adds a celebratory and whimsical touch to any event. Create vibrant streamers, unique centerpieces, or personalized accents that pop.
- DIY Craft Projects: Integrate curled ribbon into scrapbooking, card making, homemade ornaments, floral arrangements, or even unique hair accessories. Its texture and volume add visual interest and a professional finish.
- Cost-Effective Decor: Ribbons are relatively inexpensive, and learning to curl them effectively means you can create high-impact decorations and embellishments without breaking the bank.
- Personalized Touch: The ability to customize the tightness and direction of your curls allows for endless creative expression, ensuring your projects always have a unique, personal touch.
Far from being a forgotten craft, ribbon curling remains a timeless technique that offers immense value in various creative endeavors. Let’s delve into how you can effortlessly achieve these charming curls.
Essential Supplies for This Ribbon Curling Tutorial
Before you begin your journey to ribbon-curling mastery, gather these simple tools. The beauty of this technique lies in its minimal requirements and readily available materials.
- Curling Ribbon: This is the star of our show, and yes, it’s actually called “curling ribbon” for a reason! It’s typically thin, made of plastic or polypropylene, and designed specifically to hold a curl when scraped. You’ll find it in a vast array of colors, widths, and finishes (matte, glossy, metallic, iridescent). Its flat or slightly ridged edge is key to achieving that perfect spiral. Avoid satin, grosgrain, or wired ribbons for this particular technique, as they are not designed to curl in the same way.
- Scissors: Your trusty pair of scissors will serve as your curling tool. The key here is to use the sharp, flat edge of the blade, not the cutting action. A pair of sharp scissors is crucial, as a dull blade will merely crimp or damage the ribbon rather than curl it effectively. Safety scissors or child-friendly scissors usually won’t work well due to their blunted edges.
- Your Hands: Your hands are essential for holding the ribbon, applying pressure, and executing the pulling motion. With a little practice, your hands will become attuned to the perfect amount of tension and speed required for consistent curls.
With these three simple items, you’re fully equipped to transform ordinary ribbon into extraordinary decorative elements.
Step 1: Cut Your Ribbon to Desired Length
The first crucial step is to determine how much ribbon you’ll need for your project. If you’re creating a small accent curl for a gift tag, a few inches might suffice. For a festive bow or to adorn a larger gift, you’ll likely need longer segments, perhaps 12 to 24 inches (30-60 cm) or more, depending on the desired curl length and volume. It’s always better to cut a little more than you think you need, as you can easily trim excess later, but you can’t add more once it’s cut. Experiment with various lengths to see how they impact the final look of your curls. For elaborate bows that require multiple curled strands, cut individual pieces as you go, or prepare a batch of uniform lengths beforehand. Consider the width of your ribbon as well; wider ribbons may produce a broader, more dramatic curl, while thinner ribbons create delicate spirals.
Step 2: Prepare Your Curling Tool (Scissors)
To effectively curl the ribbon, you will utilize the sharp, un-serrated edge of your scissors. Hold the scissors firmly but comfortably in your dominant hand, keeping them open so that one blade is extended and accessible. Ensure the sharp edge is facing away from you to prevent accidental nicks or cuts. Safety is paramount when working with sharp objects, so always be mindful of your hand placement and the direction of the blade. The goal is to create a friction point, not to cut the ribbon. Position the scissors so that the flat side of the blade is easily accessible for the next step, ready to meet the ribbon with just the right amount of pressure.
Step 3: Position the Ribbon Over the Scissors
Take one end of your ribbon in your non-dominant hand. Observe your ribbon closely; often, curling ribbon has a subtle natural curve or direction. For the best results, you’ll want to encourage the curl in this natural direction rather than working against it. Place the base of your ribbon (about 1/2 to 1 inch from the end) firmly over the sharp, flat edge of your open scissor blade. Now, press your thumb firmly against the ribbon, pinning it securely against the flat side of the blade. The ribbon should be sandwiched between your thumb and the scissor blade. The amount of pressure you apply here is crucial – too little, and the ribbon won’t curl; too much, and it might fray or crease. Practice will help you find that sweet spot.
Step 4: Execute the Pulling Motion
With your thumb holding the ribbon firmly against the scissor blade, use your other hand (your non-dominant hand if you’re right-handed) to grasp the free end of the ribbon. In one smooth, continuous motion, pull the ribbon firmly and steadily across the blade. Your thumb should remain stationary, applying consistent pressure, allowing the ribbon to slide beneath it. The friction created between the ribbon, your thumb, and the sharp edge of the blade is what causes the plastic material to stretch and curl. Maintain a consistent speed and pressure throughout the pull. Avoid jerky movements, as these can result in uneven or poorly formed curls. A steady, deliberate pull is key to achieving a beautiful, uniform spiral.
Step 5: Refine and Repeat for Perfect Curls
Congratulations! Your ribbon should now exhibit a lovely curl. If the initial curl isn’t as tight or bouncy as you’d like, don’t fret. You can easily repeat the process. Simply reposition the ribbon over the blade, adjust your thumb pressure, and pull again. Remember the importance of working with the ribbon’s natural tendency to curl; going against it will yield less satisfactory results. You can control the tightness of the curl by varying the pressure you apply and the speed of your pull. More pressure and a slower pull generally create tighter curls, while less pressure and a quicker pull can result in looser, flowing curls. Practice on a few scrap pieces to find your preferred technique and achieve consistently beautiful spirals. The more you practice, the more intuitive the process becomes, and the more confident you’ll be in achieving professional-looking results.
Troubleshooting Common Ribbon Curling Issues
Even though curling ribbon is a straightforward technique, you might encounter a few hurdles along the way. Here are some common issues and how to resolve them:
- Ribbon Isn’t Curling:
- Insufficient Pressure: You might not be pressing your thumb firmly enough against the ribbon and blade. Increase the pressure slightly.
- Dull Scissors: A blunt scissor edge won’t create the necessary friction. Ensure your scissors are sharp.
- Wrong Ribbon Type: Confirm you are using actual “curling ribbon.” Satin, fabric, or wired ribbons won’t curl with this method.
- Too Fast a Pull: Try pulling the ribbon a bit slower to allow more friction to build.
- Ribbon is Fraying or Tearing:
- Too Much Pressure: You might be pressing too hard, causing the ribbon to stretch unevenly or tear. Reduce the pressure slightly.
- Incorrect Angle: Ensure the ribbon is flat against the blade, not at an acute angle that could cause tearing.
- Damaged Blade: A nicked or rough scissor blade can snag the ribbon. Inspect your scissors.
- Curls are Uneven or Inconsistent:
- Inconsistent Pressure/Speed: Try to maintain uniform pressure and pulling speed throughout the entire length of the ribbon.
- Starting Point: Ensure you start applying pressure consistently at the same point on each ribbon strip.
- Practice: Consistency comes with practice. Don’t be discouraged if your first few attempts aren’t perfect.
Step 6: Assemble a Beautiful Ribbon Bow
Once you’ve curled several strands of ribbon, you can easily combine them to create a gorgeous, voluminous bow. This technique is perfect for adding a grand finishing touch to gifts or party decor.
- Gather Your Curls: For a standard, full bow, you will need at least 4 to 6 different strands of curled ribbon, but you can use as many as you’d like for extra volume and flair. The more strands, the fuller your bow will be.
- Arrange the Base: Lay out three of your curled strands side-by-side or fanned out, forming the base of your bow. Try to make them relatively even in length and curl intensity.
- Secure the Center: Take your fourth curled strand (or a separate, uncurled piece of ribbon of the same color) and wrap it underneath the middle of the three laid-out strands. This will serve as the tying mechanism.
- Tie the Knot: Bring the two ends of the fourth strand up and over the center of the arrangement. Tie a simple overhand knot, pulling it tight to secure all the curls together. Double-knot it for extra security.
- Fluff and Adjust: Gently separate and fluff your curled strands, arranging them to create a full, symmetrical, and eye-pleasing bow. You can snip any uneven ends or add more curls by tying them onto the existing knot if you desire more volume.
You can also use a twist tie or a small piece of floral wire to secure the center if you prefer, then wrap another curled piece around the center to conceal the tie.
You did it! You’ve mastered the art of curling ribbon and crafted a beautiful bow. From this moment on, no ribbon in your crafting arsenal shall be left uncurled ever again!
Beyond the Basics: Advanced Ribbon Curling Tips
Once you’re comfortable with the basic technique, consider these tips to elevate your ribbon curling:
- Multiple Strands: For efficiency, you can sometimes curl 2-3 very thin strands of ribbon simultaneously if held together tightly. Practice will show you the maximum your scissors and pressure can handle.
- Alternative Tools: While scissors are most common, you can also use the edge of a ruler, a sturdy credit card, or even the back of a butter knife. Always exercise extreme caution with sharp or hard edges.
- Spiral vs. Loose Curl: Adjust your pulling speed and pressure to create different curl types. A slower, firmer pull yields tighter spirals, while a quicker, lighter pull creates softer, wavier curls.
- Combine Colors and Widths: Experiment with curling ribbons of different colors and widths together in a single pull to create multi-dimensional and vibrant effects.
- Pre-Measured Lengths: For projects requiring many curls of the same length, create a template or use a consistent measuring method to ensure uniformity.
Applications for Your Beautifully Curled Ribbon
Now that you’re a ribbon-curling expert, here are just a few ideas for where to apply your newfound skill:
- Gift Toppers: The classic application! Adorn packages with single curls or elaborate bows.
- Balloon Strings: Instead of plain strings, tie curled ribbons to balloons for a festive and elegant look.
- Party Streamers: Create stunning backdrops or room decorations by hanging long, curled ribbons.
- Centerpiece Accents: Weave curled ribbon through floral arrangements or around candle holders for added charm.
- Wreath Enhancements: Add pops of color and texture to seasonal wreaths.
- Scrapbooking & Card Making: Integrate small, delicate curls to add dimension and playfulness to paper crafts.
- Bookmark Tassels: Attach curled ribbon to the end of bookmarks for a personalized touch.
The possibilities are truly endless, limited only by your imagination!
Final Thoughts on Mastering Ribbon Curls
Curling ribbon is a prime example of how a simple technique can yield incredibly impactful results. It’s a skill that once learned, you’ll find yourself using time and time again, bringing a touch of professional polish and joyful whimsy to all your creative endeavors. Remember, practice makes perfect, and with each ribbon you curl, you’ll gain more confidence and finesse. So go ahead, grab your supplies, and start creating those beautiful, bouncy curls that will transform your gifts, decorations, and crafts into true works of art. Embrace the magic, and enjoy the process!
Like this Post? Explore More Crafting Tutorials!
Check out:
How to Tie a Bow | How to Make Beautiful Bows With Ribbon