
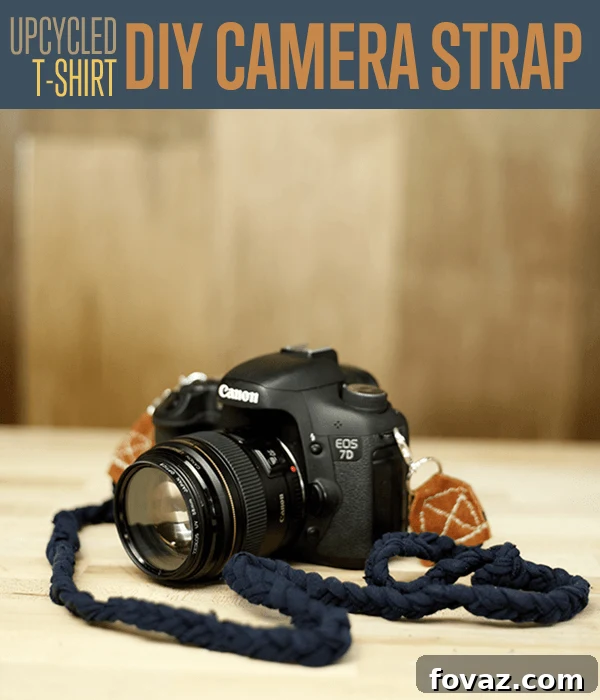
Upcycling has emerged as a powerful trend in recent years, transforming the way we view discarded items. Far more than just a passing fad, it’s a sustainable practice that breathes new life into unused or unwanted materials, diverting them from landfills and turning them into something entirely new and valuable. Instead of simply throwing away old items, upcycling encourages creativity and resourcefulness, allowing you to craft unique pieces that reflect your personal style while benefiting the planet. Today, we’re diving into an exciting upcycling project: creating your very own custom camera strap from an old T-shirt!
Let’s be honest about factory-made camera straps: they often lack personality, can be uncomfortable, and the more stylish options typically come with a hefty price tag. For photographers who spend hours capturing moments, a generic strap simply won’t do. So, why not craft a DIY camera strap that’s not only functional but also a true reflection of your unique aesthetic? This project is perfect for those spring cleaning sessions when you stumble upon old T-shirts that are too worn for wear but too sentimental to toss. Grab a couple of those beloved tees and give this incredibly rewarding tutorial a try. It’s remarkably simple, cost-effective, and makes for a truly thoughtful, personalized gift for the photography enthusiasts in your life!
Why Embrace Upcycling? More Than Just a Camera Strap
Before we delve into the step-by-step creation of your camera strap, let’s take a moment to appreciate the broader impact of upcycling. Choosing to upcycle isn’t just about saving money or creating something unique; it’s a conscious decision that benefits the environment and fosters creativity. By transforming an old T-shirt, you’re actively participating in waste reduction, decreasing the demand for new materials, and lessening your carbon footprint. This practice aligns perfectly with a more sustainable lifestyle, offering a tangible way to make a difference.
Beyond its ecological advantages, upcycling offers immense personal satisfaction. There’s a profound sense of accomplishment in taking something destined for the trash and turning it into a functional, beautiful object. It encourages problem-solving, develops crafting skills, and allows for boundless personal expression. Every upcycled item tells a story, and your DIY camera strap will undoubtedly carry the unique narrative of its origins, making it far more meaningful than any store-bought alternative.
Step 1: Gather Your Essential Materials
Preparation is key for any successful DIY project. Before you begin, ensure you have all the necessary materials laid out. Sourcing quality items, especially for components that ensure your camera’s safety, is crucial. Here’s a detailed list of what you’ll need, along with some tips for selection:
- Leather Cloth (or Faux Leather): This will form the sturdy ends of your camera strap, connecting securely to your camera. A medium-weight leather or faux leather provides durability and a professional finish. Scraps from old bags or furniture can be perfect for upcycling here too!
- Sharp Scissors: Essential for precise cuts on both fabric and leather. A dedicated fabric or craft scissor will make the job much easier.
- Old T-Shirt (Size L or XL Recommended): The star of our show! A larger T-shirt provides more fabric length, which is ideal for creating a long enough strap. Opt for a T-shirt made of soft, stretchy cotton for comfortable wear and easy braiding. Consider interesting colors or patterns to make your strap truly unique.
- Sewing Machine/Strong Thread: While a sewing machine offers speed and durability, hand-sewing with a sturdy needle and strong thread is perfectly viable if you don’t have access to a machine. Ensure your thread is durable enough for heavy-duty use.
- Split Rings (2): These small, strong metal rings will attach the strap to the lobster clasps. Choose rings made from robust material to ensure they can securely hold your camera.
- Lobster Clasps (2): These are the connectors that will clip directly onto your camera’s strap lugs. Look for high-quality, durable clasps that provide a secure closure and can withstand the weight of your camera. Metal clasps are highly recommended for reliability.
- Marker: For tracing outlines on your leather. A fine-tip permanent marker works best for clear lines.
- Ruler: Crucial for accurate measurements, especially when cutting your T-shirt strips.
- Optional: Tape: Masking tape or painter’s tape can be incredibly helpful for securing the start of your braid, preventing it from unraveling while you work.
Step 2: Crafting the Leather Bases for Your Strap
The leather ends of your camera strap are critical for both aesthetics and functionality, providing the secure connection point to your valuable camera. Take your time with this step to ensure accuracy and strength.
Begin by laying your leather cloth flat on a sturdy surface. Using your marker, carefully create the outline for two identical base pieces. These pieces will house the hardware that attaches to your camera. For optimal dimensions, a smart approach is to trace an existing camera strap’s leather end or measure the strap lugs on your camera to ensure a perfect fit. The outline should be a rectangular shape, with a slightly narrower central section where the split ring will sit. You should aim for a design that is robust enough to be sewn securely yet narrow enough to connect neatly to your camera’s attachment points. Remember, you’ll need two of these outlines, one for each end of your strap.
Step 3: Precisely Cutting Your Leather Outlines
With your outlines clearly marked on the leather, it’s time to cut them out. Precision here is important for a clean, professional finish. Using sharp scissors, carefully follow the lines you’ve drawn. Ensure you cut along the outer perimeter of each shape. A crucial detail to remember is: do not cut the middle line! This central line defines the narrow section where your split rings will be inserted, and cutting it would compromise the integrity of the piece. After cutting, you should have two distinct leather pieces, each with a narrow slot in the middle, ready to receive the hardware. They should mirror each other perfectly.
Step 4: Assembling the Connecting Hardware
Now that your leather pieces are ready, it’s time to prepare the metal hardware that will link your strap to your camera. This step is straightforward but vital for the security of your device.
Take your two lobster clasps and your two split rings. Connect one lobster clasp to one split ring, ensuring the split ring is fully threaded through the clasp’s attachment loop. Repeat this process for the second set of hardware. You should now have two complete units, each consisting of a lobster clasp securely attached to a split ring. These units are designed to provide both flexibility and strength at the camera connection points.
Step 5: Integrating Hardware with Leather Bases
With your clasps and rings assembled, it’s time to marry them with your prepared leather bases. This step requires a gentle touch to ensure a snug fit.
Carefully slip one of the assembled split rings through the narrow, central opening you created in one of your leather pieces. Center the split ring within this slot. The leather should securely encompass the ring. If the central opening of your leather piece appears too wide, allowing the split ring to move excessively or even slip out, you may need to trim the leather slightly to achieve a tighter fit. The goal is for the split ring to fit just enough to move slightly, allowing for natural movement, but not so loosely that it becomes insecure. Once both leather pieces have their respective split rings securely in place, set them aside. These will be sewn onto your braided T-shirt strap later.
Step 6: Preparing Your T-Shirt for Transformation
The T-shirt forms the comfortable and stylish main body of your camera strap. Proper preparation of the fabric ensures consistent and beautiful results.
Lay your chosen T-shirt flat on a large, clean countertop or work surface. Orient the shirt in what’s often referred to as “hot dog style,” meaning the longest side of the shirt is facing you. This orientation makes it easier to cut long, continuous strips. Take your time to smooth out the fabric thoroughly, removing as many wrinkles and creases as possible. A flat, even surface is crucial for precise cutting in the next step. Ensure the front and back layers of the T-shirt are perfectly aligned, especially along the bottom seams, as this will affect the loops you create.
Step 7: Crafting Your T-Shirt Fabric Strips
This is where your T-shirt truly begins its transformation into “fabric yarn.” Consistent cutting is essential for a beautiful, even braid.
First, carefully cut off the bottom hem of the T-shirt. Then, using your ruler as a guide, cut along one of the side seams to open up the shirt, effectively turning it into a single layer of fabric (if it wasn’t already). Now, still using your ruler, measure and cut six strips, each precisely 1 centimeter (approximately 0.4 inches) wide. It’s crucial to cut these strips widthwise across the entire shirt, from one end to the other. By cutting widthwise and keeping the shirt’s folded bottom edge intact (before cutting the bottom hem), you will create strips that have loops at both ends. If you’ve opened the side seam, you’ll be cutting from fold to fold. You should now have six distinct fabric strips, each forming a continuous loop.
Step 8: Preparing Your Strips for Braiding
To prepare your looped T-shirt strips for braiding, you’ll need to modify them slightly to create single, long strands.
Take each of your six looped strips and gently stretch it out. The stretching process helps the fabric curl inward, creating a more “yarn-like” quality. Now, for each strip, cut open only one of the looped ends. This means you will effectively have a long piece of fabric with a single loop remaining at one end, resembling a long piece of fabric that has been folded in half. This modification creates the necessary open ends for knotting and starting your braid, while the remaining loop can be used strategically later if desired, or simply ignored as the open end of your fabric strip.
Step 9: Knotting the Strips for the Braid Foundation
With your T-shirt strips now prepared, the next step is to create a secure foundation for your braid. This initial knot will hold everything together as you begin braiding.
Gather one unlooped end from each of your six fabric strips. Align them neatly, laying one on top of the other. Once they are stacked together, tie a strong, tight knot close to the ends. Ensure the knot is firm and secure, as it will be the starting point and one of the anchor points for your entire strap. Trim any excessively long loose ends if necessary, but leave enough fabric to ensure the knot won’t unravel. This knot will become one of the points where your braid eventually connects to a leather end piece.
Step 10: Reinforcing Your Braid with Doubled Strips
For a camera strap, strength and durability are paramount. To achieve this, we’ll double up the fabric strips before braiding, creating a thicker, more robust strap.
Take your six knotted strips and divide them into three distinct stacks. Each stack should contain two of the fabric strips. By pairing them up in this manner, you are effectively creating three thicker “strands” from your original six. Doubling up the strips not only reinforces the braid, making it significantly stronger and more resistant to wear and tear, but it also adds a pleasing bulk and comfort to the finished strap. This preparation ensures your DIY camera strap will be sturdy enough to safely carry your camera.
Step 11: The Art of Braiding Your Camera Strap
Now comes the fun part – braiding your T-shirt yarn into a cohesive, strong strap! This step requires a bit of focus but is incredibly satisfying.
Take your three doubled-up sections of T-shirt strips. To keep your work stable and prevent the strips from shifting as you braid, it’s highly recommended to secure the knotted end. You can use strong tape to affix it to a countertop, clamp it to a table, or even have a friend hold it for you. Begin a simple three-strand braid, treating each doubled-up section as a single strand. Braid consistently, maintaining even tension to create a uniform and aesthetically pleasing pattern. As you braid, periodically pause and fold the braided section in half to check its length against your desired camera strap length. Continue braiding until you reach the desired length for your strap, keeping in mind that you’ll need a few inches of unbraided fabric at the end for attachment. Once you’ve achieved the perfect length, trim the unbraided ends, ensuring you leave at least one inch of fabric on the end beyond your last braid for the next step.
Step 12: Attaching the Braided Strap to Leather Ends
This step brings together the fabric body of your strap with its leather attachment points, giving your camera strap its final structure.
Take one of your prepared leather strips (the one with the split ring and clasp already inserted and set aside). Open up the leather piece slightly to reveal the area where the fabric will be secured. Carefully insert the one-inch section of unbraided fabric from the end of your braid into this opening. It’s crucial to flatten the fabric as much as possible within the leather piece, ensuring even distribution. This not only creates a neat appearance but also facilitates easier and stronger sewing in the next step. The goal is to maximize contact between the fabric and leather for a robust connection. Once one end is securely positioned, untie the initial knot on the opposite end of your braid (the end you started with in Step 9) and repeat this entire process. Open the second leather strip and carefully insert the now unknotted, unbraided end of your strap, flattening it for even distribution.
Step 13: The Final Stitch – Sewing for Security
This is arguably the most critical step for the safety of your camera. Strong, meticulous sewing will ensure your strap can reliably support your gear.
With your fabric ends neatly tucked into the leather pieces, it’s time to sew them together. If you have a sewing machine, use it with a strong thread for maximum durability. Choose a sturdy stitch setting. If you’re hand-sewing, opt for a strong needle and a durable thread, performing multiple passes. For each leather strip, sew along all three open edges (the two sides and the bottom edge where the fabric is inserted) to create a secure pocket. Then, for added reinforcement, sew diagonally across the corners or create an “X” stitch pattern over the fabric-filled area. This crisscross stitching provides extra strength and prevents the fabric from pulling out. The goal isn’t necessarily perfection in appearance (though a neat stitch is always a bonus), but rather unwavering strength and security. Check both ends thoroughly to ensure the stitching is robust and the fabric is firmly encased. This will be the connection bearing the weight of your camera, so don’t skimp on stitches!
Step 14: Attach and Enjoy Your Custom Creation!
Congratulations! Your handmade, upcycled camera strap is now complete and ready for action. The final step is to attach it to your camera and admire your craftsmanship.
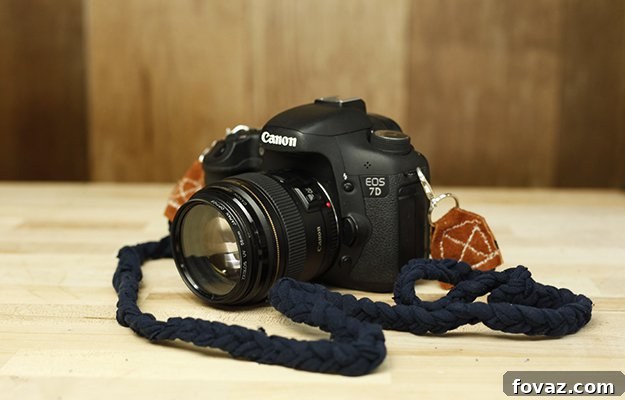
Take the lobster clasps attached to the leather ends and clip them securely onto the strap lugs located on the sides of your camera body. Give the strap a gentle tug to ensure all connections are firm and secure before trusting it with your valuable equipment. Voila! You now possess a brand new, unique DIY camera strap that perfectly blends style, sustainability, and personal touch. This isn’t just a functional accessory; it’s a statement piece born from creativity and a commitment to upcycling. Keep it for yourself and enjoy the comfort and individuality it brings to your photography, or proudly gift it to your favorite photographer friend – it’s a present that truly comes from the heart.
Unlock More Creativity: Customization and Care
One of the greatest joys of DIY projects is the ability to customize. Your braided T-shirt camera strap is a blank canvas for further personalization. Consider using T-shirts with vibrant patterns, tie-dye effects, or even mixing different colors for a multi-toned braid. You could also experiment with adding decorative elements like beads, charms, or embroidered details along the fabric braid. Fabric paints or textile markers could also add unique designs. The possibilities are endless, allowing you to truly make this strap your own.
To ensure your custom camera strap lasts for many adventures, proper care is important. For cleaning, gently hand wash the fabric braid with mild soap and cold water, avoiding harsh scrubbing on the leather parts. Allow it to air dry completely. Periodically, inspect the stitching on the leather ends and the integrity of the metal clasps and split rings. This simple maintenance routine will help prolong the life of your beautiful, handmade accessory.
Conclusion: The Reward of Upcycling and Crafting
We sincerely hope you enjoyed this detailed DIY camera strap tutorial. Crafting something useful and beautiful from discarded materials is an incredibly rewarding experience. Not only have you created a unique and personalized accessory for your camera, but you’ve also contributed to a more sustainable world through the power of upcycling. This project stands as a testament to how creativity can transform the ordinary into the extraordinary, proving that “old” doesn’t have to mean “useless.”
We encourage you to share your beautiful DIY camera strap creations with us and provide any feedback you might have. Your ingenuity inspires others to embark on their own upcycling journeys!
Explore More Inspiring DIY Articles
DIY Leather Couch Repair | 6 Super Easy Steps in Fixing Cuts and Scratches
DIY Comfy Baby Car Seat Cover For A Safe and Warm Ride