
The Ultimate Guide to Crafting Luxurious Homemade Whipped Mango Body Butter
Discover the secret to deeply nourished and radiant skin with our comprehensive guide to making your very own whipped mango body butter. Mango butter, a magnificent natural emollient derived from the seeds of mango fruit, is celebrated for its incredibly rich and creamy texture, making it a perfect ingredient for all skin types, including sensitive and dry skin. Packed with essential vitamins and antioxidants, it offers a myriad of benefits for the skin, from intense hydration to improved elasticity. Today, we’ll walk you through each step, empowering you to create a personalized, chemical-free moisturizer that your skin will absolutely adore.
Unlock the Power of Mango Butter: Why Your Skin Will Love It
Before we dive into the creation process, let’s explore why mango butter stands out as a superior choice for natural skincare. This tropical delight is not just for eating; its butter is a skincare powerhouse, offering a unique blend of properties that contribute to healthy, glowing skin.
- Deep Hydration: Mango butter is an exceptional moisturizer, forming a protective barrier on the skin that locks in moisture without feeling greasy. It’s particularly effective for dry, flaky patches.
- Rich in Vitamins: It’s loaded with vitamins A, C, and E, which are vital for skin health. Vitamin A encourages healthy skin cell production, Vitamin C is crucial for collagen synthesis, and Vitamin E is a potent antioxidant.
- Antioxidant Powerhouse: The high concentration of antioxidants helps to combat free radicals, protecting the skin from environmental damage and signs of premature aging. This contributes to a youthful and vibrant complexion.
- Improves Skin Elasticity: Regular use can help improve the skin’s natural elasticity and suppleness, reducing the appearance of fine lines and wrinkles.
- Soothing and Calming: Its anti-inflammatory properties make it ideal for soothing irritated skin, making it beneficial for conditions like eczema, psoriasis, and dermatitis.
- Non-Comedogenic: Unlike some other rich butters, mango butter is generally non-comedogenic, meaning it’s less likely to clog pores, making it suitable for a wider range of skin types, including those prone to breakouts.
- Lightweight Absorption: Despite its richness, mango butter absorbs beautifully into the skin, leaving it soft and smooth without a heavy residue.
The Art of DIY Skincare: Purity and Personalization at Your Fingertips
There’s a growing movement towards homemade skincare, and for good reason. Crafting your own products, like this luxurious mango body butter, offers numerous advantages over store-bought alternatives.
- Ingredient Control: When you make your own, you have complete control over what goes into your product. This means no hidden chemicals, synthetic fragrances, or unwanted preservatives that can often irritate sensitive skin.
- Cost-Effectiveness: While the initial investment in raw materials might seem like a lot, in the long run, making your own body butter is often significantly more economical than purchasing high-end commercial products.
- Customization Opportunities: You can tailor the recipe to your specific needs and preferences. Want a different scent? Add a different essential oil. Prefer a firmer or softer consistency? Adjust the butter-to-oil ratio. The possibilities for creation are endless.
- Sustainability: By buying ingredients in bulk and reusing your storage containers, you can reduce your environmental footprint compared to continuously purchasing products packaged in single-use plastics.
- A Sense of Accomplishment: There’s a unique satisfaction that comes from using a product you’ve lovingly created yourself. It’s a therapeutic process that connects you more deeply with the items you use daily.
Your Essential Ingredient List for Luxurious Body Butter
This recipe provides a fantastic foundation for a rich and nourishing body butter. We’ll utilize a blend of butters and oils to achieve the perfect texture and deliver maximum skin benefits.
Decoding the Core Ingredients:
- 1 cup Shea Butter: A highly moisturizing and healing butter, shea butter is renowned for its ability to soothe dry, chapped skin. It’s packed with vitamins A, E, and F, and offers natural sun protection. It provides a solid base that contributes to the rich, creamy texture of the body butter.
- 1/2 cup Mango Butter: Our star ingredient! Mango butter brings its unique profile of vitamins, antioxidants, and a slightly firmer texture than shea butter, helping to create a stable and luxurious final product.
- 1/2 cup Almond Oil: A fantastic carrier oil, almond oil is light, easily absorbed, and gentle on the skin. Rich in Vitamin E, it’s excellent for nourishing and softening the skin, improving complexion, and reducing irritation. It helps make the body butter spreadable and less heavy.
- 20-25 drops Mango Essence Oil: This provides a delightful, natural mango scent to your body butter. You can adjust the quantity based on your preference or even swap it for other essential oils like lavender, vanilla, or sweet orange for a different aromatic experience. Ensure you use skin-safe essence or essential oils.
Gathering Your Tools: Preparing for Your Body Butter Creation
Having the right tools on hand will make the process smooth and enjoyable. Most of these items are likely already in your kitchen.
Tools and Supplies You’ll Need:
- Whisk or Electric Mixer: Essential for whipping the cooled butter mixture into a light, fluffy consistency. An electric mixer will save you time and effort.
- Stirring Spoon: For mixing ingredients, especially during the melting phase.
- Glass Bowl (heat-safe): This will be used in a double-boiler setup to gently melt your butters without direct heat, preserving their beneficial properties.
- Mixing Bowl: A separate bowl, preferably chilled, for the whipping process.
- Large Pot: To hold water for your double-boiler setup.
- Airtight Jar for Storage: Crucial for keeping your homemade body butter fresh and uncontaminated. Glass jars are ideal.
Step-by-Step Guide: How to Make Whipped Mango Body Butter at Home
Follow these detailed instructions carefully to ensure a perfect batch of velvety smooth mango body butter.
Step 1: Gentle Melting of Butters
Begin by setting up a double boiler. Fill your large pot with water, ensuring it’s about one-third to one-half full. Place your heat-safe glass bowl on top of the pot, making sure the bottom of the bowl does not touch the water. This creates a gentle, indirect heat that is crucial for melting butters without scorching them or diminishing their therapeutic qualities. Add your shea butter and mango butter into the glass bowl. Turn your stove on to medium-low heat and bring the water to a low simmer – avoid a rolling boil. As the butters begin to melt, stir them frequently with your spoon to ensure even melting and prevent any sticking. Continue until both butters are completely liquid and thoroughly combined into a smooth, clear consistency.
Step 2: Infusing with Nourishing Oils
Once the butters are fully melted, carefully remove the glass bowl from the pot of hot water. Be cautious as the bowl will be hot. Place it on a heat-resistant surface. Now, it’s time to incorporate the liquid ingredients. Stir in the almond oil and the 20-25 drops of mango essence oil (or your chosen essential oil). Mix well with your stirring spoon, ensuring all ingredients are evenly distributed throughout the butter mixture. The almond oil will cool the mixture slightly, and the essence oil will begin to infuse its delightful aroma.
Step 3: Cooling for Perfection
For the whipping process to be successful, the mixture needs to cool down and solidify partially. Transfer the glass bowl (or pour the mixture into a separate, clean mixing bowl) to the refrigerator. Chill the mixture for about 20 minutes. The goal is for the butter mixture to become opaque and firm around the edges, but still soft enough in the center to easily indent with your finger. It should resemble a soft solid, similar to a thick pudding or very soft butter, not completely hard. This semi-solid state is crucial for achieving that light and fluffy whipped texture.
Step 4: The Whipping Transformation
Remove the partially solidified mixture from the refrigerator. Using an electric mixer (or a whisk, if you prefer a more strenuous arm workout!), begin to whip the butter mixture. Start on a low speed to break up the solid mass, then gradually increase to medium-high speed. Continue whipping until the mixture becomes significantly lighter in color, significantly increases in volume, and takes on a wonderfully airy, fluffy, and creamy texture. You’re looking for soft peaks, much like whipped cream. This process can take anywhere from 5 to 10 minutes, depending on your mixer and the initial consistency of your chilled mixture. Keep whipping until it’s light and ethereal.
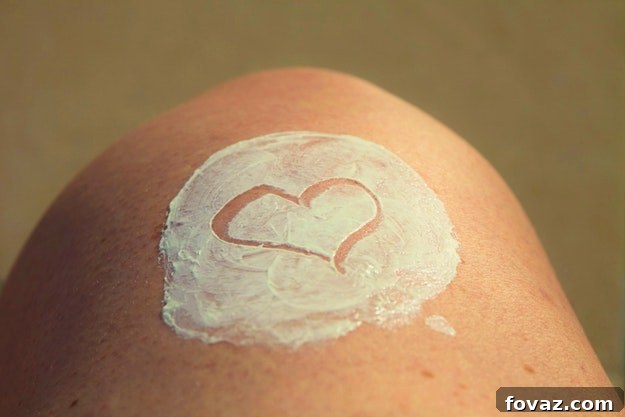
Now, your homemade whipped mango body butter is ready to be lovingly massaged into your skin for an unparalleled body butter bliss. Its rich, non-greasy formula will leave your skin feeling incredibly soft, smooth, and beautifully scented.
Preserving Your Homemade Bliss: Storage and Shelf Life
To maximize the freshness and efficacy of your homemade mango body butter, proper storage is essential. Place your finished body butter into an airtight container, preferably a glass jar. Store it in a cool, dry, and dark place, away from direct sunlight or excessive heat. Heat can cause the butter to melt and lose its whipped consistency. When stored correctly, your mango body butter should maintain its quality for approximately 3-4 months. To further extend its shelf life and prevent contamination, always use clean, dry hands or a small spatula when scooping out the product.
Elevate Your Recipe: Customization and Creative Variations
One of the joys of DIY skincare is the freedom to customize. Here are a few ideas to personalize your mango body butter:
- Aromatherapy Boost: Experiment with different essential oils for varied scents and therapeutic benefits. Lavender oil is calming, frankincense is rejuvenating, and citrus oils (like sweet orange or grapefruit) are uplifting. Always ensure essential oils are skin-safe and properly diluted.
- Extra Nourishment: Add a teaspoon of other beneficial carrier oils such as jojoba oil (great for balancing skin), rosehip oil (known for its regenerative properties), or argan oil (deeply moisturizing) during Step 2.
- Vitamin E Power: Incorporate a few drops of pure Vitamin E oil. It’s a powerful antioxidant that not only benefits your skin but can also act as a natural preservative, slightly extending the shelf life of your butter.
- Adjusting Consistency: If you prefer a firmer butter, you can slightly increase the amount of mango butter. For a softer, more spreadable butter, slightly increase the almond oil.
Common Questions and Troubleshooting
- My body butter is too greasy: This can happen if too much carrier oil was used, or if it wasn’t whipped sufficiently. Try whipping it again for a longer period. If it’s still greasy, next time reduce the amount of almond oil slightly.
- My body butter is too hard: If it’s too solid, it might be due to too much shea or mango butter, or it might be stored in too cold a place. Allow it to come to room temperature for a bit, or next time, increase the amount of almond oil. You can also re-melt and re-whip it with a little more oil.
- My body butter isn’t whipping properly: This usually means it wasn’t cooled to the right consistency. It needs to be firm enough but still pliable. If it’s too warm, chill it longer. If it’s too hard, let it soften at room temperature for a while before trying again.
The Final Touch: Enjoying Your Natural Skincare Journey
Congratulations! You’ve successfully created your own batch of luxurious whipped mango body butter. This homemade elixir is not just a moisturizer; it’s a testament to the power of natural ingredients and the rewarding experience of DIY skincare. Embrace the journey of nourishing your skin with pure, wholesome ingredients, and revel in the beautiful glow and softness it brings. Share your experiences and any creative variations you discover!
Explore More DIY Skincare & Craft Projects
Don’t stop here! The world of DIY projects is vast and full of exciting discoveries for your home and personal care routine. Here are a few more articles you might have missed:
- Homemade Lotion – Step by Step Tutorial
- DIY Jewelry Making | Drilling Sea Glass