
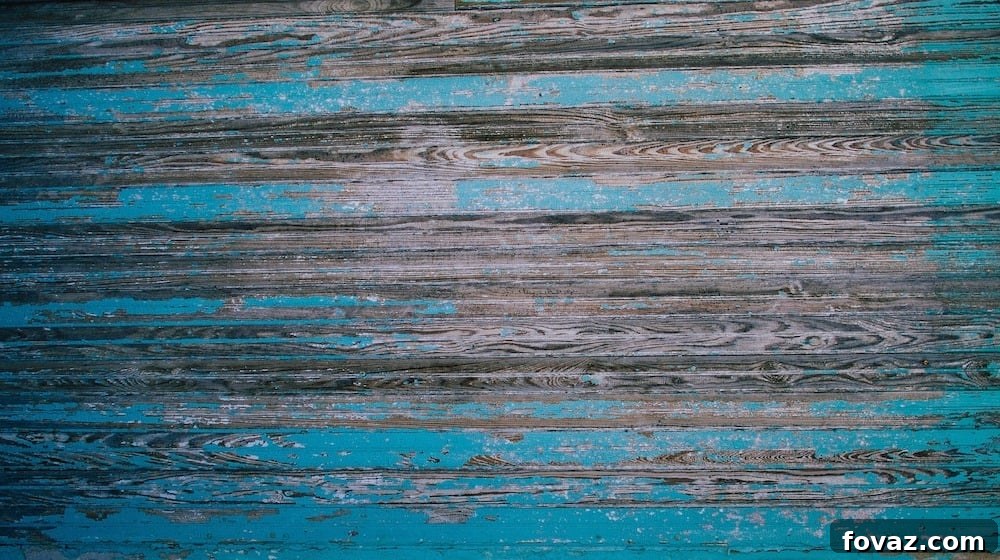
Transform Your Space: The Ultimate DIY Wood Pallet Accent Wall Guide
— This post is courtesy of livingroomideas.com and shared with permission —
Dreaming of a captivating feature wall that breathes new life into your home? A wood pallet accent wall is not just a trend; it’s a timeless design choice that offers rustic charm, coastal serenity, or even industrial edge, depending on your finish. This comprehensive tutorial will guide you through every step of creating your very own DIY wood pallet accent wall, offering a refreshing aesthetic upgrade that’s both cost-effective and deeply satisfying. Imagine transforming a plain room into a cozy retreat with a whitewashed wood pallet wall, often for less than $50!
Why Choose a DIY Wood Pallet Accent Wall?
Wood pallet accent walls have soared in popularity for many compelling reasons. Firstly, they offer an incredible opportunity for homeowners to personalize their living spaces with a unique, handcrafted touch. Unlike expensive wallpaper or intricate paint jobs, a pallet wall provides a tangible, textured element that instantly adds character and warmth. Secondly, it’s an incredibly budget-friendly project. Reclaimed wood pallets are often free or very inexpensive, making this an accessible DIY for almost anyone. Thirdly, it’s an eco-conscious choice, giving new life to discarded materials and contributing to sustainable home decor. Whether you envision a beach cottage vibe for your bedroom, a rustic farmhouse feel for your living room, or a unique backdrop in a home office, a pallet wall provides immense versatility. The beauty of a whitewashed wood pallet wall, for example, can evoke the tranquility of a seaside escape, easily extending from your bedroom to your living area, creating a cohesive and inviting atmosphere throughout your home.
Gather Your Tools and Materials
Before embarking on any DIY project, thorough preparation is key. Ensuring you have all the necessary tools and materials on hand will streamline the installation process and prevent frustrating delays. Here’s a detailed list of what you’ll need to create your stunning wood pallet accent wall:
- Boards for Frame: These will form the underlying structure for securing your pallet wood, minimizing damage to your main wall.
- Screws: For securely fastening the frame boards to your wall studs.
- Tape Measure: Essential for accurate measurements of your wall space and pallet boards.
- Power Drill: For driving screws efficiently and creating pilot holes.
- Sawzall (Reciprocating Saw): Highly recommended for quick and easy disassembly of pallets. Alternatives include a crowbar and hammer.
- Wood Pallets: The star of your project! Source them carefully, ensuring they are safe and untreated.
- Nail Gun: For fast and secure attachment of pallet boards to your frame.
- Nails: Compatible with your nail gun for securing the pallet planks.
- Vacuum Cleaner: To clean the pallet boards thoroughly before finishing.
- Water & Rag: For dampening boards and mixing with paint for the whitewash effect.
- Water-Based Paint: Your chosen color for the whitewash. White, off-white, or even light pastels work beautifully.
- Paint Brush: For applying the whitewash mixture.
- Safety Gear: Gloves, eye protection, and a dust mask are crucial when working with tools and raw wood.
- Level: To ensure all frame boards and pallet planks are installed perfectly straight.
- Stud Finder: To locate wall studs for secure frame installation.
Step-by-Step Guide to Your Pallet Accent Wall
Step 1. Prepare Your Wall with a Base Coat
Before attaching any wood, it’s advisable to paint your accent wall. Since small gaps will inevitably appear between the pallet boards, choosing a base color close to your pallet wood or desired finish will create a cohesive look and hide any wall color inconsistencies. For a classic whitewashed effect, a tan, beige, or light gray paint provides an excellent neutral background, allowing the texture of the wood and the subtle whitewash to truly shine. This preparatory step ensures a professional finish and contributes significantly to the overall aesthetic of your completed accent wall.
Step 2. Measure and Mark for the Frame Structure
Installing a sturdy wooden frame on your wall before attaching the pallet boards offers several advantages: it significantly reduces the number of holes drilled into your primary wall and provides a secure, level surface for the pallet planks. Begin by meticulously measuring your accent wall. If you have a baseboard, start your measurements from its top edge up to the ceiling. Use a stud finder to locate and mark all the wall studs, as this is where your frame boards will be securely fastened. Additionally, mark horizontal lines every foot or so from the edge of the wall to guide your frame board placement. For walls with architectural features like windows, measure from the baseboard to the bottom window frame, and then from the top window frame up to the ceiling. Accurate measurements are paramount for a perfectly aligned and professional-looking accent wall.
- DEWALT drill with brushless motor delivers more run time over brushed
- This power drill is compact (7.52″ front to back). Lightweight design fits into tight areas
- Ergonomic comfort grip handle of Dewalt 20V drill provides ideal balance and tool control
- LED light with 20-second trigger release delay provides increased visibility in dark or confined spaces
Buy on Amazon
Step 3. Install the Wooden Frame
With your measurements and stud locations clearly marked, it’s time to install the wooden frame. Begin by drilling your first frame board securely into place along one edge of the accent wall, aligning it with your initial markings. Use a level extensively throughout this process, setting it against each board to guarantee it’s perfectly straight before fastening. Continue to drill additional frame boards horizontally, spacing them approximately every foot, ensuring they are all level and firmly attached to the wall studs. This robust frame will provide a consistent and strong backing for your pallet planks, ensuring your accent wall remains stable and aesthetically pleasing for years to come. Remember, accuracy here saves a lot of headaches later!
Step 4. Disassemble and Prepare Your Pallets
Safety first! Before disassembling, ensure your pallets are safe to use indoors. Look for the “HT” (Heat Treated) stamp; avoid pallets marked “MB” (Methyl Bromide), which are chemically treated. Always wear sturdy gloves, eye protection, and a dust mask. Now, for the fun part: breaking down the pallets into individual planks. While a crowbar and hammer can certainly get the job done, a sawzall (reciprocating saw) will make this task significantly easier and faster. Carefully cut through the nails or wooden blocks connecting the planks, being mindful of hidden nails. Once disassembled, inspect each board for remaining nails or staples and remove them. You may also want to lightly sand any rough edges or splinters to ensure a smoother, safer surface for handling and installation. This step is crucial for both safety and the overall quality of your finished wall.
- 4-position blade clamp of DEWALT 20V reciprocating saw allows for flush cutting and increased positional versatility with tool-free blade changes
- 1-1/8-inch stroke length delivers a fast cutting speed
- Variable speed trigger with 0-3000 spm provides increased blade control and fast cutting speed
- Pivoting adjustable shoe extends blade life and allows depth-of-cut control
- Rubber comfort grip delivers optimal comfort and control
Buy on Amazon
Step 5. Install the Pallet Boards
Now comes the exciting part: seeing your wall come to life! Begin installing your pallet boards from the bottom of your accent wall, working your way upwards. Place the first pallet plank horizontally against your frame, ensuring it’s perfectly level. Use your nail gun to securely fasten it to the underlying frame boards. Consistency in using a level for each successive row is crucial for a professional finish. For a classic, rustic, or reclaimed wood aesthetic, consider staggering the ends of your boards in each row. This means that the end joints of adjacent rows won’t line up directly, creating a more organic and visually interesting pattern. Alternatively, for a more uniform look, you could cut boards to consistent lengths. As you proceed upwards, continue to check for levelness and tightness against the frame. Don’t be afraid to mix and match different widths or shades of pallet wood for added character!
Step 6. Clean the Installed Pallet Wall
Once all your pallet boards are securely nailed to the frame, it’s essential to give the entire wall a thorough cleaning. Pallet wood, even after initial preparation, can accumulate dust, dirt, and fine wood debris during the installation process. Use a vacuum cleaner with a brush attachment to remove all loose particles from the surface and especially from any gaps between the boards. This step is critical before you proceed with any finishing treatments like whitewashing, as it ensures a clean canvas and allows the paint to adhere properly, preventing a patchy or uneven finish. A clean surface is the foundation for a beautiful whitewashed wood pallet accent wall.
Step 7. Apply the Whitewash Finish
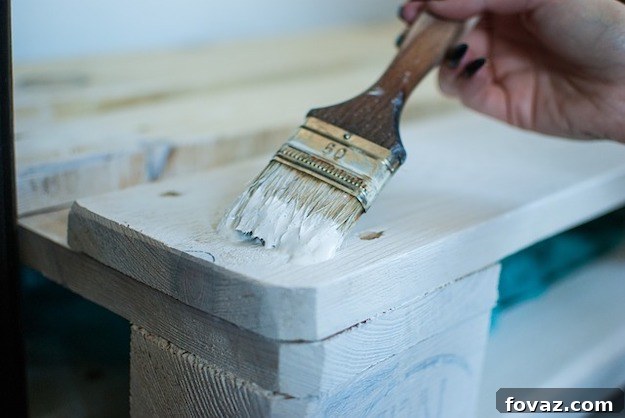
Achieving that perfect whitewashed effect is easier than you think and adds incredible depth and character to your pallet wall. Start by mixing your water-based paint with water, typically a 1:1 ratio, but you can adjust this to your preference for a more opaque or translucent finish. Experiment on a scrap piece of pallet wood first. Next, lightly dampen a section of your installed pallet boards with a clean rag dipped in plain water. This helps the paint mixture spread more evenly and prevents it from soaking too quickly into the wood. Then, take your paintbrush, dip it into your paint and water mixture, and apply it thinly and evenly over the dampened pallet wood. You can brush with the grain for a smoother look or use cross-hatching strokes for a more distressed appearance. The goal is to allow some of the wood’s natural grain and color to show through, creating that desired weathered, beachy, or rustic charm. Continue this process, section by section, until the entire pallet wall is whitewashed. Allow the first coat to dry completely, then assess the effect. If you desire a more pronounced whitewash, apply a second, thin coat, or vary the amount of paint to create subtle color variations. For an even more unique look, consider experimenting with a touch of turquoise or light gray in your mixture for a coastal-inspired theme, or simply stick to classic white for a timeless appeal.
- Increase your productivity with thoughtfully constructed premium paint brushe
- Blending the finest SRT filaments gives brushes up to 30% more paint holding capacity
- The premium filaments provide a smooth, even release: more finesse and precision
- Can withstand even the most abrasive surfaces for versatility and heavy-duty jobs
- SRT filaments are also durable and easy to clean, making them easy to reuse several times
Buy on Amazon
Watch the Full Tutorial:
For a visual walkthrough and further tips, press play to watch the full tutorial on creating a stunning wood pallet accent wall:
Conclusion: Your Dream Accent Wall Awaits!
Congratulations! You’ve successfully learned how to create a beautiful and unique DIY wood pallet accent wall. This project not only offers incredible aesthetic appeal but also allows for significant cost savings, often completed for a fraction of what professional installations or other wall treatments would cost. The satisfaction of transforming your space with your own hands, utilizing reclaimed materials, is truly unmatched. Whether you opted for a classic whitewash, a natural wood finish, or something entirely unique, your new accent wall is sure to be a focal point and a conversation starter in your home. This budget-friendly home upgrade is a testament to what you can achieve with a little effort and creativity.
We’d love to see your creations! Share your experience or a picture of your finished wood pallet accent wall in the comment section below!
Eager for more inspiration? Discover other captivating creative wall art ideas to further enhance your home decor!