
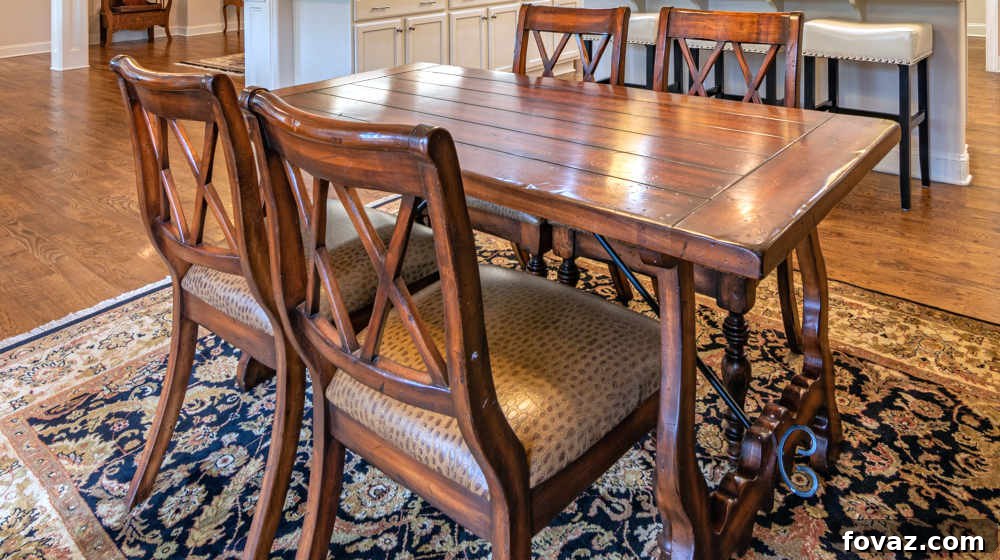
Unlock the secrets to restoring your beloved furniture pieces quickly and effortlessly, bringing them back to their original splendor without the need for harsh chemical stripping. This comprehensive guide will walk you through a non-invasive furniture restoration process, revealing how to revive the beauty of your old furniture with minimal fuss and maximum impact.
RELATED: 17 Glaze Furniture Rehab Ideas | Instant Facelift For Old Furniture
Effortless Furniture Restoration: Revitalize Your Old Pieces Without Stripping
Do you have a cherished piece of furniture that has lost its luster over the years? Perhaps an antique dresser, a family heirloom dining table, or a vintage chair showing signs of wear and tear? While the idea of a full strip-and-refinish might seem daunting, time-consuming, and even intimidating due to strong chemicals, there’s a simpler, gentler approach. This method focuses on repairing, enhancing, and preserving the existing finish, allowing you to restore your furniture’s glossy glory and extend its life without resorting to harsh chemical strippers. It’s an accessible DIY project that yields incredibly satisfying results, preserving the character and history of your furniture while giving it a fresh, revitalized appearance.
Your Essential Toolkit for Furniture Restoration Without Stripping
Before you embark on this rewarding restoration journey, gather the following materials. Having everything at hand will ensure a smooth and efficient process, preventing interruptions and making your project more enjoyable.
- Mineral Spirits: A petroleum-derived solvent used for cleaning, degreasing, and thinning oil-based paints and varnishes. It’s crucial for evaluating the existing finish and preparing the surface. Choose an odorless variety for indoor use.
- Soft Sponges and Clean Cloths: Essential for cleaning, applying finishes, and wiping away excess materials. Keep several on hand to avoid cross-contamination.
- Mild Soap: A gentle, pH-neutral soap (like dish soap or wood cleaner) mixed with water will be your primary cleaning solution for removing years of accumulated grime without damaging the finish.
- Water: For diluting soap and general cleaning purposes.
- Petroleum Jelly: An unexpected hero for tackling those pesky white rings caused by moisture or heat. Its oily consistency helps to draw out or fade the moisture trapped in the finish.
- Wood Epoxy: A two-part resin-based filler ideal for reconstructing missing wood, filling significant cracks, and repairing deep defects. Look for a product that can be sanded, stained, and painted.
- Gel Stain: A thick, non-drip stain that’s perfect for refreshing existing finishes or blending repairs. It’s less messy than traditional liquid stains and offers good color control. Choose a shade that closely matches your furniture’s existing wood tone.
- Wax Filler Sticks for Wood: Semi-soft sticks available in various wood tones, designed to fill small cracks, nail holes, and minor imperfections. They are easy to apply and blend.
- Flat Iron: A household item (like a clothing iron) used with a damp cloth to steam out dents in wood, helping the compressed fibers swell back into place.
- Razor Blade (or utility knife): Primarily used for carefully scraping off paint spatters and leveling epoxy. Opt for a sharp, clean blade.
Step 1: Evaluate the Existing Finish with Mineral Spirits
The very first and arguably most crucial step in any successful furniture restoration project is a thorough assessment of the existing finish. Before you commit to any repairs or refurbishing techniques, apply mineral spirits to an inconspicuous small section of your furniture piece. This simple test is a powerful indicator of the finish’s condition and will guide your subsequent actions.
Dampen a clean cloth with mineral spirits and wipe it over a small area. Observe carefully. The mineral spirits will temporarily saturate the finish, mimicking how it might look with a fresh coat of wipe-on clear finish. If the surface, once dampened, appears to regain its depth, sheen, and color without showing significant wear or damage, you’re in luck! This indicates that the original finish is largely intact and a simple clean, repair, and re-coat with an oil-based wipe-on finish will likely be sufficient. However, if the mineral spirits reveal deep scratches, extensive wear-through, or significant discoloration that doesn’t improve, it suggests a more intensive repair might be needed, or perhaps even professional intervention if the damage is beyond DIY scope. This initial evaluation prevents unnecessary work and ensures you choose the most appropriate restoration path.
Step 2: Deep Clean the Furniture
Years of accumulated dust, grime, grease, and polishing waxes can dull even the most beautiful furniture. Before any actual restoration work can begin, a thorough cleaning is paramount. Neglecting this step means you’d be applying new finishes and repairs over a dirty surface, which will prevent proper adhesion and result in an unsatisfactory outcome.
Start by using a soft brush or a paintbrush to carefully remove loose dust and debris, paying special attention to intricate details, carvings, and moldings where dirt tends to hide. Once the loose dirt is gone, prepare a mild cleaning solution. A small amount of mild dish soap diluted in warm water is usually sufficient. Dampen a soft sponge or cloth with this solution, wring out any excess water so it’s just damp, not soaking wet, and gently wipe down all surfaces of the furniture. For stubborn spots, a slightly stronger concentration of soap might be used, but always test in an inconspicuous area first. Ensure you rinse the surface with a clean, damp cloth to remove any soap residue. Allow the furniture to dry completely for several hours, or even overnight, before proceeding to the next steps. This ensures no moisture is trapped in the wood or finish.
Step 3: Mend Unsightly White Rings and Water Marks
White rings and cloudy spots are common blemishes on old coffee tables, dining sets, and other frequently used furniture, typically caused by hot beverages or condensation trapping moisture beneath the finish. Fortunately, this common problem often has a surprisingly simple solution: petroleum jelly.
Generously apply petroleum jelly directly onto the white ring, ensuring the entire discolored area is covered. The oil in the petroleum jelly works to penetrate the finish and displace the trapped moisture, often causing the stain to disappear or significantly fade over time. For best results, leave the petroleum jelly on the affected area for at least 12 hours, or even overnight. After the waiting period, gently wipe off the petroleum jelly with a clean, soft cloth and buff the area. If the stain persists, you can repeat the process. For more stubborn white rings, a light application of rubbing alcohol (tested first on an inconspicuous area) or specialized commercial white ring removers may be more effective. Always follow product instructions carefully and use sparingly to avoid damaging the finish further.
Step 4: Carefully Remove Paint Spatters
Accidental paint spatters are a common nuisance, but they can be removed from furniture surfaces without damaging the underlying finish if approached with care and precision. The key is to scrape off the paint while maintaining a slight distance between the sharp edge of your razor blade and the precious wood surface.
To achieve this, take a sharp razor blade or utility knife and wrap the ends of the blade with masking tape. This creates a small buffer zone on either side of the blade, preventing its sharp corners from unintentionally scratching or digging into the wood. Hold the blade at a very shallow angle, almost parallel to the furniture surface. Gently and slowly push the blade underneath the paint spatter, allowing the taped edges to lift the blade ever so slightly off the wood. The goal is for the blade to scrape off only the dried paint, leaving the original finish untouched. Work with light pressure and short, controlled strokes. For very thin or widespread spatters, you might also try carefully rubbing with a cloth dampened with mineral spirits, as this can sometimes soften the paint enough to remove without scraping. Patience and a steady hand are essential here to prevent any accidental damage.
RELATED: 39 Ways To Transform Your Old Furniture
Step 5: Fix Missing Wood Sections with Wood Epoxy
Missing chunks of wood, deep gouges, or significant cracks can seem like insurmountable problems, but wood epoxy offers a remarkably effective and durable solution. This two-part filler allows you to reconstruct damaged areas, providing a solid foundation that can be shaped, sanded, and stained to blend seamlessly with the surrounding wood.
Wood epoxy is DIY-friendly, but working with it requires speed and precision. Once the two components are mixed, you’ll typically have less than 10 minutes before it begins to solidify, so prepare everything in advance. Start by thoroughly cleaning and drying the area to be repaired. Mix the epoxy according to the manufacturer’s instructions, ensuring a consistent blend. Then, apply the epoxy to the void, overfilling it slightly. Crucially, before it fully hardens, use your fingers (wearing gloves!) or a small shaping tool to mold the epoxy into the desired form, mimicking the contours of the original wood. You can moisten your finger slightly with water to smooth the surface and prevent the epoxy from sticking. Use the edge of a razor blade or a putty knife to carefully level the epoxy, scraping off any excess while it’s still pliable. This proactive shaping minimizes the amount of sanding and shaping required once it cures, which can be challenging with hardened epoxy. Allow the epoxy to dry completely for several hours (or as recommended by the product) until it’s rock-hard. Once cured, carefully sand the repaired area to blend it perfectly with the surrounding surface. Be gentle around the original finish. To achieve a seamless look, you will then need to apply a gel stain that matches the existing wood grain and color, ensuring the repair becomes virtually invisible.
Here are easy steps to follow for applying epoxy:
- Using your finger (with a glove), gently shape the epoxy to match the wood’s contour and smoothen the surface.
- If the epoxy starts to feel too sticky, put a very small amount of water on your finger to moisten and loosen it up a bit, aiding in the smoothing process.
- While the epoxy is still workable, use the edge of a razor blade or a putty knife to carefully level the surface, scraping off any excess and ensuring it’s flush with the surrounding wood.
Wait for several hours, or follow the epoxy manufacturer’s recommendation for full curing time. Once completely dry and hard, you can begin careful sanding and then staining the repaired surface. Exercise extreme caution during sanding to avoid damaging the original finish adjacent to the repair. The ultimate goal is to make the repair blend and look like the surrounding veneer or solid wood. To achieve this, select a gel stain with the appropriate color and apply it strategically to match the existing grain and color tones.
Step 6: Revitalize the Finish with Gel Stain
One of the most appealing aspects of restoring furniture without stripping is the ability to refresh the existing finish, rather than completely removing it. Gel stain is an excellent choice for this, as its thick consistency allows for controlled application over an existing finish that is in good condition, adding color and depth without penetrating deeply into the wood. It’s particularly useful for evening out color, blending repairs, or simply giving a tired finish a new lease on life.
Here’s how to apply gel stain for a professional-looking finish:
- Preparation: Before applying the gel stain, gently wet sand the entire surface with 320-grit sandpaper. The purpose of wet sanding here is not to remove the original finish, but to create a micro-scratched surface that provides mechanical adhesion for the gel stain. Use a small amount of water or mineral spirits as a lubricant during sanding. After wet sanding, thoroughly clean the surface to remove all sanding dust and allow it to dry completely for a few hours.
- Application: Always wear protective gloves to avoid staining your hands. Apply an even, thin coat of gel stain to the surface using a clean cloth, foam brush, or staining pad. Work in sections, applying the stain in the direction of the wood grain. The goal is a uniform application.
- Wiping Excess: Immediately after applying the stain to a section, use a separate clean, dry staining pad or cloth to wipe off all excess stain. This is a critical step; if too much stain is left on the surface, it can dry unevenly or become tacky. Wipe down the entire stained surface, ensuring there are no streaks, lap marks, or puddles left behind. The idea is to leave a very thin, consistent layer of stain.
- Drying and Topcoat: Allow the gel stain to fully dry for at least 24 hours (or longer, depending on humidity and product instructions). Once completely dry, it’s essential to seal the finish with a protective topcoat of your choice. A clear polyurethane, varnish, or lacquer will provide durability, protect the stain, and enhance the sheen. Apply thin, even coats according to the topcoat product’s instructions, allowing adequate drying time between coats. This final layer will make your refreshed finish resistant to wear and tear.
Step 7: Discreetly Fix Small Furniture Cracks and Imperfections
Small cracks, nicks, and minor gouges are inevitable signs of a furniture piece’s age and use. While they might seem minor, they can detract from the overall appearance. Fortunately, these imperfections are relatively easy to fill and blend, thanks to readily available wax filler sticks and repair sticks sold at most paint or hardware stores.
Wax sticks are semi-soft, colored fillers that come in a variety of wood tones, making it easy to find a match for your furniture. Their malleability makes them incredibly user-friendly:
- Preparation: Before applying the wax, ensure the damaged area is clean and free of loose debris. Carefully scrape away any loose splinters or bits of wood around the crack. If there are any sharp or raised edges, gently sand them down until they are flush with the surrounding wood surface. Be meticulous during this step to avoid inadvertently scratching or damaging the intact finish around the repair.
- Application: To use the wax stick, you have a couple of options. For smaller cracks, you can simply rub the end of the wax stick directly over the damaged area, pressing firmly to ensure the wax fills the void completely. For larger or deeper cracks, you might find it easier to use your finger (or a small putty knife) to take a piece of the wax off the stick, then press it firmly into the damaged area. Overfill the crack slightly to ensure a complete fill.
- Blending and Removal: Once the crack is filled, use a soft, clean cloth (or the edge of a plastic scraper) to gently rub off any excess wax from the surrounding surface. Buff the area lightly to ensure the wax blends smoothly with the existing finish, leaving no noticeable residue or streaks. The goal is for the repair to be inconspicuous, allowing the natural beauty of the wood to shine through.
Step 8: Repair Dents and Indentations
Dents in wood furniture are often caused by impact, where the wood fibers are compressed rather than completely removed. This means the fibers are still there; they just need a little encouragement to return to their original state. Heat and moisture are your allies in this process, helping the wood fibers to swell and rise.
- Moisten the Dent: Begin by placing a single drop of water directly into the dent. Allow this water to penetrate the wood fibers for a few minutes. This initial moisture starts the process of rehydrating the compressed wood.
- Apply Heat and Steam: Place a clean, damp cloth (not soaking wet) directly over the area where the dent is located. Ensure the cloth covers the dent entirely.
- Iron the Area: Take a hot clothes iron (set to a medium-high setting with steam if possible, but be careful not to scorch the cloth or wood) and gently press it onto the damp cloth directly over the dent. The heat from the iron will convert the moisture in the cloth and the wood into steam. This steam penetrates the compressed wood fibers, causing them to expand and gradually push the dent upwards.
- Repeat if Necessary: Apply the iron for about 10-20 seconds at a time, checking the progress. Be careful not to hold the iron in one spot for too long to avoid burning the finish or the wood. You might need to repeat this process several times, replenishing the water in the cloth as needed, until the dent rises to be flush with the surrounding surface. For deeper dents, complete removal might not be possible, but significant improvement can almost always be achieved. Once the dent is raised, allow the area to dry completely before proceeding with any final finishing steps.
Step 9: Apply the Final Wipe-on Finish for Protection and Sheen
The final wipe-on finish is the crowning glory of your restoration project, providing protection to the repaired and refreshed surfaces while enhancing their natural luster and depth. Whether you choose an oil-based finish, a wiping varnish, or a thin polyurethane, the application technique is key to a flawless result.
Pour a small amount of your chosen wipe-on finish onto a clean, lint-free cloth. Begin applying the finish to the furniture surface in a gentle, swirling motion to ensure even coverage. This method helps to work the finish into the grain and achieve a uniform coat. Once the entire surface is covered, immediately switch to wiping along the direction of the wood grain. This step is crucial for removing any excess finish and preventing streaks or uneven buildup. The goal is to leave a very thin, consistent layer of finish. Allow the first coat to dry overnight, or as recommended by the product manufacturer. Depending on the desired level of protection and sheen, you may apply additional coats, lightly sanding with very fine-grit sandpaper (e.g., 400-grit) between coats if recommended, and always wiping away dust thoroughly. Multiple thin coats are always superior to one thick coat, as they cure harder and provide a more durable finish. With careful application and patience, your restored furniture piece will look as good as new, ready to grace your home for many more years.
The best ways to restore wooden furniture in this video from Quest TV:
There you have it! Embarking on a furniture restoration project, especially without the intensive process of stripping, is a rewarding endeavor. It’s a journey that demands a little patience, keen observation, and sound judgment, from the initial assessment of the finish to the final protective wipe-on coat. By following these steps, you can avoid the mess and chemicals associated with traditional stripping, preserving the original character of your furniture while breathing new life into it. Regaining the inherent beauty and quality of your cherished pieces will undoubtedly be a fulfilling experience, leaving you with furniture that tells a story and continues to add charm to your living space.
What are your thoughts about this furniture restoration process? Share them with us in the comments section below!
UP NEXT:
- Embellish Your Dining Space with Luxury Buffet Furniture
- 20 Awesome Chalk Paint Furniture Ideas
- 39 Easy Finger Foods | Recipes And Ideas For Your Party
Stay connected with us on Facebook, Twitter, and Instagram!Editor’s Note: This post was originally published on January 8, 2016, and has been updated for quality and relevancy.