
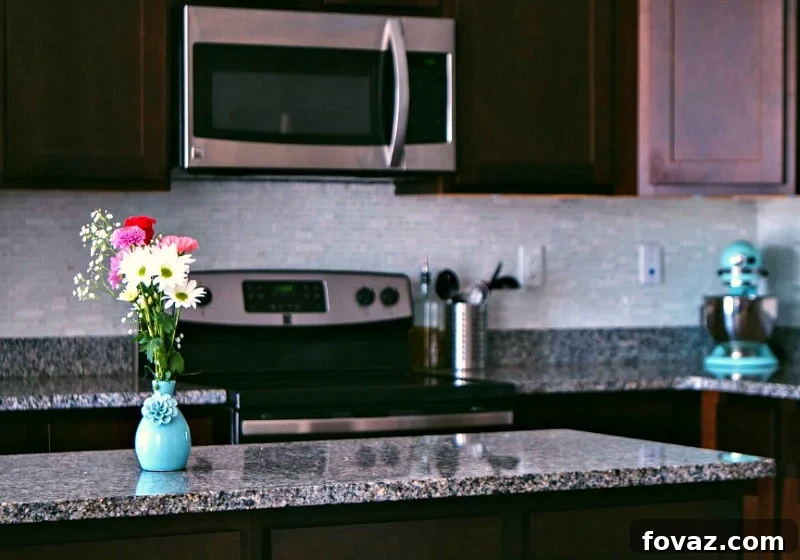
How to Refinish Kitchen Countertops: A DIY Guide for a Stunning, Budget-Friendly Makeover
The kitchen is the heart of the home, but a full-scale renovation can feel more like heartbreak for your wallet. With professional kitchen remodels often soaring past the $15,000 mark, many homeowners feel that a fresh new look is simply out of reach. But what if you could achieve a dramatic transformation in a single weekend for less than $100? It’s not only possible; it’s a project you can tackle yourself.
This comprehensive guide will walk you through the process of refinishing your kitchen countertops using one of the most accessible and budget-friendly methods available: countertop paint. We’ll explore all your options, detail why paint is a fantastic starting point for beginners, and provide a meticulous step-by-step plan to ensure a durable, beautiful finish that lasts for years.
Exploring Your DIY Countertop Options: From Paint to Epoxy
Before we dive into our featured method, it’s important to understand the landscape of DIY countertop solutions. Each has its own price point, skill requirement, and lifespan. Knowing your options ensures you’re making the best choice for your home, budget, and DIY comfort level.
- Contact Paper ($20 – $40): Often called the renter’s best friend, this adhesive vinyl film comes in countless patterns, from realistic marble to warm wood grains. It’s the cheapest and fastest option, but also the least durable. Expect it to last 1-2 years with gentle use, as it’s susceptible to tears and heat damage.
- Countertop Paint Kit ($50 – $80): This is our focus for a reason. These specialized kits are formulated for high-traffic kitchen environments. They offer a solid color finish and, with proper preparation, provide a durable surface that can last 3-5 years. It’s incredibly forgiving for first-timers.
- Tile Paint ($30 – $50): If you’re dealing with dated ceramic tile countertops, this is your go-to. It’s designed to adhere strongly to glazed surfaces, but remember that it won’t hide the grout lines, which will also need to be sealed.
- Concrete Overlay ($60 – $120): For a modern, industrial aesthetic, a thin layer of troweled-on concrete can completely transform your counters. This method creates a seamless, highly durable surface that can last 5-8 years. However, it requires more skill, patience, and comfort with a trowel.
- Epoxy Resin Kit ($80 – $150): This is the premium DIY option, delivering a glossy, glass-like finish that can mimic high-end granite or marble with stunning realism. When done correctly, an epoxy countertop can last 7-10 years. The downside is that it’s the least forgiving method; precise mixing, temperature control, and a dust-free environment are critical for success.
Why Countertop Paint is the Best Choice for Beginners
For your first foray into countertop refinishing, we wholeheartedly recommend a high-quality countertop paint kit. It strikes the perfect balance of affordability, ease of application, and durability. Unlike epoxy, there’s no complex mixing or race against curing time. Unlike a concrete overlay, you don’t need specialized troweling skills. The process is straightforward: clean, prime, paint, and seal. It’s a project that builds confidence, and the skills you learn—thorough preparation, proper priming, and applying a protective topcoat—are foundational for any future home improvement project.
Your Shopping List: Tools and Materials for a Perfect Finish
One trip to the hardware store is all you need. This entire project, using the paint method, should cost between $50 and $80.
Essential Tools:
- Painter’s tape
- Drop cloths or plastic sheeting
- Lint-free rags
- Putty knife or utility knife
- Caulk gun
- 4-inch high-density foam roller and tray
- 2-inch angled paintbrush (for cutting in edges)
- Sandpaper (220-grit and 320-grit)
- Nitrile gloves and safety glasses
Essential Materials:
- Degreasing Cleaner: Dish soap with a scrubbing pad works, but a TSP (trisodium phosphate) substitute is even better for cutting through years of kitchen grime.
- Kitchen & Bath Silicone Caulk: Choose a 100% silicone, mold-resistant formula.
- Bonding Primer: This is crucial. Products like Zinsser B-I-N or STIX are designed to adhere to slick, non-porous surfaces. Do not use standard wall primer.
- Countertop Paint: Rust-Oleum Countertop Coating is a popular, reliable choice available in a tintable base.
- Water-Based Polyurethane Topcoat: This is the armor for your countertop. A clear coat in a satin or semi-gloss finish will provide the necessary durability.
- Optional – Liquid Deglosser: If you want to avoid the fine dust from sanding, a liquid deglosser (or liquid sandpaper) chemically etches the surface to promote adhesion.
Critical Prep: 3 Checks Before You Start
A successful paint job is 90% preparation. Rushing these initial steps is the number one cause of peeling and failure. Before you open a single can of paint, perform these three quick checks.
- The Tape Test: Firmly press a piece of strong painter’s tape onto your existing countertop. Rip it off quickly. If any flakes of the old finish, laminate, or paint come off with the tape, the surface is unstable. You will need to strip or thoroughly sand away the failing layer before proceeding.
- The Seam Inspection: Carefully examine the seams along the backsplash and around the sink. Is the caulk cracked, peeling, or soft? If so, it must be completely removed and replaced. Painting over a failing seam traps moisture, which can lead to mold and rot in the particleboard substrate beneath.
- Identify Your Surface: Is your countertop laminate (like Formica), ceramic tile, or solid wood (butcher block)? Most paint kits are designed for laminate. Tile will require a specific tile-friendly primer, and butcher block should ideally be sanded and refinished with food-safe oil, not paint.
How to Paint Kitchen Countertops: Your 8-Step Guide to Success
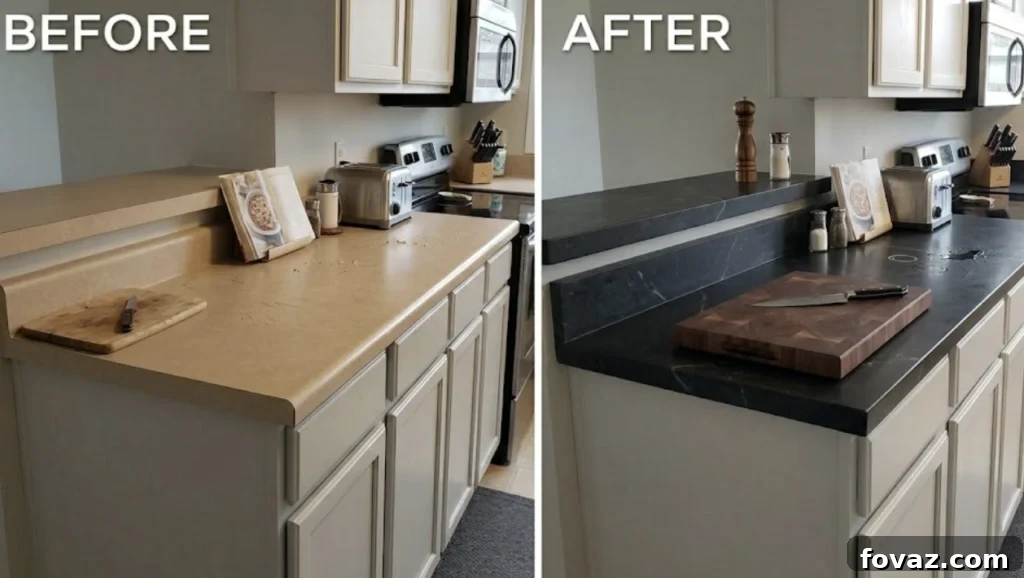
With your materials gathered and prep checks complete, it’s time to transform your kitchen. Follow these steps meticulously for a professional-grade result.
Step 1: Deep Clean the Surface
Remove everything from your countertops. Using your TSP substitute or a strong degreasing soap, scrub the entire surface vigorously. Pay special attention to areas around the stove and sink where grease and grime accumulate. Any residue left behind will prevent the primer from bonding correctly. Rinse the surface twice with clean water and a lint-free rag, then allow it to dry completely.
Step 2: Remove Old Caulk and Reseal
Using a putty knife or utility knife, carefully slice and scrape away all the old caulk from around the sink and along the backsplash. Clean the now-empty seam with rubbing alcohol to remove any residue. Apply a fresh, continuous bead of 100% silicone caulk. Smooth the bead with a wet fingertip or a caulk finishing tool for a clean, professional line. Allow the caulk to cure for at least 24 hours as specified by the manufacturer.
Step 3: Create a Grippable Surface (Sand or Degloss)
The goal here is to remove the glossy sheen from your laminate. This creates a “tooth” for the primer to grip onto. Either lightly scuff the entire surface with 220-grit sandpaper or apply a liquid deglosser according to the product directions. If you sand, be sure to vacuum up all the dust and then wipe the surface with a damp, lint-free cloth. Ensure the countertop is perfectly clean and dry before the next step.
Step 4: Tape and Protect
This step may seem tedious, but it will save you immense cleanup time. Use high-quality painter’s tape to create a clean edge along the walls, backsplash, and under the countertop lip to protect your cabinets. Tape off your sink and faucet fixtures. Lay drop cloths over the floor and lower cabinets to catch any drips.
Step 5: Apply the Bonding Primer
Using your angled brush, “cut in” the primer along the edges and backsplash. Then, using your 4-inch foam roller, apply a thin, even coat of bonding primer to the rest of the surface. A thin coat is more effective than a thick one. Let the primer dry for the time recommended on the can, typically 2-4 hours.
Step 6: Paint Your Countertop
Stir your countertop paint thoroughly. As you did with the primer, cut in the edges first with your brush. Then, apply the first thin coat of paint with the foam roller. Avoid pressing too hard and watch for lap lines. Let this coat dry for at least 4 hours, or as directed. Apply a second thin coat for full, even coverage. Two thin coats are always better than one thick coat, which can lead to bubbling and improper curing.
Step 7: Lock It In with a Durable Topcoat
The clear topcoat is what gives your countertop its long-term durability. After the final paint coat has dried for the recommended time, lightly sand the entire surface with 320-grit sandpaper. This feels counterintuitive, but it helps the topcoat adhere better. Wipe away the dust with a tack cloth or damp rag. Apply your first thin coat of water-based polyurethane with a new, clean foam roller. Work in one direction to minimize roller marks. Allow it to dry, then apply a second and final coat. Two coats are non-negotiable for durability.
Step 8: The Curing Process (The Hardest Part!)
This is the most critical and often-rushed step. Your countertop might feel dry to the touch in a few hours, but it is not fully cured. Curing is a chemical process where the paint and polyurethane harden to their maximum durability.
- After 24-72 hours: You can engage in very light use. You can set light objects like a coffee mug down, but be gentle.
- After 7 days: The surface is ready for normal use. You can now use your appliances and clean the surface gently.
- After 30 days: The countertop is fully cured and has reached its maximum hardness.
Rushing this process is the primary reason for premature peeling and chipping.
When to Skip DIY and Hire a Pro
Paint is a surface solution; it cannot fix underlying structural issues. If you notice any significant problems with your countertops, it’s best to pause the DIY project. Look for soft spots (which indicate water damage to the particleboard substrate), swelling, or areas where the laminate is peeling away from the base (delamination). Painting over these issues will only temporarily hide them, and the problem will worsen. In these cases, you’re better off considering professional resurfacing (around $300-$600) or a full replacement with new laminate ($400-$800), both of which are still significantly cheaper than a major renovation.
Frequently Asked Questions About DIY Countertop Refinishing
1. What is the absolute cheapest way to update kitchen countertops?
Adhesive contact paper, at $20-$40, is the cheapest method. However, for a solution that involves actual refinishing and offers greater durability, a countertop paint kit at $50-$80 provides the best value.
2. How long does an epoxy countertop last?
When applied correctly with meticulous prep in a temperature-controlled environment, a high-quality epoxy countertop can easily last 7 to 10 years, offering a finish comparable in durability to solid surfaces.
3. Can you paint laminate countertops without sanding?
Yes. Using a liquid deglosser is an excellent, mess-free alternative to sanding. It chemically dulls the glossy surface, creating the necessary profile for the bonding primer to adhere strongly.
4. How do you prevent painted countertops from peeling?
Success hinges on three things: 1) Flawless prep, including a thorough cleaning and deglossing step. 2) Applying multiple thin coats of paint and topcoat, never one thick coat. 3) Respecting the full 7-day cure time before resuming normal kitchen activities.
5. How do you clean and maintain painted countertops?
Treat them with care. Use mild, non-abrasive cleaners like dish soap and water. Avoid harsh chemicals like bleach or ammonia. Always use cutting boards for chopping and trivets for hot pots and pans. With these simple habits, your finish will stay looking fresh for years.