
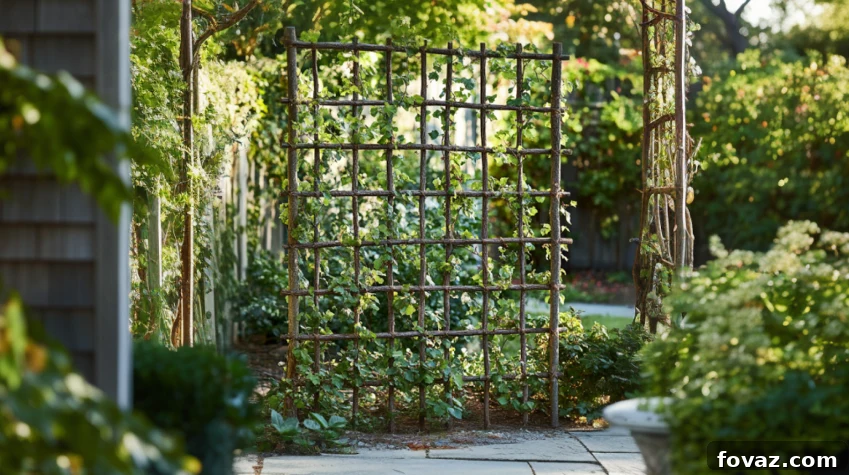
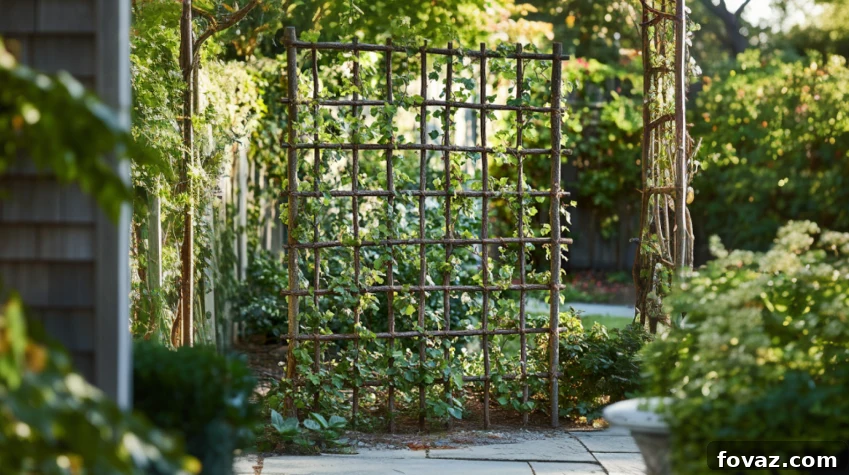
Are you eager to transform your ordinary backyard into an extraordinary green sanctuary? Building a homemade trellis is a fantastic way to elevate your gardening endeavors, literally and figuratively. This rewarding DIY project not only introduces a touch of rustic elegance to your outdoor space but also revolutionizes how you cultivate your plants. Whether you’re a seasoned green thumb or just embarking on your gardening journey, crafting your own sturdy and beautiful trellis is an accessible and highly beneficial undertaking. Get ready to unlock the full potential of vertical gardening and create a breathtaking masterpiece right in your own backyard!
Imagine your garden flourishing upwards, showcasing vibrant blooms and bountiful harvests. Let’s dive into the exciting process of building your very own garden trellis and start creating that stunning vertical landscape today!
Why Building Your Own Homemade Trellis is a Game-Changer
Opting to construct your own garden trellis goes far beyond mere practicality; it’s a strategic and creative decision that yields a multitude of advantages for both your plants and your garden’s overall aesthetic. Here’s a closer look at precisely why this DIY project is an invaluable investment of your time and effort:
Maximize Garden Space with Vertical Growth
In gardening, space is often a precious commodity. A homemade trellis ingeniously addresses this challenge by enabling you to cultivate plants vertically. This innovative approach frees up invaluable ground space, which can then be allocated to other crops, ornamental flowers, or even comfortable seating areas. By maximizing every square inch of your garden’s layout, you ensure that your outdoor environment is both productive and aesthetically pleasing. Vertical gardening not only increases yield in smaller spaces but also makes your garden appear larger and more dynamic.
Boost Plant Health and Vigor
Elevating your plants off the ground offers significant health benefits. Improved air circulation around the foliage drastically reduces the risk of fungal diseases and mildew, common issues for ground-hugging plants. Furthermore, plants on a trellis receive more consistent and equitable sunlight exposure throughout the day, which is crucial for photosynthesis and robust growth. The result is stronger, healthier, and more resilient plants that thrive in optimal conditions, leading to more vibrant blooms and more abundant harvests.
Enhance Visual Appeal and Garden Aesthetics
A custom-built trellis acts as a striking architectural element, adding significant vertical interest and depth to your garden design. It can transform a flat, two-dimensional space into a dynamic, multi-layered landscape. Imagine lush vines cascading down or vibrant flowers climbing upwards, creating a picturesque focal point. Your homemade trellis isn’t just a support structure; it’s an integral part of your garden’s visual narrative, drawing the eye and enhancing the natural beauty of your plants with its rustic charm and bespoke design.
Simplify Harvesting and Garden Maintenance
Trellising makes the act of harvesting fruits and vegetables like tomatoes, cucumbers, peas, and beans considerably easier and more efficient. No more excessive bending or stooping to find hidden produce! Crops grown on a trellis are often cleaner, as they are kept off the soil, reducing pest access and rot. This organized growth also makes monitoring plant health, pruning, and general maintenance a much more enjoyable and less strenuous task, turning gardening chores into a pleasure rather than a burden.
Cost-Effective and Eco-Friendly Gardening Solution
Building a trellis from materials readily available in your backyard, such as fallen branches, is incredibly cost-effective. Instead of purchasing expensive pre-made structures, you can create a robust and beautiful trellis using natural, sustainable resources. This approach not only saves money but also promotes eco-friendly practices by repurposing natural materials, reducing waste, and lessening your environmental footprint. It’s a sustainable choice that benefits both your wallet and the planet.
Curious about how a homemade trellis can truly transform your garden into a productive and beautiful oasis? Explore our detailed guide to uncover all the secrets and empower you to start your project with confidence and creativity!
Gathering Materials and Tools for Your DIY Trellis Project
Before you embark on the rewarding journey of building your homemade trellis, a critical first step is to methodically gather all the necessary materials and tools. Having everything at hand will ensure a smooth, efficient, and enjoyable construction process. Here’s a comprehensive list of what you’ll need to create your sturdy and beautiful garden support:
- Sturdy Backyard Branches or Bamboo Poles: The foundation of your trellis. Select strong, straight branches from your garden or a nearby wooded area. Look for hardwoods like oak, maple, or even robust bamboo poles. They should ideally be 1 to 2 inches in diameter for good support, and ensure they are relatively dry to prevent warping or rotting once assembled. The length will depend on the desired height of your trellis.
- Natural Twine or Durable Garden Wire: These are crucial for securely binding your branches together. Natural jute twine offers a rustic aesthetic and is biodegradable, while weather-resistant garden wire (such as galvanized steel or plastic-coated wire) provides superior long-term durability against the elements. Consider the weight of the plants your trellis will support when making your choice.
- Sharp Pruning Shears or a Small Saw: Essential for trimming branches to their precise desired lengths and removing any small offshoots. A sharp tool ensures clean cuts, which are important for both aesthetics and structural integrity. For thicker branches, a small hand saw might be more appropriate.
- Measuring Tape: Accuracy is key in construction. A reliable measuring tape will help you cut branches to uniform lengths and ensure proper spacing for a symmetrical and well-proportioned trellis that perfectly fits your designated garden space.
- Optional: Wood Stain, Paint, or Natural Preservative: To enhance the longevity and visual appeal of your trellis. A good quality exterior wood stain or paint can protect the wood from moisture, UV rays, and pests, significantly extending its lifespan. Alternatively, natural oils like linseed oil can offer protection while maintaining a more rustic, untreated look. Choose non-toxic options if you plan to grow edible plants near the trellis.
- Work Gloves: To protect your hands from splinters, cuts, and dirt during the gathering and assembly process.
- Safety Glasses: Especially important when using pruning shears or saws to protect your eyes from debris.
For an in-depth guide on selecting the most appropriate and sustainable materials for all your garden creations, be sure to explore our Comprehensive Gardening Materials Guide.
Designing Your Perfect Homemade Trellis
Designing your homemade trellis is an exciting phase where creativity meets practicality. This initial planning stage is paramount to ensuring your structure is not only functional and robust but also beautifully complements your garden’s aesthetic. Careful consideration of plant needs, garden space, and desired style will lead to a truly successful and lasting garden feature.
Step 1: Envisioning Your Trellis Design
Before you even touch a branch, take a moment to visualize your ideal trellis. Consider the types of climbing plants you intend to grow – do they need wide, sturdy supports (like cucumbers) or fine, intricate grids (like peas)? Think about the available space in your garden; is it a narrow bed, an open wall, or a large open area? Common and effective trellis styles include:
- A-Frame Trellis: Excellent for support on both sides, perfect for beans or cucumbers in rows.
- Fan-Shaped Trellis: Ideal for single plants that spread outwards, like raspberries or certain roses, providing a beautiful display.
- Ladder-Style Trellis: A simple, strong vertical structure with horizontal rungs, versatile for many climbing vegetables and flowers.
- Obelisk or Pyramid Trellis: A freestanding, conical structure great for focal points in garden beds, supporting plants like clematis or small gourds.
- Grid Trellis: Often wall-mounted, providing extensive support for heavier vines and creating a green wall effect.
Sketching a rough design will serve as an invaluable guide during construction, helping you solidify dimensions and the arrangement of branches. Consider the overall height and width you desire, ensuring it’s proportionate to your garden and the mature size of your plants.
Step 2: Gathering and Preparing Your Chosen Materials
With your design firmly in mind, it’s time to gather your branches. Venture into your backyard or a nearby natural area (with permission, if necessary) to collect suitable wood. Focus on finding straight, sturdy branches, ideally 1 to 2 inches in diameter, free from significant rot or pest damage. For a rustic look, you can leave the bark on, but consider stripping it if you want a cleaner finish or plan to paint/stain the wood, as this can also help prevent insect infestations.
Once collected, use your pruning shears or saw to trim the branches to the lengths specified in your design. Lay them out on a flat surface to confirm they meet your size requirements. If the branches are fresh or slightly damp, allow them to air dry for a few days in a shaded, well-ventilated area. This minimizes shrinkage and increases the structural integrity of your finished trellis. Ensure all materials are clean and free of loose debris before moving on to assembly.
Building Your Homemade Trellis: Step-by-Step Instructions for Success
With your design finalized and materials prepared, the exciting phase of assembling your homemade trellis begins. These detailed instructions will guide you through each critical stage, ensuring your structure is not only functional and aesthetically pleasing but also exceptionally sturdy and ready to support your climbing plants for seasons to come.
Step 3: Assembling the Main Frame
Begin by laying out your primary vertical support branches on a flat, even surface, aligning them exactly as planned in your design sketch. These will form the backbone of your trellis, so ensure they are spaced equally to guarantee optimal stability. For a standard ladder or A-frame trellis, you’ll typically have two to four main vertical supports. Once the vertical branches are positioned, introduce the horizontal branches that will form the base and provide initial cross-support. Use your strong twine or garden wire to securely tie the joints where branches intersect. Employ a robust knot, such as a square knot or a figure-eight knot, ensuring each connection is tight and doesn’t allow for excessive wobble. The more secure the initial frame, the more durable your entire trellis will be.
Step 4: Adding Intricate Cross Supports for Plant Climbing
After the main frame is firmly assembled, the next crucial step is to add the cross supports that will serve as the climbing grid for your plants. Depending on your chosen design and the specific needs of your plants, these supports can be horizontal, vertical, or even diagonal. For smaller vines like peas, closer spacing (4-6 inches) is beneficial, while larger, more robust plants like cucumbers or gourds might require wider spacing (8-12 inches) to accommodate their thicker stems and fruit.
Carefully measure and cut your smaller branches or sticks for these supports. Attach each cross support to the main frame using the same strong twine or garden wire, making sure each connection is evenly spaced and tightly bound. This intricate network not only provides ample climbing opportunities but also significantly enhances the overall rigidity and strength of your trellis. Double-check all knots to ensure they are secure and will withstand the weight of mature, fruit-laden plants.
Step 5: Securely Anchoring Your Trellis in the Garden
Choosing the right location for your trellis is as vital as its construction. Select a spot in your garden that receives ample sunlight – most climbing plants thrive with at least 6-8 hours of direct sun daily. Once the ideal location is identified, dig holes for the base of your vertical supports. These holes should be deep enough to provide substantial stability, typically 12-18 inches, depending on the height and size of your trellis.
Carefully place the trellis into the prepared holes, ensuring it stands perfectly upright and level. Then, backfill the holes with soil, compacting it firmly around the base of the branches. You can use your foot or a tamper to press the soil down, eliminating air pockets and creating a secure anchor that will prevent the trellis from shifting or toppling, especially during strong winds or under the heavy weight of mature plants. For extra stability, especially with very tall or heavy-duty trellises, consider adding a layer of gravel at the bottom of the holes before backfilling with soil, or even mixing a small amount of concrete for a permanent fixture.
Step 6: Optional Finishing Touches for Durability and Aesthetics
To truly personalize your homemade trellis and extend its lifespan, consider adding some finishing touches. For a polished and protective look, you might choose to paint or stain the entire structure. Select a color that either blends seamlessly with your garden’s natural palette or creates a vibrant contrast, making your trellis a true focal point. Ensure you use an exterior-grade, weather-resistant paint or stain that is safe for garden use, especially if you’re growing edible plants nearby.
If you prefer a more natural appearance, applying a clear wood sealant or a natural oil (like linseed oil) can protect the branches from moisture and UV degradation without altering their rustic charm. After applying any finish, allow it to dry completely, following the manufacturer’s instructions, before introducing any plants. This crucial step not only enhances the visual appeal of your trellis but also provides a vital layer of protection, making your custom-built structure resilient against the elements and ensuring it remains a beautiful and functional part of your garden for many seasons to come.
Choosing the Best Plants for Your Homemade Trellis
The success of your trellis garden hinges significantly on selecting the right climbing plants and providing them with optimal growing conditions. A thoughtful combination of suitable plant varieties, coupled with meticulous attention to their specific needs, can transform your new trellis into a lush, thriving, and highly productive vertical garden. Below, you’ll find essential considerations and practical tips to help you choose the best plants and maximize the growth potential of your elevated green space.
Selecting Ideal Climbing Plants for Trellises
When choosing flora for your trellis, prioritize plants that naturally exhibit climbing tendencies and will thrive in a vertical setting. Excellent choices include a diverse array of both edibles and ornamentals. For a bountiful harvest, consider:
- Vining Vegetables: Peas (especially shelling and snap varieties), pole beans, cucumbers (bush or vining types), indeterminate tomatoes (requiring strong support), small squash and gourds (like decorative gourds or small pumpkins, with additional fruit slings if needed).
- Flowering Vines: For sheer beauty and attracting pollinators, clematis (various types offer different bloom times and colors), morning glories, sweet peas (fragrant and delicate), climbing roses (choose vigorous, repeat-flowering varieties), honeysuckle, and jasmine.
These plants possess tendrils, twining stems, or clinging roots that instinctively reach upwards, making them perfectly suited for a trellis that provides the necessary structural support for their ascent. Research specific varieties to match your climate and growing season.
Maximizing Growth Potential and Harvests
To ensure your trellis plants flourish, strategic placement and consistent care are paramount.
- Optimal Sunlight: Most climbing plants, especially fruiting vegetables, demand abundant sunlight. Position your trellis in a location that receives at least 6-8 hours of direct sunlight per day. A south-facing spot is often ideal.
- Soil Quality: Prepare the soil around the base of your trellis thoroughly. It should be rich in organic matter, well-draining, and have a pH suitable for your chosen plants. Amend heavy clay soils with compost and sand, and sandy soils with compost to improve water retention and nutrient availability.
- Watering Regimen: Vertical plants can dry out faster than ground-level plants due to increased air circulation. Implement a consistent watering schedule, ensuring the soil remains moist but not waterlogged. Drip irrigation or soaker hoses are excellent for delivering water directly to the root zone, minimizing evaporation.
- Nutrient Supply: Climbing plants, particularly those bearing fruit, are heavy feeders. Supplement your soil with a balanced, slow-release organic fertilizer at planting time, and consider liquid feeds throughout the growing season according to package directions.
- Training and Pruning: Gently guide young vines to the trellis as they begin to grow, loosely tying them if necessary. Regular pruning helps manage growth, improves air circulation, and often encourages more blooms or fruit production. Remove any yellowing, diseased, or dead foliage promptly.
By attentively addressing these factors, you can cultivate a vibrant and highly productive trellis garden that not only supports your plants but also yields an impressive bounty and enhances your outdoor living space.
Essential Tips for Successful Trellis Gardening
To truly make the most of your beautifully crafted homemade trellis and ensure a thriving vertical garden, incorporating a few expert tips into your routine will make a significant difference. These practices will help maintain plant health, maximize yields, and prolong the life of your trellis structure.
1. Select the Right Plants for Vertical Success
Beyond simply choosing climbing plants, consider their growth habit, mature size, and weight. For delicate trellises, opt for lighter vines like peas, sweet peas, or small nasturtiums. For robust structures, heavier-duty plants such as cucumbers, pole beans, indeterminate tomatoes, small pumpkins, or even climbing roses are excellent choices. Research specific varieties known for good vertical growth and disease resistance in your region.
For a broader selection and detailed profiles of ideal candidates for vertical cultivation, be sure to explore our comprehensive Climbing Plants Guide.
2. Implement Regular Trellis and Plant Maintenance
A diligent maintenance schedule is key to longevity and productivity. Regularly inspect your trellis for any signs of wear, loose ties, or structural instability, especially after strong winds or heavy rains. Tighten any loose twine or wire and repair damaged sections promptly. Similarly, keep a close eye on your plants. Prune regularly to remove dead, diseased, or overcrowded foliage, which improves air circulation, reduces the risk of fungal infections, and redirects plant energy towards fruit or flower production. Gently guide new growth onto the trellis supports to ensure even coverage and prevent tangling.
3. Master Watering and Fertilizing Techniques
Trellised plants often have different watering needs compared to their ground-bound counterparts. They can dry out faster due to increased exposure to sun and wind. Ensure your plants receive consistent and adequate moisture, especially during dry spells and when fruiting. Deep watering is generally preferred over frequent shallow watering. A drip irrigation system or a soaker hose installed at the base of your trellis is an excellent investment, delivering water directly to the roots and minimizing waste. As for nutrients, climbing plants are often heavy feeders. Incorporate organic compost or a balanced slow-release fertilizer into the soil at planting and supplement with liquid feeds during peak growth periods, following product instructions carefully.
For advanced strategies on efficient water delivery and nutrient management in your garden, learn more about innovative irrigation techniques at Gardening Know How.
4. Proactive Pest and Disease Management
Vigilance is your best defense against garden pests and diseases. Regularly inspect the leaves, stems, and fruits of your trellised plants for any early signs of trouble, such as discolored spots, chewed leaves, or the presence of insects. Early detection allows for more effective and less invasive interventions. Employ organic pest control methods whenever possible, such as hand-picking larger pests, using insecticidal soaps for aphids, or introducing beneficial insects like ladybugs. Maintaining good garden hygiene, ensuring proper air circulation through pruning, and choosing disease-resistant plant varieties are also crucial preventative measures.
Discover a wide array of natural and sustainable strategies for keeping your garden healthy and pest-free by visiting The Old Farmer’s Almanac on natural pest control methods.
5. Consider Seasonal Care and Winterization
Depending on your climate, your homemade trellis might need seasonal attention. For annual plants, you’ll remove them at the end of the season. For perennial vines, consider pruning them back in late winter or early spring to encourage new growth. If your trellis is made of natural branches and is freestanding, you might consider reinforcing its base or even moving it to a sheltered location during harsh winter conditions to extend its life. Protecting the wood from prolonged moisture during dormant seasons can prevent rot and decay.
Elevate Your Garden’s Beauty and Productivity with a Homemade Trellis
Embarking on the journey to build your own homemade trellis is far more than just a simple gardening task; it’s a profoundly rewarding project that intertwines creativity, sustainability, and practicality. Not only does this custom structure provide essential support for your climbing plants, encouraging healthier growth and more abundant yields, but it also significantly elevates the overall aesthetic charm and visual interest of your outdoor space.
With just a handful of readily available materials and some fundamental tools, you possess the power to craft a bespoke trellis that perfectly complements your garden’s unique character and meets the specific needs of your plants. This hands-on endeavor allows you to express your individual style, transform a simple garden bed into a dynamic vertical landscape, and create a delightful, productive area that you’ll cherish for years to come. Embrace the satisfaction of DIY and watch your garden flourish to new heights!
For more inspiring ideas, detailed instructions, and innovative solutions to enhance your outdoor sanctuary, explore our complete guide to DIY Garden Projects and discover countless ways to continue beautifying your green space.