
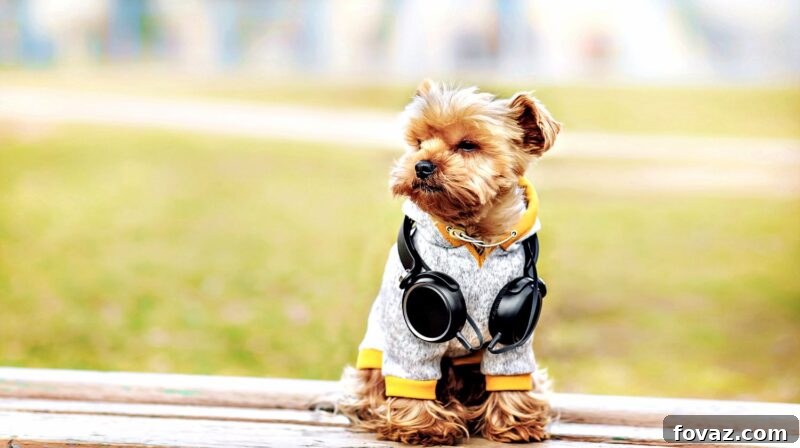
Transforming old fleece wear into stylish and functional pet apparel has never been easier! Discover how to create an adorable, no-sew dog jacket that will keep your furry friend warm, comfortable, and looking their best. This DIY project is perfect for pet parents looking for a budget-friendly and sustainable way to expand their pup’s wardrobe.
RELATED: 21 DIY Dog Clothes And Coats You Should Make
In this comprehensive guide, you’ll learn:
- Why Make a No-Sew Dog Jacket?
- Essential Tools & Materials
- Method 1: Upcycled Fleece Pants Dog Jacket
- Method 2: Upcycled Old Fleece Shirt Sleeve Dog Jacket
- Tips for a Perfect Fit & Customization
DIY No-Sew Dog Jacket: Easy Upcycled Fleece Designs for Your Beloved Pet
Give your dog the gift of warmth and style with a custom-made jacket that requires absolutely no sewing! Using simple materials like an old fleece shirt or a pair of track pants, you can craft a cozy and fashionable jacket that’s perfect for chilly weather or just adding a touch of flair to your pup’s ensemble. This guide provides two straightforward methods, ensuring that even beginners can achieve fantastic results. Say goodbye to expensive pet store finds and hello to sustainable, personalized dog apparel that you can be proud of.
Whether your furry companion needs extra warmth during cold weather walks, protection from light rain, or simply a stylish accessory, a no-sew fleece dog jacket is the perfect solution. It’s an accessible project that prioritizes your dog’s comfort and your desire for a creative, eco-conscious solution.
Why Make a No-Sew Dog Jacket?
The Growing Appeal of DIY Pet Apparel
Many pet owners delight in dressing up their dogs, and for a multitude of valid reasons! Beyond the undeniable cuteness factor, pet clothing serves practical purposes, from protecting delicate breeds from harsh weather to helping senior dogs stay warm and comfortable. However, purchasing dog clothes can often be an expensive endeavor, and finding items that offer a perfect, non-restrictive fit can be surprisingly challenging. This is precisely where the magic of DIY solutions, especially no-sew projects, comes to the rescue, empowering pet parents to create bespoke items.
Unveiling the Benefits of Crafting a No-Sew Dog Jacket
Choosing to create a no-sew dog jacket offers a compelling list of advantages that benefit both you and your cherished pet:
- Unbeatable Cost-Effectiveness: Instead of investing in new, often pricey, pet store apparel, you’re cleverly repurposing old clothing items you already own. This savvy approach significantly cuts down on expenses while giving new life to forgotten garments.
- Remarkably Quick & Simple: Forget about wrestling with a sewing machine or grappling with complex patterns. This project requires no needles, thread, or advanced techniques. Most no-sew jackets can be completed from start to finish in less than an hour, making it an ideal last-minute solution for unexpected cold snaps.
- A Sustainable & Eco-Friendly Choice: Embracing upcycling means diverting textiles from landfills and reducing your environmental footprint. By transforming old garments, you’re participating in a more sustainable lifestyle, giving materials a second, meaningful purpose.
- Achieve a Custom, Perfect Fit: One of the biggest challenges with store-bought dog clothes is the “one-size-fits-all” dilemma. With DIY, you can meticulously tailor the jacket to your dog’s unique measurements, guaranteeing maximum comfort, full range of motion, and a snug fit that won’t chafe or slip.
- Instant Warmth & Protection: Fleece is an exceptional material renowned for its insulating properties. It provides immediate warmth, making it ideal for keeping your dog cozy during brisk morning walks, cold evenings, or simply when they need an extra layer of comfort indoors.
- Stylish, Unique & Personal: Design a truly one-of-a-kind piece that perfectly reflects your dog’s personality and your aesthetic preferences. You can choose from a variety of colors and patterns from your existing wardrobe, ensuring your pup stands out in the park.
Imagine the satisfaction of seeing your adorable companion snug and warm in a beautifully fitted jacket you crafted with your own hands! This project is not only practical and economical but also a profoundly rewarding experience. It’s a fantastic way to utilize those old fleece items that might otherwise sit unused, transforming them into something truly special and beneficial for your furry family member.
Essential Tools & Materials for Your No-Sew Dog Jacket
Before embarking on your crafting journey, take a moment to gather these fundamental items. The beauty of this DIY project lies in its simplicity and the likelihood that you already possess most, if not all, of the necessary supplies right at home, making it incredibly convenient and budget-friendly.
- Sharp Scissors: These are absolutely crucial for achieving clean, precise cuts through fleece fabric. Using dull scissors can lead to ragged edges, make the cutting process frustratingly difficult, and potentially distort the fabric, affecting the final fit of the jacket.
- Fleece Fabric (from an Old Jumper/Sweatshirt or Track Pants): This is the hero material of our project! Fleece is ideal for no-sew projects because its edges do not fray when cut, eliminating the need for hemming. It also offers superb warmth, softness, and a comfortable stretch, perfect for dog apparel. Select a garment that is clean, free from holes or excessive wear, and has sufficient fabric for your dog’s size.
- Pins: A simple yet indispensable tool. Pins are excellent for marking precise measurements directly onto the fabric, holding layers together if you’re cutting through multiple thicknesses, and temporarily securing folds or overlaps to ensure accuracy before making permanent cuts.
- Measuring Tape: Accuracy is paramount for a well-fitting jacket, and a flexible measuring tape is your best friend here. It’s essential for taking precise measurements of your dog’s body, which will guide every cut and ensure the final garment is comfortable and functional.
That’s it! The charm of this project truly lies in its accessibility. With just these few basic items, you’re fully equipped and well on your way to crafting a fantastic, custom-fitted jacket for your beloved canine companion.
Method 1: Upcycled Fleece Pants Dog Jacket
This popular method expertly utilizes a leg from an old pair of fleece track pants or sweatpants. It’s an exceptionally clever and effective way to repurpose garments that might otherwise be discarded or languish unused, giving them a renewed purpose as stylish pet wear.
Step 1: Take Precise Measurements of Your Pup
Accuracy is the cornerstone of a comfortable, well-fitting jacket. Approach this step with care, ensuring your dog is relaxed and standing still on a flat surface. When measuring, always allow a slight bit of extra room – approximately an inch or two – to guarantee freedom of movement and supreme comfort, especially around the chest and neck areas. Do not pull the tape measure too tightly.
See an example of accurate dog measurement on Pinterest.
Carefully record the following critical measurements:
- Back Length: Measure from the very base of your dog’s neck (precisely where their collar typically rests) all the way along their spine to the top of their tail. This measurement will be the primary determinant for the overall length and coverage of the jacket.
- Neck Circumference: Gently measure around the widest part of their neck. It’s vital that this measurement is snug enough to prevent slipping but loose enough to ensure comfortable breathing and movement without restriction.
- Chest Circumference (Girth): This is a crucial measurement. Measure around the broadest section of your dog’s rib cage, typically just behind their front legs. This ensures the jacket isn’t overly tight or restrictive, allowing for proper circulation and comfort.
- Distance Between Front Legs (Chest Width): Measure horizontally across your dog’s chest, from the inside of one front leg to the inside of the other. This measurement is key for accurately positioning the armholes, preventing them from being too close or too far apart.
RELATED: How To Make Dog Treats | 21 Healthy Recipes Of Homemade Dog Treats
Step 2: Prepare Your Chosen Fleece Pants Leg
Select one leg from your old fleece track pants or sweatpants. The existing ribbed cuff at the ankle of the pant leg will ingeniously serve as the neck opening of your dog’s new jacket. Carefully assess its current elasticity and fit:
- If the ribbed cuff is inherently loose and sufficiently stretchy to allow your pup’s head to pass through with ease and comfort, you can beautifully utilize it as is. Simply roll it back a few times to create a neat, finished, and stylish collar.
- However, if the cuff appears too tight or lacks adequate stretch, it’s best to carefully cut it off completely. In subsequent steps, you will then need to create a new, wider, and more comfortable neck opening directly from the raw edge of the fabric.
Once you’ve made your decision regarding the cuff, lay the selected pant leg completely flat on a clean surface, meticulously aligning the side seams. This prepared section will form the primary body of your dog’s brand-new jacket.
Step 3: Mark and Cut Precise Holes for Paws
With the pant leg meticulously laid flat and smooth, refer to your dog’s “distance between front legs” measurement. Use this critical dimension to accurately mark the precise positions for the armholes. Place pins or use a washable fabric marker to indicate these spots. The holes should be strategically positioned closer to the cuff end (which will become the jacket’s neck opening) to align with your dog’s anatomy.
With steady hands, carefully cut two oval-shaped openings at your marked points. It’s always wise to start by cutting smaller holes than you anticipate needing. You can always gradually enlarge them if necessary, but you cannot make them smaller once cut. Ensure these openings are comfortably large enough for your dog’s front paws to pass through easily without any restriction or potential chafing, yet not so excessively large that they cause the jacket to gape or feel baggy.
Step 4: Shape the Jacket with a Tailored Angled Cut
Carefully reposition the fabric on your flat work surface, ensuring that the existing side seams of the pant leg run perfectly along what will become the sides of your pet’s body. Now, using your dog’s “back length” measurement, accurately determine the ideal overall length the jacket needs to be for optimal coverage.
From the open end of the pant leg (the end opposite the cuff/neck opening), cut the fabric with a gentle, slight angle, gradually tapering it towards what will be the tail end of the jacket. This thoughtfully designed angled cut is essential for helping the jacket conform more naturally to your dog’s body contours, providing a more custom-like and less bulky fit, particularly around the hindquarters. Aim for a smooth, gentle curve or angle that harmonizes with the natural slope of your dog’s back for a truly refined finish.
Step 5: Fit and Final Adjustments for Optimal Comfort
Now comes the most exciting moment – the trial fitting! Gently guide your pup’s head through the neck opening and carefully maneuver their front paws through the newly cut armholes. Take a moment to observe how the jacket sits on their body, paying close attention to these details:
- Does the jacket adequately cover their back without being excessively long or bunching up?
- Is the neck opening comfortable and free from any signs of restriction, allowing for easy breathing and head movement?
- Are the armholes positioned correctly, allowing your dog a full and unhindered range of motion for their legs, without any rubbing or pinching?
- Does the jacket feel comfortably snug around the chest, providing warmth without being tight or constraining?
Based on your observations, make any necessary minor adjustments. You might need to delicately trim a small amount of excess fabric from the back length if it’s too long, or subtly enlarge the armholes for better mobility. The ultimate objective is to achieve a jacket that fits just right – one that is perfectly comfortable, securely stays in place, and grants your cherished pet complete freedom of movement during all their activities.
Method 2: Upcycled Old Fleece Shirt Sleeve Dog Jacket
This alternative method is even quicker to execute and proves particularly ideal for crafting jackets for smaller dogs, or if your only available repurposable item is a long-sleeved fleece shirt. The natural tubular shape of a shirt sleeve conveniently forms the perfect starting point for a straightforward and adorable dog jacket.
Step 1: Prepare the Shirt Sleeve to the Correct Size
Begin by selecting a suitable sleeve from an old fleece shirt. Referring to your dog’s “back length” measurement, precisely cut the sleeve to the appropriate length. It’s important to cut from the armpit end of the sleeve, ensuring you leave the existing wrist cuff intact for the time being, as it will naturally form the neck opening of your jacket.
Once cut, lay the sleeve completely flat, carefully aligning any existing seams or edges. This prepared tube of fabric will constitute the main body of your dog’s new, cozy jacket.
Step 2: Assess and Adjust the Cuff for the Neck
The existing wrist cuff of the shirt sleeve is intended to function as the neck opening of your dog’s jacket. It’s crucial to first assess if it’s sufficiently wide and stretchy enough for your pup’s head to comfortably pass through without any struggle or discomfort. If you determine that the cuff is too tight or lacks adequate elasticity, you have a couple of effective options:
- You can carefully cut the cuff off entirely. If you choose this, you will then need to create a new, wider opening by cutting a gentle V-shape or a half-moon shape into the raw sleeve opening that will sit comfortably at the neck.
- Alternatively, for a slight increase in stretch without completely removing the cuff, you can make two small, strategic slits on opposite sides of the cuff. Exercise caution here; while fleece generally doesn’t fray, excessive cutting can weaken the fabric.
Once the neck opening is successfully addressed and made comfortable, utilize your dog’s “distance between front legs” measurement to precisely mark where the armholes should be positioned, following a similar approach to Method 1.
Step 3: Create Paw Holes and Add a Collar Detail
View an example of cutting paw holes for a dog jacket on Pinterest.
Carefully cut two distinct holes for the front paws at the marks you precisely made in the preceding step. Ensure these holes are generously spacious enough to allow for complete, comfortable movement of your dog’s legs, yet not so excessively large that they cause the jacket to gape unattractively around the chest.
For an added touch of charm and a neat finish, if your neck cuff (or newly created neck opening) allows, you can stylishly roll the end of the sleeve back a few times. This simple action creates a refined, finished edge that doubles as a cute and comfortable collar for your dog jacket, elevating its appearance.
Lastly, it’s time for the final fitting! Try the newly crafted no-sew jacket on your dog. Observe the fit, assess the comfort level, and check for any restrictions in mobility. Make any minor trims or adjustments deemed necessary to ensure the jacket is absolutely perfect and supremely comfortable for your beloved furry companion. This method is exceptionally fast and consistently yields an adorable, highly functional jacket!
Tips for a Perfect Fit & Customization
To ensure your DIY no-sew dog jacket is not only perfectly functional but also wonderfully fabulous, consider incorporating these valuable additional tips into your crafting process:
- Double-Check Measurements with Precision: The old adage “measure twice, cut once” is incredibly pertinent here. A relaxed, cooperative dog will invariably yield the most accurate measurements. If your dog is squirming, take a break and try again when they are calmer.
- Selecting the Right Fleece Fabric: Be aware that different types of fleece possess varying thicknesses, textures, and degrees of stretch. A medium-weight, soft fleece often performs best for dog jackets, offering a good balance of warmth and flexibility. Consider the typical weather conditions you’re preparing for when choosing the fleece weight.
- Consider Your Dog’s Activity Level: If your dog is particularly active, loves to run, jump, or play vigorously, it’s crucial to ensure that the armholes are generous and strategically placed. The jacket should never restrict their natural movements or cause any discomfort during their favorite activities.
- Personalize with Non-Sew Embellishments: Elevate your dog’s jacket with unique, no-sew decorative touches:
- Fabric Markers: Unleash your creativity by drawing fun designs, your dog’s name, their adorable paw prints, or playful patterns directly onto the fleece.
- Iron-On Patches: Explore the vast array of iron-on patches available. They come in countless designs and can be easily applied to fleece without the need for a single stitch.
- Fabric Glue: While fleece generally doesn’t fray, a strong, flexible fabric glue can be used to attach small fabric scraps for unique patterns, or to secure any folded edges for an extra-neat, polished finish. Always ensure the glue is pet-safe and fully dry before dressing your dog.
- Prioritize Safety Above All Else: Before putting the jacket on your dog, meticulously inspect it for any loose threads or small, detached pieces that your dog could potentially chew off, ingest, or get tangled in. The jacket should fit snugly enough to prevent snagging but absolutely must not constrict breathing, movement, or cause any irritation.
- Simple Care and Maintenance: To preserve the softness, shape, and longevity of your upcycled fleece jacket, treat it with care similar to any other fleece garment. Machine wash it in cold water on a gentle cycle and tumble dry on a low heat setting, or ideally, air dry. Avoid high heat, which can damage fleece fibers.
For visual learners, watch a full video tutorial on how to make a no-sew dog jacket from CookingForDogs, providing step-by-step guidance:
Conclusion: Happy Pups, Happy Planet with Your DIY No-Sew Dog Jacket!
Crafting a DIY no-sew dog jacket is a wonderfully rewarding project that offers a myriad of benefits. Not only do you get the immense satisfaction of creating a unique, comfortable, and functional piece of apparel specifically tailored for your beloved pet, but you also actively contribute to sustainable living by mindfully upcycling old clothing items. These simple, accessible methods prove unequivocally that you don’t need to be an experienced seamstress or invest a fortune to ensure your furry friend stays warm, protected, and incredibly stylish.
Whether you choose the versatile fleece pants leg method or the super-speedy shirt sleeve technique, you’ll undoubtedly end up with a cozy, custom-fitted garment. This jacket will provide essential protection from chilly temperatures and add an undeniable touch of homemade charm and personality to your dog’s everyday look. It’s a quick, easy, and profoundly eco-friendly way to express your love and dedication to your pup.
So, don’t let those old fleece items gather dust any longer! Grab your trusty scissors and a measuring tape, and get ready to embark on a delightful crafting adventure. Spoil your furry companion with their very own custom, heartwarming, and utterly adorable no-sew jacket – a true testament to your creativity and care!
Did you enjoy our comprehensive tutorial on how to make a no-sew dog jacket? We’d genuinely love to hear your thoughts and see your amazing creations! Please share your experiences, tips, and photos of your custom dog jackets in the comments section below. Your insights could inspire fellow pet DIY enthusiasts!
Up Next: Discover More Engaging DIY Pet Projects & Clever Home Hacks!
- Seal A Chip Bag Without A Clip | Simple & Fun Kitchen Hack
- 23 Awesome DIY Pet Projects To Keep Your Furry Friends Happy
- How To Make A Shabby Chic Dog Leash And Treat Wall Hanger | DIY Pet Project
Stay connected with us on Facebook, Twitter, Pinterest, and Instagram for more exciting DIY ideas and inspiration!Editor’s Note: This post was originally published on February 17, 2015, and has been updated for quality, relevancy, and to include additional valuable content.