
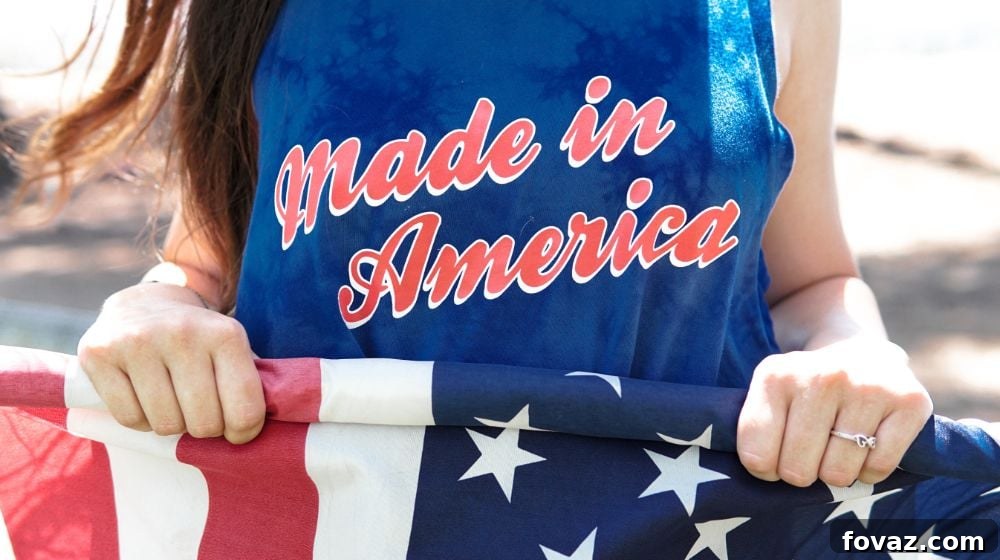
As the nation gears up for its most vibrant celebration, Independence Day on July 4th, there’s no better way to show your patriotic spirit than with a custom-made outfit. Forget generic store-bought attire; this year, embrace your creativity and craft unique 4th of July shirts that truly stand out. Whether you’re attending a backyard barbecue, a community parade, or a spectacular fireworks display, these DIY projects offer a fantastic way to celebrate America’s freedom with style and personal flair. God bless America, and happy crafting!
RELATED: 4th Of July | Make Your Own American Flag Hat
In this article, you’ll discover five exciting ways to design your own patriotic shirts:
- Craft a Classic Bandana Flag T-Shirt
- Engage the Kids with a Star-Patterned Eraser-Stamped Shirt
- Show Your Colors with an American-Flag Spray Paint Top
- Design a Feminine Ruffled Flag 4th of July Shirt for Her
- Create a Complementary Matching 4th of July Shirt for Him
DIY 4th of July Shirts: Perfect for Your Independence Day Celebration
Independence Day is a time for parades, picnics, and patriotism, and what better way to express your love for the USA than by sporting a unique, handmade shirt? These DIY projects are not only fun to make but also allow you to personalize your festive attire, ensuring you’ll be the talk of the celebration. From simple no-sew options to more intricate designs, there’s a project here for every skill level, promising a memorable and stylish 4th of July.
1. Craft a Classic Bandana Flag T-Shirt
|
The bandana flag t-shirt offers a timeless and effortlessly cool way to display your patriotic spirit. This project is incredibly straightforward, making it perfect for beginners or anyone looking for a quick and impactful DIY. It taps into classic American aesthetics, transforming a simple white tee into a vibrant display of red, white, and blue. The texture of the bandanas adds an authentic, rustic charm to your festive ensemble, ensuring you look perfectly in tune with the spirit of Independence Day.
What You’ll Need:
- An old white t-shirt (or a new one, preferably 100% cotton for best adherence)
- A sharp pair of scissors and a household iron
- One blue bandana and one red bandana (standard cotton bandanas work best)
- Heat n Bond (or similar iron-on adhesive fabric interfacing, the no-sew kind)
Do It Yourself:
- Begin by preparing your Heat n Bond. Cut a small square or strip from the Heat n Bond sheet, ensuring it’s large enough to cover the area you intend to cut from your bandana. Place the bumpy, adhesive side of the Heat n Bond onto the back (wrong side) of your bandana fabric. Using a warm iron, press firmly and evenly for a few seconds to bond the adhesive to the bandana.
- Once bonded, allow it to cool slightly. On the paper backing of the Heat n Bond, carefully draw the shapes you need for your flag design – typically stars and stripes. Precision is key here, so use a ruler for straight lines if cutting stripes. For stars, a stencil can be helpful. Cut out these shapes precisely using your scissors.
- Now that your shapes are cut, gently peel off the paper backing from each piece. You should be left with the bandana fabric, which now has a shiny, adhesive “glue” layer on its back. This is what will bond to your t-shirt.
- Carefully position your bandana stars and stripes onto your white t-shirt according to your desired flag design. Ensure the arrangement is aesthetically pleasing and symmetrical. Once you are satisfied with the placement, cover the design with a pressing cloth (a thin cotton fabric works well) and iron over the entire design with a warm, dry iron. The heat from the iron will activate the adhesive, permanently bonding your bandana shapes to the t-shirt. Hold the iron firmly over each section for about 10-15 seconds. Let it cool completely before wearing.
This project is not only easy but also allows for creative variations. Consider distressing the edges of your bandana cutouts before ironing for a vintage look, or layering different shades of red and blue for added depth. The classic bandana flag t-shirt is a testament to simple yet powerful patriotic expression.
2. Engage the Kids with a Star-Patterned Eraser-Stamped Shirt
|
Unleash your inner artist and involve the little ones in crafting a whimsical, star-patterned shirt that’s perfect for the 4th of July. This eraser-stamping technique is incredibly fun, forgiving, and yields impressive results, making it an ideal activity for families. The charm of this project lies in its playful imperfection and the unique star clusters you can create, reminiscent of a sky full of fireworks on a festive night. It’s a fantastic way to combine art, family time, and patriotic celebration.
What You’ll Need:
- A plain t-shirt (any color that contrasts well with red and blue paint, white is classic)
- A star pattern or stencil (you can draw one or print one)
- Red and blue fabric paint (ensure it’s permanent and washable once cured)
- Freezer paper (the waxy kind, often found near aluminum foil)
- A pencil with a clean, unused eraser (the smaller the eraser, the smaller the stamp)
- A piece of cardboard or extra freezer paper to protect the back of the shirt
Do It Yourself:
- Start by preparing your star stencil. Trace or draw your desired star pattern onto the non-shiny, paper side of the freezer paper. You can make it a single large star, or several smaller stars. For sharper edges, an X-Acto knife or craft blade works best for cutting out intricate designs, but scissors are fine for simpler shapes. Cut out the star shape(s) carefully.
- Position your cut-out freezer paper star onto the t-shirt, shiny side down. This shiny side has a waxy coating that will temporarily adhere to the fabric when heated. Using a warm iron, press firmly over the freezer paper star for about 10-15 seconds. The heat will bond the stencil to the shirt, creating a crisp, non-bleeding edge for your design.
- Before you start stamping, protect the back of your shirt from paint bleed-through. Slide a piece of cardboard or another layer of freezer paper inside the shirt, directly beneath the area you’ll be painting. This will ensure your design stays on one side only.
- Now, it’s time to get creative with your stamping! Pour small amounts of red and blue fabric paint onto separate paper plates or a palette. Dip the eraser end of your pencil into one color of fabric paint, making sure it’s evenly coated but not dripping. Begin stamping around your freezer paper star stencil. You can create a dense cluster of dots near the star, gradually fading them out towards the edges of the shirt for a fireworks-like effect, as shown in the inspiration. Experiment with alternating red and blue, or creating distinct sections of each color.
- Once you’re happy with your design, allow the fabric paint to dry completely. This can take several hours, or even overnight, depending on the paint and thickness of application. Once dry, carefully peel off the freezer paper star stencil from the shirt. Finally, follow the specific instructions on your fabric paint for curing it. This often involves heat-setting with an iron or placing the shirt in a dryer, which helps the paint become permanent and washable.
This stamping project offers endless possibilities for customization. Try using different sized erasers for varied dot sizes, or experiment with glitter fabric paint for an extra festive sparkle. The result will be a charming, handcrafted shirt that proudly displays your patriotic stars.
3. Show Your Colors with an American-Flag Spray Paint Top
|
For a bold and artistic statement, transform an ordinary t-shirt into a striking American flag using spray paint. This method allows for a more distressed, worn-in look, or a crisp, defined flag design, depending on your technique. It’s an excellent project for upcycling old shirts and giving them a new lease on life, ready for the Independence Day festivities. This technique lends itself well to creating a unique, graphic interpretation of the flag, perfect for making a stylish patriotic statement.
What You’ll Need:
- An old white t-shirt (or any light-colored shirt you wish to upcycle)
- Painter’s tape or packaging tape (for crisp lines)
- Red and blue fabric spray paint (ensure it’s designed for fabric)
- Star stickers (various sizes work well)
- Cardboard to protect surfaces and prevent bleed-through
Do It Yourself:
- First, customize the fit of your shirt if desired. If your shirt is too large or you prefer a tank top style, carefully cut off the sleeves. You can also widen the neckline by snipping it, trim the bottom hem for a crop top look, or take in the sides for a more fitted silhouette. Consider fringing the bottom hem later for added flair. Ensure all cuts are clean and symmetrical.
- Once your shirt is tailored to your liking, prepare it for painting the blue “union” field. Use painter’s tape to carefully section off the area where you want the blue field to be – typically the top-left portion of the shirt. Ensure the tape is pressed down firmly to prevent paint from seeping underneath. Insert a piece of cardboard inside the shirt, beneath the taped area, to prevent paint from bleeding through to the back of the shirt.
- Now, apply your star stickers onto the blue-taped section of the shirt. Arrange them as you would on an American flag, or create a more abstract, scattered pattern. Press the stickers down firmly. With your blue fabric spray paint, apply even coats over the entire blue section. Hold the can at the recommended distance and spray in light, sweeping motions to avoid saturation and drips. Let it dry to the touch.
- Once the blue paint is sufficiently dry (check paint manufacturer’s instructions), carefully peel off the star stickers. You should be left with a blue field dotted with crisp white stars. Take your time to avoid smudging the paint.
- Next, prepare for the red stripes. Use painter’s tape to create the white stripes of the flag. Carefully cover the white areas you wish to remain unpainted, as well as the newly painted blue section (you can use another piece of cardboard to protect the blue field). Again, ensure cardboard is inside the shirt to prevent bleed-through to the back.
- With the white stripes taped off and the blue field protected, spray paint the remaining exposed areas red. Apply even coats, building up the color as desired. You can go for a lighter, faded look or a darker, more intense red. Allow the paint to dry to the touch.
- When the red paint is mostly dry, carefully peel off all the painter’s tape. Your shirt should now proudly display the iconic red, white, and blue pattern of the American flag. Allow the shirt to dry completely for at least 24 hours, and then follow the fabric spray paint instructions for heat-setting to ensure durability and washability.
- To add an extra touch, you can lightly spray the entire shirt with a glitter fabric spray for a subtle shimmer. For a playful finish, consider fringing the bottom of the shirt. Cut vertical strips approximately three inches up from the hem, about every inch or so. After cutting, gently pull on each fabric tab to stretch and curl it slightly, creating a fun, dynamic fringe.
RELATED: 17 DIY Memorial Day Decorations You Can Make And Reuse On July 4th
4. Design a Feminine Ruffled Flag 4th of July Shirt for Her
|
For a charming and distinctly feminine touch, this ruffled flag shirt is an absolute winner. It combines the traditional elements of the American flag with a soft, textural design, perfect for ladies and girls who want to celebrate Independence Day with elegance and style. This project involves some basic sewing, but the steps are straightforward, making it an achievable goal for those with minimal sewing experience. The result is a delightful, handcrafted garment that feels as good to wear as it looks.
What You’ll Need:
- A plain white t-shirt (for the base)
- Old red and blue shirts or fabric scraps (cotton blends work well for ruffles)
- Pins and sewing needles (or a sewing machine)
- Red, white, and blue sewing thread
- A pencil and ruler for marking
- Small white buttons (about five, for the stars)
Do It Yourself:
- Begin by preparing your red fabric strips for the flag’s stripes. From an old red cloth or t-shirt, carefully cut several strips, each approximately 1/2 inch wide and 12 inches long. The number of strips will depend on the size of your base t-shirt and how many stripes you want to represent. Aim for an odd number of stripes to maintain balance.
- Lay your white base t-shirt flat. Decide where you want your flag design to sit and how wide you want the ruffled flag portion to be. Use pins to mark the left and right boundaries of your flag on the shirt. These marks will guide the placement of your ruffled strips.
- Start laying your red strips across the shirt, ensuring their ends extend slightly past your marked boundaries on the right side. This allows for a neat finish later. Make small pencil marks on both the left and right sides of each strip, approximately a quarter-inch down from the top edge of where the ruffle will sit. Then, draw a faint straight line with your pencil to connect these marks; this line will serve as a guide for where to sew your ruffled strips.
- To create the ruffles, perform a basting stitch down the center of each 12-inch strip. A basting stitch is a loose, temporary stitch that allows you to gather the fabric. Pull gently on one end of the basting thread to gather the fabric until each strip is reduced to approximately 6.5 inches in width (or whatever width matches the desired width of your flag design). Evenly distribute the gathers along the strip.
- Pin your gathered red ruffles into place along the pencil lines you just drew on the white t-shirt. Ensure they are evenly spaced and aligned. Once pinned securely, use your sewing machine (or hand-sew with a running stitch) to sew each ruffle into place, stitching along the center of the ruffle where your basting stitch is. Remove the basting thread after sewing.
- Finally, create the blue union field and stars. Cut a blue square from an old blue shirt or fabric scrap, sized appropriately to represent the union of the flag. Place it on the upper-left corner of your ruffled flag design. Pin it in place and sew it securely to the t-shirt. To represent the stars, hand-sew five small white buttons onto the blue square. You can arrange them in a star pattern or randomly, as desired.
This ruffled flag shirt is a beautiful way to combine fashion with patriotism, perfect for any Independence Day gathering. Consider using different shades of red and blue, or adding lace trim to the ruffles for an even more delicate look.
5. Create a Complementary Matching 4th of July Shirt for Him
|
Why should she have all the fun? Create a matching 4th of July shirt for him that embodies a more streamlined, graphic interpretation of the flag. This project uses the same versatile Heat n Bond technique, making it a no-fuss option for crafting a stylish and coordinated patriotic look. It’s perfect for ensuring the whole family is dressed in theme, offering a masculine yet festive alternative to more elaborate designs. This design is clean, bold, and undeniably American.
What You’ll Need:
- Heat n Bond (or similar iron-on adhesive)
- Old red, white, and blue shirts or fabric scraps (cotton is recommended for easy bonding)
- Sewing needles and red, white, and blue sewing thread (optional, for added durability)
- A household iron
- Scissors (sharp ones for clean cuts)
Do It Yourself:
- To create the red stripes, take your red fabric (from an old shirt or scrap). Cut strips approximately 1/2 inch wide and 6 inches long. Before cutting, apply Heat n Bond to the back of the red fabric. Place the bumpy side of the Heat n Bond against the wrong side of the fabric and press with a warm iron for a few seconds. Allow to cool before cutting your strips.
- Next, prepare your blue union field. Cut a small blue square from your blue fabric. Again, iron a piece of Heat n Bond onto the back of this blue square before cutting. The size of the square should be proportionate to the shirt and the red stripes you’ve created.
- Finally, create the white stars. Take a piece of white fabric and iron Heat n Bond onto its back. Then, carefully cut out small star shapes. You can use a stencil or freehand them if you’re confident. Aim for varying sizes or uniform stars, depending on your preference.
- Once all your red strips, blue square, and white stars have Heat n Bond applied and are cut, gently peel off the paper backing from each shape. Arrange these adhesive-backed fabric pieces onto the front of your chosen t-shirt. Lay out the red strips to form the flag’s stripes, and then place the blue square in the upper-left corner. Lastly, carefully position the white stars on top of the blue fabric cutout. Take your time to ensure the arrangement is straight and aesthetically pleasing.
- Once you are completely satisfied with the layout, cover the entire design with a pressing cloth and iron over it firmly for about 15-20 seconds per section. The heat will activate the adhesive, permanently bonding the fabric shapes to the t-shirt. Allow the shirt to cool completely. For extra durability and to ensure the edges won’t peel after washing, it’s highly recommended to stitch around the perimeter of each fabric shape with matching thread. This creates a neat, finished look and reinforces the bond.
This matching shirt for him is a fantastic way to coordinate outfits for the holiday, celebrating national pride with a clean and contemporary design. It’s a project that combines simplicity with a strong visual impact.
Beyond these fantastic 4th of July shirts, there are countless ways to infuse your celebrations with handmade charm. For more creative inspiration and budget-friendly ideas, check out this video from Themissalliecakes, featuring Pinterest-inspired cheap and easy 4th of July crafts that perfectly complement your new patriotic wardrobe:
Struggling to decide what to wear for Independence Day? These DIY 4th of July shirts offer the perfect solution, allowing you to craft a personalized statement of patriotism. Step out in style and celebrate America’s heritage with pride, knowing your outfit is as unique as your spirit.
Are there other ingenious 4th of July shirt ideas or accessories that truly capture the holiday spirit that we might have overlooked? We’d love to hear your creative suggestions in the comments section below!
UP NEXT:
- These DIY Projects For Home Are Perfect For The 4th Of July
- 4th Of July Mason Jar Lanterns | DIY Lighting And Decor
- Shibori Tie Dye Patterns You Can Try At Home
Calling all crafting DIYhards, DIY Projects needs YOU! Click here if you want to contribute for us.
Don’t forget to stay connected with us on Facebook, Twitter, and Instagram for more inspiring DIY projects and crafting ideas!