
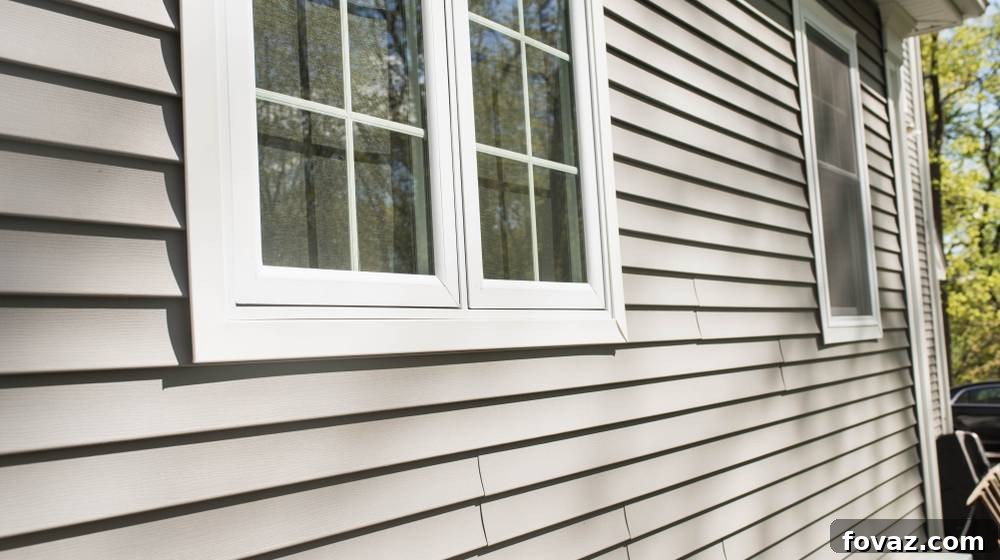
Welcome to the ultimate guide for homeowners seeking comprehensive answers about vinyl siding repair and maintenance. If you’re looking to protect your investment, enhance your home’s curb appeal, and ensure its longevity, you’ve come to the right place. We’ll demystify everything from understanding what vinyl siding is to tackling common repairs and navigating insurance coverage, all presented in a clear, easy-to-understand format.
RELATED: How To Paint Baseboards The Right Way To Avoid A Messy Room Repaint
In this article, you’ll find:
- What is Vinyl Siding?
- How Many Years Does Vinyl Siding Last?
- Can You Repair Vinyl Siding?
- When Should You Replace Vinyl Siding?
- How Much Does Vinyl Siding Repair Cost?
- How Do You Repair Cracked Vinyl Siding?
- Can You Paint Vinyl Siding?
- Does Homeowners Insurance Cover Vinyl Siding Damage?
Vinyl Siding Repair and Maintenance: Your Essential Homeowner’s Guide
What is Vinyl Siding?
Vinyl siding is a ubiquitous and highly popular exterior cladding material for homes and small apartment buildings across North America. Crafted from polyvinyl chloride (PVC) resin, it offers a robust, weather-resistant barrier that protects your home’s structure while contributing significantly to its aesthetic appeal. Its widespread adoption isn’t by chance; vinyl siding boasts a compelling combination of benefits that appeal to a broad spectrum of homeowners.
Key Advantages of Vinyl Siding:
- Cost-Effectiveness: One of vinyl siding’s most attractive features is its affordability. Compared to other popular siding options like fiber-cement, wood, or brick, vinyl often presents a significantly lower upfront cost, making it an excellent choice for budget-conscious homeowners. Fiber-cement siding, for instance, can be two to four times more expensive than its vinyl counterparts, both in material and installation.
- Ease of Installation: While professional installation is often recommended for optimal results, vinyl siding is relatively straightforward to install compared to more labor-intensive materials. Its lightweight nature and interlocking panels expedite the process, potentially reducing labor costs.
- Low Maintenance: Vinyl siding is famously low maintenance. Unlike wood, it doesn’t require regular painting, staining, or sealing. Its color is infused throughout the material (100% homogenous), meaning it won’t scratch off, fade significantly, or peel like paint. A simple wash with a garden hose or pressure washer is usually sufficient to remove dirt, cobwebs, and other debris, keeping your home looking fresh for years.
- Durability and Resilience: Modern vinyl siding is engineered to withstand various environmental challenges, including strong winds, minor impacts, and moisture. It’s designed to flex and adapt to temperature changes, reducing the risk of cracking under normal conditions.
- Versatility in Design: Available in a vast array of colors, textures, and styles, vinyl siding offers incredible design flexibility. Homeowners can choose from traditional lap siding, vertical siding, shakes, shingles, and even options that mimic the look of natural wood or stone, allowing for personalized exterior aesthetics.
Potential Drawbacks of Vinyl Siding:
- Installation Nuances: While generally easy to install, improper installation can lead to long-term issues. Vinyl expands and contracts with temperature changes, and if panels are nailed too tightly, it can lead to buckling, warping, or cracking. Most homeowners rely on experienced contractors to ensure correct installation techniques are followed.
- Fading Over Time: Although its color is baked-in, vinyl siding can experience some fading, especially in direct, prolonged sunlight or harsh climates. While high-quality vinyl offers better fade resistance, its original vibrancy may diminish after 10 to 15 years. Repainting is often not a viable long-term solution as traditional paints may struggle to adhere properly and could peel or crack.
- Temperature Sensitivity: Low-quality vinyl can become brittle in extremely cold temperatures, making it susceptible to cracking or breaking if struck. Conversely, exposure to intense heat sources, like a grill or reflected sunlight, can cause warping or melting.
- Impact Damage: While durable, strong impacts from hail, thrown objects, or accidental contact can cause dents, cracks, or holes in vinyl panels.
How Many Years Does Vinyl Siding Last?
The longevity of vinyl siding is a key consideration for homeowners. When properly installed and maintained, high-quality vinyl siding can last an impressive two to four decades. This extended lifespan contributes to its excellent value proposition, requiring very low maintenance over its service life. However, several factors influence how long your vinyl siding will truly maintain its integrity and appearance.
Factors Influencing Vinyl Siding Lifespan:
- Quality of Material: Not all vinyl siding is created equal. Thicker-grade vinyl (ranging from .40mm to .55mm or more) is inherently more durable, resistant to impact, and formulated with better UV inhibitors to resist fading. While a higher initial investment, it often pays off in extended lifespan and reduced maintenance. The original article mentions thickness between .35mm and .55mm; opting for the higher end of this spectrum generally yields better results.
- Installation Quality: Proper installation is paramount. If panels are installed too tightly, they can buckle or warp as they expand and contract with temperature fluctuations. Incorrect fastening can also lead to panels pulling away from the wall, making them vulnerable to wind damage and moisture infiltration.
- Climate and Sun Exposure: Homes in regions with extreme temperature swings, intense UV radiation, or frequent severe weather events (like hail or high winds) may experience accelerated aging of their siding. Constant exposure to direct sunlight can cause colors to fade over 10-15 years, even if the structural integrity of the vinyl remains sound.
- Maintenance Practices: While low maintenance, occasional cleaning helps prevent mold, mildew, and dirt buildup, which can degrade the material over time if left unchecked. Promptly addressing minor damages also prevents them from escalating into larger, more costly repairs or premature replacement.
- Impact and Stress: Repeated impacts from sports equipment, tree branches, or even strong hail can weaken or damage panels, shortening their lifespan.
While the material itself can endure for decades, it’s important to note that the aesthetic appeal, particularly the color, often shows signs of aging sooner. Fading after 10 to 15 years is common, especially with darker colors or in sunny climates. Additionally, extreme temperatures can pose specific challenges: excessively cold weather can make vinyl brittle and prone to cracking upon impact, while intense heat from sources like grills, fire pits, or even reflected sunlight from windows can cause warping or melting.
Tip for Choosing Siding: When selecting new vinyl siding, always prioritize thickness. Generally, thicknesses range from .35mm to .55mm or more. A thicker gauge (e.g., .44mm or .50mm) will offer superior durability, better rigidity, enhanced impact resistance, and improved fade resistance. While it comes with a heavier price tag, the long-term benefits in performance and longevity often justify the investment.
Can You Repair Vinyl Siding?
Absolutely, the quick and reassuring answer is yes, you can repair vinyl siding! While vinyl siding is renowned for its resilience and ability to withstand many elements, it’s not entirely immune to damage. Fortunately, many common issues that arise are minor and can be effectively addressed with a bit of DIY know-how and a few basic tools. The ability to repair rather than fully replace damaged sections is one of vinyl siding’s significant advantages, offering both cost savings and convenience for homeowners.
From minor scratches and small holes to individual cracked panels, many vinyl siding problems don’t necessitate a complete overhaul of your home’s exterior. Learning how to perform these repairs yourself can save you hundreds, if not thousands, of dollars in professional labor costs. Furthermore, timely repairs prevent small issues from escalating into larger, more complex, and expensive problems down the line, such as moisture infiltration or pest infestations.
Common types of vinyl siding damage that are often repairable include:
- Small cracks or splits: Often caused by impacts or extreme temperature fluctuations.
- Minor holes or punctures: From nails, screws, or errant objects.
- Loose or flapping panels: Often due to strong winds or improper installation.
- Warped sections: Sometimes caused by intense, localized heat.
For many of these common ailments, you won’t need an extensive toolkit. Many of the tools required are ones you most likely already have at home, making DIY vinyl siding repair an accessible project for many.
RELATED: DIY Leather Couch Repair | 6 Super Easy Steps In Fixing Cuts And Scratches
When Should You Replace Vinyl Siding?
While many minor damages to vinyl siding can be repaired, there comes a point when replacement is the more prudent and cost-effective solution. Recognizing the signs that indicate a need for partial or full siding replacement is crucial for protecting your home’s structural integrity, energy efficiency, and overall value. Here are key indicators that it’s time to consider replacing your vinyl siding:
- Extensive Holes, Chips, or Dents: Isolated minor damage can be patched, but widespread holes, chips, or dents across multiple panels signal a compromise in the siding’s protective barrier. These openings are direct invitations for moisture to seep behind the siding, potentially leading to wood rot, mold growth, and pest infestations. If the damage is extensive, replacing the affected sections or the entire wall is often more practical than continuous patching.
- Widespread Cracks or Loose Siding: Beyond isolated cracks, if you observe numerous panels with significant cracks, splits, or if large sections of siding are loose and flapping in the wind, your home is at risk. These breaches allow rainwater to penetrate between the siding and your home’s exterior sheathing, potentially causing serious water damage to the underlying structure, insulation, and even interior walls. Severe cracking might indicate that the siding has become brittle due to age or prolonged UV exposure.
- Bubbling or Warped Panels: Warped, buckled, or bubbling panels are often a sign of improper installation (panels nailed too tightly, preventing expansion and contraction) or excessive heat exposure. These distortions create unsightly gaps and compromises the siding’s ability to shed water effectively. Large areas of warped siding can leave your home vulnerable to moisture intrusion and diminish its curb appeal significantly.
- Dry Rot Beneath the Surface: This is a critical sign that your vinyl siding has failed in its primary function. If you notice soft, crumbling wood beneath or around your siding, it means moisture has been consistently penetrating the exterior and causing the underlying wood sheathing or framing to rot. At this point, simply repairing the vinyl won’t suffice; the compromised wood needs to be addressed, and the siding replaced to prevent future recurrence. This often requires professional intervention to assess and repair the structural damage.
- Persistent Mold, Mildew, or Fungus: While surface mold on vinyl can usually be cleaned, persistent or recurring growth, especially underneath the panels or in hard-to-clean crevices, suggests a deeper moisture problem. This could indicate water is trapped behind the siding, creating a damp environment conducive to fungal growth. Identifying and rectifying the source of the moisture is paramount, which often means removing and replacing the affected siding sections.
- Increased Energy Bills: Old, damaged, or improperly installed siding can lose its insulating properties, leading to air leaks and reduced energy efficiency. If you notice a sudden or gradual increase in your heating and cooling bills without other apparent causes, your siding might not be providing adequate thermal protection, signaling it’s time for an upgrade.
- Outdated Appearance and Diminished Curb Appeal: Even if your siding is structurally sound, significant fading, discoloration, or an outdated style can detract from your home’s curb appeal and resale value. If the aesthetic issues are extensive and cannot be remedied by cleaning or minor repairs, a full replacement can dramatically refresh your home’s exterior and boost its market value.
When you observe one or more of these signs, it’s advisable to consult with a qualified siding professional. They can provide a thorough assessment of the damage, recommend the most appropriate course of action (repair or replacement), and offer insights into the best materials for your home and climate.
How Much Does Vinyl Siding Repair Cost?
The cost of vinyl siding repair can vary significantly, ranging from a minimal DIY expense to several hundred dollars or more for professional services, depending on various factors. On average, homeowners can expect to pay somewhere between $400 and $600 for typical vinyl siding repair projects. However, understanding the elements that influence this cost is essential for budgeting and making informed decisions.
Factors Influencing Vinyl Siding Repair Costs:
- Extent and Type of Damage: This is the primary determinant of cost. A small crack or a single warped panel is far less expensive to fix than extensive hail damage across an entire side of the house or significant water damage that requires replacing underlying sheathing. Minor aesthetic issues (like scratches) might be DIY projects, while structural damage demands professional expertise.
- DIY vs. Professional Repair:
- DIY Repair: If you’re tackling minor repairs yourself, your costs will be limited to materials (e.g., replacement panels, caulk, adhesive, specialized tools like a siding removal tool). This can be as low as $20-$100 for small fixes.
- Professional Repair: Hiring a professional contractor adds labor costs, which typically account for a significant portion of the total expense. Labor rates vary by region and the complexity of the job. Professionals also bring specialized tools, expertise, and often warranties on their work.
- Materials and Siding Quality: The cost of replacement panels depends on the type, brand, and quality of your existing vinyl siding. Finding an exact match in terms of color, texture, and profile can sometimes be challenging, especially for older siding. If an exact match is unavailable, you might have to purchase a larger quantity or consider replacing a wider area to ensure visual uniformity. Higher-grade, thicker vinyl siding panels will be more expensive than basic thin panels.
- Regional Pricing Trends: The cost of labor and materials can fluctuate significantly based on your geographic location. Metropolitan areas often have higher labor costs than rural ones.
- Accessibility of the Damaged Area: Repairs on easily accessible sections of siding (e.g., ground level) will be less expensive than those requiring scaffolding, ladders, or specialized equipment to reach high or complex areas of the home. Repairs around windows, doors, or intricate architectural features can also increase labor time and cost.
- Seasonality: In some regions, contractors may charge higher rates during peak construction seasons or for urgent repairs during adverse weather conditions.
- Underlying Damage: If the vinyl siding damage has led to secondary issues, such as water infiltration, mold growth, or damage to the underlying wood sheathing or insulation, the repair cost will increase substantially as these issues must be addressed before new siding can be installed.
For a small, isolated repair, like replacing one or two cracked panels, a professional might charge $150-$300, including labor and materials. However, if the damage is more extensive, requiring multiple panels or involving complex areas, the cost can easily climb to $500-$1000+. For widespread damage, such as after a severe storm, the cost might even approach that of a partial or full siding replacement. It’s always advisable to get multiple quotes from reputable local contractors to ensure you’re getting a fair price for the scope of work required.
How Do You Repair Cracked Vinyl Siding?
Repairing cracked vinyl siding might seem daunting, but it’s often a straightforward DIY task that can restore your home’s exterior integrity and appearance. The key is to replace the damaged section with a new, matching piece of vinyl. Here’s a detailed step-by-step guide:
- Gather Your Tools and Materials:
- Siding Removal Tool (Zip Tool): This specialized tool is designed to unlock and relock vinyl siding panels without damage. You can find them at most hardware stores or online (e.g., siding removal tool).
- Tin Snips or Utility Knife: For cutting out the damaged section and shaping the new patch.
- Matching Vinyl Siding Piece: Ideally, use a scrap piece from the original installation or purchase a single panel that matches your existing siding’s color, profile, and texture. If you don’t have a spare, you might be able to remove a discreet piece from an inconspicuous area (like under a deck) to use as your patch, then replace that hidden section with a new, slightly mismatched panel if necessary.
- Adhesive Caulk (e.g., exterior-grade silicone or polyurethane caulk): Used to secure the patch. Choose an exterior-grade, waterproof caulk that can withstand temperature fluctuations.
- Circular Saw or Table Saw (Optional, for precise patch cutting): While tin snips can work, a power saw can create cleaner, straighter cuts for your patch. (e.g., circular saw or a table saw).
- Measuring Tape and Marker: For accurate measurements.
- Safety Glasses and Gloves: Always prioritize safety.
- Unlock the Siding Panels:
Locate the cracked panel. Using your siding removal tool (zip tool), carefully slide it under the bottom edge of the panel directly above the damaged one. Hook the tool onto the locking lip of the upper panel and pull down gently but firmly. This will disengage the interlocking connection between the two panels. Work your way across the length of the damaged section, unlocking the panel above it. You may need to do this for a couple of panels above and below the damaged piece to allow enough flexibility.
- Cut Out the Damaged Area:
Once the upper panel is loose, you’ll have access to the damaged panel. Use tin snips or a utility knife to cut out the cracked or broken section. Make clean, straight cuts, slightly larger than the actual crack, to create a rectangular or square opening. Ensure your cuts are precise, as the patch will need to fit snugly into this opening. Be careful not to damage the underlying house wrap or sheathing.
- Prepare the Replacement Patch:
Measure the opening you just created. From your matching vinyl siding piece, cut a patch that is approximately 1 to 2 inches larger in both width and height than the opening. This extra material will allow the patch to overlap the existing siding behind the opening, providing a secure adhesion. If using a power saw, ensure the blade is suitable for cutting plastic.
- Apply Adhesive and Secure the Patch:
Apply a continuous bead of high-quality, exterior-grade adhesive caulk (like adhesive caulk) around the back perimeter of your newly cut patch. This caulk will create a watertight seal and firmly bond the patch to the existing siding. Carefully insert the patch into the opening, ensuring the adhesive side is against the existing siding. Press firmly around the edges of the patch to ensure good contact and even distribution of the caulk. Wipe away any excess caulk immediately with a damp cloth.
- Allow to Dry and Relock Panels:
Allow the adhesive caulk to dry and cure completely according to the manufacturer’s instructions. This usually takes several hours, but can be up to 24 hours depending on humidity and temperature. Once the patch is securely bonded and the caulk has set, use your siding removal tool again to relock the panels you disengaged in step 2. Hook the tool onto the lip of the upper panel and gently push it back into place, engaging the lock with the panel below it. Work methodically along the length of the panel until it’s fully re-secured.
With these steps, your cracked vinyl siding will be repaired, restoring your home’s protection and appearance. This repair method is effective for localized damage, offering a discreet and durable solution.
Can You Paint Vinyl Siding?
Historically, the answer to painting vinyl siding was a definitive “no.” The conventional wisdom was that since vinyl siding has its color baked in, painting it would be futile, as the paint would inevitably peel, chip, and crack due to the vinyl’s expansion and contraction with temperature changes, and its inherently slick surface. However, advancements in paint technology have revolutionized this, making it possible to successfully paint certain types of vinyl siding today.
The Evolution of Vinyl Siding Paint:
Modern paint formulations, specifically designed for vinyl, now contain advanced acrylic and urethane resins that offer superior adhesion and flexibility. Critically, these paints are often formulated with “vinyl safe” technology, meaning they are designed with specific light reflective values (LRV). Using colors that are too dark on vinyl siding can cause excessive heat absorption, leading to warping and buckling of the panels. Vinyl-safe paints reflect more heat, minimizing this risk.
When is Painting a Good Option?
- Fading and Discoloration: If your vinyl siding is structurally sound but has significantly faded or discolored over time, painting can offer a cost-effective way to refresh its appearance without the expense of full replacement.
- Outdated Color: Painting allows homeowners to update their home’s exterior color palette to a more modern or preferred hue, enhancing curb appeal.
- Minor Imperfections: While painting won’t hide major damage, it can mask minor surface imperfections or blend in small, inconspicuous repairs.
The Painting Process for Vinyl Siding:
Repainting vinyl siding is a multi-step process that, when done correctly, can yield beautiful and long-lasting results. Here’s a general outline:
- Thorough Cleaning: This is arguably the most crucial step. The siding must be impeccably clean and free of dirt, grime, mold, mildew, chalking, and loose paint (if previously painted). Use a pressure washer on a low setting with a good quality exterior cleaner, or scrub manually with a brush and cleaning solution. Rinse thoroughly and allow ample drying time, typically 24-48 hours.
- Repair and Preparation: Before painting, all cracks, holes, or loose panels must be repaired. Sand any rough spots or raised edges if necessary. Ensure all caulk is in good condition; replace any old, failing caulk.
- Priming (Optional but Recommended for Best Results): While some vinyl paints are self-priming, applying a high-quality exterior primer formulated specifically for vinyl or difficult-to-adhere surfaces can significantly improve paint adhesion and durability, especially if your siding shows pitting, excessive chalking, or if you’re making a dramatic color change.
- Choosing the Right Paint: Select a 100% acrylic latex paint specifically labeled as “vinyl safe” or suitable for vinyl siding. Ensure the color choice has an LRV appropriate for vinyl to prevent warping. Stick to colors that are lighter than or similar in shade to the original siding color, or use only vinyl-safe dark colors.
- Application:
- Technique: Apply paint using a high-quality roller for large, flat areas, and brushes for trim and corners. A paint sprayer can also be used for faster, more even coverage on large areas.
- Thin Coats: Apply paint in thin, even coats to prevent drips and ensure proper curing.
- Two Coats: Most projects will require at least two coats for optimal coverage, color depth, and durability. Allow adequate drying time between coats as per the manufacturer’s instructions.
Important Considerations:
- Color Choice: As mentioned, stick to “vinyl safe” colors. Generally, this means choosing a color that is no darker than the original siding. Darker colors absorb more heat, which can cause vinyl to warp, buckle, or sag. Always check the paint manufacturer’s recommendations regarding LRV for vinyl siding.
- Manufacturer’s Recommendations: Always follow the specific instructions and recommendations from both your siding manufacturer (if available) and your chosen paint manufacturer.
- Test Patch: If unsure, apply a small test patch in an inconspicuous area and observe it for several weeks to ensure proper adhesion and no adverse reactions before painting the entire house.
With careful planning, proper preparation, and the use of appropriate paints, painting your vinyl siding can be an excellent way to refresh your home’s exterior and extend its aesthetic life.
Does Homeowners Insurance Cover Vinyl Siding Damage?
Understanding your homeowners insurance policy regarding vinyl siding damage can be complex, as coverage is typically determined by the cause of the damage rather than the damage itself. The majority of standard homeowners insurance policies (HO-3 being the most common) provide coverage for vinyl siding damage that results from sudden, accidental, and specific perils. However, damage due to wear and tear or improper maintenance is generally excluded.
Commonly Covered Perils:
Most policies will cover damage caused by events that are typically outside of a homeowner’s control. These often include:
- Wind and Tornadoes: If high winds, strong gusts, or a tornado rip off panels, cause them to crack, or otherwise damage your siding, it’s usually covered.
- Hail: Hailstorms can cause significant dents, cracks, and holes in vinyl siding. Damage from hail is a frequent claim and is generally covered.
- Fire: If your home’s siding is damaged by a fire, either originating from your property or a neighboring one, it would typically be covered under your dwelling coverage.
- Falling Objects: Damage from falling trees, branches, or other objects (like debris carried by a storm) is usually covered.
- Vandalism: If your siding is intentionally damaged by acts of vandalism, your policy should cover the repair or replacement costs.
- Impact by Vehicle: If a vehicle (not owned by you or a resident of your household) accidentally impacts and damages your siding, it’s generally covered.
Commonly NOT Covered Perils and Situations:
Homeowners insurance is designed to protect against unexpected events, not gradual deterioration or preventable issues. Therefore, the following are typically excluded:
- Normal Wear and Tear: As vinyl siding ages, it can fade, become brittle, or show minor signs of deterioration. Damage resulting from the natural aging process over the course of several years is considered normal wear and tear and is not covered. Its maintenance and eventual replacement due to age fall under your responsibility as a homeowner.
- Lack of Maintenance: If damage is a direct result of neglected maintenance (e.g., not cleaning siding, allowing mold to grow unchecked and damage the material, or failing to address minor repairs that escalate), the claim may be denied.
- Faulty Workmanship: Problems arising from improper installation of the siding (e.g., buckling due to being nailed too tightly) are generally not covered.
- Pest Damage: Damage caused by termites, rodents, or other pests is typically excluded from standard policies.
- Flood Damage: While water damage from a burst pipe is usually covered, damage specifically caused by rising floodwaters is not covered by standard homeowners insurance. You would need a separate flood insurance policy for this.
- Mold or Rot Due to Neglect: While sudden water damage leading to mold might be covered, mold or rot that develops slowly over time due to chronic leaks or lack of maintenance is usually not.
Important Considerations for Claims:
- Deductible: Remember that even if the damage is covered, you will be responsible for paying your policy’s deductible before your insurance coverage kicks in.
- Matching Clause (Law & Ordinance Coverage): A significant issue with siding claims can be the “matching” of replacement panels. If only a section of your siding is damaged, but the exact color or style is no longer available (or the existing siding is significantly faded), your policy might only pay to replace the damaged sections. This can result in a patchwork appearance. Some policies offer “matching siding” or “ordinance and law” coverage, which might pay to replace all siding on a particular elevation or even the entire house to ensure uniformity, even if only a portion was damaged. It’s crucial to check your policy for such clauses.
- Actual Cash Value vs. Replacement Cost Value: Understand whether your policy covers Actual Cash Value (ACV) or Replacement Cost Value (RCV). ACV policies factor in depreciation, meaning you’ll receive less than the cost of new siding. RCV policies pay for the full cost of replacement without deducting for depreciation.
Before you need to file a claim, it’s highly recommended to thoroughly review your homeowners insurance policy. If you have questions about specific coverages or limitations regarding vinyl siding, contact your insurance agent directly for clarification. Understanding your policy ensures you’re prepared should unexpected damage occur.
Before you even get to vinyl siding repair, learn how to install vinyl siding with this quick tutorial from Chad DIY:
Vinyl siding remains one of the most popular exterior cladding choices for homes due to its affordable price point, relative ease of installation, and minimal maintenance demands. By now, you should be well-equipped with a comprehensive understanding of vinyl siding, from its fundamental characteristics and lifespan to the intricacies of repairing common damages and navigating insurance coverage. Mastering the essentials of vinyl siding repair and maintenance empowers you to protect your home’s exterior, preserve its curb appeal, and maximize the longevity of this excellent material.
Are there other questions about vinyl siding repair or maintenance that you would like answered? Share your queries in the comments section below, and let’s keep the conversation going!
Up Next:
- Craft The Perfect Bedroom With These Cool DIY Upholstered Headboards
- How To Repair Leaky Single And Double Handle Faucet Cartridges
- Homebrewery Guide: Everything You Need To Know Before Brewing Your First Beer
Calling all crafting DIYhards, DIY Projects needs YOU! Click here if you want to write for us.
Don’t forget to stay connected with us on Facebook, Twitter, and Instagram!