
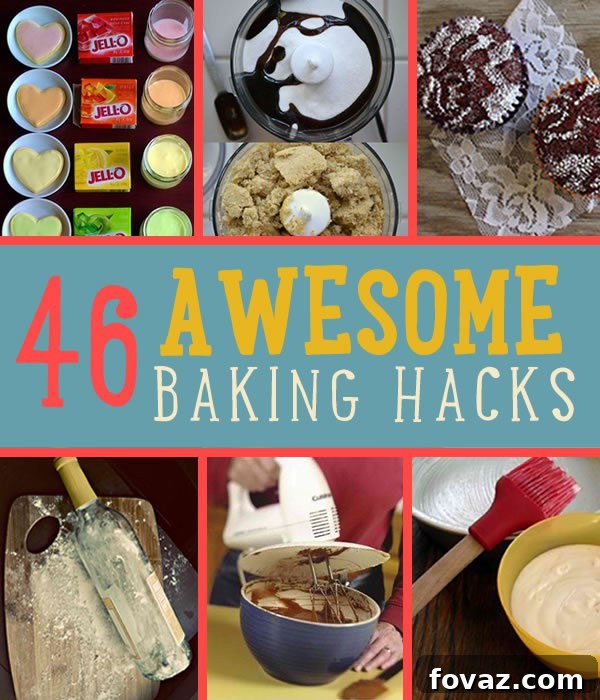
Baking is often described as a precise science, a delicate art, and a comforting craft all rolled into one. From the exact measurements required to achieve that perfect consistency to the careful timing needed for an impeccable texture, every step in the baking process contributes to the final masterpiece. Understanding the interplay of ingredients and techniques is key to transforming simple components into delectable treats that satisfy even the most discerning sweet tooth.
While precision is undoubtedly paramount, the journey to becoming a confident baker doesn’t have to be daunting. In fact, a few clever tips, tricks, and ingenious hacks can make the entire experience not just easier, but also significantly more fun and enjoyable. Whether you’re a complete novice just starting your culinary adventures or an experienced home baker looking to refine your skills, these baking secrets are designed to streamline your efforts and boost your success.
Our trusted sister site, Homemade Recipes, has curated an incredible collection of 46 professional baking hacks, carefully chosen to simplify your life in the kitchen. We’ve compiled some of our favorites here to get you started on your path to becoming a true bake sale superstar, impressing everyone with your newfound efficiency and perfectly executed desserts.
Unlock Your Potential: 46 Baking Hacks to Become the Next Bake Sale Superstar
1. Effortless Eggshell Removal: It’s a classic kitchen mishap – a rogue piece of eggshell falls into your bowl of batter. Don’t fret! Instead of chasing it around with a spoon, simply wet your finger and gently touch it to the visible bit of broken shell. You’ll notice the shell gravitates directly towards your finger, allowing you to easily fish it out. This ingenious trick works because the water on your finger alters the surface tension, making the shell stick to your finger more readily than to the egg mixture. It’s a simple yet incredibly effective solution that saves time and prevents frustration. For more clever baking ideas and similar kitchen shortcuts, explore helpful resources like this collection of easy cooking shortcuts.
2. Elevate Boxed Cake Mixes to Gourmet Status: There’s absolutely no shame in reaching for a boxed cake mix when time is short or you just need a quick, reliable dessert. However, with a couple of simple substitutions, you can transform a humble boxed mix into a decadent, homemade-tasting treat. The secret? Swap out the recommended vegetable oil for an equal amount of melted butter. Butter introduces a richer, more complex flavor and a tenderer crumb that oil simply can’t replicate. Additionally, substitute water with milk to add extra fat and protein, resulting in a moister, denser cake with a luxurious texture. Trust in the wisdom of adding more butter – a philosophy often embraced by culinary icons like Paula Deen – to achieve a superior flavor profile. This simple tweak is a game-changer for enhancing the overall quality of your convenient cake mixes. For insights into the magic of butter in baking, resources like this article often highlight its transformative power.
3. Flawless Frosting with a Syringe: Achieving perfectly neat and evenly distributed frosting on cookies and cupcakes can be challenging, especially for intricate designs. A simple, yet incredibly effective tool for this is a clean, food-grade syringe (without the needle, of course). Fill the barrel of a regular syringe with your chosen frosting, and you’ll gain unparalleled control over the flow and placement. This method allows you to create precise lines, delicate dots, and beautifully smooth layers with ease, making your baked goods look professionally decorated. It’s a brilliant way to add a touch of elegance without investing in expensive piping bags and tips, perfect for both beginners and experienced decorators. Witness the demonstration of this clever baking technique and learn how to get nice lines when icing cookies here.
4. Keep Cookies Perfectly Moist and Chewy: There’s nothing quite as disappointing as biting into a stale, hard cookie when you were expecting a soft, chewy delight. To ensure your homemade cookies retain their freshness and wonderful texture, try this remarkably simple trick: place an apple wedge inside your cookie jar or airtight container when storing them. The apple naturally releases moisture, which the cookies then absorb, keeping them soft and delicious for days longer. Just remember to replace the apple wedge every day or two to prevent it from molding. This small step makes a huge difference in preserving the quality of your baked goods. To understand the science behind moisture retention and food storage, exploring resources from companies like Glad can provide valuable insights.
5. The Miracle Pan Release for Effortless Unmolding: The fear of a freshly baked cake sticking to the pan can haunt any baker. Eliminate this anxiety forever with a homemade “miracle pan release” mixture that guarantees your cakes will slide out perfectly every time. In a small bowl, simply combine equal parts shortening, vegetable oil, and all-purpose flour. Whisk them together until you have a smooth, spreadable paste. Generously brush this mixture onto every surface of your cake pans – bottom, sides, and into any crevices – before adding your batter. This creates a superior non-stick barrier that works far better than just greasing and flouring, or even store-bought sprays. The combination of fats and flour ensures a flawless release, preserving the integrity of your beautiful cakes. Discover the full recipe and detailed instructions for this indispensable baking hack here.
6. Create Elegant Lace-Stenciled Cakes: Want to add a touch of sophisticated elegance to your cakes or cupcakes without needing advanced decorating skills? This hack is for you. Simply take a piece of clean, delicate lace (or a paper doily with an intricate pattern) and carefully lay it on top of your cooled cake or cupcake. Then, using a fine-mesh sieve, gently sprinkle confectioner’s sugar evenly over the lace. Once you’ve achieved a desired layer of sugar, carefully lift the lace off. You’ll be left with a stunning, intricate lace pattern dusted onto your dessert, creating an instant “wow” factor. It’s a remarkably simple way to achieve a professional, decorative finish that will surely impress family and friends at any gathering. Find more about this creative baking trick and how to make lace-stenciled cupcakes here.
7. Master the Art of Swirled Frosting: Swirled, multi-colored frosting adds a vibrant and playful touch to cupcakes and cakes, making them instantly more appealing. Achieving this visually striking effect is much easier than you might think. The simplest method involves using two different colors of frosting in separate piping bags. Instead of trying to pipe them simultaneously from separate tips, simply fit both filled bags into one larger piping bag that already has your chosen icing tip attached. As you squeeze the outer bag, the two colors will emerge from the single tip, naturally twisting and swirling together to create a beautiful two-tone effect. Experiment with complementary or contrasting colors to create endless decorative possibilities for your baked treats. See this and more baking hacks, along with a detailed tutorial on how to swirl colored icing for cupcakes, here.
8. Mix Your Own Custom Frosting Hues: One of the great advantages of making your own frosting from scratch, rather than relying on store-bought variants, is the complete creative freedom it offers, especially when it comes to color. Why settle for basic shades when you can mix an entire spectrum of custom hues? With a simple color mixing guide, you can blend primary food colorings to achieve virtually any shade imaginable, from soft pastels to vibrant, bold tones. Remember that gel food coloring provides more intense, concentrated color with less liquid, which is ideal for maintaining frosting consistency. Start with a small amount of coloring and gradually add more until you reach your desired shade, always mixing thoroughly. This allows you to perfectly match frosting colors to your party theme, season, or personal preference, adding a truly bespoke touch to your baked creations. For more ideas on how to make a cake with its specialized frosting and how to make frosting colors, see this insightful post from Food Network.
9. Jell-O as a Flavorful Frosting Substitute: Unexpected ingredients can sometimes yield the most delightful results in baking. Did you know that when you’re out of traditional food coloring or simply want to infuse a unique flavor into your frosting, Jell-O can come to the rescue? Jell-O powder not only provides vibrant color but also adds a fruity, distinctive taste to your buttercream or cream cheese frosting. Simply whisk the dry Jell-O powder into your frosting mixture until fully incorporated and the desired color and flavor are achieved. This hack is particularly fantastic for themed parties or children’s desserts, offering a fun twist on classic flavors. The gelatin also helps to stabilize the frosting slightly, providing a beautiful finish. See the complete recipe and instructions for making delicious Jell-O frosting here.
10. Quickly Soften Rock-Hard Brown Sugar: Brown sugar is a staple in many baking recipes, prized for its moist texture and rich molasses flavor. However, it has an unfortunate tendency to dry out and turn into a solid, unworkable brick if not stored properly. When you find your brown sugar rock-hard just as you’re about to bake, there’s a quick fix that will save your recipe. Simply place the hardened brown sugar in a microwave-safe bowl or container. Lay a damp (not soaking wet) paper towel over the top of the sugar. Microwave it on high for about 20 seconds. The steam generated by the wet paper towel will reintroduce moisture to the sugar, quickly softening it to its original pliable state. If it’s not soft enough, stir it and microwave for another 10-15 seconds. This method is a lifesaver when you’re in a pinch and need soft brown sugar immediately.
11. Prevent Brown Sugar from Hardening Again: After softening your brown sugar, the next logical step is to prevent it from hardening again in the first place. This common kitchen problem can be easily solved with another ingenious hack. Store your brown sugar in an airtight container along with a slice of fresh bread (any type will do, but plain white bread works perfectly). The bread slice acts as a natural humectant, releasing its moisture into the air within the container. The brown sugar will then absorb this moisture, staying soft, moist, and easily scoopable for much longer periods. Just be sure to replace the bread slice every few days or when it becomes hard. This simple, cost-effective method ensures your brown sugar is always ready for your next baking adventure, eliminating frustration and waste. Learn more about how and why this kitchen tip works for keeping your brown sugar soft here.
These initial eleven hacks are just a taste of the many clever solutions available to enhance your baking experience. Each tip is designed to simplify complex steps, prevent common problems, and ultimately lead to more enjoyable baking and more delicious results. Whether it’s saving a batch of cookies, perfecting a cake’s release, or adding a stunning decorative touch, these hacks empower you to bake with greater confidence and creativity.
Ready to discover even more incredible insights and tips that will transform your kitchen endeavors?
For the rest of these awesome hacks, check out the whole post from Homemade Recipes!
Click here to continue your journey to baking mastery!
Mastering the art of baking doesn’t stop with these hacks. If you’re eager to expand your culinary repertoire beyond sweet treats, we have more DIY kitchen recipes that are just as easy and satisfying to make. Dive into these fantastic guides to elevate your everyday cooking with simple yet impressive dishes.