
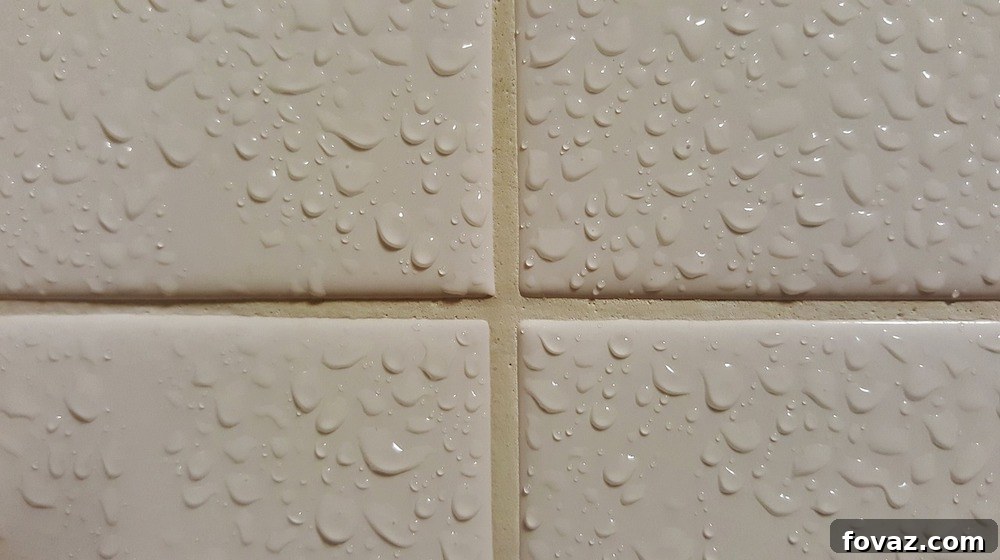
Are you looking to refresh your home with new tiles? Learning how to grout tile yourself is a highly rewarding skill that can save you significant costs on your next home improvement project. Whether you’re undertaking a full bathroom remodel, updating your kitchen backsplash, or simply replacing a few worn tiles, this comprehensive DIY tutorial will guide you through every step. Forget about hiring expensive professionals; with a little patience and the right techniques, you can achieve beautiful, long-lasting results that look professionally done.
How to Grout Tile Like a Pro: Your Ultimate DIY Guide
Recently, we embarked on a refreshing bathroom renovation, and one of the most satisfying DIY projects was the tile work. We decided it was time for a complete overhaul, opting to replace the old, tired tiles with something fresh and modern. As an avid DIY enthusiast, I’m always eager to tackle projects myself, and this time, with a little help from my partner, we transformed our bathroom. I was particularly keen on mastering the art of grouting tile, a step that often seems intimidating but, to my pleasant surprise, turned out to be incredibly straightforward. Anyone can do it!
This guide is designed for everyone, from first-time DIYers to seasoned renovators looking to perfect their technique. We’ll cover everything you need to know, from selecting the right materials to applying and cleaning the grout, ensuring a durable and aesthetically pleasing finish. Get ready to add another valuable skill to your DIY arsenal and enjoy the immense satisfaction of a job well done!
Why Proper Grouting is Essential for Your Tiles
Grouting isn’t just about making your tiles look good; it’s a critical step that impacts the longevity, functionality, and hygiene of your tiled surfaces. Here’s why proper grouting is so important:
- Structural Integrity: Grout fills the gaps between tiles, providing stability and preventing them from shifting or cracking under pressure. It creates a unified surface, distributing stress evenly.
- Protection Against Moisture: Properly applied grout creates a barrier against water penetration, protecting the subfloor or wall behind the tiles from moisture damage, mold, and mildew. This is especially crucial in wet areas like bathrooms and kitchens.
- Hygiene and Cleanliness: Grout prevents dirt, debris, and spills from accumulating in the spaces between tiles, making the surface much easier to clean and maintain. It inhibits the growth of bacteria and other microorganisms.
- Enhanced Aesthetics: Beyond its practical benefits, grout plays a significant role in the overall appearance of your tiled surface. The right grout color and application technique can highlight your tiles, define their pattern, and contribute to the room’s overall design aesthetic.
- Durability: A well-grouted surface is more resilient to daily wear and tear, extending the lifespan of your tile installation.
Essential Tools and Materials You’ll Need for Grouting Tile
Before you begin, gather all necessary tools and materials. Having everything at hand will ensure a smooth and efficient grouting process. Here’s a detailed list:
- Grout: Select the right type of grout for your project (sanded, unsanded, or epoxy) based on joint width and tile type. Always follow the manufacturer’s instructions for preparation, as mixing ratios can vary.
- Two Buckets: One for mixing the grout and another for clean water, essential for cleaning your tools and sponge.
- Large Sponge: A sturdy, dense grout sponge is crucial for effective cleaning. Avoid household sponges, as they tend to tear and don’t absorb enough water.
- Rubber Grout Float: This specialized tool has a rubber base and is designed for pressing grout into joints and scraping off excess. Make sure it’s comfortable to hold.
- Margin Trowel or Taping Knife: Useful for scooping grout out of the bucket and applying it to smaller areas, or for mixing small batches.
- Drill with Mixing Paddle Attachment (Optional but Recommended): For large batches of grout, this ensures a consistently smooth, lump-free mix, which is critical for a good finish.
- Dust Mask and Safety Glasses: Essential for protecting yourself from grout dust during mixing and splashes during application.
- Rubber Gloves: Protect your hands from the alkalinity of grout, which can be irritating.
- Clean Cloths or Microfiber Towels: For final buffing and cleanup.
- Grout Sealer (Optional but Recommended): To protect your grout lines from stains and moisture after the grout has cured.
Step-by-Step Guide: How to Grout Tile Effectively
Step 1: Prepare Your Workspace and Mix the Grout
Before mixing, ensure your tiled surface is clean, dry, and free of any debris or spacers. Any adhesive residue should be scraped off. Once ready, prepare your grout according to the manufacturer’s instructions. This is a crucial step; improper mixing can lead to weak, crumbly, or discolored grout. Typically, you’ll add water to the dry mix gradually, stirring continuously until you achieve a consistency similar to peanut butter or thick oatmeal. If using a drill with a mixing paddle, mix on a low speed to avoid introducing too much air. Let the grout “slake” (rest) for 5-10 minutes, then re-stir before use. This allows the polymers to fully hydrate, improving workability.
Before applying grout, lightly dampen the tile surface with a wet sponge. The water will help lubricate the tiles, prevent them from absorbing moisture too quickly from the grout, and facilitate easier cleanup, reducing the risk of scratches.
Step 2: Apply Grout to the Tile Surface
Using your margin trowel or taping knife, scoop a generous amount of prepared grout onto a section of the tiled surface. It’s best to work in manageable sections, typically 3’x3′ to 3’x4′ at a time. This prevents the grout from drying out prematurely before you have a chance to work it into the joints and clean up the excess.
Step 3: Spread and Fill Grout Joints with the Float
Dampen your rubber grout float slightly. Holding it at a 45-degree angle, firmly push the grout into the tile joints using diagonal strokes. Apply firm pressure to ensure the grout completely fills the gaps, eliminating any air pockets. Work across the tiles, spreading the grout over the entire section. Once the joints are filled, hold the float at a nearly 90-degree angle to the tile surface and lightly scrape off any excess grout by pulling it across the tiles, again using diagonal strokes. Collect the excess and reapply it to ungrouted sections.
PRO TIP: Always work diagonally across the tile joints. This technique helps push the grout deep into the joints and prevents it from being pulled out as you clean.
Step 4: Initial Grout Cleanup (The First Pass)
Once you’ve filled a section, it’s time for the first cleanup. Dunk your large sponge into your bucket of clean water and wring out as much water as possible. The sponge should be damp, not soaking wet, to avoid diluting the grout or leaving too much water in the joints. Gently wipe the excess grout off the tile surface in a circular motion or using light diagonal passes. Rinse your sponge frequently in the bucket of water, wringing it out thoroughly each time. This removes grout residue from the sponge, preventing you from spreading it back onto the clean areas. Change your water frequently to ensure effective cleaning.
KEY ADVICE: Don’t press too hard during this initial cleaning. The goal is to remove the bulk of the surface grout without digging into the newly filled joints.
Step 5: Refine and Shape the Grout Lines (Second Pass)
After the initial wipe, you’ll notice the grout lines begin to form. For a second pass, take a freshly rinsed and well-wrung sponge. Using a firm but controlled pressure, wipe the grout lines again. This pass helps to smooth and “tool” the grout, creating uniform, slightly concave lines that sit just below the tile surface. This technique not only enhances the appearance but also helps compact the grout, making it denser and more durable. Use a different side of the sponge for each wipe, or flip it over, to avoid redepositing grout. Continue rinsing and wringing your sponge frequently.
EXPERT TIP: Press firmly when wiping with your sponge. This helps lower the grout line slightly below the tile height, creating a clean, finished look and making it easier to clean the tile surface in the future.
Step 6: Repeat and Final Clean-up
Repeat steps 1-5 until all areas that need to be grouted are completed. As you finish each section, it’s crucial to regularly step back and inspect your work. Look for any missed spots, uneven grout lines, or excess grout that might have dried on the tile surface. Once all grouting is done, and the grout has had a chance to slightly firm up (usually within 15-30 minutes after application, depending on conditions), you may notice a light, dusty film known as “grout haze.” This haze can be removed with a clean, damp sponge or a dedicated grout haze remover. This final cleaning ensures your tiles shine.
Important Considerations for Long-Lasting Grout
- Curing Time: Grout needs time to cure properly. Refer to the manufacturer’s instructions for specific curing times, which can range from 24 hours to several days before light traffic or exposure to water. Do not expose the newly grouted area to heavy moisture or traffic during this period.
- Grout Sealing: Most cement-based grouts are porous and prone to staining. Once your grout has fully cured (typically 48-72 hours or more, check product specifics), apply a high-quality grout sealer. Sealing helps protect the grout from water, stains, and mildew, significantly extending its life and making it easier to clean. Reapply sealer every 1-2 years, or as recommended by the product.
- Ventilation: Work in a well-ventilated area, especially when mixing grout or using chemical cleaners/sealers.
- Temperature and Humidity: Grout curing times can be affected by ambient temperature and humidity. Work in moderate conditions for best results.
Troubleshooting Common Grouting Issues
- Uneven Grout Lines: This often results from inconsistent pressure during application or cleaning. Practice makes perfect! Ensure even pressure with your float and sponge.
- Grout Haze: A common issue, especially with darker grouts. If a damp sponge doesn’t remove it, use a specialized grout haze remover following the product’s directions.
- Cracking or Crumbling Grout: This can be due to improper mixing (too much water, not enough water), applying grout to a surface that wasn’t properly prepared, or insufficient curing time.
- Discoloration: Can be caused by inconsistent water ratios during mixing, using dirty water during cleanup, or applying sealer too soon.
And just like that, you’re done! Step back and admire your handiwork. Imagine how much you’ve saved by tackling this project yourself, not to mention the immense satisfaction of transforming your space with your own hands. This DIY approach not only saves money but also gives you complete control over the quality and finish.
Visual Learner? Watch This Easy Video Tutorial!
Sometimes seeing is believing. For those who prefer visual instructions, watch this helpful video tutorial from enduringcharm that demonstrates the entire grouting process:
We hope you thoroughly enjoyed our comprehensive guide on how to grout tile. We’d love to hear about your experiences! Share your thoughts, tips, and any challenges you faced in the comments section below. Do you have other brilliant DIY projects you’d like to share with our community? We’re always seeking innovative ideas and love trying new things, whether they are craft projects, home decor transformations, clever upcycling ideas, delicious recipes, or practical tutorials. This platform was created with the vision of inspiring people to connect with their creative side and realize the incredible potential of what they can accomplish themselves. We aim to foster a vibrant community of DIY enthusiasts where every project is just a click away. Stay connected with us for more inspiration and exciting projects on Facebook, Twitter, Pinterest and Instagram!
Explore More Inspiring DIY Projects:
How to Acid Stain a Concrete Floor: A Step-by-Step Guide
How To Paint A Concrete Floor For a Fresh New Look
An Incredible DIY Bathroom Makeover You Can Achieve