
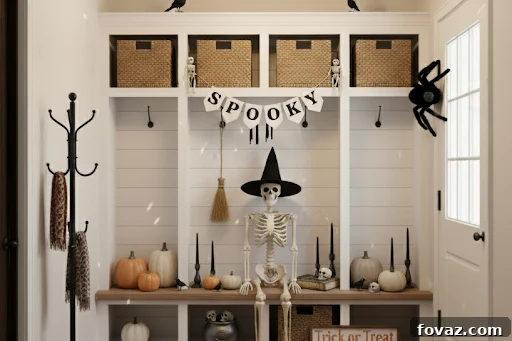
Transform your mudroom into a spectacularly spooky yet inviting space this Halloween with a series of simple, low-cost DIY updates. Often overlooked, the mudroom or entryway is the first area guests encounter, presenting a unique opportunity to set a festive and frightful tone. These six small entryway Halloween ideas leverage existing furniture and subtle accents to craft an aesthetically captivating and functional space that perfectly captures the spirit of the season. Forget elaborate setups; we’re focusing on quick, impactful changes that are both easy on the wallet and a breeze to execute.
Most homeowners typically adorn their porches or living rooms with Halloween décor, yet the mudroom, a critical pass-through zone, often remains untouched. This small entry space serves as the gateway to your home, where coats are shed, shoes are stored, and bags are dropped. Why not transform this practical area into a startle-worthy welcome for the brave souls who dare to visit your sanctuary? Our curated Halloween mudroom decor ideas will help you infuse personality and eerie charm into this often-underestimated spot. From ingenious DIY upgrades to cleverly themed accents, these projects ensure your entryway is both brilliantly functional and delightfully eerie, creating an unforgettable first impression.
Budget-Friendly DIY Halloween Mudroom Decor You Can Conjure in a Day
For this enchanting mudroom makeover, you won’t need colossal props or extravagant displays. Instead, a few minor, strategic tweaks are all it takes to immerse the space in a captivating Halloween theme. We’ve meticulously planned each project, providing realistic time and cost estimates, along with invaluable tips on how to effortlessly reuse or restyle your items for a seamless transition into Thanksgiving. Prepare to cast a spell as we transform your everyday shoe zone into a full-on boo corner, blending practicality with spine-tingling charm.
1. Halloween Entry Labels and Themed Hooks: Organized Spookiness
Hooks and storage bins, though seemingly minor components of a mudroom, play a crucial role in maintaining order, especially during busy mornings or after a day of outdoor adventures. For Halloween, these functional elements become prime canvases for playful decoration. You can quickly infuse a festive spirit by adding clip-on pumpkin tags or stick-on bat labels, transforming ordinary organization into a delightful Halloween touch. The beauty of these additions lies in their easy detachability, allowing for quick changes and versatile use – a true win-win situation for seasonal decorating!
Materials: A selection of plain storage bins, vinyl stickers or versatile paint pens, black or orange decorative ribbon, felt pumpkins, bats, or ghosts, removable adhesive strips or dots, a small chalkboard sign, and painter’s tape for clean lines.
Time: Approximately 30–45 minutes, allowing for creative application and drying time.
Cost: Roughly $15–$25, depending on the variety and quantity of basic craft supplies chosen.
- Begin by thoroughly cleaning your existing bins and hooks to ensure they are free from dust, grime, and any sticky residues. A clean surface ensures better adhesion for your decorative elements.
- Apply spooky vinyl stickers or hand-painted labels to each bin. Get creative with phrases like “Trick-or-Treat Gear,” “Spooky Shoes,” “Witch’s Wears,” or “Ghoul’s Goodies” to designate specific storage areas.
- Wrap the hooks with black or vibrant orange ribbon. This simple step adds a festive pop of color and texture, instantly elevating their appearance. Secure the ribbon ends with a small dab of hot glue or clear tape.
- Using removable adhesive, attach charming felt pumpkins, bats, or friendly ghosts to the tops or fronts of your newly decorated hooks. This adds a whimsical, dimensional touch that can be easily removed post-Halloween.
- Finally, hang a small chalkboard sign above the organized area. Pen a short, inviting Halloween message, a spooky quote, or even a daily countdown to Halloween. This personal touch completes the look and adds an interactive element.
2. Pumpkin and Skeleton Bench Vignette: A Ghoulish Gathering Spot
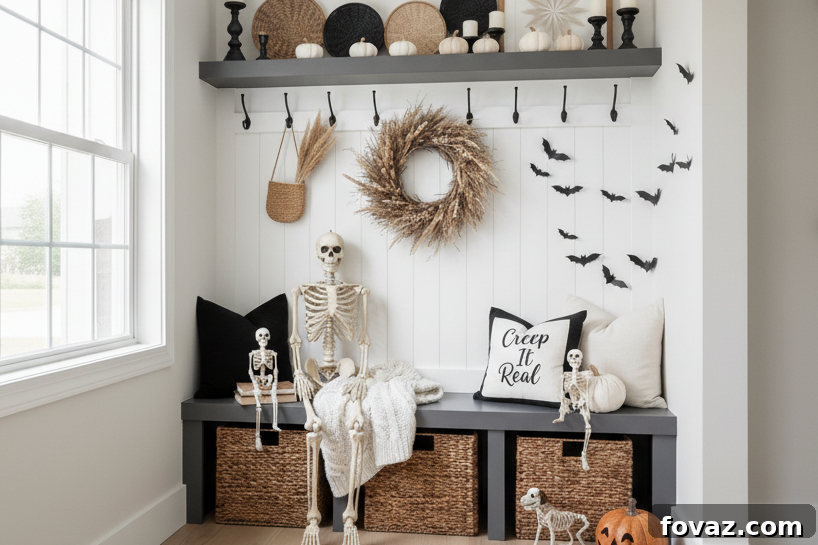
The mudroom bench, typically a utilitarian surface for sitting or a catch-all for everyday items, presents an ideal opportunity to craft a captivating seasonal display. Its flat, prominent surface makes it the perfect stage to house a collection of creepy yet charming accents, instantly giving your mudroom a festive makeover. By arranging small pumpkins and integrating a whimsical skeleton figure, you can transform this functional piece into a central focal point of your Halloween decor.
Materials: Two to three real or realistic faux pumpkins of varying sizes, spray paint in classic Halloween shades like black, white, or metallic for a sophisticated touch, a small skeleton prop (poseable is a bonus!), a cozy plaid blanket or a textured throw pillow, and a cleaning cloth.
Time: A quick 25–30 minutes, not including paint drying time if applicable.
Cost: Ranging from $20–$40, depending on the size and quality of your chosen props and paint preferences.
- Begin by clearing the bench surface of any unnecessary items and giving it a quick wipe-down to ensure it’s clean and ready for decoration.
- Arrange two or three pumpkins of different sizes along one edge or across the length of the bench. Play with their placement to create an aesthetically pleasing grouping.
- If you prefer a cohesive and chic palette, spray-paint your pumpkins black, crisp white, or a shimmering metallic shade. Ensure you do this in a well-ventilated area and allow ample drying time before handling.
- Position a small skeleton prop artfully next to or between your pumpkins. You can have it sitting casually, leaning against the wall, or even holding a mini prop for added character.
- Complete this spooky scene by draping a plaid blanket or adding a textured throw pillow onto the bench. Choose colors that complement your Halloween theme, such as deep reds, forest greens, or classic orange and black plaids.
3. Witchy Corner with Hats and Brooms: Enchanting Entry
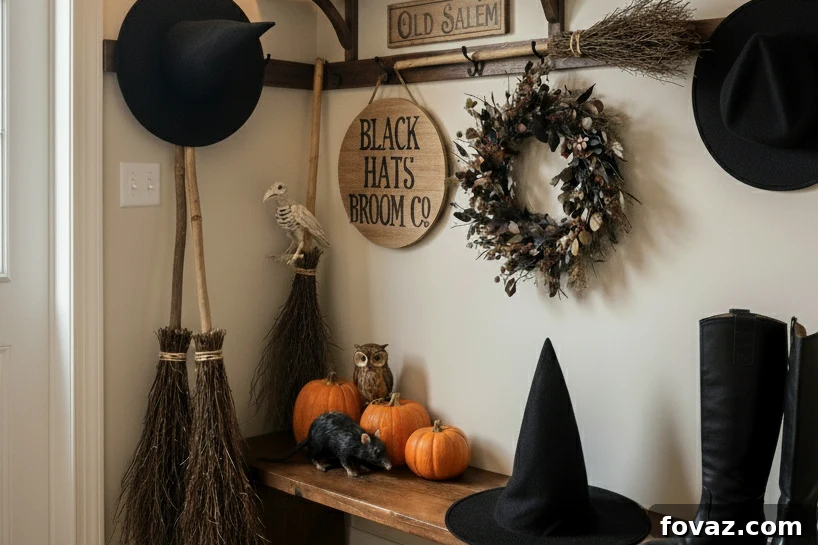
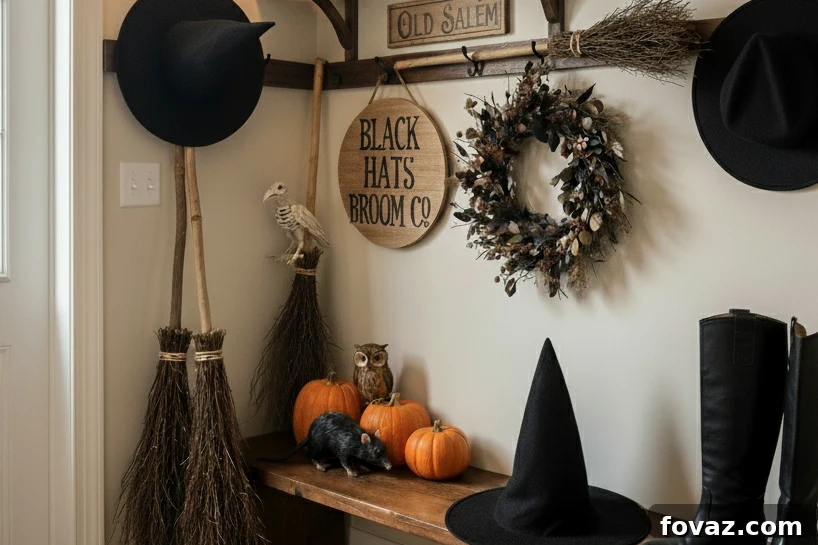
Coat racks, typically reserved for outerwear, offer an unexpected opportunity for a dash of Halloween magic. For this season, transform your everyday storage into a spine-chillingly fun themed corner by hanging whimsical witch hats and other enchanting props. By adding a rustic broom and a small bucket or cauldron underneath, you create an immersive display that’s both playful and perfectly spooky, inviting a touch of mystical charm into your mudroom.
Materials: Two to three classic witch hats, decorative ribbon, optional spray paint for customization, a rustic broom (store-bought or a DIY version), a charming basket, a handful of mini pumpkins, LED string lights for a magical glow, and a small cauldron or bucket.
Time: Approximately 40 minutes, allowing for creative assembly.
Cost: Around $25–$35, especially if you get resourceful and incorporate thrifted items or existing decorative elements.
- Gather your two or three witch hats. Personalize them with decorative ribbon wrapped around the base, or add a subtle touch of spray paint (like a touch of glitter or a metallic accent) to make them unique.
- Hang the decorated witch hats from your existing coat hooks or wall pegs. Use a thin, clear string or small clips to ensure they hang securely and appear to float magically.
- Place a traditional broom, or a charming handmade version crafted from a bundle of straw tied to a sturdy stick, into a nearby basket on the floor. Position it as if it’s just been set down after a flight.
- Introduce a small cauldron or bucket on the floor next to the broom. Fill it with an assortment of mini pumpkins, small decorative skulls, or weave in some LED string lights for an enchanting, eerie glow.
- Finally, adjust the spacing and arrangement of your witchy elements to ensure the display remains compact, visually appealing, and, most importantly, doesn’t obstruct any walkways or common traffic areas in your mudroom.
4. Spooky Lighting and Mist Corner: Atmospheric Entrance
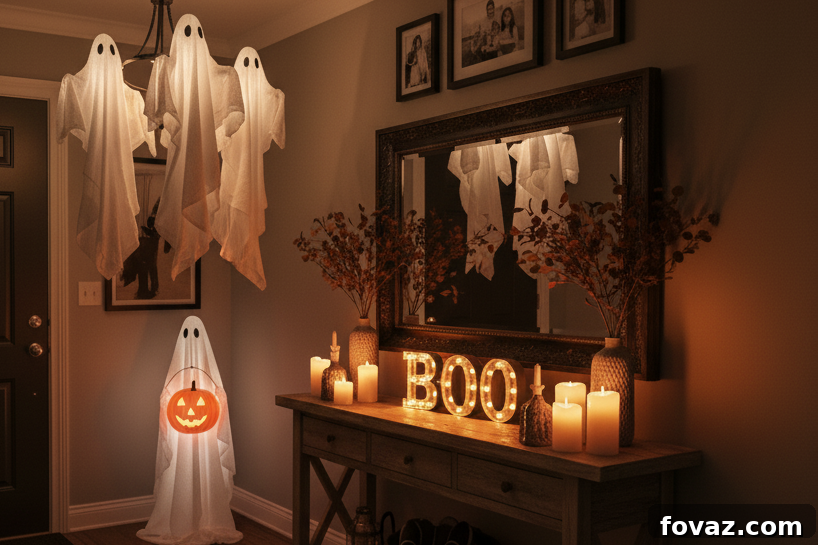
Mudrooms frequently double as the primary entryway into a home, making them the perfect strategic location to establish an immersive and unforgettable tone for Halloween night. A carefully curated combination of atmospheric lighting and a subtle mist effect can instantly create an eerie ambiance that will delightfully spook out trick-or-treaters and guests the very moment they step through your door. This sensory experience transforms a simple entrance into a gateway to a festive, haunted realm.
Materials: Orange or purple LED strip lights (battery-operated or plug-in), a compact indoor mist machine or diffuser, an extension cord if necessary, paper bats or spider cutouts, tape, and a pair of sharp scissors.
Time: A quick 30 minutes for setup and testing.
Cost: Ranging from $25–$45, depending on the quality and features of your chosen lighting and mist diffuser.
- Identify a corner or a lower shelf in your mudroom where the lighting and mist will be most visible and have the greatest impact without impeding movement.
- Install the orange or purple LED strip lights. Adhere them discreetly under the bench, along a wall edge, or beneath a shelf to cast a dramatic, colored glow across the floor and walls.
- Carefully place a compact indoor mist machine or diffuser in the same designated spot. Ensure it’s on a stable surface and away from any valuable items that could be affected by moisture.
- Cut out several paper bats or intricate spider shapes. Tape them strategically to the wall or ceiling nearby so that they cast captivating, eerie shadows when illuminated by the colored LED lights.
- Plug in and test your entire setup. Double-check that all cords are neatly secured and tucked away to prevent tripping hazards, and assess the visibility and effect of your lighting and mist to ensure maximum spookiness.
5. Rustic Leaf Garland with Pumpkin Accents: Autumnal Charm
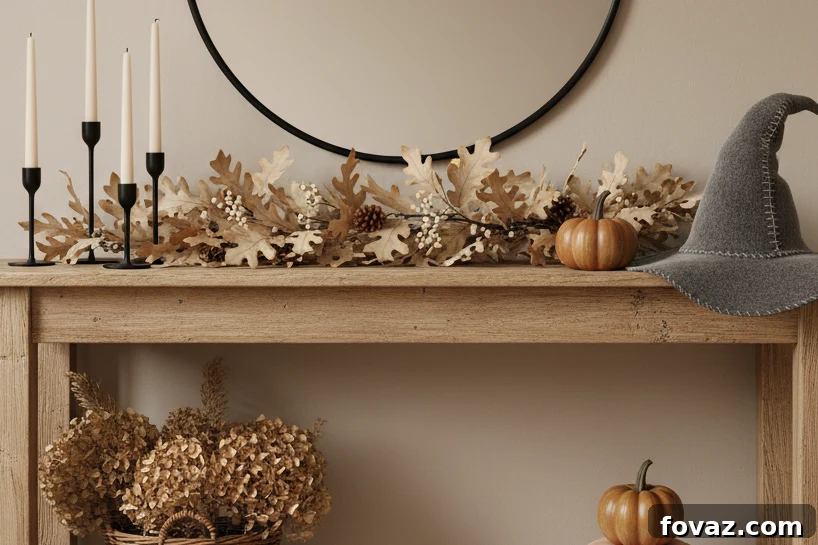
If you’re seeking a decorative element that seamlessly transitions beyond Halloween, a beautifully crafted garland is an exceptional mudroom ornament. Begin by hanging one adorned with vibrant autumn leaves and small pumpkins to perfectly capture the essence of October. As the spooky season wanes, simply swap out a few accents for darker, warmer fall-toned elements like pinecones or berries to effortlessly shift your decor towards a cozy Thanksgiving theme, extending its festive lifespan.
Materials: A selection of faux or felt leaves in various autumnal hues, sturdy twine or thin craft wire, an assortment of small pumpkins or gourds, craft clips or adhesive hooks for hanging, and gold or cream-colored paint for potential color shifts.
Time: Approximately 30–40 minutes, depending on the length and intricacy of your garland.
Cost: Roughly $15–$25, varying based on the quality and quantity of materials chosen.
- Carefully string together your faux or felt leaves using twine or thin craft wire. Alternate colors and shapes to create a rich, layered effect, ensuring each leaf is securely attached to form a cohesive garland.
- Strategically hang the finished garland above your mudroom bench, along a prominent shelf, or gracefully draped across coat hooks. Experiment with different placements to find the most visually appealing arrangement.
- Place a collection of small pumpkins or gourds beneath the bench or on a lower shelf. These provide a grounding element and reinforce the autumnal theme.
- For Halloween, opt for darker, classic orange or even black mini pumpkins to enhance the spooky vibe. As Thanksgiving approaches, simply swap these out for elegant gold or creamy white pumpkins to transition to a more harvest-centric aesthetic.
- After the season, gently store your garland in a labeled bag or box, ensuring it’s protected from dust and damage. This careful storage allows you to reuse this versatile decoration for many seasons to come, making it a sustainable choice.
6. Matte Pumpkins and Natural Textures: Modern Spooky Chic
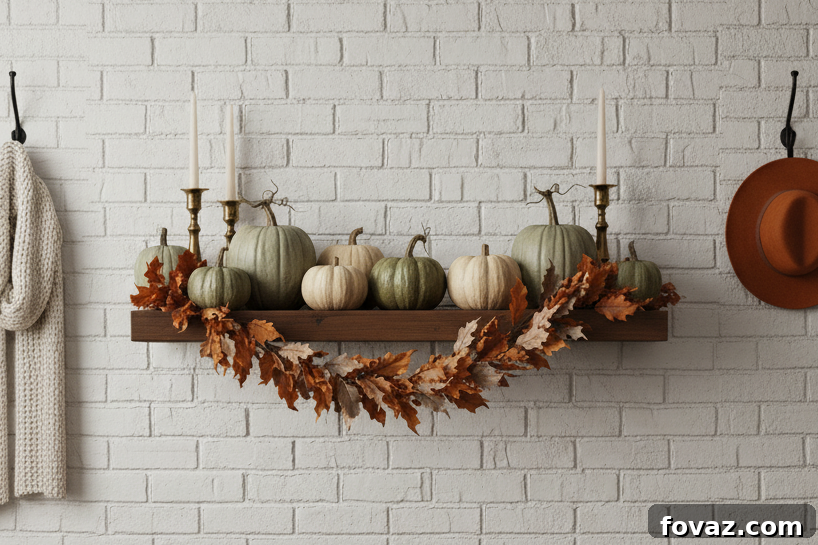
For those who prefer a more understated approach to Halloween decor, neutral-colored minimalist pieces can be just as striking and impactful as the traditional vibrant orange pumpkins and black bats. Pairing elegantly matte-finished neutral pumpkins with rich, woven textures creates a sophisticated look that beautifully complements most modern mudroom interiors. This refined aesthetic not only offers a chic nod to Halloween but also seamlessly transitions into a fitting display for Thanksgiving, showcasing versatility and timeless style.
Materials: Faux or real pumpkins, matte white or off-white spray paint for a sophisticated finish, a woven basket or a stylish tray, dried grasses or wheat stems for natural texture, and a neutral-toned throw blanket or a simple cloth.
Time: Approximately 20–25 minutes for arrangement, plus crucial drying time for the painted pumpkins.
Cost: Ranging from $20–$30, depending on the quantity of pumpkins needed and the size and quality of your chosen basket.
- Begin by painting your chosen pumpkins with matte white or a subtle off-white spray paint. Apply even coats in a well-ventilated area and allow them to dry completely according to product instructions to achieve a flawless, modern finish.
- Once dry, artfully arrange the matte pumpkins on a mudroom shelf, atop the bench, or within woven baskets or trays. Experiment with different heights and groupings to create visual interest.
- Fill your woven baskets or trays with dried grasses, elegant wheat stems, or neutral-colored faux florals. These elements introduce an organic touch and enhance the minimalist, natural aesthetic.
- To transition this sophisticated decor seamlessly for Thanksgiving, replace the dried grasses with warmer-toned accents such as small pinecones, faux berries, or deeper hued fall foliage. This simple swap will align your decor perfectly with the harvest season without a complete overhaul.
DIY Complete! Your Mudroom is Ready to Bewitch!
Who would have thought this unassuming, functional catch-all area could serve as such a magnificent blank canvas for inspiring seasonal home decor DIY projects? With these six imaginative Halloween mudroom decor options now at your fingertips, you’re perfectly equipped to plan a setup that is both frightfully fun to behold and brilliantly versatile, effortlessly transitioning into the next holiday. Each project offers a unique blend of creativity and practicality, ensuring your entryway leaves a lasting impression. Which of these wickedly good projects will be the first to transform your space?
Ready to immerse your entire home in the thrilling spirit of Halloween? Dive deeper into more captivating step-by-step builds, fright-night ideas, and festive inspiration atDIYProjects.com. Unleash your inner decorator and make this Halloween your most creative yet!
Related Projects for More Halloween Inspiration
Explore an abundance of additional Halloween-inspired ideas and creative DIY projects on DIYProjects.com to continue your festive decorating journey:
- DIY Halloween Makeup Looks 2025: Cool Ideas for $10 or Less
- Halloween Table Decor: Spooktacular Ideas to Delight Your Guests
- DIY K-Pop Demon Hunters Costume: Craft Your Unique Look
Frequently Asked Questions About Halloween Mudroom Decor
1. How can I decorate my mudroom for Halloween without causing clutter in a high-traffic area?
The key to decorating a mudroom effectively without creating clutter is to focus on small, removable, and space-conscious pieces. Opt for elements like clip-on pumpkin tags on existing bins, easy-to-apply wall decals such as bats or spiders, or lightweight themed garlands hung above eye level. These decorative accents add a festive Halloween personality and a touch of spooky charm while ensuring that surfaces and essential walkways remain clear and functional for everyday use. Smart placement and minimalist choices are crucial.
2. What’s the easiest and most budget-friendly way to create DIY Halloween mudroom decor?
The easiest and most affordable approach to DIY Halloween mudroom decor involves leveraging and upgrading what you already possess. Begin by enhancing existing features like hooks, storage bins, and the mudroom bench. Integrate simple, themed accents such as lengths of black or orange ribbon, faux cobwebs draped subtly, or strategically placed battery-operated LED lights. These quick, inexpensive additions can achieve a polished and impactful transformation, giving your mudroom a festive and spooky makeover without breaking the bank or requiring extensive crafting skills.
3. Can Halloween decorations in the mudroom be easily transitioned for Thanksgiving?
Absolutely! If you’re looking to decorate your mudroom for both fall and Halloween, start by selecting versatile pieces that evoke the autumn season rather than being exclusively Halloween-themed. Examples include neutral-colored faux leaves, white or metallic pumpkins, and natural textures like dried grasses. The foundational setup can remain largely the same, saving you considerable time, effort, and money between holidays. A simple swap of a few specific items, like exchanging a spooky sign for a harvest-themed one or adding pinecones to a garland, can effortlessly shift the mood from eerie to autumnal gratitude.
4. What are some kid-friendly Halloween mudroom decor ideas?
For a mudroom that’s fun for all ages, incorporate friendly ghost cutouts, googly eyes on pumpkins, or brightly colored monster footprints leading up to the door. You can also hang kid-drawn Halloween pictures with clothespins on a string. Consider a “candy station” bucket that’s easily accessible but keeps treats contained. The goal is to create a playful atmosphere rather than an overly frightening one.
5. How do I ensure my DIY mudroom decorations are durable for the season?
To ensure your DIY decorations last throughout the Halloween season and beyond, use quality materials suitable for their intended placement. If items are near a door that opens frequently or in a high-traffic area, use stronger adhesives or more robust materials. For painted items, apply a clear sealant to prevent chipping. For reusable decorations, store them carefully in labeled bins once the season is over to protect them from dust and damage, ensuring they’re ready for next year.